sparkfun RedBot User manual

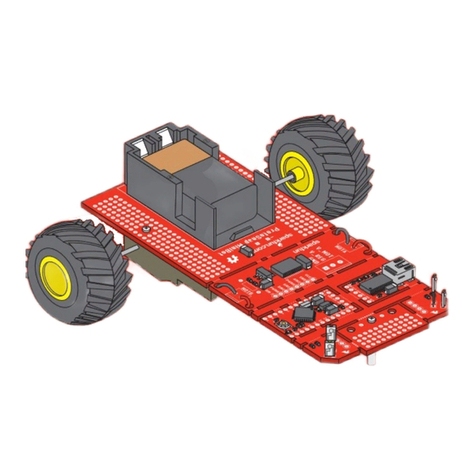
The SparkFun RedBot is a platform for teaching basic robotics and sensor
integration! It is based on the SparkFun RedBoard and fully programmable
using Arduino. This guide describes the assembly of the new Shadow
Chassis for the RedBot. If you want to learn how to program your robot, see
the Experiment Guide for RedBot.
NOTE: We recommend that you read all of the directions first, before
building your RedBot.
This tutorial will cover how to install all the parts in the SparkFun RedBot
Basic Kit and the SparkFun Inventor’s Kit for RedBot (SIK for RedBot).
The SIK for RedBot contains additional parts to the RedBot Basic Kit.
If you have the RedBot Basic Kit, please ignore sections pertaining to
these extra parts. These sections are marked with the label (SIK).

RedBot Extra Sensors SparkFun Wish List
We have two flavors of the RedBot available - the Basic kit and the
SparkFun Inventor’s Kit for RedBot. If you have the SparkFun RedBot Basic
Kit, you can skip the sections marked with (SIK).
Alternatively, you can pick up additional sensors to install on your RedBot.
These parts include the Wheel Encoder Kit, RedBot Buzzer, and two
RedBot Mechanical Bumpers. Follow the sections in this guide that covers
any of the extra sensors you might have.
SparkFun USB Mini-B Cable - 6 Foot
CAB-11301
This is a USB 2.0 type A to Mini-B 5-pin cable. You know, the mini-B c
(2) Jumper Wire - 0.1", 3-pin, 6" (Black, Red, White)
PRT-13164
This is a simple three wire cable. Each cable is 6" long and is great fo
SparkFun RedBot Buzzer
ROB-12567
This buzzer is an add-on for your RedBot that gives your robot the abi
Wheel Encoder Kit
ROB-12629
This is the Wheel Encoder Kit from DAGU, a simple add-on to any wh
(2) SparkFun RedBot Sensor - Mechanical Bumper
SEN-11999
These simple switches are the Mechanical Bumper sensor for the Sp
The SIK for RedBot has a few extra parts that you won’t see in the Basic
Kit. These include the mechanical bump sensors (whiskers), the buzzer,
and wheel encoders. If you have the SIK for RedBot, you can follow all the
sections in this guide, including those marked with (SIK).
…
…
…
…
…

The SparkFun RedBot Basic Kit contains the following pieces. SIK-only
parts are noted with an asterisk (*). Note that several of the parts need to
be snapped out of the main chassis boards.
Part Qty
A Bottom Chassis Plate 1
B Top Chassis Plate 1
C Front Motor Mount 2
D Rear Motor Mount 2
E Side Strut 4
F Encoder Mount 2
G Mainboard Mount 2
H Battery Pack Clip 1
I Line Follower Mount 1
J Line Follower Mount Plate 1
K Motor 2

L Wheel 2
M Nub Caster 1
N* Encoder Magnet Plate (SIK) 2
O* Encoder Hall Effect Sensor (SIK) 2
P RedBot Mainboard 1
Q Line Follower Board 3
R Accelerometer Board 1
S* Buzzer Board (SIK) 1
T* Bumper Board (SIK) 2
U* Bumper Whisker (SIK) 2
V* #4-40 x 3/8" Screw (SIK) 6
W* #4-40 Nylon Standoff (SIK) 2
X* #4-40 Hex Nut (SIK) 2
Y 3-Wire Jumper Cable (SIK) 3 (5*)
Z Battery Holder 1
AA* AA Batteries (SIK) 4
AB* Screwdriver (SIK) (Not Shown) 1
AC* USB Mini-B Cable (SIK) (Not Shown) 1
* Indicates parts included in the SIK for RedBot
IMPORTANT: If you have the RedBot Basic Kit, you will need 4x AA
batteries.
None! The RedBot Basic Kit does not require any additional tools. The SIK
for RedBot comes with a screwdriver, which you will need to mount the
Bumper Boards. If you bought the Bumper Boards separately, you will need
a Phillips screwdriver.
WARNING: Do not attempt to remove chassis parts by squeezing them
with pliers. You will break them, and the robot will be sad.

When we talk about the “front,” “left,” “right,” and “back” of the RedBot, we
are referring to specific sides of the robot when viewed from above.
Notice that we consider the Mainboard to be on the “back” of the RedBot
and the Bumper Whiskers and Line Follower Boards to be in the “front.”
Read on if you have the SIK for RedBot or are using the Wheel
Encoder Kit. If not, skip to the next section.
The Wheel Encoder Kit is a simple add-on sensor that can be used to
detect how far each wheel rotates. The wheel encoders will allow you to
monitor and control the distance the robot travels. The Wheel Encoder Kit
uses a multi-pole diametric ring magnet attached to the motor shaft. As the
motor spins, the ring magnet spins as well. This is detected by a small
magnetic sensor called a hall effect sensor. The RedBot can use this
sensor input to count / track the number of rotations of the motor and hence
how far the wheel moves.
NOTE: You will likely need some scissors to open the Wheel Encoder Kit.
Also, the Encoder Kit might contain some extra parts (e.g. screws and
some blue mounting bars). You won’t need those, as the Shadow Chassis

contains all the necessary mounting hardware.
1x Bottom Chassis Plate (A) 2x Encoder Mount (F) 2x Motor (K)
2x Encoder Magnet Plate (N) 2x Encoder Hall Effect Sensor
(O)
Slide the Encoder Magnet Plates (N) onto the metal shaft on the back of the
Motors (K). Note that magnet side (silver) should face away from the motor.
Slide the magnet down onto the shaft, but make sure that it does not rub or
interfere with the back of the motor housing.
Repeat this for both motors.

Take one of the Encoder Mounts (F) and hold it so that the protruding slot is
on the left. Push one of the encoder sensors through the first slot on the
right.
Note: The direction of the sensor does not matter.
Loop the sensor and push it through the second (middle) slot.

Once more, push the sensor through the small protruding slot on the left.
Carefully pull the wires so there is no more slack in the mount. Make sure
the whole sensor can be seen coming out of the final slot (the sensor
should protrude between ¼" and 3/8" past the mount).
Snap the assembled encoder mount into the back-left vertical slot of the
Bottom Chassis Plate (A).

The right encoder is a mirrored assembly of the left encoder.
Take the other Encoder Mount (F) and hold it so that the protruding slot is
on the right. Push the other encoder sensor through the first slot on the left.
Loop the sensor and push it through the second (middle) slot.
Once more, push the sensor through the protruding slot on the right.
Carefully pull the wires so there is no more slack in the mount. Make sure
the whole sensor can be seen coming out of the final slot (the sensor
should protrude between ¼" and 3/8" past the mount).

Snap the assembled encoder mount into the back-left vertical slot of the
Bottom Chassis Plate (A). Note that the hall effect sensors are facing to the
outside of the chassis.
The motors add some motion to the RedBot by turning the nice, rubbery
wheels.
NOTE: If you completed the previous Wheel Encoder (SIK) step, your
motors will each have an encoder magnet plate attached to their rear shaft.
However, they are not necessary to complete this step.
ALSO NOTE: Your motors might not be yellow. Worry not, they will work
just as well!
2x Front Motor Mount (C) 2x Rear Motor Mount (D) 2x Motor (K)

2x Wheel (L)
Hold the wires near the middle of the Motor (K), and carefully slide a Rear
Motor Mount (D) in from the side and over the two motor wires. Be careful
not to snag the wires, the cable tie, or the clear plastic strap.
Holding the motor wires, gently twist the Rear Motor Mount counter
clockwise so that it snaps in place on the motor and the wires are centered
in the gap of the motor mount. Again, be sure not to snag the wires under
the motor mount.

Repeat the process for the second motor.
Slide a Front Motor Mount (C) onto the protruding eyelet on the front of a
Motor (K). Ensure the rounded sides of the motor mounts are facing the
same way.
Repeat the process for the second motor.

Snap one of the motor assemblies into the left 2 horizontal slots of the
Bottom Chassis Plate (A). Make sure that the rounded edges of the motor
mounts and the wires are facing toward the center of the chassis.
Snap the other motor assembly into the right 2 horizontal slots of the
Bottom Chassis Plate (A). Again, make sure that the rounded edges of the
motor mounts and the wires are facing the center of the chassis.
Slide one Wheel (L) onto the plastic shaft of a Motor (K). Look at the motor
shaft. Notice it has two flat edges. Make sure to line up the flat edges of the
motor shaft with the flat edges of the wheel.

Repeat with the other wheel.
In this section, you will be putting standoffs on the RedBot Sensor - Line
Followers. Then you will add the sensors to your chassis.
1x Line Follower Mount (I) 1x Line Follower Mount Plate
(J) 3x Line
Follower
Board (Q)
3x 3-Wire Jumper Cable (Y)

>
Attach the 3 Line Follower Boards (Q) to the Line Follower Mount (I) such
that the rectangular pegs in the Line Follower Mount poke through the
mounting holes in the Line Follower Boards. Make sure the sensors are
facing away/down from the clip of the mount.
Place the Line Follower Mount Plate (J) on top of the Line Follower Mount
(I) so that the center clip of the mount is poking through the center slot of
the plate.

You will need to connect a 3-Wire Jumper Cable (Y) to each of the Line
Follower Boards (Q). Note the color of the wire attached to each pin.
Line Follower Connections:
Jumper Wire Color RedBot Sensor - Line Follower
Black GND
Red VCC
White OUT
Attach all 3 cables to the 3 Line Follower Boards. Notice that the white wire
should be on the right and the black wire should be on the left.
Locate the wide, rectangular slot near the front of the chassis and snap the
line follower assembly in from the bottom side of the chassis. Route the
cables through the large hole in the bottom plate.
Read on if you have the SIK for RedBot or are using the Mechanical
Bumpers. If not, skip to the next section.
One of the sensors included in the SIK for RedBot are a set of Whisker

Mechanical Bumpers. These are basically simple switches that close a
circuit when the whisker pushes against an object. The whiskers are made
from a thick music wire and a simple RedBot Bumper board. You will need
to prepare the music wire by bending the wire itself. Then, you will add
standoffs and screws to your mechanical bumpers, followed by adding the
mechanical bumpers to the RedBot chassis.
1x Top Chassis Plate (B) 2x Bumper Board (T) 2x Bumper Whisker
(U)
6x #4-40 x 3/8" Screw (V) 2x #4-40 Nylon Standoff (W) 2x #4-40 Hex Nut (X)
2x 3-Wire Jumper Cable (Y) 1x Phillips Screwdriver (AB)

The Mini Screwdriver contains a flat-head and Phillips head. To change to
the Phillips head, you might have to remove the metal shaft, turn it around,
and insert it back into the plastic handle.
Screw a #4-40 x 3/8" screw (V) and #4-40 hex nut (X) to one of the two
large mechanical bumper holes. You can get it pretty tight with just your
fingers, but we’ve included a screwdriver screwdriver (AB) in your kit. Note
that the screwdriver has both a Phillips and a regular head. Pull the
screwdriver out of the handle to change the head.

Time to bend the whisker!
It is easy to bend the whisker using needle nose pliers. However, there is a
trick to bend the whisker using the Mechanical Bumper Board itself. First,
stick one of the whiskers (U) through one of the smaller side holes. It only
needs to stick out a little bit.
Bend the whisker 90 degrees.
Bend the whisker 90 degrees again.

Now that the whisker is bent, take the wire out of the PCB hole. Add a
#4-40 x 3/8" Screw (V) from the bottom and loop the bent whisker around
the screw. Hold this tight and secure it with a the #4-40 nylon standoff.
Note: It is very important that you do not let the whisker touch the hex nut or
screw on the other side. This is what triggers the sensor. Leave a little
space between the wire and other side’s nut.
Twist and tighten the #4-40 nylon standoff on top of the screw to secure the
whisker.
Other manuals for RedBot
1
This manual suits for next models
3
Other sparkfun Robotics manuals
Popular Robotics manuals by other brands
RoboBuilder
RoboBuilder RQ-110 quick start guide
neobotix
neobotix MPO-500 manual
ADEEPT
ADEEPT Hexapod 6 Legs Spider Robot manual
Makeblock
Makeblock mScara-Laser Version user guide
ROKAE
ROKAE xMate SR3 Hardware installation manual
Innovation First
Innovation First HEXBUG BATTLE GROUND BUNKER 409-5121 instructions
