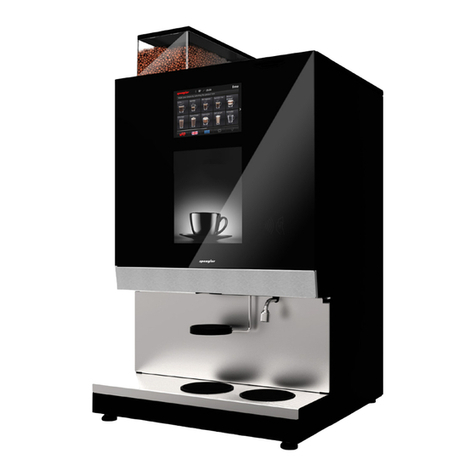
Spengler CL Series User manual

SpenglerTT_SM_EN
Part No.: 10037114_03
CL & PSL50 SERIES
SERVICE MANUAL

2
CL & PSL50 Series
CONTENTS
CONTENTS
MANUAL REVISIONS
SERVICE OVERVIEW
4 Semi-annual service tasks
4 Semi-annual service required equipment
5 Annual service tasks
5 Annual service required equipment
6 Biannual service tasks
6 Biannual service required equipment
MAINTENANCE SCHEDULE
SERVICE MENU
9 Accessing the service menu
SERVICE TASKS
10 Step 1: Clean canisters, canister outlets
11 Step 2: Clean spout adaptor, mixers, Black Coffee Kit
12 Step 3: Clean air channel, air filters
13 Step 4: Clean espresso brewer
14 Step 4: Install espresso brewer service kit (annually & biannually)
15 Step 4: Reassemble espresso brewer
16 Step 5: Clean monobrewer
17 Step 5: Install monobrewer service kit (annually & biannually)
18 Step 5: Reassemble monobrewer
19 Step 6: Clean bean hopper
20 Step 7: Clean grinder, replace outlet
21 Step 8: Replace grinder soft ring (annually & biannually), adjustment ring
(biannually only)
22 Step 9: Replace extractor fan (biannually only)
23 Step 10: Replace fast mixer motor assembly (annually & biannually)
24 Step 11: Replace overpressure valve (annually & biannually)
25 Step 12: Replace non-return valve (annually & biannually)
26 Step 13: Inspect inlet valve
27 Step 14: Clean interior
28 Step 15: Reinstall bean hopper
29 Step 16: Reinstall air channel and filters
30 Step 17: Reinstall spout adaptor, mixers, Black Coffee Kit
31 Step 18: Reinstall canisters
32 Step 19: Reinstall espresso brewer
33 Step 20: Reinstall monobrewer
TROUBLESHOOTING
34 Error codes, causes, solutions
SCHEMATICS
36 Hydraulic diagram PSL50 ES12B
37 Hydraulic diagram PSL50 ES13
38 Hydraulic diagram PSL50 FBT14
39 Hydraulic diagram CL22
40 Electrical diagram PSL50 series
43 Electrical diagram CL series

3
CL & PSL50 Series
Rev. # Date TSB # Description
01 Jan. 19, 2018 None First draft released for technical review.
02 Feb. 09, 2018 None Updated based on technical review feedback.
03 March 16, 2018 None Finalize service kit contents.
04
05
06
07
08
09
10
MANUAL REVISIONS

4
CL & PSL50 Series
SERVICE OVERVIEW
Semi-annual service tasks
The service tasks listed below are to be done on an annual basis to guarantee good
dispenser functionality and maintain warranty compliance. Step-by-step instructions
are provided on the following pages.
• Clean canisters, canister outlets
• Clean spout adaptor, mixers, Black Coffee Kit
• Clean air channel, replace air lters
• Clean espresso brewer
• Reassemble espresso brewer
• Clean monobrewer
• Reassemble monobrewer
• Clean bean hopper
• Clean grinder, replace outlet
• Clean dispenser interior
• Reinstall bean hopper
• Reinstall air channel and lters
• Reinstall spout adaptor, mixers, Black Coffee Kit
• Reinstall canisters
• Reinstall espresso brewer
• Reinstall monobrewer
Semi-annual service required equipment
The following cleaning equipment/consumable items are required to perform the
semi-annual service tasks.
• Door key
• Cleaning cloth/sponge
• Mild kitchen cleaning spray
• Service access code (available from the service technician or distributor)
• Air lter material (PN10034178)
• Grinder outlet* (one per grinder - PN10031032)
Items marked with a “*” are only required if the dispenser is equipped with the
applicable system.
Important:
The Semi-annual Service (6 month service tasks) shall only be performed by
a trained technician using all required safety equipment as outlined during the
training session(s) and service kits from the original equipment manufacturer.

5
CL & PSL50 Series
SERVICE OVERVIEW
Annual service tasks Annual service required equipment
The service tasks listed below are to be done on an annual basis to guarantee good
dispenser functionality and maintain warranty compliance. Step-by-step instructions
are provided on the following pages.
• Clean canisters, canister outlets
• Clean spout adaptor, replace mixers, Black Coffee Kit
• Clean air channel, replace air lters
• Clean espresso brewer
• Install espresso brewer service kit
• Reassemble espresso brewer
• Drain boiler
• Clean monobrewer
• Install monobrewer service kit
• Reassemble monobrewer
• Clean bean hopper
• Clean grinder, replace outlet
• Replace grinder soft ring
• Replace fast mixer motor assembly
• Replace overpressure valve
• Clean dispenser interior
• Reinstall bean hopper
• Reinstall air channel and lters
• Reinstall spout adaptor, mixers, Black Coffee Kit
• Reinstall canisters
• Reinstall espresso brewer
• Reinstall monobrewer
Important:
The Annual Service (12 month service tasks) shall only be performed by a
trained technician using all required safety equipment as outlined during the
training session(s) and service kits from the original equipment manufacturer.
The following cleaning equipment/consumable items are required to perform the
annual service tasks.
• Door key
• Cleaning cloth/sponge
• Mild kitchen cleaning spray
• Service access code (available from the service technician or distributor)
• Air lter material (PN10034178)
• Fast mixer unit* (PN10032974)
• Mixer bracket assembly (PN 10011038)
• Espresso Service Kit*(PN10021379)
• Monobrewer Service Kit*(PN10037202 for coffee or PN10037220 for tea)
• Overpressure Valve (PN10024356)
• Non-return valve (PN100246950)
• Grinder outlet* (one per grinder - PN10031032)
• Grinder soft ring*(one per grinder - PN10032591)
• Grinder adjustment ring*(one per grinder - PN10031008)
Items marked with a “*” are only required if the dispenser is equipped with the
applicable system.

6
CL & PSL50 Series
SERVICE OVERVIEW
Biannual service tasks Biannual service required equipment
The service tasks listed below are to be done on an annual basis to guarantee good
dispenser functionality and maintain warranty compliance. Step-by-step instructions
are provided on the following pages.
• Clean canisters, canister outlets
• Clean spout adaptor, mixers, Black Coffee Kit
• Clean air channel, replace air lters
• Clean espresso brewer
• Install espresso brewer service kit
• Reassemble espresso brewer
• Drain boiler
• Clean monobrewer
• Install monobrewer service kit
• Reassemble monobrewer
• Clean bean hopper
• Clean grinder, replace outlet
• Replace grinder soft ring, adjustment ring
• Replace extractor fan
• Replace fast mixer motor assembly
• Replace overpressure valve
• Replace inlet valve
• Clean dispenser interior
• Reinstall bean hopper
• Reinstall air channel and lters
• Reinstall spout adaptor, mixers, Black Coffee Kit
• Reinstall canisters
• Reinstall espresso brewer
• Reinstall monobrewer
Important:
The Biannual Service (24 month service tasks) shall only be performed by a
trained technician using all required safety equipment as outlined during the
training session(s) and service kits from the original equipment manufacturer.
The following cleaning equipment/consumable items are required to perform the
biannual service tasks.
• Door key
• Cleaning cloth/sponge
• Mild kitchen cleaning spray
• Service access code (available from the service technician or distributor)
• Air lter material (PN10034178)
• Fast mixer unit* (PN10032974)
• Mixer bracket assembly (PN10011038)
• Spout adaptor (PN100166133 and PN10009288)
• Espresso Service Kit*(PN10021379)
• Monobrewer Service Kit*(PN10037202 for coffee or PN10037220 for tea)
• Overpressure Valve (PN10024356)
• Non-return valve (PN100246950)
• Grinder outlet* (one per grinder - PN10031032)
• Grinder soft ring*(one per grinder - PN10032591)
• Grinder adjustment ring*(one per grinder - PN10031008)
• Extractor fan (PN10013350)
• Ingredient canisters and outlet chutes (see below for part numbers)-
CL22: PN1003379 (1pcs) + PN10033780 (1pcs) + PN1009619 (2pcs)
ES12B: PN10009570 (1pcs) + PN10009705 (1pcs) + PN1009619 (2pcs)
ES13: PN10009562 (1pcs) + PN10009563 (1pcs) + PN10009705 (1pcs) +
PN1009619 (3pcs)
FBT14: PN10009562 (1pcs) + PN10009563 (1pcs) + PN10009567 (1pcs) +
PN10009704 (1pcs) + PN1009619 (4pcs)
Items marked with a “*” are only required if the dispenser is equipped with the
applicable system.

7
CL & PSL50 Series
System Components
Semi-annual (every 6
months/12,500 servings*)
Service Tasks
Annual (every 12
months/25,000 servings*)
Service Tasks
Bi-annual (every 24
months/50,000 servings*)
Service Tasks
Reference Instruction
Hydraulic System
Overpressure valve Inspect for leaks Replace OVERPRESSURE VALVE
14BAR PN10024356
Replace OVERPRESSURE VALVE
14BAR PN10024356 See pg. 24
Non-return valve Inspect for leaks Replace NON-RETURN VALVE
PN10024695
Replace NON-RETURN VALVE
PN10024695 See pg. 25
Inlet valve Inspect for leaks See pg. 26
Water Filter In-tank water filter Check through-put, replace as needed based on manufacturer recommendations See filter manufacturer’s recommendations
Air Channel
Air Filters Remove & Clean Replace FILTER MAT PN10034178 Replace FILTER MAT PN10034178 See pg. 12, 29
Extractor Fan Remove & Clean Replace EXTRACTION FAN
PN10013350 See pg. 22
Brewers
Espresso brewer Remove & Clean Rebuild w/ ESPRESSOBREWER KIT
PN10037204
Rebuild w/ ESPRESSOBREWER KIT
PN10037204 See pg. 13-15, 32
Monobrewer (BTB/FBT) Remove & Clean
BTB (coffee) versions rebuild
w/ MONOBREWER KIT COFFEE
PN10037202
FBT (tea) versions rebuild
w/ MONOBREWER KIT TEA
PN10037220
BTB (coffee) versions rebuild
w/ MONOBREWER KIT COFFEE
PN10037202
FBT (tea) versions rebuild
w/ MONOBREWER KIT TEA
PN10037220
See pg. 16-18, 33
Grinders
Grinder outlets Replace w/ GRINDER OUTLET
PN10031032
Replace GRINDER OUTLET
PN10031032
Replace GRINDER OUTLET
PN10031032 See pg. 21-22
Grinder motors Clean with tablets Replace SOFTRING PN10032951 Rebuild w/ SOFTRING PN10032951 &
ADJUSTMENT RING PN10031008
Mixers and Spouts
Spouts and adaptors Remove & Clean
Replace NOZZLE HOLDER
PN100166133 & DISPENSE NOZZLE
PN10009288
See pg. 11, 23, 30
Steam traps Remove & Clean Replace FAST MIXER UNIT PN
10032974
Replace FAST MIXER UNIT PN
10032974
Mixer bodies Remove & Clean
Mixers motors Remove & Clean Replace MIXER BRACKET ASSY
PN10011038
Replace MIXER BRACKET ASSY
PN10011038
Black coffee kit Remove & Clean
MAINTENANCE SCHEDULE
(Chart continues on next page.)
* indicates whichever comes first; time or servings.

8
CL & PSL50 Series
MAINTENANCE SCHEDULE
System Components
Semi-annual (every 6
months/12,500 servings*)
Service Tasks
Annual (every 12
months/25,000 servings*)
Service Tasks
Bi-annual (every 24
months/50,000 servings*)
Service Tasks
Reference Instruction
Bean Hopper Bean hopper Remove & Clean See pg. 19, 28
Ingredient
Canisters Canisters and chutes Remove & Clean
CL22: Replace PN1003379 (1pcs)
+ PN10033780 (1pcs) + PN1009619
(2pcs)
ES12B: Replace PN10009570 (1pcs)
+ PN10009705 (1pcs) + PN1009619
(2pcs)
ES13: Replace PN10009562 (1pcs)
+ PN10009563 (1pcs) + PN10009705
(1pcs) + PN1009619 (3pcs)
FBT14: Replace PN10009562 (1pcs)
+ PN10009563 (1pcs) + PN10009567
(1pcs) + PN10009704 (1pcs) +
PN1009619 (4pcs)
See pg. 10, 31
Yellow indicates Semi-annual (every 6 months/12,500 servings continually) Service tasks for all subsequent pages.
Green indicates Annual (every 12 months/25,000 servings continually) Service tasks for all subsequent pages.
Blue indicates Bi-annual (every 24 months/50,000 servings continually) Service tasks for all subsequent pages.
* indicates whichever comes first; time or servings.

9
CL & PSL50 Series
SERVICE MENU
Accessing the service menu
01
Open door. Service menu will appear (access level 255 will be granted).
Press Program to access basic service functions. For
additional service functions, enter specic service code
provided by distributor or service company.
02
Press Service On (A) to enter. Press Service Off (B) to exit.
Press Return icon (C) to return to user menu.
03
A B C

10
CL & PSL50 Series
Step 1: Clean canisters, canister outlets
SERVICE TASKS
Remove canisters. Remove chutes.
Close canister outlet gates by rotating
so arrows point straight up (A).
Wipe exterior of canisters with dry
cloth to remove any dust or spilled
ingredients. For dried-on ingredients,
damp cloth can be used to spot clean.
05
02
01
03
04
Clean all parts inside and out. Dry
after cleaning.
Pro Tip:
Save time by exchanging dirty
parts with clean spares and
washing and drying the dirty
parts later (in a dishwasher if
dishwasher-safe) then reusing
them during the next thorough
cleaning.
Snap chutes back on. Set aside.
06
Important:
For Biannual Service replace
the canister units. Dispose of all
used parts in the appropriate
recycling bins.
CL22: Replace PN1003379
(1pcs) + PN10033780 (1pcs) +
PN1009619 (2pcs)
ES12B: Replace PN10009570
(1pcs) + PN10009705 (1pcs) +
PN1009619 (2pcs)
ES13: Replace PN10009562
(1pcs) + PN10009563 (1pcs)
+ PN10009705 (1pcs) +
PN1009619 (3pcs)
FBT14: Replace PN10009562
(1pcs) + PN10009563 (1pcs)
+ PN10009567 (1pcs)
+ PN10009704 (1pcs) +
PN1009619 (4pcs)

11
CL & PSL50 Series
SERVICE TASKS
Step 2: Clean spout adaptor, mixers, Black Coffee Kit
Remove whipper disc - one per mixer
- by gripping and pulling it straight out.
(Medium force is required.)
Disconnect ingredient spouts from
spout adaptor.
Pull spout adaptor forward to
separate it from support arm.
Release mixer by rotating red lever
from 6:00 (locked) position to 7:00
(unlocked) position (A), then pull it
forward to release it (B).
02
03
01
A
B
04
For dispensers with Black Coffee Kit
pull vessel forward to release it from
mounting clip, then pull rear tube off
stem.
Disassemble and clean all parts inside
and out. Dry after cleaning, Set aside.
06
05
Pro Tip:
To make removing the whipper
disc easier, a special Whipper
Disc Tool is available from the
distributor. (Part # 6162028)
Important:
For Annual and Biannual
Services replace the mixer
units with PN10032974 and
PN10011038. Dispose of all used
parts in the appropriate recycling
bins.

12
CL & PSL50 Series
SERVICE TASKS
Remove red air channel.
(Pay attention to location of lters,
they must be reinstalled in same
locations later.)
Clean all parts inside and out.
Rinse lters thoroughly and
squeeze to remove excess moisture.
Dry after cleaning. Set aside.
02
01
Important:
For Annual and Biannual
Services replace the air channel
and lter with PN10034178.
Dispose of all used parts in the
appropriate recycling bins.
Step 3: Clean air channel, air filters

13
CL & PSL50 Series
Step 4: Clean espresso brewer
Slide red locking latch fully to left to
unlock brewer. Disconnect water inlet
tube’s quick-connect tting.
01
Lift brewer up approx. 2-3cm to
clear drive assembly and remove it
from dispenser.
03
Grip brewer at top and pull forward
and down so it hinges down/outwards
approx. 20°/3cm.
02
Rotate espresso outlet so tube points
away from centre of brewer to align
retaining nib to release position, then
pull it away to release it.
04
SERVICE TASKS
Wash all parts under running water
and scrub away any dried coffee
residue with brushes. Dry after
cleaning. Set aside.
Slide cake pusher off back of brewer
to separate it and fully unlock the
brewer cover from the brewer (A).
Then pull brewer cover out fully to
separate it from brewer (B).
05
Pull brewer cover up/away from
centre of brewer until it extends by
2-3cm.
06
07
A
BImportant:
For Annual and Biannual
Services rebuild the brewer
with PN10037204. Dispose of
all used parts in the appropriate
recycling bins. Refer to “Install
espresso brewer service kit” for
instuctions.

14
CL & PSL50 Series
Step 4: Install espresso brewer service kit (annually & biannually)
Rotate exposed gear cog at back of
espresso brewer until piston reaches
top of cylinder.
Remove screw securing lter and seal
seal to piston. Replace with new lter
and seal included with kit.
02
01
SERVICE TASKS

15
CL & PSL50 Series
Step 4: Reassemble espresso brewer
Insert espresso outlet so tube points
away from the centre of brewer to
align retaining nib to release position,
then push it into brewer cover and
rotate it 180° to lock it in place. Set
aside.
Slide grounds pusher into its track
and push it back until it just extends
past the back of the brewer.
Fit brewer cover into guide slots
(when correctly aligned brewer cover’s
outlet tube orice will be pointing to
right - when viewed brewer from front
- brewer cover cannot be successfully
installed backwards).
Slide cake pusher and brewer cover
towards each other so that cake
pusher’s guide nibs align into brewer
cover’s corresponding slots and then
push brewer cover down until it is
fully seated to brewer.
02
01
03
04
SERVICE TASKS

16
CL & PSL50 Series
Step 5: Clean monobrewer
SERVICE TASKS
Grip monobrewer at bottom and
rotate it upwards approx. 25° to
release it from housing to remove it.
Disconnect monobrewer’s outlet tube.
Remove safety cover.
02
01
03
Important:
For Annual and Biannual
Services rebuild the brewer
with PN10037202 (coffee
versions) or PN10037220
(tea versions). Dispose of all
used parts in the appropriate
recycling bins. Refer to “Install
monobrewer service kit” for
instuctions.
04
Rotate exposed gear cog at back of
monobrewer (A) so chamber base
at bottom is fully opened.Then slide
grounds scraper out from back (B).
B
Rotate exposed gear cog at back of
monobrewer (A) so both chamber top
(B) and chamber bottom (C) are both
fully opened.
Slide grounds guide (A) out from back, then pull chamber top
out (B). Rotate gear cog up then pull chamber bottom out
(C). Wash all parts under running water and scrub away any
dried coffee residue with brushes. Dry after cleaning. Set aside.
05
B
C
06
A
B
C
A
A
Pro Tip:
If opening the monobrewer by
rotating the gear cog at the back
of the brewer proves too difcult
to perform by hand, use an
8mm wrench to rotate the shaft
connecting the gear sets.

17
CL & PSL50 Series
Step 5: Install monobrewer service kit (annually & biannually)
SERVICE TASKS
Press ejector button to release
lter and gasket from chamber
bottom. Replace with new lter and
gasket included with kit.
Remove screw securing shower head
and silicone plate. Pull off o-ring.
Replace with new silicone plate and
o-ring included with kit.
Remove o-ring from water inlet.
Replace with new o-ring included with
kit.
01
Pull old scraper blade off of grounds
scraper. Replace with new blade
included with kit.
05
07
06
Slide cylinder out of bottom of brewer. Slide cylinder back into brewer.Pull silicone nipple holder out of
brewer. Replace new nipple included
with kit in holder and replace in
brewer.
02
03
04

18
CL & PSL50 Series
Step 5: Reassemble monobrewer
SERVICE TASKS
From back of monobrewer, slide
grounds scraper into its track
and push it forward until scraper
surface extends past chamber base.
Reinstall grounds guide (A) into its
track partway. Reinstall chamber top
(B) into brewer. Set aside.
Insert chamber base into bottom of
brewer. Rotate exposed gear cog
at back of monobrewer to adjust
internal components if needed.
02
01
03
A
B

19
CL & PSL50 Series
Close bean gate (push in for some
models, pull out for others).
01
Step 6: Clean bean hopper
SERVICE TASKS
Remove screw securing bean hopper
to dispenser housing (located at either
inside front left corner of hopper or at
outside bottom/front corner).
Lift entire bean hopper out of
disperser.
Empty beans, then clean all accessible
areas of hopper with a dry cloth.
Set aside.
02
03
04

20
CL & PSL50 Series
SERVICE TASKS
Step 7: Clean grinder, replace outlet
Remove grinder outlet and replace
with new.
Clean around grinder area.
02
01
WARNING:
When working with electrical
components, always turn the
dispenser OFF at the main switch,
or disconnect the plug from the
outlet, to prevent risk of electrical
shock.
This manual suits for next models
1
Table of contents
Other Spengler Coffee Maker manuals
