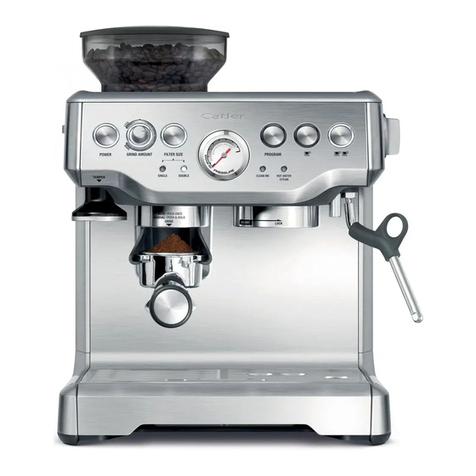
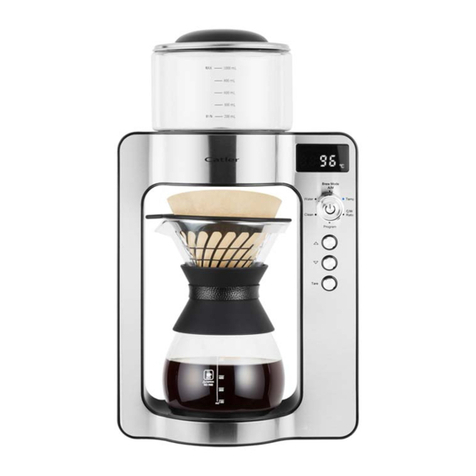
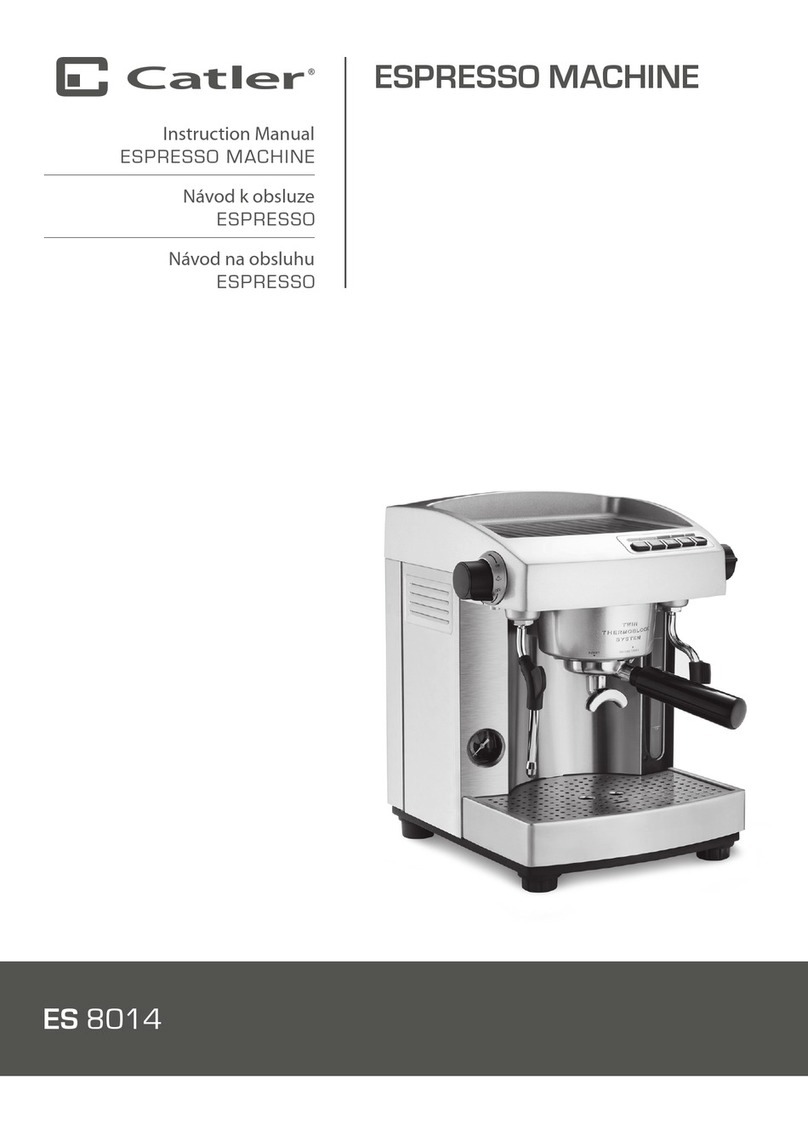
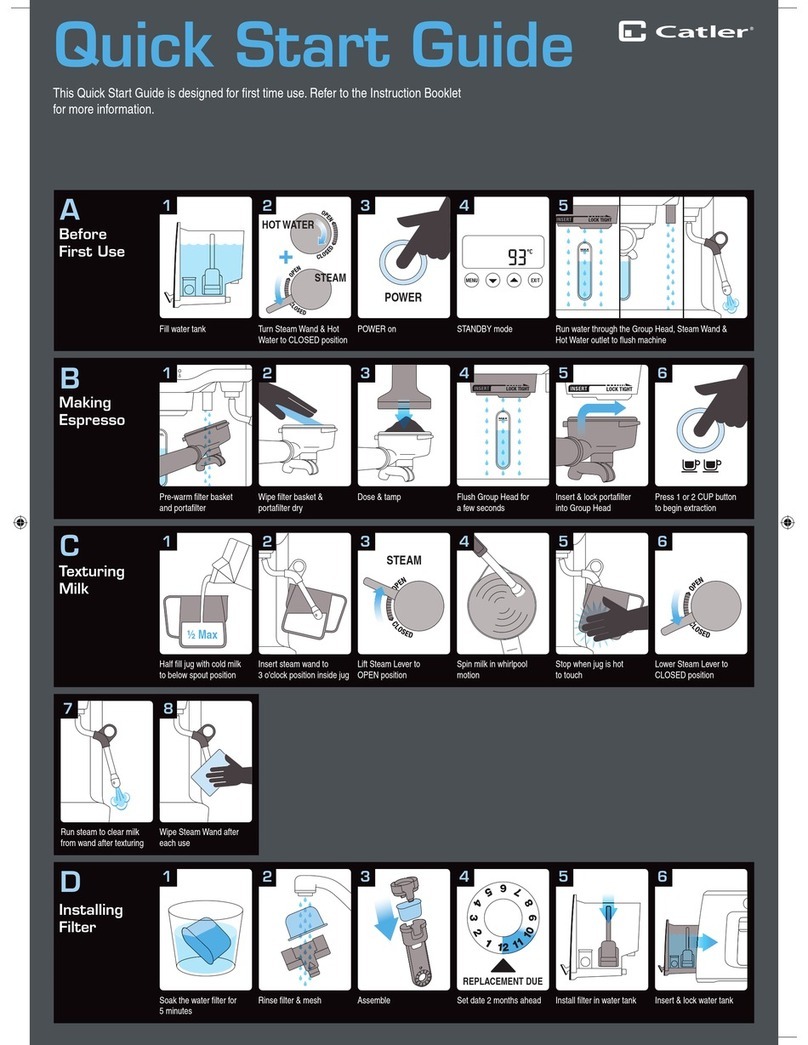
Catler ES 300 User manual

ES 300
Instructions for use
ESPRESSO MACHINE
Návod kobsluze
PÁKOVÉ ESPRESSO
Návod na obsluhu
PÁKOVÉ ESPRESSO
Használati útmutató
KAROS KÁVÉFŐZŐ
Instrukcja obsługi
EKSPRES DŹWIGNIOWY

ESPRESSO
MACHINE

3
TABLE OF CONTENTS
TABLE OF CONTENTS
5 Catler recommends safety rst
9 Know your Espresso Machine ES 300
11 Using your Espresso Machine ES 300
16 Care and Cleaning
19 Troubleshooting

4CONGRATULATIONS
Congratulations
on the purchase of your new Espresso Machine ES 300.

5
CATLER RECOMMENDS SAFETY FIRST
We understand the importance of safety and that’swhy we put your safety first from the initial
design concept to the production itself. Nevertheless, we ask you to be careful when using
electrical equipment and to observe the following guidelines:
• This appliance may be used by children 8 years
of age and older and by persons with physical
or mental impairments or by inexperienced
persons, if they are properly supervised or
have been informed about how to use of the
product in asafe manner and understand the
potential dangers.
• Children must not play with the appliance.
• User cleaning and maintenance must not be
performed by children unless they are older
than 8 years of age and work under supervision.
• Keep the appliance and its supply out of the
reach of children under 8 years of age.
• If the power cord is damaged, ask the
authorised service for areplacement in order
to prevent hazards. It is forbidden to use the
appliance with the power cord damaged.
• This appliance is designed for household use.
The appliance is also designed for personal
non-commercial use in areas that include, but
are not limited to the following:

6CATLER RECOMMENDS SAFETY FIRST
– staff kitchens in stores, offices and other
workplaces;
– agricultural farms;
– hotel or motel rooms and other living areas;
– bed and breakfast establishments.
• Do not do immerse the power cord, plug or
appliance in water or any other liquid.
WARNING: The lling hole must not be opened
during use.
WARNING: Avoid spilling on the plug.
• Always clean the parts of the appliance that
come into contact with foodstuffs with clean
warm water and alittle neutral dishwashing
liquid, rinse them with clean water and wipe
dry.
WARNING: Incorrect use may lead to injury.
• The outer surface of the appliance heats up
during use and may be hot for some time after
use. Be very careful.

7
CATLER RECOMMENDS SAFETY FIRST
• This appliance is designed to be freestanding and must not be placed in acabinet when in
use.
• Before connecting the appliance to apower socket, check that the nominal voltage on the
appliance'srating label matches the electrical voltage in the socket.
• Connect the appliance only to agrounded socket. For safety reasons, we don’t
recommend using adaptor plugs or extension cords.
• Do not place the appliance on windowsills, sink drip tray or unstable surfaces. Always
place the appliance on an stable, at and dry surface.
• Do not place the appliance on electric or gas cooker or in the vicinity of naked ame.
• Never use the appliance in the near vicinity of abath, shower or swimming pool.
• The appliance is designed for making coee. Use the appliance only for the purpose for
which it has been designed.
• Do not use the product outdoors.
• Use the appliances according to the instructions in this user'smanual. Otherwise injury,
damage to the appliance or dangerous situation might occur.
• During operation, aclear space of at least 15 cm must be left around and above the
appliance to ensure sucient air circulation.
• Only use the top surface of the appliance for warming cups, handles or strainers. Do not
use it to store other items.
• Fill the water tank with clean, cold water. Do not pour hot water or other liquids into it or
place any objects inside it.
• Before turning on the appliance, check that:
– the drip tray together with the grate is installed in position;
– the water tank is lled with asucient amount of water and is properly installed in
position. The water level must not exceed the maximum mark.
• Never use the appliance when the water tank is empty. There is arisk of damage to the
appliance.
• Take great care when operating the appliance to avoid scalding with hot water or steam.
• When using the appliance, check the water level in the water tank regularly. If the water
level drops below the minimum mark, rell the tank according to the instructions in this
manual. Before adding water, rst turn the appliance o and disconnect it from the power
socket.
• Take great care when handling adrip tray full of water. The water can be hot and there is
arisk of scalding or burns.
• Do not move the appliance with acup of coee placed on the drip tray grate or with cups
placed on the surface designed to heat them up.
• Ensure that the power cord does not come into contact with ahot surface.
• When disconnecting the appliance from the power socket, always pull the plug, not the
power cord. Otherwise, damage to the power cord or the socket could occur.
• Make sure that the mains cord and plug does not come into contact with water or other
uid.

8CATLER RECOMMENDS SAFETY FIRST
IMPORTANT SAFETY INSTRUCTIONS FOR USING ELECTRICAL EQUIPMENT
• Fully unwind the power cord before use.
• Do not leave the power cord hanging over the edge of atable or counter top or allow it
to touch ahot surface or to become tangled up. Do not put heavy objects on the power
cord.
• For safety reasons, we recommend to connect the appliance in an independent electrical
circuit separated from other appliances. Do not use adapter plugs or extension cords to
connect the appliance to apower socket.
• To prevent electric shock, do not immerse the appliance, its base or the power cord in
water or other liquids.
• We recommend that you check your appliance regularly. Do not use the appliance if it is
damaged in any way or if the power cord or plug is defective. All repairs or adjustments
must be performed at the nearest Catler authorised service centre.
Any maintenance other than routine cleaning must be entrusted to an authorised Catler
service centre.
• We recommend to install aresidual current device (standard safety switches in your power
outlet) to provide ahigher level of protection when using the appliance. We recommend
to install aresidual current device (with anominal residual operating current of no more
than 30mA) in the electric circuit in which your appliance is to be connected. For further
expert advise, please contact your electrician.
WARNING: HIGH PRESSURE
• To prevent serious injury, burns, damage to the appliance or property damage, never
remove the water tank or handle from the appliance when it is in use.
• Before removing the water tank or handle from the appliance, always make sure the
control is in the position and the pressure gauge needle is at“0”.
Instructions are also available at www.catler.eu.

9
KNOW YOUR ESPRESSO MACHINE ES 300
1
2
3
4
5
6
7
8
9
10
13
11 12

10 KNOW YOUR ESPRESSO MACHINE ES 300
14 15 16
1. Cup/strainer/handle heating surface
2. Pressure indicator
3. Brew head
4. Handle
5. Drip tray
6. Lid of the water tank
7. Water tank
8. Coee/steam dispenser control
9. Steam jet
10. Body of the Espresso Machine
11. Strainer for 1 cup
12. Strainer for 2 cups
13. Coee measuring scoop / tamper
14. button – used to dispense steam
15. button – used to prepare coee
16. button – used to switch the appliance on/o

11
USING YOUR ESPRESSO MACHINE ES 300
BEFORE FIRST USE
Before rst use, remove all packaging
and advertising labels/stickers from the
appliance.
Lift the lid and remove the water tank. Wash
it with clean water and asmall amount of
neutral dishwashing liquid. Then rinse it
properly with clean water, dry it and put it
back in place.
Remove the drip tray and the grate. Wash
the grate, drip tray, handle, strainers and
measuring scoop in warm water with asmall
amount of neutral dishwashing liquid. Then
rinse it properly with clean water, dry it and
put it back in place.
Wipe the outer surface of the Espresso
Machine with aslightly damp cloth and wipe
it dry.
INSTALLATION LOCATION
Place the Espresso Machine on aat, dry and
clean surface. Make sure there is aclear space
around it, at least 35 cm above the top and
15 cm on the sides.
Place the Espresso Machine at sucient
distance from the power socket. Ensure free
access to the power socket so that the plug
can be unplugged if necessary.
WARNING!
THE ESPRES-
SO MACHINE IS
DESIGNED TO BE
FREESTANDING. DO
NOT INSTALL IT IN
ACABINET OR OTH-
ER ENCLOSED SPACE
WHILE YOU ARE US-
ING IT.
PREPARATION OF THE ESPRESSO
MACHINE
Filling the water tank
1. Lift the lid of the water tank and pull
the tank out of the back of the Espresso
Machine.
2. Fill the tank with clean, potable water up
to the maximum mark and put it back in.
3. Make sure the tank is properly installed in
place. The groove in the tank must t into
the holder in the rear wall.
The maximum tank capacity is 1.2 litres of
water. Do not overll it. When lling, always
observe the minimum and maximum
marks on the tank. Never ll the tank with
warm, heated or sparkling water or other
liquids such as milk. This could damage
the appliance. Never ll the tank when it
is installed in the Espresso Machine. The
tank must be removed before relling.
Otherwise there is arisk of spilling water on
the Espresso Machine or overlling the tank,
resulting in damage.
USING YOUR ESPRESSO MACHINE ES 300

12 USING YOUR ESPRESSO MACHINE ES 300
The water you ll the tank with should ideally
be at room temperature (around 25°C). Water
that is too cold can adversely aect the nal
taste of the coee drink.
REMARK:
Do not leave the water in the tank for
more than one day. Fresh, potable water
should always be used to make quality
fresh coee. Otherwise, the taste of
the resulting drink may be adversely
aected.
REMARK:
Check the water level in the tank
regularly. If the water level drops
below the minimum mark, the water
must be replenished according to the
instructions above.
INSERTING THE STRAINER IN THE
HANDLE
1. Insert the strainer in the handle to brew 1
or 2 cups of coee.
2. Press rmly so that the strainer ts
properly in the handle. Correct insertion
is indicated by aclick.
REMARK:
If you want to prepare stronger coee in
alarger cup, we recommend using the
strainer for 2 cups.
COFFEE DISPENSING AND TAMPING
Put the freshly ground coee into the strainer
using ameasuring scoop. Clean the edges
of the strainer and the handle of any excess
ground coee. This will ensure aproper seal
when the handle is placed in the brew head.
Turn the measuring scoop and use the at
end as atamper to press the ground coee in
the strainer.
We recommend resting the handle on the
edge of the counter.
Tamp the ground coee with an even,
steady and long pressure. You can repeat the
tamping afew times. The last press should
take up to 5 seconds.
It is important to tamp the ground coee
rmly enough (the pressure exerted should
be 11 to 14 kg).
INSERTING THE HANDLE IN THE COFFEE
MACHINE
Place the handle underneath the brew head
so that the grip is aligned with the open lock
symbol on the brew head.
Insert the handle in the brew head and turn
it towards the closed lock symbol until you
feel resistance.
USING THE ESPRESSO MACHINE
Before each use always check that:
– the tank is lled with fresh, potable
water;
– the drip tray is empty;
– the coee is properly tamped;
– the handle is correctly inserted in the
brew head;
– the control is in the“ ”position.
SWITCHING THE ESPRESSO MACHINE
ON/OFF
1. Insert the power plug into aproperly
grounded power socket.
2. The button will light up red.
3. Press the button and the Espresso
Machine will turn on. The button will
light up white and the button will
ash red. This means that the Espresso
Machine is being warmed up.

13
USING YOUR ESPRESSO MACHINE ES 300
4. When the button turns white, the
Espresso Machine is heated to operating
temperature and is ready to use.
5. If you are not going to use the Espresso
Machine, press the button. The
Espresso Machine will switch o and the
button will light up red.
6. To turn the appliance completely o,
unplug the power cord from the socket.
AUTO SHUT-OFF
For safety reasons, the Espresso Machine is
equipped with an auto shut-o function. It
switches o the appliance after 30 minutes
of inactivity. Press the button to switch on
the Espresso Machine.
COFFEE
1. Wait until the Espresso Machine is ready
to use.
2. Place acup under the dispensing holes of
the handle.
3. Press the button to start the coee
making process.
4. First, the coee is brewed by pouring
asmall amount of hot water into the
strainer to swell the coee. Then hot
water will start to ow into the strainer
and after about 5 seconds the resulting
coee will ow into the cup.
5. Once the desired amount of coee has
been poured into the cup, press the
button and the coee dispensing stops.
6. Remove the cup from under the handle.
7. Wait afew seconds before removing
the handle from the brew head. Turn
the handle counterclockwise until it
is aligned with the open lock symbol.
Remove it from the brew head with
adownward motion.
8. Dispose of the used coee and clean
the handle and strainer according to
the instructions in the chapter“Care and
cleaning”.
If you are using the Espresso Machine for the
rst time or after alonger period of time, we
recommend pouring out the rst two coees,
as the rst brewing will ush the internal
piping, which may contain deposits, and the
coee may not have the optimal taste.
You can skip this step by inserting an empty
strainer into the handle, and once the
Espresso Machine is ready to use, press the
button and let about 100ml of hot water
ow through the handle. This will ush the
internal pipes.
WARNING!
DURING THE
BREWING PROCESS,
THE GROUND COF-
FEE, THE STRAINER
AND THE INTERIOR
OF THE HANDLE ARE
HEATED AND RE-
MAIN HOT FOR SEV-
ERAL MINUTES AF-
TER THE BREWING
PROCESS IS COM-
PLETE. BE CAREFUL
NOT TO GET BURNT
BY THE HOT PARTS.

14 USING YOUR ESPRESSO MACHINE ES 300
HOT WATER SPOUT
1. Wait until the Espresso Machine is ready
to use.
2. Place the cup next to the Espresso
Machine and point the steam jet into the
cup.
3. Turn the control to the position and
the hot water spout will start.
4. The button will go out and the
button will ash.
5. Once the desired amount of water has
been poured into the cup, turn the
control to the position. The
button will light up and the button
will go o.
MILK TEXTURING
1. Wait until the Espresso Machine is ready
to use.
2. Press the button and it will ash. The
water is heated to steam temperature.
3. When the button turns white, the
steam is ready to use.
4. Place ajug with cooled milk next to the
Espresso Machine and dip the end of the
steam jet into the milk.
REMARK:
We recommend using milk with ahigher
fat content to achieve abetter quality
and richer foam.
5. Turn the control to the position and
steam will be dispensed through the jet.
The button will light up.
6. Keep the steam jet just below the surface
of the milk until it starts to swirl in the
jug.
7. To create arich froth, bring the jet up
close to the surface of the milk to let
in air bubbles. Keep the milk in the jug
swirling. Once the foam is rich enough,
dip the jet deeper into the milk to
warm it up. You will know the correct
temperature of the milk by touching
the bottom of the jug. Once the bottom
starts to get too hot to keep your hand
on it, the milk is warm enough.
8. Turn the control to position to stop
the steam.
9. Wait until the steam spout has stopped
completely. Then carefully remove the jet
from the milk. This will prevent possible
splashing of milk.
10. Wipe the end of the steam jet with
asoft, slightly dampened sponge. It is
important to wipe and clean the steam
jet after each use to prevent deposits
and unwanted odours from dried milk
residues. Follow the instructions in the
chapter“Care and Cleaning”.
After steam is dispensed, the temperature
of the water in the indoor system is too hot
to make coee, therefore the button
may light up red. Turn the control to the
position and allow the hot water to ow out
of the system. When you turn the control to
the , the button will light up white.
Cappuccino
Cappuccino is apopular coee drink that
consists of three parts: espresso, warm,
frothed milk and milk foam.
Prepare one shot of espresso in acup of
about 150 ml.
Heat and froth asucient amount of fresh
milk. Create asucient amount of foam.
Pour the frothed milk into the cup containing
the espresso. Add the milk foam into the cup
using aspoon.

15
USING YOUR ESPRESSO MACHINE ES 300
PRESSURE INDICATOR
The pressure indicator is an important
measuring device in the preparation of
avour-balanced coee. The indicator is
divided into several zones according to the
pressure level that the Espresso Machine
reaches when brewing coee.
BEST zone – in this zone, the Espresso
Machine reaches apressure of 9 to 12 bar,
which is ideal for making delicious and
avour-balanced coee. The aim is to make
the indicator line reach this zone.
Maximum pressure zone – in this zone,
the Espresso Machine reaches apressure of
15 to 18 bar. This pressure is very high and
the resulting coee is bitter, very dark and
you can feel the burn in the taste. The coee
only drips from the holes of the handle and
the brewing takes along time. This may be
caused by the ground coee being too ne
or very heavily tamped or there could be
alot of coee in the strainer. We recommend
reducing the amount of ground coee and
adjusting the coarseness of the grind. When
tamping, apply constant and long pressure
to the entire surface of the ground coee in
the strainer.
Minimum pressure zone – in this zone,
the Espresso Machine reaches apressure
of 0 to 8 bar. This pressure is very low and
the resulting coee is watery, without
adistinctive colour and the taste is bland.
The coee ows very quickly. This can be
caused by the ground coee being too
coarse or not properly tamped or there is
not enough in the strainer. We recommend
increasing the amount of ground coee and
adjusting the coarseness of the grind. When
tamping, apply constant and long pressure
to the entire surface of the ground coee in
the strainer.
REMARK:
The pressure indicator displays the
pressure at any given time during coee
brewing. The pressure level is inuenced
by the operating conditions, coarseness/
neness of the ground coee, etc.
COFFEE MAKING TIPS
Use ground coee specially designed and
ground for espresso machines.
If you are using acoee grinder, adjust the
setting to grind the coee for an espresso
machine.
To reduce the period of storage, buy ground
coee / coee beans in smaller packages.
Use freshly roasted coee beans that have
the date of roasting marked on the package
and consume them within 3 weeks from the
date of the roasting.
Store coee beans / ground coee in acool,
dark and dry place, preferably in an airtight
container.
Do not store ground coee / coee beans in
the freezer or fridge.
Grind the coee beans just before brewing
the coee.
Brew coee into preheated cups. You can
use the surface at the top of the Espresso
Machine to preheat the cup or pour hot
water into it.
We recommend preheating both the handle
and the strainer that you will be using. You
can rinse it under warm water and then dry it
properly with aclean cloth.

16 CARE AND CLEANING
CARE AND CLEANING
Before cleaning the appliance, always
disconnect the plug of the power cord from
the mains socket and let it to cool down
properly.
WARNING!
DO NOT WASH
THE APPLIANCE,
MAINS CORD AND
PLUG UNDER RUN-
NING WATER AND
DO NOT IMMERSE
IT IN WATER OR ANY
OTHER LIQUID.
CAUTION:
Do not use sharp objects, chemicals,
thinners, petrol or other similar
substances. Under no circumstances
should the appliance be cleaned with
asteam cleaner.
CLEAN AFTER EVERY USE
It is important to clean the Espresso Machine
after each use to prevent unwanted odours,
ground coee residue, mould, bacteria etc.
This will ensure proper operation of the
appliance and prolong its life.
STRAINERS AND HANDLES
The strainer and handle should be cleaned
properly after each use.
1. Turn the handle counterclockwise until
it is aligned with the open lock symbol.
Remove it from the brew head with
adownward motion.
2. Dispose of the coee grounds in the
compost heap or in regular municipal
waste. If the coee grounds are dicult
to remove from the strainer, use atable
knife or spoon.
3. Remove the strainer from the handle.
You can use asecond strainer as an aid
to remove the strainer from the handle.
Insert its edge into the space between
the strainer and the handle and push
the inserted strainer out of the handle in
adownward motion.
WARNING!
TAKE EXTRA
CARE AS THE COF-
FEE GROUNDS,
STRAINER AND
HANDLE ARE VERY
HOT AFTER USE.
THERE IS ARISK OF
BURNS.
4. Rinse the strainer and handle under
warm running water and wipe them
dry with aclean cloth. Place them on
the heating surface so that they are
preheated and ready for use.

17
CARE AND CLEANING
5. If the holes in the strainer become
blocked during use, use aneedle or pin
to remove the debris. If the holes in the
strainer are heavily soiled, soak it in warm
water for about 20 minutes.
STEAM JET
The steam jet should be cleaned after each
use to prevent deposits and unwanted
odours from dried milk residues.
After each use: Point the steam jet at the
cup or bowl and start the steam for afew
seconds. This will remove most of the milk
residue in the jet.
Remove the steam jet cap and rinse it under
clean, warm water. Wipe it dry. Wipe the
steam jet with aslightly damp cloth. Put the
steam jet cap back on.
Blocking the holes: If the opening in
the steam jet becomes blocked with milk
residue, use aneedle or pin to remove it
manually. Then start hot water spout through
the steam jet for about 40 seconds.
DRIP TRAY AND GRATE
1. Carefully remove the drip tray from the
body of the machine and remove the
grate.
2. Empty all the contents of the drip tray
over the sink.
3. Wash the tray and grid with clean water
and then dry them properly.
WARNING!
BE CARE-
FUL NOT TO SCALD
YOURSELF WHEN
HANDLING THE
TRAY. IT MAY CON-
TAIN HOT WATER.
4. Replace the grid and insert the
assembled drip tray back into the body of
the Espresso Machine.
WARNING!
NEVER USE
THE MACHINE WITH-
OUT APROPERLY IN-
STALLED DRIP TRAY
AND GRATE.
WATER TANK
Lift the water tank lid and pull the tank out of
the back of the Espresso Machine.
Pour out the remaining water from the tank,
rinse it under clean water and wipe it dry
with aclean cloth. Put it back in the Espresso
Machine.
REMARK:
The water tank, grate and drip tray
can be washed in the dishwasher in
the top basket on the gentle washing
programme.
EXTERIOR SURFACE
Use aclean, slightly dampened cloth to clean
the exterior surface. Then wipe everything
dry.
DECALCIFICATION
Mineral deposits that occur in the water
may settle inside the Espresso Machine
during use. These can negatively aect the
operation of the Espresso Machine, energy
consumption, coee preparation and the
nal taste. It is therefore important to carry
out the descaling process regularly to
remove these deposits.

18 CARE AND CLEANING
The frequency of descaling depends on the
hardness of the water you use. The table
below shows the recommended time after
which the descaling process should be
carried out.
Water hardness Recommended time
for descaling
Soft water /
ltered water After 80 cycles
High water
hardness After 40 cycles
For descaling, use a1:3 solution of white
vinegar and water or special descaling
agents designed for espresso machines. For
these, follow the manufacturer'sinstructions
in the package leaet.
DESCALING THE WATER TANK
1. Make sure the control is in the
position, the Espresso Machine is
switched o and the power cord plug is
unplugged from the power socket.
2. Remove the tank, ll it with descaling
solution and put it back into the Espresso
Machine.
3. Leave it overnight and then pour the
solution down the sink.
4. Rinse and wash the water tank properly
in clean, warm water. Also wipe the
entrance hole at the back of the Espresso
Machine.
DESCALING THE ESPRESSO MACHINE
1. Descale the water tank according to the
steps above.
2. Make sure the Espresso Machine is
switched o and the power cord plug is
disconnected from the power socket.
3. Fill the tank with descaling solution
above the minimum mark.
4. Put the strainer into the handle and
insert it into the brew head.
5. Place abowl under the handle and then
place another bowl with some cold water
next to the Espresso Machine and direct
the steam jet into it.
6. Plug the power cord into the power
socket and turn the appliance by
pressing the button.
7. Wait until the Espresso Machine is heated
to operating temperature.
8. Press the button and let about 2/3 of
the solution in the tank ow through the
handle. Then press the button again
to stop the dispensing.
9. Now press the button and wait for
the Espresso Machine to heat up to the
steam spout temperature.
10. Turn the control to the position and let
the steam escape for about 10 seconds.
11. Turn the control to the position. Turn
o the Espresso Machine and disconnect
the power plug from the power socket.
12. Remove the water tank and pour o the
remaining solution. Wash the water tank
and ll it with clean water.
13. Repeat steps 4 to 11 above to remove
any residual solution and sediment from
the Espresso Machine.
Storage
Before storing, make sure that the appliance
is clean, dry andcompletely cooled. Store it
in awell-ventilated dry place out of reach of
children and animals.
Put the handle aside. Do not install it in the
brew head. The seal could be damaged due
to long and constant pressure.

19
TROUBLESHOOTING
TROUBLESHOOTING
This chapter describes the most common problems you may encounter while using this
appliance. If your problem is either not stated here or persists, stop using the appliance,
unplug the power cord and contact your authorized service centre.
UNDER NO CONDITION SHOULD YOU REPAIR OR DISASSEMBLE THE APPLIANCE
YOURSELVES. THE APPLIANCE CONTAINS NO USER SERVICEABLE PARTS.
The Problem Cause Solution
Coee is not
dispensing.
The water tank is
empty.
Fill the tank with clean, potable water.
The ground coee in
the strainer is too ne.
Too ne coee can block the ow of water
and as aresult it will not be dispensing. We
recommend choosing acoarser grinding
grade.
There is too much
ground coee in the
strainer.
Reduce the amount of ground coee in the
strainer.
The Espresso Machine is
switched o or the plug
is not plugged in the
power socket.
Switch on the Espresso Machine or plug it in
the power socket.
The ground coee in
the strainer was too
strongly tamped.
Empty the tamped coee and use new ground
coee, which you tamp with uniform force (the
pressure exerted should be 11 to 14 kg).
The coee is
leaking from
the edges of the
handle.
The handle is
incorrectly inserted in
the brew head.
Secure the handle in the brew head so that the
grip is aligned with the closed lock symbol on
the brew head.
There was ground
coee residue on the
edge of the handle
which caused the leak.
Before inserting the handle into the brew
head, wipe the edge of the handle and the
strainer to remove any ground coee residue.
There is too much
ground coee in the
strainer.
Reduce the amount of ground coee in the
strainer.

20 TROUBLESHOOTING
Espresso Machine
does not
dispense steam.
The water tank is
empty.
Fill the tank with clean, potable water.
The Espresso Machine is
switched o or the plug
is not plugged in the
power socket.
Switch on the Espresso Machine or plug it in
the power socket.
The steam jet is
blocked.
Clean the handle. For quick cleaning, start the
steam for afew seconds immediately after the
foaming is nished. If necessary, clean it more
thoroughly according to the instructions in the
“Care and Cleaning”chapter.
The milk is not
frothy enough.
The steam does not
have enough pressure
because there is not
enough water in the
tank.
Fill the tank with clean, potable water.
The milk wasn't cooled
down enough.
Allow the milk to cool down suciently before
frothing it.
The coee ows
too fast.
The ground coee
in the strainer is too
coarse.
Water will just ow through coarsely ground
coee too quickly. We recommend choosing
aner grinding grade.
There is little ground
coee in the strainer.
Add the ground coee to the strainer.
, ,
buttons ash red
simultaneously.
The internal boiler
temperature is too high
or the temperature
sensor has been
damaged.
Turn o the Espresso Machine and disconnect
the power plug from the power socket. Allow
it to cool down for about 30 minutes and then
turn it on again. If the problem persists, please
contact aservice centre.
The button is
white, the ,
buttons ash red
simultaneously.
The control is not in the
position. Turn the control to the position.
The continuous hot
water discharge
exceeded 60 seconds.
Turn the control to the position and wait
afew minutes before dispensing water again.
Continuous steam
spout exceeded 60
seconds.
Turn the control to the position and wait
afew minutes before continuing to dispense
steam.
You have turned the
control to the
position while brewing
coee.
Turn the control to the position.
Table of contents
Other Catler Coffee Maker manuals

Catler
Catler ES 8011 User manual

Catler
Catler ES 8011 SE User manual

Catler
Catler ES 8013 User manual

Catler
Catler ES 4050 User manual

Catler
Catler 400 series User manual

Catler
Catler ES 4011 User manual

Catler
Catler ES 8014 User manual

Catler
Catler ES 700 PORTO BG User manual

Catler
Catler CM 413 User manual

Catler
Catler ES 8011 User manual