Clip-On Stopwatch - 810016 - Instruction Manual
This Sper Scientic Clip-On Stopwatch
(Model 810016) attaches easily to a key
chain or belt loop to provide convenient,
accurate measurement. Despite its
miniature size, this full-function, 24-hour
stopwatch provides precise 1/100th of a
second resolution. The large buttons and
LCD allow easy, comfortable use.
Features include a clock, calendar,
compass, thermometer, and alarm. This
product is available with an NIST traceable
certicate of compliance (Model 810016C).
MEASUREMENT PROCEDURES
Stopwatch Event Mode
1. Press MODE repeatedly to select Stopwatch Mode. “0:0000” will display.
2. Press START/STOP to begin counting up in minutes, seconds, and hundredths of a second.
3. Press START/STOP again to stop the counter.
4. Continue to press START/STOP as desired to start and stop the counter.
5. Press SPLIT/RESET to reset the counter to zero.
Stopwatch Split Mode
1. Press MODE repeatedly to select Stopwatch Mode. “0:0000” will display.
2. Press START/STOP to begin counting up in minutes, seconds, and hundredths of a second.
3. Press SPLIT/RESET to freeze the reading on the display. The stopwatch will continue recording
total elapsed time even though the display is static.
4. Press SPLIT/RESET to display the total elapsed time and resume counting up.
5. Continue to press SPLIT/RESET as desired to freeze the reading on the display.
6. Press START/STOP to stop the counter.
7. Press SPLIT/RESET to reset the counter to zero.
Stopwatch First and Second Finish Mode
1. Press MODE repeatedly to select Stopwatch Mode. “0:0000” will display.
2. Press START/STOP to begin counting up in minutes, seconds, and hundredths of a second.
3. Press SPLIT/RESET to record the rst nish. The stopwatch will continue recording total elapsed
time even though the display is static.
4. Press START/STOP to record the second nish. The display will not change.
5. Press SPLIT/RESET to display the second nish.
6. Press SPLIT/RESET to reset the counter to zero.
SETTING THE CLOCK, CALENDAR, AND ALARM
Note…
When pressing START/STOP to adjust a value, you can scroll more quickly by holding down the button.
Displaying the Clock, Calendar, and Alarm
1. Press MODE repeatedly to select Clock Mode. The time will display in hours, minutes, and seconds.
2. Press and hold START/STOP to display the month and day.
3. Press and hold SPLIT/RESET to display the alarm time setting.
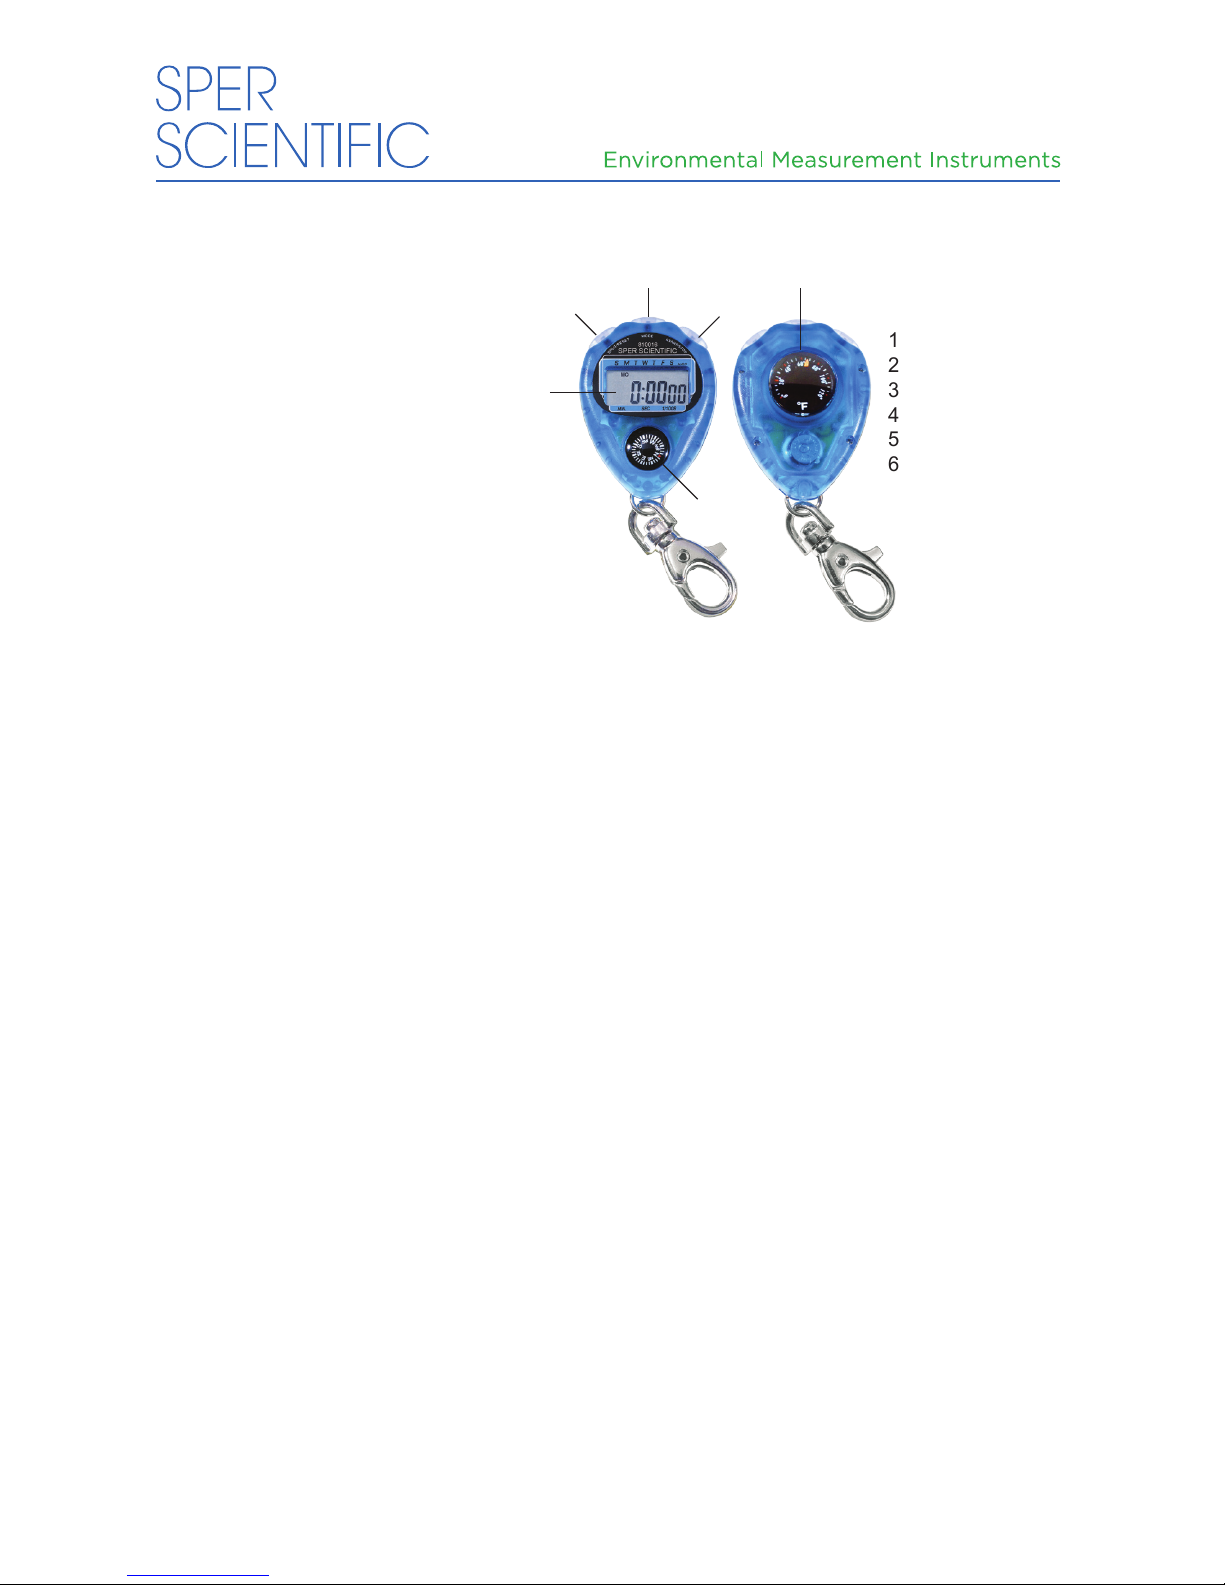
STOPWATCH
DESCRIPTION
1. LCD Display
2. Split/Reset Button
3. Mode Button
4. Start/Stop Button
5. Compass
6. Thermometer
1
2
3
4
5
6