manuals.online logo
Brands
  1. Home
  2. •
  3. Brands
  4. •
  5. Spirax Sarco
  6. •
  7. Measuring Instrument
  8. •
  9. Spirax Sarco R1C User manual

Spirax Sarco R1C User manual

1
IM-P087-33 MI Issue 6
R1C
Steam Trap Failure Monitor
Installation and Maintenance Instructions
IM-P087-33
MI Issue 6
0871750/6
1. General
safety information
2. General
product information
3. Installation
4. R1C commissioning
5. BEM /EM
commissioning
6. Normal operation
Printed in the UK © Copyright 2004
2IM-P087-33 MI Issue 6
1. General safety information
Your attention is drawn to Safety Information Leaflet IM-GCM-10.
WARNING
This product complies with the requirements of the Electromagnetic Compatibility
Directive 89/336/EEC by meeting the standards of:-
EN 61326: 1997 A1 + A2 Emmissions - Class B Equipment Table 4.
EN 61326: 1997 A1 + A2 Immunity for Industrial Locations Annex A.
The product may be exposed to interference above the limits of EN 61326 if:
- The product or its wiring is located near a radio transmitter.
Cellular telephones and mobile radios may cause interference if used within approximately
one metre of the product or its wiring. The actual separation distance necessary will vary
according to the surroundings of the installation and the power of the transmitter.
3
IM-P087-33 MI Issue 6
2.1 Introduction
The R1C steam trap failure monitor will continually monitor the performance of a steam trap
when used in conjunction with a Spiratec sensor chamber and sensor or a steam trap with
integral sensor. It will indicate whether a trap is operating correctly, passing live steam or has
failed closed by means of coloured trap status lights on the unit. Analogue and digital outputs
allow it to be connected directly to BEMS/EMS to indicate steam trap status remotely.
To detect a steam trap that is leaking steam, the R1C is used in conjunction with a Spiratec
sensor chamber or steam trap fitted with a standard SS1 Spiratec sensor.
To detect a steam trap that is leaking steam or is waterlogged, the R1C is used in conjunction
with a Spiratec sensor chamber or steam trap fitted with a WLS1 waterlogging sensor
assembly.
2.2 General description
The R1C steam trap failure monitor constantly measures the conditions in the steam line
through a Spiratec sensor fitted in the sensor chamber or steam trap.
If a steam trap is operating correctly, condensate will collect and submerge the sensor. The R1C
monitor measures the resistance at the SS1 sensor, detecting whether the sensor is submerged
in condensate or surrounded by steam. In the case of steam leakage (i.e. the trap has failed
open), steam will blast through the line clearing the condensate and exposing the SS1 sensor to
steam. The R1C monitor detects the high resistance due to the presence of steam and shows a
fail open signal.
The WLS1 combined steam leak and waterlogging sensor monitors steam leakage in the same
way as above, but also has a built in temperature sensor. When a trap fails closed, the
condensate which backs up will start to cool. The R1C monitor detects this drop in temperature
and shows a fail closed signal.
The R1C is supplied with steam leak and waterlogging values set ready for use. These values
may be changed using internal switches if required (see Section 4, Commissioning, for details).
2. General product information
4IM-P087-33 MI Issue 6
3.1 Mechanical installation
3.1.1 Sensor chamber installation
Spiratec sensor chambers are available with screwed (BSP or NPT), socket weld or flanged
connections. In all cases, installation should be as shown below. Specific installation details
are given with each type of sensor chamber.
Sensor chambers are available with an SS1 Spiratec sensor already installed for steam leak
only applications. For applications where the waterlogging facility is required, sensor chambers
are available without a sensor and a WLS1 waterlogging sensor assembly must be fitted.
Note that the R1C will only work with Spiratec WLS1 sensors which do not have built in diode
packs. WLS1 waterlogging sensor assembly with integral diode packs should not be used.
The sensor chamber should be installed horizontally immediately upstream of the trap with
the direction of flow according to the arrow found on the body of the sensor. The correct
orientation is shown in Figure 1.
3.1.2 Steam trap installation
See installation details supplied with the steam trap.
3.1.3 R1C installation
The R1C enclosure is a circular conduit box with 20 mm threaded entry holes. To maintain
resistance to moisture, use a suitable cable gland between the R1C and the Spiratec sensor. If
the cable to the BEMS/EMS passes through a conduit, make sure that the threaded connection
to the R1C is water-tight.
The R1C can be supported by the conduit or mounted on any convenient flat surface using
suitable bulkhead mounting clamps.
The maximum distance between the sensor and the R1C is 10 metres.
3.1.4 Operating temperature range -20°C to +55°C
7
3
Steam
trap
Sensor
chamber
➔
Fig. 1 Sensor chamber correct
installation Fig. 2 Sensor chamber incorrect
installation
3. Installation
Flow
Note: Screwed pipe connections shown. Steam traps with integral sensors do not require
separate sensor chambers.
5
IM-P087-33 MI Issue 6
3.2 Electrical installation
Cabling should be installed in accordance with BS 6739 - Instrumentation in process control
systems: Installation design and practice or local equivalent.
Before wiring, make sure that power to the BEMS / EMS is OFF, then remove the cover of the
R1C to expose its connectors. Figure 5 shows the internal layout of the R1C.
3.2.1 Sensor wiring to R1C
The R1C can be used with either a standard SS1 sensor or a WLS1 waterlogging sensor
assembly. These are shown below:
Fig. 3
Sensor chamber (or steam trap, not shown)
with SS1 standard sensor
Fig. 4 Sensor chamber (or steam trap, not shown) with WLS1 waterlogging sensor
Note: Ensure that the resistance from the body of the sensor to the pipework is less than 1W.
Wire the R1C to the Spiratec sensor as shown in Tables 1 and 2 below.
Standard sensor
SS1 PT1
PT2
PT3
Waterlogging sensor
WLS1
Table 1
SS1 standard sensor fitted
with PT2 or PT3 plugtail R1C
Blue PL2 pin 1
Red PL2 pin 3
Table 2
WLS1 waterlogging
sensor assembly R1C
Black PL2 pin 1
Red PL2 pin 2
White PL2 pin 3
6IM-P087-33 MI Issue 6
D14
SW1
SW2
1 23
4
4 3 2 1
D8
D9
D10
R4
x1 J1 J2
PL1
J3
J5
J7 J8
J4
J6
2
PL2
Fig. 5
R1C
0871740
3.2.2 BEMS /EMS to R1C Wiring
We recommend that the R1C is connected to the BEMS/EMS via a 6 core 7/0.2 mm cable. The
cable must be installed in steel conduit. Note: To ensure no loss in performance of the R1C,
other power cables should not share the same conduit.
To remain compliant the R1C needs to be connected to a marked BEMS/EMS system or
power supply and must be earthed.
Table 3 describes the R1C’s power and failure signals. Refer to the BEMS/EMS manual for
connection details.
Note that the 0 V signal from the R1C is connected through the sensor to the grounded
pipework. Galvanic isolation between widely separated units should be used to prevent ground
loops.
Table 3
R1C Signal Notes
PL1 pin 1 Power supply 0 V input Power return and signal reference
PL1 pin 2 Power supply +ve input +24 Vdc power (I< 35 mA) See note A below.
PL1 pin 3 Failure output: Digital signal - open collector transistor
Trap waterlogged
PL1 pin 4 Failure output: Digital signal - open collector transistor
Trap leaking
PL2 pin 4 4 - 20 mA +ve output Current source
Note A: R1C supply voltage:
The required supply voltage for the R1C depends on the output signal configuration as shown
below.
Table 4
R1C configuration Supply voltage required
4-20 mA output not used Separate 9-30 Vdc, <35 mA
4-20 mA output used Separate 22-30 Vdc, <35 mA
7
IM-P087-33 MI Issue 6
3.2.3 R1C output options:
PNP open collector outputs.
Use this output option to connect the R1C to a BEMS / EMS whose digital inputs are pulled-
down to 0 volts. The pnp outputs act like switches connected to the R1C’s power supply. During
normal trap operation, the pnp outputs will switch On and give out a voltage equal to the R1C’s
power supply minus 0.4 V. Their output resistance in this state is 220 ohms. If the trap fails, one
of the pnp digital outputs will switch Off.
NPN open collector outputs.
Use this output option to connect the R1C to a B/EMS whose digital inputs are pulled-up to a
positive voltage: The npn outputs act like switches connected to 0 volts. During normal trap
operation, the npn outputs will switch On, giving out 0 volts with an output resistance of
220 ohms. If the trap fails, one of the npn digital outputs will switch Off.
BEMS/EMS R1C
PL1
1 2 3 4
4 3 2 1
PL2
white
red
black
Steel
conduit
Spiratec
SS1/WLS1
sensor
0 Volts
4 - 20 mA
analogue o/p
Load resistor
Waterlogged
digital o/p Leaking
digital o/p
0 Volts
-+
Fig. 6 Wiring diagram
Fig. 7 R1C with PNP outputs Fig. 8 R1C with NPN outputs
+ Power
Input
EMS input
0 volts
+ Power
Input
EMS input
0 volts
Power supply
R1C
output R1C
output
PL1/2
PL1/3, 4
PL1/1
R
PL1/2
PL1/3, 4
PL1/1
R
Note: Ensure that the resistance from the body of
the sensor to the pipework is less than 1W.
8IM-P087-33 MI Issue 6
4. R1C commissioning
The R1C has internal switches which allow the following parameters to be adjusted:
1. Trap leaking detection period. This is the delay between a trap failing open (i.e. starting to leak
steam) and a warning being given by the R1C
2. Trap leaking detection levels. This is the conductivity threshold of the condensate required
for correct operation.
3. Trap waterlogging detection level. This is the condensate temperature at the sensor that will
trigger a waterlogging warning.
As supplied, the R1C is set as described in Table 5:
Table 5 R1C settings (as supplied)
Channel Setting Notes
Leak detection period 22 minutes The trap must leak for 22 minutes before
the R1C signals a fault. See Table 6.
The conductivity of the condensate at the sensor
Leak detection level 4.8 mS must be greater than 4.8 microsiemens for
correct operation. See Table 7.
Waterlogging detection The condensate at the sensor must cool below
temperature 85°C this temperature before the R1C signals a
waterlogging fault. See Table 9.
The R1C’s modes of operation are configured with the DIL switches on the PCB.
Please note: the SW1 DIL switch 1 is the test switch which should be OFF for all normal trap
monitoring modes except the test modes described in Table 9.
Table 6 Trap leaking detection period:
1 2 3 4 Trap leaking detection period
OFF OFF - - 2 minutes
SW2 OFF ON - - 22 minutes
ON ON - - 44 minutes
ON OFF - - 88 minutes
Table 7 Trap leaking detection levels:
1 2 3 4 Trap leaking detection level
- - OFF OFF Disabled
SW2 - - OFF ON 17 mS
- - ON ON 4.8 mS
- - ON OFF 1.2 mS
Table 8 Trap waterlogging detection levels:
1 2 3 4 Trap waterlogged detection level
- OFF OFF OFF Disabled
- OFF OFF ON 48°C
- OFF ON ON 63°C
SW1 - OFF ON OFF 85°C
- ON ON OFF 111°C
- ON ON ON 140°C
- ON OFF ON 169°C
- ON OFF OFF 191°C
9
IM-P087-33 MI Issue 6
Table 9 R1C test modes
(in test mode the green LED flashes every half a second):
SW1 SW2 Mode
112
Trap monitor mode - the R1C’s trap leaking steam detection period
filters turns off and the outputs show if there is steam or condensate
ON OFF OFF present in the trap. In this mode, the switches controlling the temperature
and conductivity thresholds still operate as described in the Tables
on pages 8 and 9.
ON OFF ON BEMS/EMS set-up mode - the R1C will cyclically change it’s outputs,
one step every 8 seconds.
An analogue output is available from the R1C as standard for use with BEMS/EMS’s that
operate on an analogue input signal. Recommended BEMS/EMS setting details are given
below:
Table 10 BEMS / EMS recommended analogue settings
Trap status Nominal output Recommended BEMS /EMS
current from R1C alarm threshold settings
Trap operating correctly 20 mA 23.0 mA > setpoint > 17.5 mA
Trap leaking steam 15 mA 17.5 mA > setpoint > 12.5 mA
Trap blocked or waterlogged 10 mA 12.5 mA > setpoint > 7.5 mA
Trap cold, but free of 4 mA 7.5 mA > setpoint > 0 mA
condensate (or R1C failure)
Two digital outputs are also available from the R1C as standard.
a. PNP open collector outputs
b. NPN open collector outputs
R1C digital outputs
Trap status Waterlogged Leaking steam
Trap operating correctly ON ON
Trap leaking steam ON OFF
Trap blocked or waterlogged OFF ON
Trap cold, but free of condensate
(or R1C failure) OFF OFF
5. BEM /EM commissioning
10 IM-P087-33 MI Issue 6
Table 11 R1C normal operation
Trap status Status lights
Trap operating correctly Red and orange lights Off
Green light Flashing
Trap leaking steam Red light On Green light Flashing
Trap blocked or waterlogged Orange light On Green light Flashing
Trap cold but free of condensate
(this is a common state during system Red and Orange lights On
start-up or when the system is shut-down) Green light Flashing
or sensor wires disconnected.
During normal operation, the green light flashes On every second to show that electrical power
is connected to the R1C and that it is operating correctly.
If the green light is not flashing, there may be a problem with the R1C.
The R1C will show a failure for as long as the fault is present. If the R1C detects a transient fault,
it will show the failure for at least one minute.
6. Normal operation
11
IM-P087-33 MI Issue 6
12 IM-P087-33 MI Issue 6

Other Spirax Sarco Measuring Instrument manuals
Spirax Sarco CP42 Technical specifications

Spirax Sarco

Spirax Sarco CP42 Technical specifications

Spirax Sarco Colima Visco User manual

Spirax Sarco

Spirax Sarco Colima Visco User manual

Spirax Sarco ILVA20 User manual

Spirax Sarco

Spirax Sarco ILVA20 User manual

Spirax Sarco Flowin 2 User manual

Spirax Sarco

Spirax Sarco Flowin 2 User manual

Spirax Sarco 2000 Series User manual

Spirax Sarco

Spirax Sarco 2000 Series User manual

Spirax Sarco ELM Assembly instructions

Spirax Sarco

Spirax Sarco ELM Assembly instructions

Spirax Sarco MTL10 Inline User manual

Spirax Sarco

Spirax Sarco MTL10 Inline User manual

Spirax Sarco STAPs User manual

Spirax Sarco

Spirax Sarco STAPs User manual

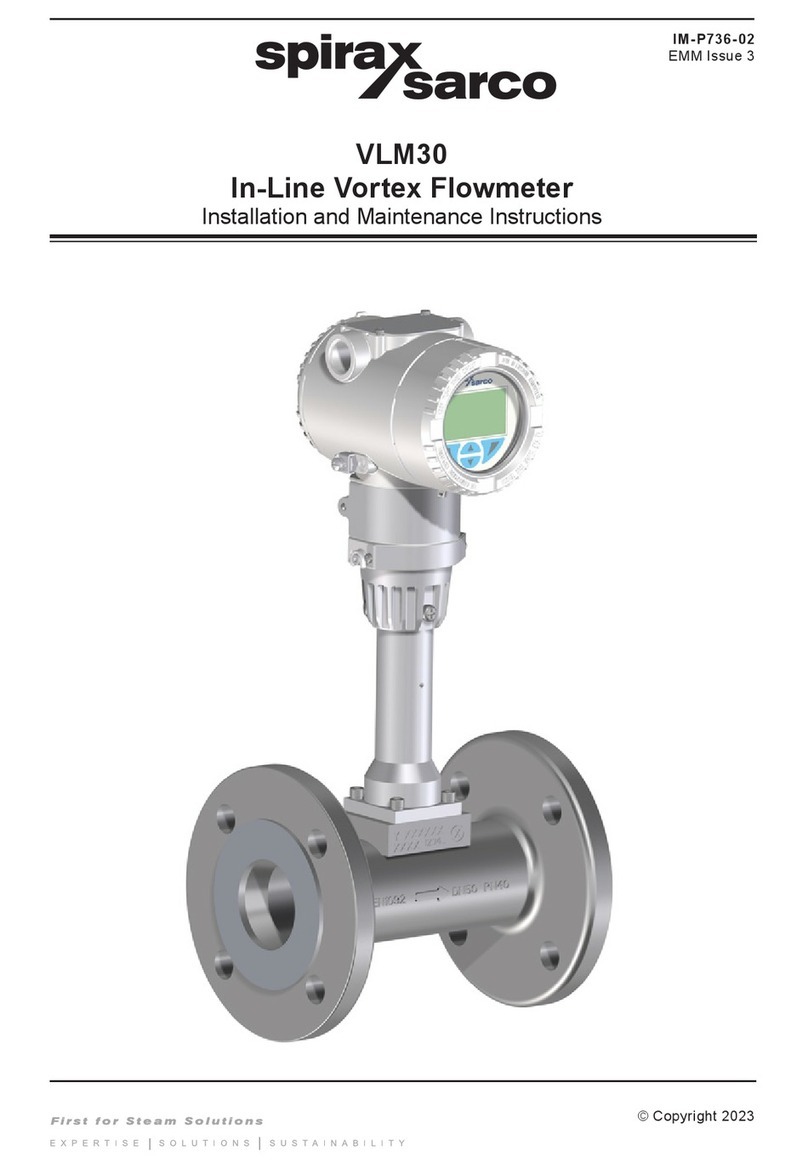
Spirax Sarco VLM30 User manual

Spirax Sarco

Spirax Sarco VLM30 User manual

Spirax Sarco RIM10 Series User manual

Spirax Sarco

Spirax Sarco RIM10 Series User manual

Spirax Sarco TVA Series User manual

Spirax Sarco

Spirax Sarco TVA Series User manual

Spirax Sarco CP32 User manual

Spirax Sarco

Spirax Sarco CP32 User manual

Spirax Sarco MTI10 Insertion User manual

Spirax Sarco

Spirax Sarco MTI10 Insertion User manual

Spirax Sarco DIVA User manual

Spirax Sarco

Spirax Sarco DIVA User manual

Spirax Sarco UTM20 Series User manual

Spirax Sarco

Spirax Sarco UTM20 Series User manual

Spirax Sarco IFTGS14 User manual

Spirax Sarco

Spirax Sarco IFTGS14 User manual

Spirax Sarco STAPs User manual

Spirax Sarco

Spirax Sarco STAPs User manual

Spirax Sarco Colima Visco User manual

Spirax Sarco

Spirax Sarco Colima Visco User manual
Spirax Sarco ILVA20 User manual

Spirax Sarco

Spirax Sarco ILVA20 User manual
Spirax Sarco B850-W User manual

Spirax Sarco

Spirax Sarco B850-W User manual

Spirax Sarco RIM20 User manual

Spirax Sarco

Spirax Sarco RIM20 User manual
Popular Measuring Instrument manuals by other brands

Promax OS-782 Quick reference guide

Promax

Promax OS-782 Quick reference guide

Right On Retinomax K-plus 2 instructions

Right On

Right On Retinomax K-plus 2 instructions

Tracer PED2 Quick start user guide

Tracer

Tracer PED2 Quick start user guide

AquaLab 4TE Series Operator's manual

AquaLab

AquaLab 4TE Series Operator's manual

A/DA AngleMeter 30 operating manual

A/DA

A/DA AngleMeter 30 operating manual

I-Tech IT9121H Programming guide

I-Tech

I-Tech IT9121H Programming guide

Powerline PLM40 Mk II instruction manual

Powerline

Powerline PLM40 Mk II instruction manual

Challenger Optics CO-OLS-6100 operating manual

Challenger Optics

Challenger Optics CO-OLS-6100 operating manual

Unit UT268B operating manual

Unit

Unit UT268B operating manual

B meters LORA-PULSE LORAWAN pulse manual

B meters

B meters LORA-PULSE LORAWAN pulse manual

Prostat PRF-912B user manual

Prostat

Prostat PRF-912B user manual

FRO­NIUS TS 5kA-3 quick start guide

FRO­NIUS

FRO­NIUS TS 5kA-3 quick start guide

Lightobject Saturn II Operation manual

Lightobject

Lightobject Saturn II Operation manual

Proseries PST-200 owner's manual

Proseries

Proseries PST-200 owner's manual

Aquametro AMTRON E-30 Mounting and operating instructions

Aquametro

Aquametro AMTRON E-30 Mounting and operating instructions

B+K precision CP62 user manual

B+K precision

B+K precision CP62 user manual

Aqualytic AL100 instruction manual

Aqualytic

Aqualytic AL100 instruction manual

Microgate RACETIME 2 manual

Microgate

Microgate RACETIME 2 manual

manuals.online logo
manuals.online logoBrands
  • About & Mission
  • Contact us
  • Privacy Policy
  • Terms and Conditions

Copyright 2025 Manuals.Online. All Rights Reserved.