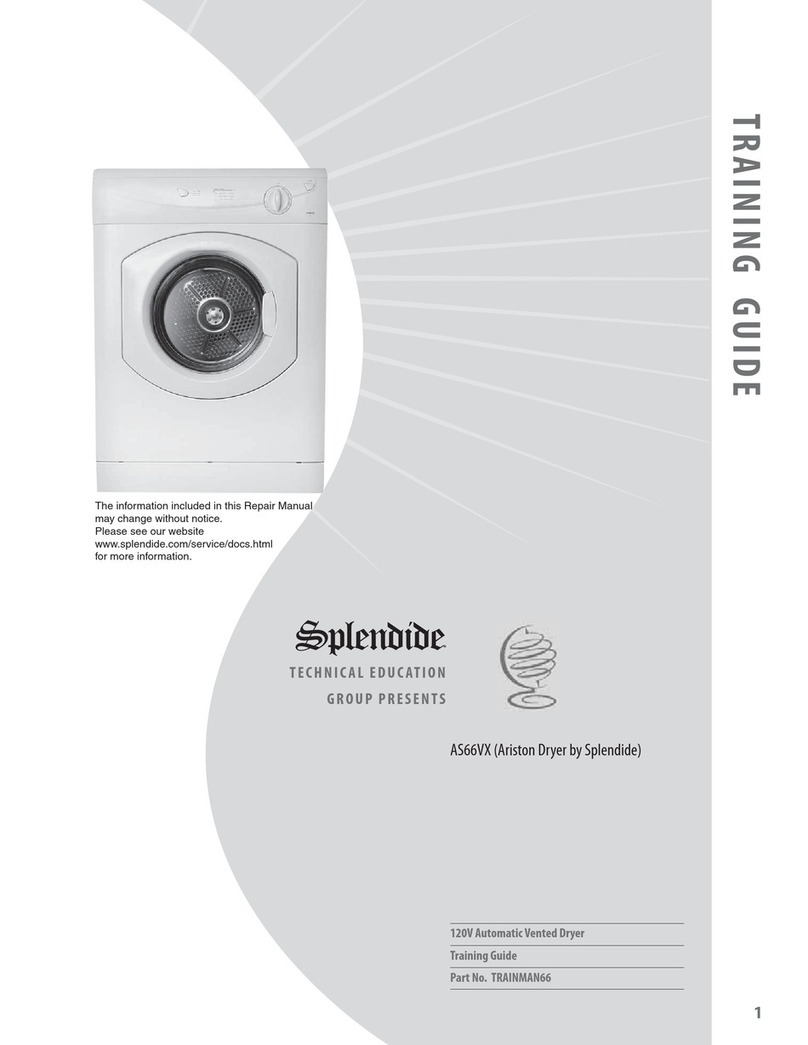
Splendide DV6500X Guide

Contents
TUMBLE DRYER
Care, Use and Installation booklet
Dryer Safety, 2-3
Operating Instructions, 4
The front
The back
Control panel
Start and Programs, 5-6
Choosing a program
Programs
Laundry, 7-8
Sorting your laundry
Wash care labels
Special clothing items
Sample dry loads
Cleaning & Maintenance, 9
When you should switch off the electricity
Clean the filter after each cycle
Check the drum after each cycle
Cleaning the dryer
Troubleshooting, 10
Spare parts
Installation, 11-12
Where to put your dryer
RV/Marine installations
Accessories
Exhaust ducting
Grounding Instructions
After-sales service, 13
Warranty, 40
EN
English
1
FR
Français, 14
DV6500X
ES
Español, 27

Dryer Safety
See Installation Instructions for Grounding
EN
You can be killed or seriously injured if you don't immediately
You can be killed or seriously injured if you don't follow
All safety messages will tell you what the potential hazard is, tell you how to reduce the chance of injury, and tell you what can
happen if the instructions are not followed.
Your safety and the safety of others are very important.
We have provided many important safety messages in this manual and on your appliance. Always read and obey all safety
messages.
This is the safety alert symbol.
This symbol alerts you to potential hazards that can kill or hurt you and others.
All safety messages will follow the safety alert symbol and either the word “DANGER” or “WARNING.”
These words mean:
follow instructions.
instructions.
DANGER
WARNING
2

EN
3
IMPORTANT SAFETY INSTRUCTIONS
WARNING:
To reduce the risk of fire, electric shock, or injury to persons when using your appliance, follow basic precautions,
including the following:
SAVE THESEINSTRUCTIONS
Read all instructions before using the appliance.
Do not dry articles that have been previously cleaned in,
washed in, soaked in, or spotted with gasoline, dry-cleaning
solvents, or other flammable or explosive substances, as
they give off vapors that could ignite or explode.
Do not allow children to play on or in the appliance. Close
supervision of children is necessary when the appliance is
used near children.
Before
the appliance is removed from service or discarded,
remove the door to the drying compartment.
Do not reach into the appliance if the drum is moving.
Do not install or store this appliance where it will be
exposed to the weather.
Do not tamper with controls.
Do
not repair or replace any part of the appliance or attempt
any servicing unless specifically recommended in the user-
maintenance instructions or in published user-repair
instructions that you understand and have the skills to carry
out.
Do
not use fabric softeners or products to eliminate static
unless recommended by the manufacturer of the fabric
softener
or product.
Do not use heat to dry articles containing foam rubber or
similarly textured rubber-like materials.
Clean lint screen before or after each load.
Keep area around the exhaust opening and adjacent
surrounding areas free from the accumulation of lint, dust,
and dirt.
The
interior of the appliance and exhaust duct should be
cleaned periodically by qualified service personnel.
Do not place items exposed to cooking oils in your dryer.
Items contaminated with cooking oils may contribute to a
chemical reaction that could cause a load to catch fire. To
reduce the risk of fire due to contaminated loads, the final
part of a tumble dryer cycle occurs without heat (cool down
period). Avoid stopping a tumble dryer before the end of the
drying cycle unless all items are quickly removed and
spread out so that the heat is dissipated.
Do not use replacement parts that have not been
recommended by the manufacturer (e.g. parts made at
home using a 3D printer).
See the Installation Instructions for grounding requirements
and installation.
Do not install a booster fan in the exhaust duct.
NOTE: The booster fan warning does not apply to clothes
dryers intended to be installed in a multiple clothes dryer
system, with an engineered exhaust duct system that is
installed per the clothes dryer manufacturer's guidelines.

Operating Instructions
Control panel
PROGRAMS
Knob
START
Button
Indicator
HEAT
Button
Filter
Air Intake Vent
Connection for
ventilation hose
Drum
Control Panel
Model & Serial
numbers
The front The back
The Special Programs Guide gives a guide to the
available programs.
The PROGRAMS knob sets the program: rotate it
clockwise, never counter-clockwise, until the indicator
is pointing to the program you want to select (see Start
and Programs). The programs knob will advance to the
‘0’ position after the program ends.
The START button begins drying a selected
program (see Start and Programs).
The HEAT button selects drying temperature (see Start
and Programs).
IN: HIGH heat.
OUT: LOW heat.
The Drying Guide allows you to consult a user friendly
table of fabric types and load capacities.
EN
4

5
Start and Programs
Choosing a program
Electrical Shock Hazard
Plug into a grounded 3 prong outlet.
Do not remove ground prong.
Do not use an adapter.
Do not use an extension cord.
Failure to follow these instructions can result in
death, fire, or electrical shock.
WARNING
1. Plug dryer into a grounded 3 prong outlet.
2. Sort your laundry according to fabric type (see
Laundry).
3. Open the door and make sure the filter is clean
and in place (see Maintenance).
4. Load the machine and make sure that the items
are not in the way of the door seal. Close the door.
5. Choose the drying program by checking the
Programs table (see Programs) as well as the
indications for each type of fabric (see Laundry). -
Set the temperature with the HEAT button.
- Select a program or drying time by rotating the
PROGRAMS knob clockwise.
6. Press the START button to begin.
During the drying program, you can check on your
laundry and take out items that are dry while others
continue drying. When you close the door again,
press START in order to resume drying.
7. About 10 minutes before the program is
completed, it enters the final AIR FLUFF phase
(fabrics are cooled), which should always be
allowed to complete.
8. Open the door, take your laundry out, clean the
filter and replace it (see Maintenance).
9. Unplug the dryer.
EN

Start and Programs
1.Select HIGH HEAT by pressing the
HEAT button.
2.Position the PROGRAMS knob
on Auto Dry.
3.Press the START button.
Program What it does... How to set it... Note:
Regular Cottons,
Permanent Press.
Important: If you select LOW
HEAT, this program will not
dry your clothes. For Acrylic
fibers or small loads select
Timed Drying. For use with
large loads, High Heat Only
Timed Dry
up to 180 minutes Dries wet clothing that will be
ironed, acrylic fibers or small
loads (less than 2 lb / 1 kg).
Consult suggested drying
times (see Laundry).
1. Select required heat setting HIGH
HEAT or LOW HEAT by pressing
the HEAT button.
2.Position the PROGRAMS knob on
the desired time.
3.Press the START button.
1.Select HIGH HEAT by pressing the
HEAT button.
2.Position the PROGRAMS knob
on Easy Iron.
3.Press the START button.
Fabric Care
Easy Iron
Brief program (approximately
20 minutes) that softens fibers
of clothing that is ready for
ironing.
Important: This is not a drying
program (see below).
Always allow the dryer to
complete this phase.
This is the final phase of all programs.
Approximately 10 minutes before
the finish, the knob advances
automatically to the Air Fluff phase.
After this the clothing is ready to be
taken out.
Heating elements turn
themselves off and clothing is
cooled down.
Fabric Care
Air Fluff
Programs
EN
6
Fabric Care
Auto Dry
Easy Iron Program
Easy Iron is a short 20 minute program (5 minutes cool then 10 minutes of heat followed by a 5 minute Air Fluff
period) which fluffs the fibers of clothing that have been left in the same position/location for an extended period of
time. The cycle relaxes the fibers and makes them easier to iron and fold.
Easy Iron is not a drying program and should not be used for wet articles of clothing.
For best results:
1. Do not load more than the maximum capacity.
These numbers refer to the dry weight:
Fabric Maximum load
Regular Cotton and Regular Cotton mix 5.5 lb / 2.5 kg
Permanent Press 4 lb / 2 kg
Denim 4 lb / 2 kg
2. Unload the dryer immediately after the end of the program, hang, fold or iron the articles and put them away.
Should this not be possible, repeat the program.
The Easy Iron effect varies from one fabric to the next. It works very well on traditional fabrics like Regular Cottons
or Regular Cotton mix, and less well on acrylic fibers.

Laundry
Sorting your laundry
Household Items
Duvet cover Cotton 1500 g 3 lb 5 oz
(Double) Other 1000 g 2 lb 3 oz
Large Tablecloth 700 g 1 lb 6 oz
Small Tablecloth 250 g 9 oz
Tea Towel 100 g 3 oz
Bath Towel 700 g 1 lb 6oz
Hand Towel 350 g 12 oz
Double Sheet 500 g 1 lb 2 oz
Single Sheet 350 g 12 oz
Wash Care Labels
Look at the labels on your garments, especially when
tumble drying for the first time. The following symbols are
the most common:
May be tumble dried
Do not tumble dry
Tumble dry at high heat setting
Tumble dry at low heat setting
What not to tumble dry in your dryer:
WARNING
Fire Hazard
No washer can completely remove oil.
Do not dry anything that has ever had any type of oil on
it (including cooking oils).
Do not dry items containing foam, rubber, or plastic in
this dryer.
Doing so can result in death or fire.
WARNING
Explosion Hazard
Keep flammable materials and vapors, such as
gasoline, away from dryer.
Do not dry anything that has ever had anything
flammable on it (even after washing).
Failure to follow these instructions can result in death,
explosion, or fire.
• Check symbols on clothing labels to make sure that
the articles can be tumble dried.
• Sort laundry by fabric type.
• Empty pockets and check buttons.
• Close zippers and hooks and tie loose belts and
strings.
• Wring out each item in order to eliminate as much
excess water as possible.
Do not load dripping wet clothes into the dryer.
• Articles that contain rubber or rubber-like materials
or plastic film (pillows, cushions, or PVC rainwear),
any other flammable objects or objects that contain
flammable substances (towels soiled with hair spray).
• Glass fibres (certain types of draperies).
• Items which have been dry cleaned.
• Items with the ITCL Code (see Special clothing items)
. These can be cleaned with special at-home dry
cleaning products. Follow instructions completely.
• Large bulky items (quilts, sleeping bags, pillows,
cushions, large bedspreads etc). These expand
when drying and would prevent airflow through the
dryer.
Maximum load size
Do not load more than maximum capacity.
These numbers refer to dry weight:
Natural fibres: 6 kg max (13 lb)
Synthetic fibres: 3 kg max (6.6 lb)
Do not overload the dryer as this could result in
reduced drying performance.
Typical weights
Clothes
Blouse Cotton 150 g 5 oz
Other 100 g 3 oz
Jeans 700 g 1 lb 6 oz
10 Diapers 1000 g 2 lb 3 oz
Shirt Cotton 300 g 10 oz
T-Shirt 125 g 4 oz
Other 350 g 12 oz
Dress Cotton 500 g 1 lb 2 oz
Other 200 g 7 oz
At the end of a drying cycle, cottons could still be
damp if you grouped cottons and permanent press
items together. If this happens simply give them an
additional short period of drying.
EN
7

Laundry
Special clothing items
Blankets and Bedspreads: acrylic items (Acilan,
Courtelle, Orion, Dralon) must be dried with special
care on LOW heat setting. Avoid drying for a long
period of time.
Pleated or creased garments: read the manufacturer’s
drying instructions on the garment.
Starched articles: do not dry these with non-starched
items. Make sure that as much of the starch solution
is removed from the load as possible before placing
it in the dryer. Do not over-dry: the starch will become
powdery and leave your clothing limp, which defeats
the purpose of starch.
Sample Dry Loads*
Sample Load 1: RV Sheet Set
Wash Cycle: Regular Cotton Heavy Duty
Dry Time: 70-90 minutes (add 15 min. for std. sheets)
1 Flat Sheet (90”x102” / all 230 thread count)
1 Fitted Sheet (60”x80”)
2 Standard Pillowcases (21”x32”)
Sample Load 2:
Wash Cycle: Regular Cotton Heavy Duty
Dry Time: 90-120 minutes
3 Pairs Jeans (35” waist / 32” inseam)
2 Wash Cloths (13”x13”)
1 Pair Boxer Shorts
6 Hand Towels (16”x28”)
Sample Load 3:
Wash Cycle: Regular Cotton Heavy Duty
Dry Time: 120-140 minutes
3 Pairs Jeans (35” waist / 32” inseam)
1 Large Sweat Shirt (50% cotton / 50% polyester)
2 Pillowcases (21”x32”)
2 Wash Cloths (13”x13”)
5 Hand Towels (16”x28”)
*Times are approximate and can vary depending
upon:
• Amount of water retained in clothes after spin cycle:
towels and delicates retain a lot of water.
• Fabrics: items that are the same type of fabric but
different textures and thicknesses may not have the
same drying time.
• Quantity of laundry: single items or small loads may
take longer to dry.
• Dryness: If you are going to iron some of your clothes,
they can be taken out while still a bit damp. Others
can be left longer if you need them to be completely
dry.
• Heat setting.
• Room temperature: if the room where the dryer is
located is cold, it will take longer for the dryer to dry
your clothes.
• Bulk: some bulky items can be tumble dried with
care. We suggest that you remove these items
several times, shake them out, and return them to the
dryer until finished.
Do not over-dry your clothes.
All fabrics contain a little natural moisture, which keeps
them soft and fluffy.
EN
8
NOTE: This clothes dryer’s Government energy
certifications were based on the Timed Dry/180 Minutes
Cycle, Maximum Drying Temperature Setting.
The as-shipped defaults of Auto, High Heat, were used.

Cleaning & Maintenance
Check the drum after each cycle
Turn the drum manually in order to remove small items
(handkerchiefs) that could have been left behind.
Cleaning the drum
Do not use abrasives, steel wool or stainless steel
cleaning agents to clean the drum.
A color film may start to appear on the stainless steel
drum, this may be caused by a combination of water
and, or cleaning agents such as fabric conditioner from
the wash. This colored film will not affect the dryer
performance.
Cleaning the dryer
• External parts in metal or plastic and rubber parts
can be cleaned with a damp cloth.
• Periodically check the vent tube and any
permanent venting fixture to make sure that
there has been no accumulation of fluff or lint,
and remove it.
• Remove lint that collects around the filter and the
outlet vents.
Do not use solvents or abrasives.
Your dryer uses special bearing components which
do not need lubrication.
Have your dryer checked regularly by authorized
technicians to ensure electrical and mechanical safety.
When you should switch off the electricity
Unplug the dryer when not using it, when cleaning it
and during maintenance activities.
Clean the filter after each cycle
The filter is an important part of your dryer:
it accumulates lint and fluff that is formed while drying.
Small items could also become trapped in the filter.
When finished drying, therefore, clean the filter by
rinsing it under running
water or with your vacuum
cleaner. Should the filter
become clogged up, the
airflow inside the dryer will
be seriously compromised:
drying times lengthen
and you will consume
more energy. It may also
damage your dryer.
The filter is found in front
of the dryer trim
(see diagram).
Removing the filter:
1. Pull the plastic grip of
the filter upwards (see
diagram).
2. Clean the filter in all
its parts, opening it and
removing the lint both
outside and inside.
3. Properly insert the filter
back in place.
Ensure the filter is fully
located flush into the
tumble dryer trim.
Do not use the dryer without replacing the filter.
EN
9

Troubleshooting
Problem:
Its taking a long time to dry.
Possible causes / Solution:
Before you call our Customer Care Department, go through the following troubleshooting suggestions:
Spare Parts
This dryer is a complex machine. Repairing it yourself or having a non-authorized person try to repair it could
cause harm to one or more persons and to the machine, and could invalidate the spare parts warranty.
If you still have a problem call our Customer Care Department on: 1 800 356 0766
Electrical Shock Hazard
Plug into a grounded 3 prong outlet.
Do not remove ground prong.
Do not use an adapter.
Do not use an extension cord.
Failure to follow these instructions can result in
death, fire, or electrical shock.
WARNING
The dryer won’t start.
• The filter has not been cleaned (see Maintenance).
• The temperature setting is not ideal for the type of fabric you are drying (see
Start and Programs, and see Laundry).
• Automatic / Sensor Dry programs require a HIGH temperature setting (see Start
and Programs).
• The correct program has not been selected for this load (see Start and
Programs, and see Laundry).
• The exhaust duct is obstructed (see Installation).
• The air intake vent is obstructed (see Installation).
• The permanent ventilation flap on the storm cover is obstructed (see Installation).
• The items were too wet (see Laundry).
• The dryer was overloaded (see Laundry).
• The plug is not plugged into the socket, or not making contact.
• There has been a power outage.
• The fuse has blown.
• The door is not closed securely?
• The PROGRAMS knob has not been set properly (see Start and Programs).
• The START button has not been pressed (see Start and Programs).
EN
10
• Room temperatures below 45°F (7°C) may cause the dryer not to shut off at the
end of the automatic sensor cycle.
The dryer won’t shut off.

Installation
Read these instructions with care.
These instructions are provided for use by qualified
installers, in addition the installation must comply with:
• In the United States, in accordance with the
National Electric Code ANSI/NFPA70 - latest
edition and any State, Municipal or local codes.
• In Canada, in accordance with the Canadian
Electric Code C22.1 - latest edition and any
Provincial, Municipal or local codes.
• Refer to the rating plate located on the front of the
dryer, along with the Model Number, for voltage
and current requirements.
Minimum installation clearances:
Closet Closet Under
(alternative) Counter
Sides 3/4” (15mm) 0 3/4” (15mm)
Top 1/2” (10mm) 4” (100mm) 1/2” (10mm)
Rear 3/4” (15mm) 3/4” (15mm) 3/4” (15mm)
Front 3/4” (15mm) 3/4” (15mm) not applicable
Vent Opening
distance from 6” (150mm) 2” (50mm) not applicable
Top of closet
If installed in a closet it must have the following
dimensions and have two ventilation openings each
having an area 72 sq.ins. (450 sq.cm) located 2”
(50mm) or 6” (150mm) from top (see table) and 6”
(150mm) from bottom of the door.
The dryer has adjustable height feet, use these to level
the dryer after fitting into its final position.
RV/Marine installations
When locating the appliance in a towable trailer or
watercraft, position the machine over the axles or
mid-ship where movement is at a minimum.
For RV or marine applications, please visit the
Splendide website or call 1-800-356-0766 for the
available installation kits.
Where to put your dryer
WARNING
Explosion Hazard
Keep flammable materials and vapors, such as
gasoline, away from dryer.
Place dryer at least 18 inches (460 mm) above the
floor for a garage installation.
Failure to do so can result in death, explosion,
or fire.
Check local codes before choosing a location. Some
codes do not permit installation in a garage, closet,
mobile home or bedroom.
Do not install the dryer in an area where gasoline or
other inflammable materials are kept or stored.
When operating the dryer, there has to be adequate
ventilation to avoid the back flow of gases into the
room from appliances burning other fuels, including
open fires.
EN
11
WARNING
Excessive Weight Hazard
Use two or more people to move and install dryer.
Failure to do so can result in back or other injury.
ACCESSORIES
Contact our Technical Assistance Service to check if
accessories are available for this tumble dryer model.
Technical Service: 1-800-356-0766.
Product must be installed with the rear of the unit
placed against a wall.

Installation
Exhaust ducting
WARNING
Fire Hazard
Use a heavy metal vent.
Do not use a plastic vent.
Do not use a metal foil vent.
Failure to follow these instructions can result in
death or fire.
The ducting system for the dryer must be as short
and straight as possible and with as few elbows as
possible. Four-inch (102 mm) rigid metal ducting
should be used, metal flexible ducting can be used
but the maximum length of ducting if used is 7ft
(2.4m) and provided it complies with the following:
Never use plastic ducting. All elbows must also be a
minimum of 4-inch (102mm) diameter. Joints must be
secured with ducting tape. Do not use screws or other
metal fastenings that extend into the duct, as lint can
collect on the screws.
Maximum length of rigid duct:
IMPORTANT:
-The appliance MUST NOT be exhausted into a
chimney, a wall, a ceiling, an attic, a crawl space or
a concealed space of a building.
-To reduce the risk of fire, this appliance MUST BE
EXHAUSTED OUTDOORS.
- Do not discharge the exhaust air into a flue, which
is used for exhausting fumes from other appliances
burning gas or other fuel.
Depending on the frequency of use it is essential that
the ducting is checked periodically and any fluff or
debris removed.
EN
12
Number of
Elbows
Rigid Duct (only)
0 22 ft. (6.6m)
118 ft. (5.4m)
214 ft. (4.2m)
36 ft. (1.8m)
The above assumes that an approved venting hood
is used and that the flap on this hood must not have
magnetic catches.
Contact Westland for additional information.
For a grounded, cord-connected dryer:
GROUNDING INSTRUCTIONS
This dryer must be grounded. In the event of malfunction or
breakdown, grounding will reduce the risk of electric shock
by providing a path of least resistance for electric current.
This dryer is equipped with a cord having an equipment-
grounding conductor and a grounding plug. The plug must
be plugged into an appropriate outlet that is properly
installed and grounded in accordance with all local codes
and ordinances.
WARNING: Improper connection of the equipment-
grounding conductor can result in a risk of electric shock.
Check with a qualied electrician or service representative
or personnel if you are in doubt as to whether the dryer is
properly grounded. Do not modify the plug provided with
the dryer: if it will not t the outlet, have a proper outlet
installed by a qualied electrician.
SAVE THESE INSTRUCTIONS

After-sales service
If you need assistance
Every Splendide washing machine comes with a Limited
Warranty. Please read the Limited Warranty Statement
that came with your machine for complete details.
You’ll nd many answers to common problems in the
“Troubleshooting” section of this manual. If you review
this section rst, you may not need to call for service at
all. NOTE: You will be charged for a service call while
the appliance is under warranty if the problems are not
caused by defective workmanship or materials.
• If you do need service, you can relax knowing
that help is only a phone call away. Call our Splendide
Technical Service/Assistance Department toll-free at
1-800-356-0766.
• Please have the model number and serial number of
your clothes dryer ready when you call.
Warranty, see page 40.
EN
13

Contenu
Livret d’entretien, d’utilisation et
d’installation
FR
Français
14
SÉCHEUSE
DV6500X
Sécurité du sèche-linge, 15-16
Consignes d’utilisation, 17
L’avant
L’arrière
Le panneau de contrôle
Démarrage et programmes, 18-19
Choisir un programme
Programmes
Lessive, 20-21
Trier votre lessive
Laver les vêtements délicats
Vêtements spéciaux
Exemples de brassées á sécher
Nettoyage et entretien, 22
Quand couper l’électricité
Nettoyer le filtre après chaque cycle
Vêrifier le tambour après chaque cycle
Nettoyer la sécheuse
Dépannage, 23
Pièces de remplacement
Installation, 24-25
Où placer la sécheuse
Installations dans des véhicules de plaisance/bateaux
Accessoires
Conduites d’échappement
Instructions de liaison à la terre
Service après-vente, 26
Garantie, 40

Voir les consignes d’installation pour la mise à la terre.
FR
15
Sécurité du sèche-linge
Risque possible de décès ou de blessure grave si vous ne
suivez pas immédiatement les instructions.
Risque possible de décès ou de blessure grave si vous
ne suivez pas les instructions.
Tous les messages de sécurité vous diront quel est le danger potentiel et vous disent comment réduire le risque de blessure et
ce qui peut se produire en cas de non-respect des instructions.
Votre sécurité et celle des autres est très importante.
Nous donnons de nombreux messages de sécurité importants dans ce manuel et sur votre appareil ménager. Assurez-vous de
toujours lire tous les messages de sécurité et de vous y conformer.
AVERTISSEMENT
DANGER
Voici le symbole d’alerte de sécurité.
Ce symbole d’alerte de sécurité vous signale les dangers potentiels de décès et de blessures graves à vous
et à d’autres.
Tous les messages de sécurité suivront le symbole d’alerte de sécurité et le mot “DANGER” ou
“AVERTISSEMENT”. Ces mots signifient :

16
FR INSTRUCTIONS IMPORTANTESDE SÉCURITÉ
AVERTISSEMENT:Afin de réduirelerisqued’incendie, de décharge électrique ou de blessurescorporelleslorsdel’utilisation
de cetappareil, observercertainesprécautionsfondamentales, notamment :
Lire toutes lesinstructions avantd’utiliserl’appareil.
Ne passécherd’articlesqui ontété précédemment
nettoyés, lavés, trempésoutachés avec de l’essence, des
solvants pour nettoyage àsec ou d’autres substances
inflammables ou explosives;ces substances dégagent des
vapeursqui pourraient s’enflammerouexploser.
Ne paslaisserdes enfantsjouer surl’appareilouà
l’intérieurdecelui-ci. Une surveillance étroite des enfants
estnécessairelorsque l’appareil est utilisé àproximité
d’enfants.
Avant de retirerl’appareilduservice ou pour le mettreau
rebut, enleverlaporte du compartiment de séchage.
Ne pasaccéderàl’intérieurdel’appareil pendantle
fonctionnement du tambour.
Ne pasinstaller ou entreposer l’appareil dans un endroit où
elle serait exposéeaux intempéries.
Ne paseffectuerd’intervention nonautorisée surles
commandes.
Ne pasréparer ou remplacerune quelconque piècede
l’appareil ou effectuer un entretienqui ne serait pas
expressément recommandédansles instructions
d’entretiende l’utilisateur ou dans les instructionsde
réparation parl’utilisateur et s’assurerdebien comprendre
cesinstructionsetd’êtrecapable de lesexécuter.
Ne pasutiliserd’assouplissant ou de produits pour éliminer
l’électricitéstatiqueàmoinsque cela ne soit recommandé
parlefabricant de l’assouplissant ou du produit.
CONSERVER CESINSTRUCTIONS
Ne pas sécher àlachaleur des articlescontenantdu
caoutchoucmousseoudes matièressimilaires.
Nettoyer le filtre àcharpie avantouaprès chaque charge.
La zone située autour de l’ouverture d’évacuationetles
zones adjacentes doiventêtrepropres,exemptesde
peluchesetpoussières.
L’intérieurde l’appareiletleconduitd’évacuationdoivent
être nettoyés régulièrementpar un personnel d’entretien
qualifié.
Ne pas placer d’articlestâchésd’huile de cuisson dans la
sécheuse. Les articlescouvertsd’huile de cuisson peuvent
provoquerune réaction chimique et enflammerlacharge
de vêtements. Pour réduire le risque d’incendiedûàdes
chargescontaminées,la partiefinaledu programme de
séchage par culbutagealieu sans chaleur (période de
refroidissement). Éviter d’arrêter unesécheuse en phase
de culbutageavant la finduprogramme de séchage, à
moins de retireretd’étendre rapidement tous les articles
afin quelachaleur se dissipe.
Ne pas utiliser de pièces de remplacement quin’ont pas
été recommandéespar le fabricant (c.-à-d., pièces
fabriquéesàla maisonàl’aided’une imprimante 3D).
Voir lesinstructions d’installation pourles exigences de
mise àlaterre et d’installation.
Ne pas installerdeventilateur d’appoint dansleconduit
d’évacuation.
REMARQUE:L’avertissement pourleventilateur d’appoint
ne s’appliquepas auxsécheuses conçuespourêtre
installées dans un systèmeoùilyaplusieurs sécheuses,
avec un système d’évacuationconçue sur mesure installé
selon lesdirectivesdufabricant de la sécheuse.
IMPORTANTES INSTRUCTIONS DE SÉCURITÉ
CONSERVEZ CES INSTRUCTIONS
Avant de jeter ou de ranger votre vieille sécheuse, enlever la porte.

FR
17
Raccordement
pour le tuyau
d’aération
Consignes d’utilisation
Le panneau de contrôle
Sélecteur de
PROGRAMMES
Bouton
DÉMARRER
Indicateur
Bouton
CHALEUR
La prise d’air
Modèle et
numéro de série
Filtre
Le panneau
de contrôle
Le tambour
L’avant
L’arrière
Le Guide des Programmes spéciaux vous fournit un
guide des Programmes disponibles.
Le sélecteur de PROGRAMMES règle le programme:
tournez-le dans le sens des aiguilles d’une montre,
jamais dans le sens inverse, jusqu’á ce que
l’indicateur pointe vers le programme que vous désirez
sélectionner (voir Démarrage et Programmes). Le bouton
de programmes avancera jusqu’á la position “0” une
fois le programme terminé.
Le bouton DÉMARRER (START) commence le
séchage selon un Programme sélectionné (voir
Démarrage et Programmes).
Le bouton CHALEUR sélectionne la température de
séchage (voir Démarrage et Programmes).
Bouton RENTRÉ (IN) : Chaleur ÉLEVÉE (HIGH HEAT)
Bouton SORTI (OUT) : Chaleur BASSE (LOW HEAT)
Le Guide de sèchage vous permet de consulter un
tableau convivial des types de tissu et capacités de
charge.

18
FR
Démarrage et programmes
1. Branchez la sécheuse dans une prise à 3
alvéoles reliée à la terre.
2. Triez votre lessive selon le type de tissus (voir
Lessive).
3. Ouvrez la porte et assurez-vous que le filtre
est en place et propre (voir Entretien).
4. Chargez l’appareil et assurez-vous que les
articles n’empêchent pas le contact avec le
joint d’étanchéité de la porte. Fermez la porte.
5. Choisissez le programme de séchage en
consultant le tableau des programmes (voir
Programmes) ainsi que les indications pour
chacun des types de tissus (voir Lessive).
- Réglez la température á l’aide du bouton
CHALEUR (HEAT).
- Sélectionnez un programme ou un temps
de séchage en faisant tourner le bouton
PROGRAMMES dans le sens des aiguilles
d’une montre.
6. Appuyez sur le bouton DÉMARRER (START)
pour démarrer l’appareil.
Durant le programme de séchage, vous
pouvez vérifier votre lessive et retirer les
articles qui sont secs et poursuivre ensuite
le séchage des autres articles. Après avoir
refermé la porte, appuyez sur le bouton
DÉMARRER (START) pour reprendre le
séchage.
7. Environ 10 minutes avant que le programme
ne soit complété, la sécheuse commence
la phase finale AIR FLUFF (aération) (pour
AVERTISSEMENT
Risque de choc électrique
Brancher sur une prise à 3 alvéoles reliée à la terre.
Ne pas enlever la broche de liaison à la terre.
Ne pas utiliser un adaptateur.
Ne pas utiliser un câble de rallonge.
Le non-respect de ces instructions peut causer
un décès, un incendie ou un choc électrique.
Choisir un programme refroidir les tissus), que vous devriez toujours
laisser se compléter.
8. Ouvrez la porte, sortez votre lessive, nettoyez le
filtre et replacez-le (voir Entretien).
9. Débranchez la sécheuse.

FR
19
Dèmarrage et programmes
1.Sélectionnez chaleur élevée (HIGH
HEAT) en appuyant sur le bouton
CHALEUR.
2.Placez le bouton PROGRAMMES sur
Séchage Automatique.
3. Appuyez sur le bouton
DÉMARRER (START).
Programme Ce qu’il fait…Comment le programmer… Note:
Cotons réguliers,
Infroissables.
Important: Si vous
sélectionnez chaleur basse
(LOW HEAT), ce programme
ne séchera pas vos
vêtements.
Pour les fibres d’acrylique
ou les petites brassées
sélectionnez Séchage minuté).
Pour une utilisation avec une
charge importante, Haute
température uniquement.
Séchage
Minuté
Jusqu’á 180
minutes
Sèche les vêtements mouillés
qui seront repassés, les fibres
acryliques ou les petites
brassées (moins de 1 kg /
2lbs).
Consultez les temps de
séchage recommandés
(voir Lessive).
1.Sélectionnez la chaleur requise
en programmant, chaleur élevée
(HIGH HEAT) ou chaleur basse
(LOWHEAT) en appuyant sur le
bouton CHALEUR.
2.Placez le bouton PROGRAMMES
sur la durée désirée.
3.Appuyez sur le bouton
DÉMARRER (START).
1.Sélectionnez chaleur élevée (HIGH
HEAT) en appuyant sur le bouton
CHALEUR.
2.Placez le bouton PROGRAMMES
sur repassage simplifié
3. Appuyez sur le bouton
DÉMARRER (START).
Soin des tissus
Repassage
Simplifié
(Easy Iron)
Soin des tissus
Séchage
Automatique
(Auto Dry)
Programme court (environ 20
minutes) qui adoucit les fibres
des vêtements prêts pour le
repassage.
Important: Ce n’est pas un
programme de séchage
(voir ci-dessous).
Laissez toujours la
sécheuse compléter cette
phase.
C’est la phase finale de tous les
programmes. Environ 10 minutes
avant la fin, le bouton PROGRAMMES
avance automatiquement á la phase
aération (Air Fluff). Après cette étape,
les vêtements sont prêts á être sortis.
Les éléments chauffants
s’éteignent et les vêtements
sont refroidis.
Soin des tissus
Air Froid
(Air Fluff)
Programmes
Programme Repassage Simplifié (Easy Iron)
Easy Iron est un court programme de 20 minutes (5 minutes de refroidissement puis 10 minutes de chaleur suivi
d’une période d’aération de 5 minutes) qui aère les fibres des vêtements qui ont été laissés dans la même position/
emplacement pour une période étendue. Le cycle détend les fibres et les rend plus faciles á repasser et á plier.
Easy Iron n’est pas un programme de séchage et doit être utilisé pour des vêtements mouillés.
Pour de meilleurs résultats:
1. Ne dépassez pas la capacité maximale de chargement.
Ces chiffres correspondent á un poids sec:
Tissus Charge maximale, de:
Coton régulier et mélange de coton régulier 2,5 kg / 5,5 lbs
Infroissable 2 kg / 4 lbs
Denim 2 kg / 4 lbs
2. Déchargez immédiatement la sécheuse á la fin du programme, suspendez, pliez ou repassez les articles avant
de les ranger. Si ce n’est pas possible, répétez le programme.
L’effet Easy Iron varie d’un tissu á l’autre. Il fonctionne très bien sur des tissus traditionnels comme Cotons réguliers
ou mélange de cotons réguliers et moins bien sur les fibres acryliques.

20
FR
Lessive
Poids typiques
Vêtements
Blouse Coton 150 g 5 oz
autre 100 g 3 oz
Robe Coton 500 g 1 lb 2 oz
autre 350 g 12 oz
Jeans 700 g 1 lb 6 oz
10 couches 1000 g 2 lb 3 oz
Chemise Coton 300 g 10 oz
autre 200 g 7 oz
Tee-shirt 125 g 4 oz
Articles de maison
Dessus de couette Coton 1500 g 3 lb 5 oz
(Double) autre 1000 g 2 lb 3 oz
Grande nappe 700 g 1 lb 6 oz
Petite nappe 250 g 9 oz
Torchon 100 g 3 oz
Serviette de bain 700 g 1 lb 6 oz
Serviette á main 350 g 12 oz
Drap double 500 g 1 lb 2 oz
Drap simple 350 g 12 oz
À la fin d’un cycle de séchage, les cotons peuvent
demeurer humides si vous groupez les articles en
cotons et ceux en tissus infroissables. Si cela se
produit poursuivez le séchage pendant une période
de temps supplémentaire.
Risque d’incendie
Aucune laveuse ne peut complètement enlever
l’huile.
Ne pas faire sécher des articles qui ont été salis
par tout genre d’huile (y compris les huiles de
cuisson).
Ne pas sécher d'articles contenant de la mousse,
du caoutchouc ou du plastique dans cette
sécheuse.
Le non-respect de ces instructions peut causer
un décès ou un incendie.
AVERTISSEMENT
Risque d'explosion
Garder les matières et les vapeurs
inflammables, telle que l’essence, loin de la
sécheuse.
Nes pas faire sécher un article qui a déjà
été touché par un produit inflammable
(même après un lavage).
Le non-respect de ces instructions peut
causer un décès, une explosion ou un
incendie.
AVERTISSEMENT
Trier votre lessive
• Vérifiez les symboles sur les étiquettes de vêtements
pour vous assurez que vos articles peuvent être
séchés á la machine.
• Triez votre lessive par type de tissus.
• Videz les poches et vérifiez les boutons.
• Fermez les fermetures éclair et les crochets et
attachez les ceintures et cordons.
• Tordez chacun des articles afin d’éliminez le plus
d’excédent d’eau possible.
Ne chargez pas la sécheuse de vêtements ruisselants
d’eau.
Quoi ne pas séchez á la machine:
• Articles qui contiennent du caoutchouc ou des
matériaux qui lui ressemblent ou encore des
pellicules de plastique (oreillers, coussins ou
imperméable en PVC), tout autre objet inflammable
ou objet qui contient des substances inflammables
(serviettes souillées de fixatif á cheveux).
• Fibres de verre (certains types de rideaux).
• Articles qui ont été nettoyés á sec.
• Articles comportant le code ITCL (voir
Vêtements spéciaux). Ces derniers peuvent être
nettoyés á l’aide de produits de nettoyage á sec
domestique. Suivez complètement les instructions.
• Les articles volumineux (couettes, sacs de couchage,
oreillers, coussins, grands couvre-lits, etc.). Ceux-ci
prennent de l’expansion lorsqu’ils sèchent et peuvent
entraver la circulation d’air dans la sécheuse.
Peut être séché á la machine
Ne pas sécher á la machine
Séchez á la machine á chaleur élevée
Séchez á la machine á chaluer basse
Laver les vêtements délicats
Examinez les étiquettes de vos vêtements, en particulier
lorsqu’il s’agit d’un premier séchage á la machine. Les
symboles suivants sont les plus communs:
Grosseur de brassée maximale
Ne dépassez pas la capacité maximale de
chargement. Ces chiffres correspondent á un poids
sec:
Fibres naturelles: 6 kg max. (13 lbs)
Fibres synthétiques : 3 kg max. (6.6 lbs)
Ne surchargez pas la sécheuse, ce qui pourrait
diminuer son rendement au séchage.
Table of contents
Languages:
Other Splendide Dryer manuals
Popular Dryer manuals by other brands

Maytag
Maytag MED5707TQ0 parts list

Mitsubishi Electric
Mitsubishi Electric JT-SB116JH2-S-NA Handbook

Laundrylux
Laundrylux Wascomat Encore DLHF0315CEMI installation manual

Samsung
Samsung DV419AES-02656B user manual

Alliance Laundry Systems
Alliance Laundry Systems CA170L Installation operation & maintenance

Solt
Solt GGSHPD70 user manual