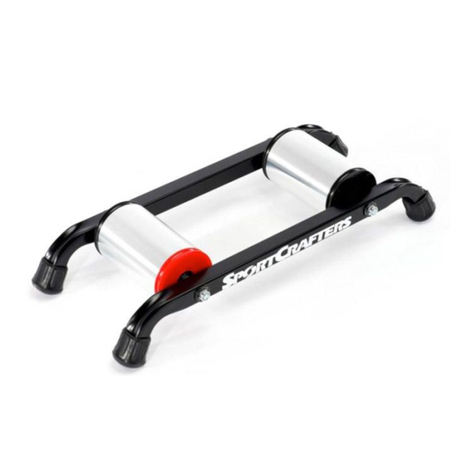
SportCrafters ROLLERS User manual

Always wipe the roller down after use to avoid corrosion.
Use a damp cloth only; do not use any cleaners.
Always disengage the belt or fold the unit after use.
Leaving the belt stretched between the drums for long
periods of time will cause the belt to lose tension.
The bearings are permanently lubricated and sealed, and
they do not require maintenance.
Make sure all fasteners are snug. Do not over-tighten any
fasteners as it can damage the roller frame.
PVC Rollers Only: The drums may warp if exposed to
direct sunlight or excessive heat for extended periods.
SportCrafters warrants all products to be free of any and all
defects in material or workmanship. This warranty does not
apply to parts that have excessive wear due to normal use,
misuse, neglect, accident, or acts of God. Where applicable,
incidental and consequential damages are not covered, and
there are no other warranties, expressed or implied. This
warranty applies to the original owner, and is valid for a lifetime.
Please retain your receipt as proof of purchase.
In the event of a warranty, please contact us at
51345 Bittersweet Road
Granger, Indiana 46530 USA

Thank you for choosing SportCrafters Rollers. Rollers are the
best training tool for developing balance, pedal technique and
handling skills for superior performance in competition. We are
proud to be the largest U.S. manufacturer of rollers, and we
believe wholeheartedly in the positive results they render.
SportCrafters Cadence Rollers offer an excellent spin with
moderate resistance. Add the optional OverDrive Drum with
progressive resistance, and you’ll get a real-road power profile
that allows for hard interval workouts.
A quick note about roller training:
Rollers are difficult to ride, and for a reason.
You will discover your own weaknesses and
be challenged to improve on them. If you commit to training on
rollers regularly, then you will become a better cyclist.
Guaranteed.
Please review the following information:
Your roller comes completely assembled. Unfold the unit
and set the belt into the grooves on the front drum and the
middle drums so that the middle drum drives the front drum
smoothly.
Be sure that the belt still wraps between the middle drum and
the front drum when you reassemble.
If your roller drums are assembled with nuts, use two 9/16”
wrenches, or 14mm wrenches, holding one nut inside the rail
while loosening the other outside the rail.
Reassembly is the opposite of disassembly, except you do not
have to hold the inner nut. Simply tighten the two nuts at the
ends of the axles toward each other.
A roller is for intermediate to advanced cyclists only.
If you are unfamiliar with roller riding technique, seek
experienced advice and read Roller Riding Tips in
this manual.
Use only on a flat and level surface. We do not
recommend riding the rollers on carpet, as the fibers
can interfere with the drums and/or belt.
Do not use in dusty or dirty conditions, and always
clean after use according to Care and Maintenance
in this manual.
Your roller drums are precision lathe-turned for a
smooth ride. Protect the drums from damage during
use, handling and storage.

The SportCrafters OverDrive Drum is designed to deliver
reliable performance for a lifetime because there are no seals or
friction devices, and nothing to wear out over time. Below is a
sneak peek at what is inside your OverDrive Drum.
Installation:
The drum should be
installed at the rearmost
position on the roller set.
To enable the progressive
resistance mechanism,
you must install the drum
so that the red cap is on
the right while you are
riding the rollers.
To disable the progressive resistance, and use the roller
for easier spinning at higher speeds, simply reverse and
install with the red cap on the left while riding the rollers.
Important Note: Feedback we have received from various
users tells us that many stronger athletes like the ability to do
intense climbing intervals by pushing hard at low cadence. So,
the power curve is intentionally steep. For recovery, you might
need to be in your small chainring.
If your roller is equipped with knobs fastening the two rear
drums, then your job is easy! Simply remove the two knobs
holding the middle drum, and one of the knobs holding the rear
drum. Separate one side of the frame, remove the middle drum,
and install the High Inertia Drum.
Make sure the roller frame aligns
like this:
Adjust front drum by folding the
frame to remove the tension on
the belt, then removing the knobs
on both sides of the drum. If one knob stays tight while the
other one comes loose, screw the loose knob back onto the
axle approximately 2-3 turns, then push the knob sideways
slightly to put a slight bind onto the threads. Now loosen
the other knob.
Spread the front legs apart just enough to slide one end of the
axle out of the frame. Then slide the other end of the axle out.
The frame will flex enough to allow you to remove the drum
without bending the frame. Choose a new position for the drum,
make sure the belt is on the drum properly and re-tighten the
knobs.
Place your bike so that the rear wheel is cradled between the
rear and middle drums, and the front wheel is on top of the front
drum. The position of the front drum should be adjusted so that
the center of the drum is slightly AHEAD of the axle of your bike’s
front wheel. Use the FIRST adjustment position that places the
drum ahead of the axle of your bike’s front wheel.

Three words: Positive Mental Attitude. It goes a long way!
Make sure the rollers are on a flat surface. Carpet can
interfere with the rollers.
Start out by placing the rollers in a hallway or a doorway.
That way, you can use the walls to lean on for balance
until you feel more comfortable.
Make sure your bike is in a middle-of-the-road gear to
start. Not too hard, not too easy.
Focus on a point a few feet in front of you instead of
straight down. Don’t look at your wheel! Trust us, it helps.
Relax your shoulders, and loosen your grip on the
handlebars. Instead of trying to steer the bike, focus on a
smooth pedal stroke and you will automatically ride in a
straight line.
Push and pull all the way through the pedal stroke, and
maintain a decent speed. If you slow down, it will be
harder to keep your wheel straight.
As soon as you get the hang of riding rollers without
needing the doorway for balance, get out of the doorway!
Challenge yourself to just use the wall for mounting the
rollers, and then abandon the wall altogether.
Want to know what happens when you ride off the side of
the rollers? We’ve seen the videos and, no, you will not
shoot forward and crash dramatically through your sliding
glass window. If you ride off the side, stop pedaling! Your
wheels will stop spinning immediately and you can put
your foot down to keep from tipping over.
Make sure there is nothing nearby that can hurt you if
you do fall off. Accidents happen.
DON’T GIVE UP!
The SportCrafters Fork Stand should only be used with
SportCrafters Rollers. Any compatibility with other brands or
models is not guaranteed.
Follow instructions provided
with your roller to adjust the
front drum ahead of the fork
stand (for shorter-
wheelbase bike):
Or behind the fork stand (for
longer-wheelbase bike):
In any case, the front
roller drum should clear
the fork stand when it is
installed on the roller
frame.
Assemble the fork stand to the frame
with 4 J-bolts and knobs (see right).
Keep the J-bolts loose as you adjust
your bike so that the rear wheel is
cradled between the rear drums.
Tighten the J-bolts with
the knobs. Do not use
any tools to tighten or
you will damage the
J-bolts or the roller
frame.
Remove your front
wheel and assemble
your bike to the
skewer using the standard adjustment procedure for quick-
release skewers.
Other SportCrafters Fitness Equipment manuals
