SPORTS ART 3120 User manual

SAFETYGUIDELINES:
Pleasereadandfollowthefollowingsafetyguidelines:
Beforebeginninganyexerciseprogram,youshouldconsultwithyourdoctor.Itis
recommendedthatyouundergoacompletephysicalexamination.
.Readthisowner'smanualandfollowtheinstructions.
.Assembleandoperatethetreadmillonasolid,levelsurface.Keeptheareabehind
thetreadmillclear.
.Neverallowchildrenonornearthetreadmill.Thetreadmillrunningbeltwillnot
stopimmediatelyifanyobjectbecomescaughtinthebeltorrollers.
.Checkthetreadmillbeforeeveryuse.Makesureallpartsareassembled,andall
nutsandboltsaretightened.Donotusethetreadmilliftheunitisdisassembledin
anyway.
.Keephandsawayfrommovingparts.
.Wearproperworkoutclothing:Donotwearlooseclothing.Donotwearshoeswith
leathersolesorhighheels.Tiebackalllonghair.
.Don'trocktheunitfromsidetoside.Careshouldbetakenwhenmountingand
dismountingtheunit.
.Straddlethemachinewithyourfeetontherightandleftstagingplatformsbefore
startingtherunningbelt.
.Donotplaceanyliquidsonanypartofthetreadmill.
.Topreventshock,keepallelectriccomponents,suchasthemotor,cord,and
switchawayfromwater.
.Donotuseanyaccessoriesthataren'tspecificallyrecommendedbythe
manufacturer,thesemightcauseinjuriesorcausetheunittofail.
.Workwithinyourrecommendedexerciselevel,doNOTworktoexhaustion.
.Ifyoufeelanypainorabnormalsensation,STOPYOURWORKOUTandconsult
yourphysicianimmediately.
.Turnoffthetreadmillwhileadjustingorworkingneartherearroller.
Warning Toreducetheriskofburns,fire,electricshock,orinjurytopersons:
.Atreadmillshouldneverbeleftunattendedwhenpluggedin.Unplugfromoutlet
whennotinuse,andbeforeputtingonortakingoffparts.

.Closesupervisionisnecessarywhenthistreadmillisusedby,on,ornearchildren,
invalids,ordisabledpersons.
.Usethistreadmillonlyforitsintendeduseasdescribedinthismanual.
.Neveroperatethistreadmillifithasadamagedcordorplug,ifitisnotworking
properly,ifithasbeendroppedordamaged,ordroppedintowater.Returnthe
treadmilltoaservicecenterforexaminationandrepair.
.Donotcarrythistreadmillbysupplycordorusecordasahandle.
.Keepthecordawayfromheatedsurfaces.
.Neveroperatethetreadmillwiththeairopeningsblocked.Keeptheairopenings
freeoflint,hair,andthelike.
.Neverdroporinsertanyobjectintoanyopening.
.Donotuseoutdoors.
.Donotoperatewhereaerosol(spray)productsarebeingusedorwhereoxygenis
beingadministered.
.Todisconnect,turnallcontrolstotheoffposition,thanremoveplugfromoutlet.
.Connectthistreadmilltoaproperlygroundedoutletonly.
Thetreadmillisdesignedfortheuseandenjoyment.Byfollowingtheabove
precautionsandusinggoodjudgmentandcommonsense,youwillenjoysafeand
pleasurableexercisewiththistreadmill.

TABLEOFCONTENTS
1.SAFETYGUIDELINES.........................................................................................
2.INTRODUCTION...................................................................................................
3.ASSEMBLINGYOURTREADMILL
InstallationRequirements......................................................................................
Listofparts............................................................................................................
Stepbystepinstructions.......................................................................................
Floorleveladjustment...........................................................................................
4.OPERATINGINSTRUCTIONS
Safetykey.............................................................................................................
5.UNDERSTANDINGTHEELECTRONICSPACKAGE
Caution.................................................................................................................
Keyfunctions........................................................................................................
Whateachofthecategoriesmeans.....................................................................
6.RUNNINGONTHETREADMILL.........................................................................
7.GUIDELINESFOREXERCISE
HowlongshouldIexercise?................................................................................
HowoftenshouldIexercise?...............................................................................
8.MAINTAININGYOURTREADMILL
Cleaningthetreadmill..........................................................................................
Adjustingtherunningbelt....................................................................................
9.TROUBLESHOOTING
ERRmessages....................................................................................................
Blankdisplay........................................................................................................
FuseFailureForElectronicsPackageAndMotor................................................
FuseFailureForInclineSystem..........................................................................
FuseFailureFordriveboard................................................................................
1
3
5
5
6
8
9
10
10
12
13
14
14
14
15
18
19
19
20
21

INTRODUCITON:
Congratulationsonpurchasingoneofthefinestpiecesofexerciseequipmentonthe
markettoday.Constructedofhighqualitymaterialsanddesignedforyearsoftrouble
freeusage.Wehopethe3120willbeanintegralpartofyourfitnessregimen.
BeforeusingyourTreadmill,werecommendthatyoufamiliarizeyourselfwiththis
Owner'sManual.Whetheryouareafirsttimeuserofexerciseequipmentora
seasoned"pro",understandingthecorrectuseoftheequipmentwillenhanceyour
abilitytoachieveyourexercisegoalssafelyandsuccessfully.
TREADMILLWITHSHORTHANDLEBARS:

TREADMILLWITHLONGHANDRAILS:

ASSEMBLINGYOURTREADMILL:
InstallationRequirements
CAUTION:
Readthisowner'smanualandfollowtheinstructionscontainedherein.
Toavoidbackstrain,andtoinsuresafetytotheunitandyourself,we
suggestyoumayneedahelpertoremovetherunningdeckassembly
frombox.
Listofparts
IMPORTANT:
Beforeassemblingyourtreadmill,makesurethatyouhaveallthefollowingitems:
1.Eight5/16"x3/4"bolts-liftpost
2.Eight5/16"nylonwashers-liftpost
3.Eight5/16"washers-liftpost
4.Four1/4"x11/4"bolts-handrail/handlebarholder
4A.Two5/16"bolts-handrailclamp(forlonghandrailsonly)
5.Two1/4"x1/2"screws-waterbottleholder
6.Onewaterbottleholder
7.Onesafetykey
8.OnehexAllenwrench
9.OnehexAllenwrenchwithhandle
10.Onecombinationwrench
11.Threefuses
a.15A(100V/120Vuse)or10A(200V/240Vuse)-ElectronicsandMotor
b.4A(100V/120Vuse)/(200V/240Vuse)-Inclinesystem
c.3A(100V/120Vuse)or2A(200V/240Vuse)-Driveboard
Ifanyitemsaremissing,contactyourauthorizedservicedealer.
Thepackingforthistreadmillwasdesignedtoprotectitduring
shipment.Pleasestoretheoriginalpackaginginasafeplacein
caseyouneedtoshipthetreadmillinthefuture.

Stepbystepinstructions
Thefollowingstepsexplainhowtoassembleyourtreadmill.Pleasereadeverystep
thoroughly,andfollowthedirectionscompletelytoensurecorrectassembly.
1.ThereareimportantpartsenclosedinsideoftheStyrofoam,pleasecheck
Styrofoamcompartmentsbeforediscarding.Makesureallpackingmaterialsare
removedfromthetreadmilldeck.
2.Laythetreadmillonitsside.Makesuretherunningbeltispositioninthetracksof
thetwoBELTALIGNMENTROLLERundersideofthemachine(seeFig.1).
3.Then,placethetreadmillonalevel,flatsurface.
4.Insertthetwoliftpostsintotheirrespectivesocketsandsecurewithfourboltsand
washersprovidedoneachside(seeFig.2).
Fig.1
Fig.2

5.Tightlyconnectthetreminaloftwowiresbetweenelectronicpackageand
handlebarbracket.Insertterminalsbacktohandlebarbracket(seeFig.3).
6.Then,securewithboltsprovided.
7.If,theunitwithlonghandrails,attachthebottomofthehandrailswithhandrail
clampstothetreadmillframesecurewithoneboltoneachside(seeFig.4).Then,
tightentheupperhandrailsboltssecurely.
Fig.3
Fig.4

8.Assemblethewaterbottle/personalstereoholdertotherightfrontpostusingthe
screwsprovided(seeFig.5).
Ifthetreadmillisnotsteadyonyourfloor,turnthefloorleveladjustmentontherear
feetlegofthetreadmill.Raiseorlowerthefloorleveladjustmenttosteadyyour
treadmill(seeFig.6).
Yourtreadmillisassembledandreadytouse.
Floorleveladjustment
Fig.5
Fig.6

OPERATINGINSTRUCTIONS
CAUTION:
Safetykey
DONOTSTANDONTHEBELTWHENSTARTING.
Thesafetykeyisrequiredtooperatethetreadmill(seeFig.7).Thesafetykeyshould
beusedasanemergencystopbyclippingthecordtoyourexerciseclothing.Be
suretoremovethesafetykeyfromyourexerciseclothingafteryouhavefinished
yourworkout,andplaceittothekeypositionforyourconvenienceor
storeinasafeplacetoavoidusebychildrenorpersonsunfamiliarwiththistreadmill.
Turnonthepowerswitchlocatedonthefrontofthetreadmill.Placethesafetykey
intothe"SAFETYKEY"positionontheelectronicspackageinorderfortheunitto
function.
"NOTINUSE"
Fig.7

UNDERSTANDINGTHEELECTRONICSPACKAGE
CAUTION:
IMPORTANT:
Keyfunctions:
DONOTSTANDONTHEBELTWHENSTARTING.Straddlethebelt
withyourfeetontherightandleftstagingplatforms.
Beforeusingthetreadmill,theleftedgeoftherunningbeltmustbe
completelyinthegreenportionoftheBELTALIGNMENTGAUGE,
locatedontheleftsideofthemotorshroud(seeFig.8).Pleasereferto
the"Maintainingtreadmill"section"Adjustingtherunningbelt"for
furtherinformation.
SAFETYKEY:TurnonthePOWERswitchlocatedonthefrontofthemachine.Put
thesafetykeyonthe"SAFETYKEY"positionoftheelectronics
packagetooperatethetreadmill.
:Afteryourworkout,placethesafetykeyonpositionforyour
convenience.Thenturningthepowerswitchoff.
MODE:Whenyouplacethesafetykeyinitsplace,theelectronicspackagewill
automaticallyaccessintoMODEfunction.Pressthemodekey,andthis
willscrollyouthroughthedifferentmodes.WitheachpressoftheMODE
key,thedisplaywillalternatelyshowTIME,DIST(Distance),CAL(Calories),
SCANorPULSE.
INCLINE:UsetheINCLINEkeystoraiseorlowerthetreadmill.The
inclinerangeforthetreadmillisfrom0%-15%.
SPEED:Usethespeedkeystoadjustyourdesiredspeed.Thespeed
rangeforthetreadmillisfrom0.1-10MPH(0.2-16KPH).
Pressthespeedkeytoincreasethespeedandpressthespeed
keytodecreasethespeed.
(NOTINUSE) (NOTINUSE)
Fig.8

key:ThesekeysareusedtochoosethedesiredTIMEorDISTANCE.
STOP/RESET:WhenyoupresstheStop/Resetbutton,thetreadmillwillslowly
cometoastop.
PresstheStop/Resetbuttononceagain,alldisplaywindows
informationwillbecleared.
PROGRAM:The3120featuresatotaloffive(5)professionallydesignedworkout
programs.Theprogramscontroltheelevation,whileyoucontrolthe
speedofyourworkout.Duringtheactualprograms,youcannotchange
theelevationpercentage,butyoucanchangethespeedofthe
treadmill.
PressthePROGRAMkeytoscrollthroughthe5programs.TheP1-P5willbe
displayedinthecentralLEDwindow,whenyouhavechosentheProgramyouwant,
presstheMODEkeytoselecttheTIMEorDIST.UsetheTIMEorDIST
keystoselectyourdesiredTIMEorDISTthenpresstheSPEEDkeystobegin.
Duringtheseprograms,youcontrolthespeed,andtheunitwillautomaticallyswitch
betweenprogramfor4secondsandtheelevationpercentagesfor8seconds,giving
youthefeelingofrunningonhillsandlevelground.
ThecourseprofileforeachPROGRAMisasfollows:
5
000
0
0
3
34
4
1 1
0
0
0 0
77
0
4
9
9
0
06
3
6
11 1
333
4
10
7
4
4
0
15
12
12 13
12 12
15 15

Whateachofthecategoriesmeans:
TIME:TherangeavailableinTIMEmodeis00:00-99:00minutes.UsetheMODE
keytoselectthetimemode.WhenTIMELEDislitinthedisplay,usethe
keystoadjustthedesiredtime.
TheelectronicspackagewillBEEPfor10secondswhenyourdesiredtimeis
reached,thenwillstarttocountupifyourworkoutcontinues.Eachpressof
thekeychangesthetimeby1minute.
DIST:Thedistancethetreadmillwillregistergoesfrom0.00-99.99milesor0.0-999.9
kilometers.UsetheMODEkeytoselecttheDISTmode.
WhenDISTLEDislitinthedisplay,usethekeystoadjustthedesired
distance.
Eachpressofthekeychangesthedistanceby0.05mileor0.1km.
TheelectronicspackagewillBEEPfor10secondswhenyourdesired
distanceisreached,thenwillstarttocountupifyourworkoutcontinues.
CAL:Thisreadoutgivesyoutheamountofcaloriesburned,therangeofcaloriesis
from0.0-999.9CAL.
SCAN:TheSCANwillresultinthedisplayalternationbetweenModereadoutsevery
4seconds.
PULSE:IfthetreadmillisequippedwithaPolarreceiveronlywithouttransmitter,you
needtopurchaseatransmitterstraptomeasureyourheartrateduringyour
workout.
PresstheMODEkeytotheheatratemode,theheartrateindicatorlight
locatedontheelectronicspackage.OptimalPolarheartratedistanceshouldnot
exceed0.6meterinordertogetthebestresult.

RUNNINGONTHETREADMILL:
Now,youhavebecomefamiliarwithyourtreadmill'soperationandarereadyto
exercise:
1.Plugthetreadmillintoastandardoutlet.Turnonthepowerswitchlocatedonthe
frontofthemachine.
2.Straddlethebeltwithyourfeetontherightandleftstagingplatforms.Placethe
SAFETYKEYonthe"SAFETYKEY"positionoftheelectronicspackageto
operatethetreadmill.
3.Selectyourcourseandfollowthescrolledmessages.YoumayalsoPRESSthe
SPEEDkeystobegin.
4.Pressspeedkeyuntilyoureach1.5-2.0mph/2.5-3.5kphoracomfortable
walkingspeed,keepbothhandsonthehandrails,andwalkforafewminutesto
getcomfortablewithyourtreadmill.
5.Afteryouarewalkinginaneasy,relaxed,andsteadyfashion,releaseyourgripon
thehandrails,andletyourarmsswingfreelyandnaturally.
6.Whenyoufeelcomfortablewalking,youmaywishtojog.Holdthehandrailwith
onehand,usetheotherhandtoincreasethespeed.
7.Remembertoholdthehandrailwhenusingthecontrolpanelontheelectronics
package,ortocatchyourbalancewhenslowingdownorstopping,andfor
dismounting.
8.Whenyouhavefinishedyourworkout,removetheSAFETYKEYfrom"SAFETY
KEY"to(NOTINUSE)position.Aftercompletingtheproperamountoftime
tocooldownbeforethemachinecompletelystop.

GUIDELINESFOREXERCISE
MAINTAININGYOURTREADMILL
HowlongshouldIexercise?
HowoftenshouldIexercise?
Cleaningthetreadmill
CAUTION:
Thedurationofyourexercisesessiondependsonyourfitnesslevel.Ingeneral,itis
recommendedthatyoumaintainyourheartrateinthetrainingzoneforatleast10
minutestorealizeanaerobicbenefit.Asyourfitnesslevelincreases,youwillbeable
tomaintainyourheartrateinthetrainingzoneforlongerperiods:usuallybetween
20and30minutes.
Whenfirststartingyourworkout,takethefirstseveralminutestowarmup,then
slowlyincreaseyourworkloadtobringyourheartrateintoyourspecifictraining
zone.Attheendofyourworkout,graduallydecreaseyourworkload,thenexercise
lightlyasa"cooldown".
Aerobicexercises,toachievethegreatestbenefits,shouldbeperformed3-5timesa
week.Itisimportanttoallowsufficienttime,atleast24hours,foryourbodyto
recoverafterexercise.
Yourtreadmillreliesonlowfrictionforpeakperformance.Thetreadmill'slowfriction
operationdependsonkeepingtheunitascleanaspossible.See"Cleaningthe
Treadmill"formoreinformation.
Properbeltalignmentisalsoimportantforproperoperationofthetreadmill.See
"AdjustingtheRunningBelt"formoreinformation.
TurnoffunitanddisconnectACcordbeforecleaning.
Regularcleaningisrecommendedtokeepyourtreadmillrunningatpeak
performance.
Beforeyourworkout,useadryclothtocleanthestagingplatform,exposedslider
deck,andunderthebeltasfarasyoueasilyreach.Thisremovesanydirtordust
whichmightenterthesliderareaandcompromisetheunit'srunningefficiency.
Tocleantheplasticparts,useamilddetergentandmakesuretheunitis
completelydrybeforeoperating.Ontherunningsurface,useasoftnylonscrub
brush.Donotusewatertocleanthebeltorrunningsurface,ortocleanthe
electronicspackage.Shouldwater,forsomereason,getontheelectronics
package,immediatelyblowdrytheelectronicspackage.
Itisrecommendedthatyoukeepallliquidsawayfromtheunitduringoperation.
Spillageofliquidsontoorintothemachinewillvoidthewarranty.

Adjustingtherunningbelt
CAUTION:
Yourtreadmillcomeswithabeltalignmentgaugelocatedontheleftsideofthe
motorcover(seeFig.9).Theedgeoftherunningbeltshouldbeinthemiddleofthe
greenportionofthegauge.Ifthebeltedgeisinthegreenarea,thebeltdoesnot
needadjusting.Iftherightedgeisintheredportion,thebeltneedsadjusting
immediately.
Thebeltisproperlyalignedatthefactory.However,duringshippingandhandlingor
byuseonanunevensurface,thebeltmaymoveoffcenter.Therefore,itisimportant
thatyoucheckthebelt'salignmentbeforeusingthetreadmill.
Thecorrectalignmentoftherunningbeltiscriticalforthesmoothoperationofthe
treadmill.
DONOTALLOWANYONETOWALKONRUNNINGBELTDURING
THISPROCEDURE.
Fig.9

Failuretorealignthebeltcouldresultintearingorfrayingofthebelt,whichisnot
coveredinthewarranty.Pleasefollowtheadjustmentprocedurelistedbelow:
1.Turnonthepowerswitchlocatedonthefrontofmachine.PlacetheSAFETYKEY
onthe"SAFETYKEY"position.
2.PresstheSPEEDkeytoincreasethespeeduntilthespeedregisters2.0mph/
3.2kphonthedigitaldisplay.
3.Whiletheunitisrunningat2.0mph./3.2kph,determinewherethebeltisin
relationtothebeltalignmentgauge.
4.Shouldyourbeltbeinthewrongcolorrange,followthestepsbelowtoreturnthe
belttothe"safetyzone":
5.Ifthebeltisintheleftredzone:Turntheleftbeltadjustmentboltlocatedatthe
rearofthetreadmillclockwise1/4turnatatime,usingthehexAllenwrench.Then
turntherightbeltadjustmentboltcounterclockwise1/4turn.Letthetreadmillrun
30seconds,thencheckthepositionofthebeltinthecolorgauge.Ifthebeltstill
hasnotreturnedtothegreensafetyzone,repeatwithanother1/4turnuntilthe
belthasreturnedtothemiddleofthegreenarea.Donotturnadjustingboltmore
than1/4turnatatime.
Ifthebeltisontheedgeofthegreencolor,pleaseadjustitsoitisinthemiddleof
thegreencolor.Youmayturntheadjustmentnutlessthan1/4turnatatime.
6.Conversely,ifthebeltisintherightredzone,turntherightbeltadjustmentnut
clockwise1/4turn,thenturntheleftadjustmentboltcounterclockwise1/4turn.
Thenletthetreadmillrunatleast30seconds,checkthepositionofthebeltinthe
colorgauge.Ifitstillhasnotreturnedtothegreensafetyzone,repeatwith
another1/4turnuntilthebelthasreturntothemiddleofthegreenarea.Donot
turnadjustingboltmorethan1/4turnatatime.
7.Whenthebeltisbackinthegreen"safetyzone",youcancontinueyourregular
useofthetreadmill.Slowlyincreasethespeedoftheunitto5.5MPH(9KPH),
andletitrunforatleast45seconds.

Periodicallymonitorthepositionofthebelttoensurepeakperformance:
Whenyouareusingthetreadmill,ifyoufeelapauseinthebeltwitheachfootplant
thebeltistooloose.Stopthemachine,checkthebelttension,grabtherunningbelt
offthedeckinthemiddle(seeFig.10&10-1).Thereshouldbeabout30m/m(11/8")
or3kgsof"give"inthebelt.Ifthereistoomuch(seeFig.10-2),thenadjustbothrear
rollerboltsclockwise1/2turnatatime(seeFig.10-3)..
Then,trythebelttensionagain,ifmoreadjustingisrequired,givebothadjusting
boltsanotherslighttrun.Donotadjustover2fullturns.
Conversely,ifthe"give"inthebeltistootight,adjustbothrearrollerbolts
counterclockwise1/2turnatatime(seeFig.10-3).
Toavoidinjury,specialcaremustbetakenwhenadjustingtherunning
belt.Turnoffthetreadmillwhileadjustingorworkingneartherearrollers.
Removeanylooseclothingorshoelacesandtiebackyourhair.Bevery
carefultokeepyourfingersoranyotherobjectsclearofthebeltand
rollers.
Thetreadmillisdesignedtocarryspecificweightsatspecificspeeds.Thetreadmill
willnotstopimmediatelyifanyobjectbecomescaughtinthebeltorrollers.
Overtighteningofthebeltcausesdamageandprematurefailureoftheprecision
bearingsinthefrontandrearrollers.
CAUTION:
Fig.10
Fig.10-2
Fig.10-1 Fig.10-3

TROUBLESHOOTING:
CAUTION:
"ERR"messages
SHUTOFFUNITANDDISCONNECTACCORDBEFOREMAKING
ANYREPAIRSORMODIFICATIONS.
Note:Iftheelectronicsdisplayshows"ERR1,ERR3,ERR6,ERR7orERR10",
pleaseturnoffthePOWERswitchonthefrontofthemachine.Allowtheunitrestfor
5seconds,thenturnonthepowerswitchbeginoperationagain.Shouldthe
electronicspackagedisplay"ERR"again,pleaserefertothefollowingsectionfor
moreinformation.OR,pleasecontactyourdealerforfurtherinstructions.
ERR1-Theopticalswitchmountedonthemotorisnotreceivingthesignal
reflectedfromthetachometerwheel.Pleasecontactyourdealer.
ERR3-Theuserisrunningfasterthanthebelt.PleaseturnthePOWERswitchoff,
allowthemachinetorestfor5seconds,thentrynormaluseagain.
ERR6-Theunit'sinclinesystemisnotresponding,pleasereplacethe4A(200-
240V)/(100-120V)fuselocatedunderneaththetreadmill,makesureyour
areastandardvoltagepriortoreplacement.
Theinclinesystemfuseholderislocatedundertheframeatthefrontofthe
machine(seeFig.11-1).
Toremovethefuse,pushonthefuseholderandthenturntheholder
counterclockwiseandthefuseholderwithfusewillprotrude.
Removethedamagedfuseandinsertanewfuse,pushthefuseandholder
in,turningclockwisetosecureit.
Iftheunitstillrefusestorespond,pleasecontactyourdealerformore
information.
ERR7-Onceyouturnonthemachine,thecomputerdisplayshowstheERR7.The
computerreceivingthesignalreflectedfromVRincorrectly,thatmeansthe
wiresdisconnected.
Makesurethe16pincableconnectorinsidetherightfrontpostplugintoits
socketatthebaseofthetreadmillisconnectedsecurely,pleaserefertoFig.
2.
If,afterperformingtheabovesteps,thedisplaystillshowsERR7,please
contactyourdealerforfurtherinformation.
ERR10-Thetreadmillsuddenlyspeedsuptomaximumspeedwhileyouareusingit
andshoutsoff.Pleasecontactyourdealerformoreinformation.

Blankdisplay
FuseFailureForElectronicsPackageandMotor
CAUTION:
1.IfyouturnonthePOWERswitchandthereisnolight:
a.Checkifthepowercordispluggedsecurelyintothewallsocket.
b.Checkthatthepowerswitchonthefrontoftheunitisonthe"ON"position.The
powerswitchshouldbelit.
c.Ifthepowerswitchisnolight,replacethefuse.Pleaserefertothe
ELECTRONICSPACKAGEANDMOTORFUSEFAILUREsectionformore
information.
d.Ifthereisstillnodisplayaftercompletingtheabovesteps,pleasecontactyour
dealerformoreinformation.
2.Thepowerswitchislit,butnowordsappearonthedisplay:
a.Makesurethecableconnectorsinsidetherightliftpostatthebaseofthe
treadmillisfirmlyinitssockets.PleaserefertotheFig.2.
b.Ifthedisplayisnowords,thenthefuseonthedriverboardneedtobe
replaced,pleasecheckwithyourdealerforfurtherinformation.
Ifnothingisdisplayedontheelectronicspackage,pleasecheckthePOWERswitch
locatedonthefrontofthetreadmill,ifitisunlit,thenthefuseisdamagedandmust
bereplaced.
MAKESURETHETREADMILLPLUGISREMOVEDFROMOUTLET
BEFOREREPLACETHEFUSE.
Therearetwofuseholdersarelocatedatthefrontofthetreadmillframe,theleft4
ampfuseholderisfortheINCLINESYSTEM,andtherightfuseholder15amp/100-
120volts(or10amp/220-240volts)isfortheElectronicsPackageandMotor,
pleasemakesuretocheckyourstandardvoltagepriortofusereplacement(see
Fig.11-1).
Toremovethefusefortheelectronicspackageandmotor,pushonthefuseholder
andthenturntheholdercounterclockwiseandthefuseholderwithfusewillprotrude.
Removethedamagedfuseandinsertanewfuse,pushingthefuseandholderin,
thenturningclockwisetosecurethefuseholder(seeFig.11-2~11-4)
This manual suits for next models
1
Table of contents
Other SPORTS ART Treadmill manuals

SPORTS ART
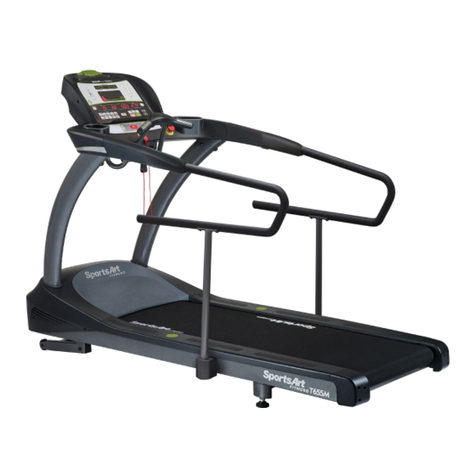
SPORTS ART T655M User manual

SPORTS ART
SPORTS ART TR20 User manual

SPORTS ART
SPORTS ART T635A User manual

SPORTS ART
SPORTS ART T675 User manual

SPORTS ART
SPORTS ART 3108 User manual

SPORTS ART
SPORTS ART 6200N User manual

SPORTS ART
SPORTS ART 6310 User manual

SPORTS ART
SPORTS ART Treadmill User manual

SPORTS ART
SPORTS ART T615 User manual

SPORTS ART
SPORTS ART 6100E User manual