Spracht Aura Professional User manual

Spracht® warrants its products against defects or malfunctions in
material and workmanship under normal use and service, with the
exceptions stated below. This warranty lasts for one year from the
original date of purchase. Coverage terminates if you sell or otherwise
transfer the product. In order to keep this warranty in eect, the product
must have been handled and used as prescribed in the instructions
accompanying the product.
Spracht® shall (at its option) repair or replace a defective unit covered
by this warranty, or shall refund the product purchase price. Repair,
replacement with a new or reconditioned unit, or refund, as provided
under this warranty, is your exclusive remedy. This warranty does not
cover any damages due to accident, misuse, abuse, or negligence.
Spracht shall not be liable for any incidental or consequential damages.
Some states do not allow limitation or exclusion of incidental or
consequential damages, so the above limitation or exclusion may not
apply to you. Implied warranties of merchantability and fitness for a
particular purpose are limited in duration to the duration of this
warranty. Some states do not allow limitations on how long an implied
warranty lasts, so the above limitation may not apply to you. To make a
warranty claim, the purchaser must obtain a return authorization
number (RA) from Spracht® (serial number and purchase date required),
and then return the product to Spracht at purchaser’s expense. A copy
of the original dated receipt or shipping document must accompany the
product. To obtain a return authorization, see Warranty on our website
Spracht®
974 Commercial Street, Suite 108
Palo Alto, CA 94303 USA
Tel: 650-215-7500 Fax: 650-485-2453

PACKAGE CONTENTS ... ..... ..... ..... ..... ..... ..... ..... ..... ..... ..... ..... ..... ..... ..... ..... ..... ..... ..... ..... .. 2
Aura Professional™ Conference Phone ... ..... ..... ..... ..... ..... ..... ..... ..... ..... ..... ..... ..... ..... .. 2
Parts List ... ..... ..... ..... ..... ..... ..... ..... ..... ..... ..... ..... ..... ..... ..... ..... ..... ..... ..... ..... ..... ..... ..... .. 2
Optional Accessories ... ..... ..... ..... ..... ..... ..... ..... ..... ..... ..... ..... ..... ..... ..... ..... ..... ..... ..... .. 2
GETTING TO KNOW YOUR PHONE
Parts of the Phone ... ..... ..... ..... ..... ..... ..... ..... ..... ..... ..... ..... ..... ..... ..... ..... ..... ..... ..... ..... .. 3
LED Indicators ... ..... ..... ..... ..... ..... ..... ..... ..... ..... ..... ..... ..... ..... ..... ..... ..... ..... ..... ..... ..... .. 3
Display Introduction ... ..... ..... ..... ..... ..... ..... ..... ..... ..... ..... ..... ..... ..... ..... ..... ..... ..... ..... .. 3
INSTALLATION AND PRECAUTIONS
Installation and Precautions ... ..... ..... ..... ..... ..... ..... ..... ..... ..... ..... ..... ..... ..... ..... ..... ..... .. 4
Setting Up ... ..... ..... ..... ..... ..... ..... ..... ..... ..... ..... ..... ..... ..... ..... ..... ..... ..... ..... ..... ..... ..... .. 4
Self Diagnostics ... ..... ..... ..... ..... ..... ..... ..... ..... ..... ..... ..... ..... ..... ..... ..... ..... ..... ..... ..... ..... .. 4
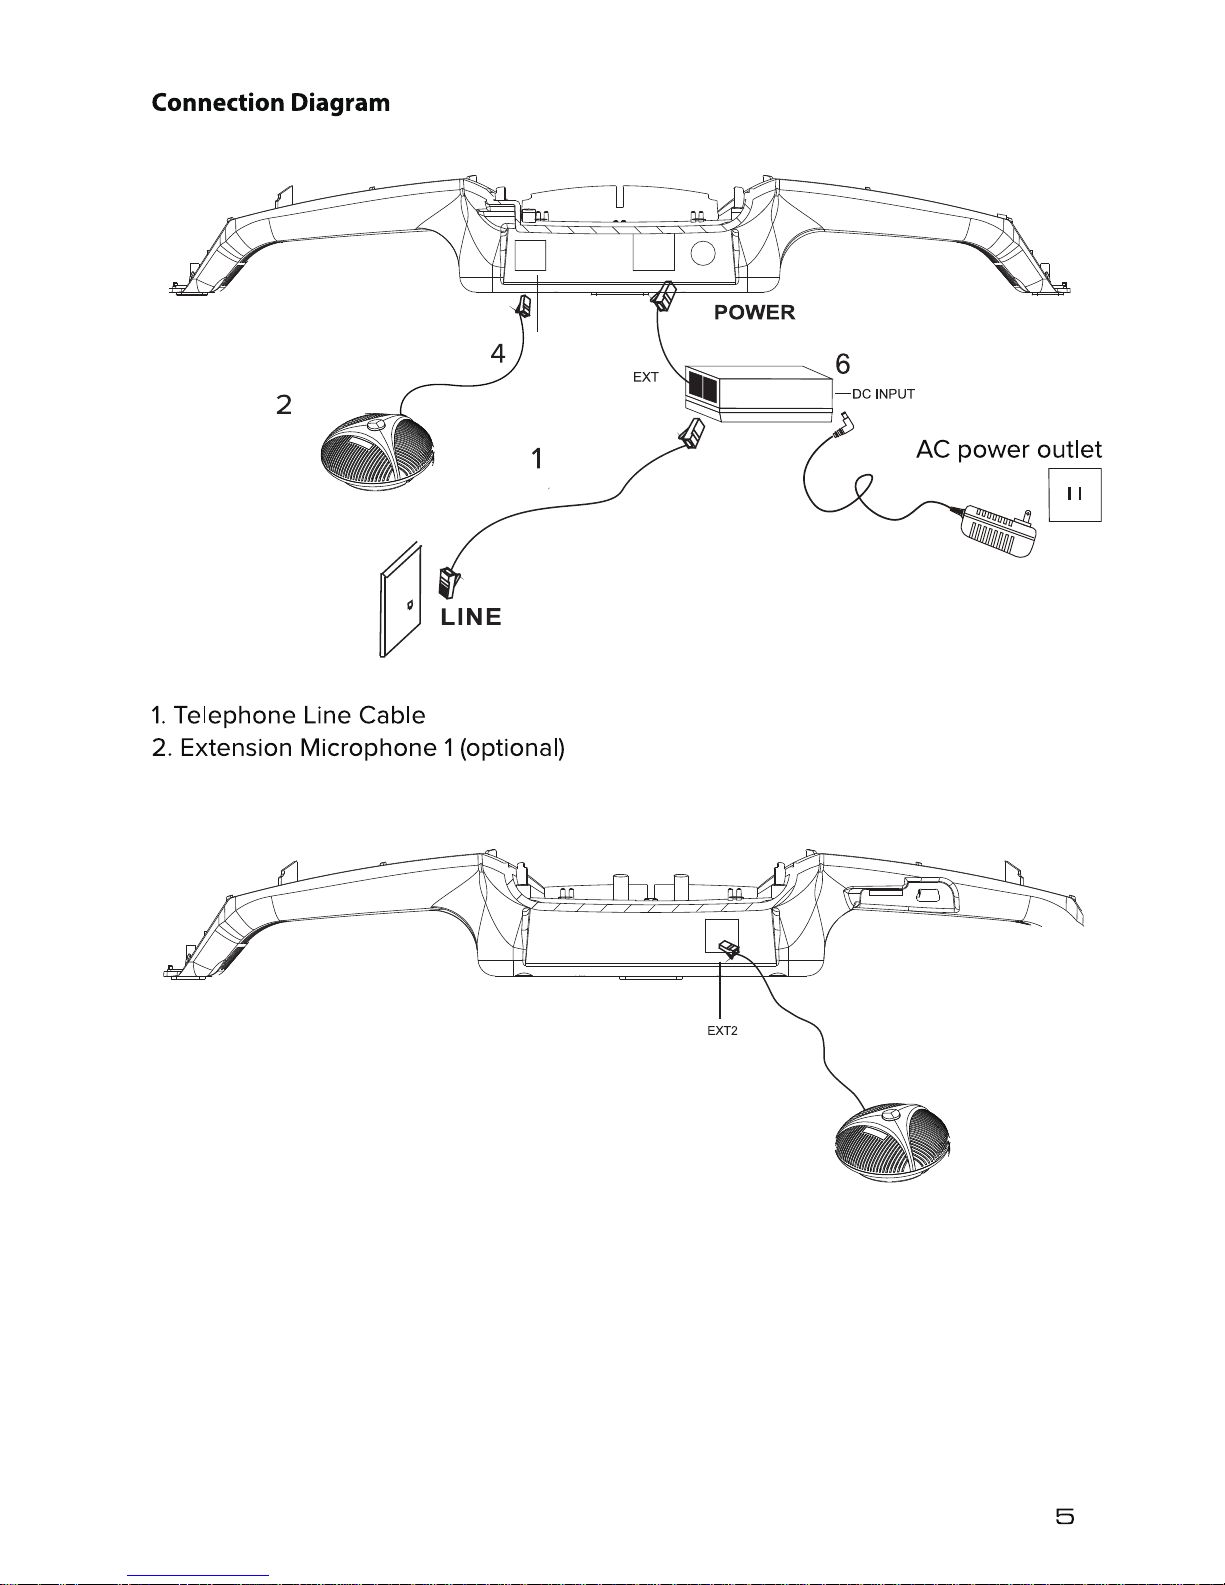
Connection Diagram ... ..... ..... ..... ..... ..... ..... ..... ..... ..... ..... ..... ..... ..... ..... ..... ..... ..... ..... .. 5
Interfaces ... ..... ..... ..... ..... ..... ..... ..... ..... ..... ..... ..... ..... ..... ..... ..... ..... ..... ..... ..... ..... ..... ..... .. 5
Aura Professional™ Buttons and Keypad ... ..... ..... ..... ..... ..... ..... ..... ..... ..... ..... ..... ..... ..... .. 6
Button and Keypad Functions ... ..... ..... ..... ..... ..... ..... ..... ..... ..... ..... ..... ..... ..... ..... ..... ..... .. 7
USING THE AURA PROFESSIONAL™
Making a Call ... ..... ..... ..... ..... ..... ..... ..... ..... ..... ..... ..... ..... ..... ..... ..... ..... ..... ..... ..... ..... .. 8
Direct Dial, Redial, Recall ... ..... ..... ..... ..... ..... ..... ..... ..... ..... ..... ..... ..... ..... ..... ..... ..... ..... .. 8
Answering a Call ... ..... ..... ..... ..... ..... ..... ..... ..... ..... ..... ..... ..... ..... ..... ..... ..... ..... ..... ..... .. 8
Answering a Second Call ... ..... ..... ..... ..... ..... ..... ..... ..... ..... ..... ..... ..... ..... ..... ..... ..... ..... .. 8
Ending a Call ... ..... ..... ..... ..... ..... ..... ..... ..... ..... ..... ..... ..... ..... ..... ..... ..... ..... ..... ..... ..... ..... .. 9
Call Mute ... ..... ..... ..... ..... ..... ..... ..... ..... ..... ..... ..... ..... ..... ..... ..... ..... ..... ..... ..... ..... ..... ..... .. 9
Call Hold ... ..... ..... ..... ..... ..... ..... ..... ..... ..... ..... ..... ..... ..... ..... ..... ..... ..... ..... ..... ..... ..... ..... .. 9
Scrolling Through Call History ... ..... ..... ..... ..... ..... ..... ..... ..... ..... ..... ..... ..... ..... ..... ..... .. 9
Deleting Call History ... ..... ..... ..... ..... ..... ..... ..... ..... ..... ..... ..... ..... ..... ..... ..... ..... ..... ..... .. 9
Call Timer ... ..... ..... ..... ..... ..... ..... ..... ..... ..... ..... ..... ..... ..... ..... ..... ..... ..... ..... ..... ..... ..... .. 9
PHONE SETTINGS
Menu ... ..... ..... ..... ..... ..... ..... ..... ..... ..... ..... ..... ..... ..... ..... ..... ..... ..... ..... ..... ..... ..... ..... ..... .. 10
Setting and Editing Menu Functions ... ..... ..... ..... ..... ..... ..... ..... ..... ..... ..... ..... ..... ..... ..... .. 11
Speaker Volume Adjustment ... ..... ..... ..... ..... ..... ..... ..... ..... ..... ..... ..... ..... ..... ..... ..... ..... .. 11
USING THE EXTENSION MICROPHONES ... ..... ..... ..... ..... ..... ..... ..... ..... ..... ..... ..... ..... ..... .. 12
FEDERAL COMMUNICATION COMMISSION STATEMENT ... ..... ..... ..... ..... ..... ..... ..... ..... .. 13

Aura Professional™ Conference Phone
Accessories
Optional Accessories
PACKAGE CONTENTS

GE
I
LED Indicators
Blue Conference call in progress
Blinking Blue Conference call on hold
Red Conference call is muted
Blinking Red Incoming call
For best performance of your Aura Professional™ Conference Phone, please
follow these recommendations:
Avoid areas with high levels of background noise. The microphone(s) might
pick up extraneous sounds and prevent the conference phone from going
into receiving mode when you have finished talking.
Avoid placing the phone where it would be subject to vibration.
Place the unit on an even surface. Avoid locating it in a corner, under a cabinet
or next to a cabinet. Those kinds of locations will create an echo eect.
Keep objects 24”(60cm) away from the conference phone.
CAUTION
To reduce the risk of personal injury, fire, or damage, use only the supplied
power adapter.
SETTING UP THE AURA PROFESSIONAL™
1. Plug one end of the RJ11 Telephone Cable into the LINE jack on the
Junction Box. Plug the other end into a telephone wall jack. See page 5 for
the connection diagram.
2. If you’re going to use the optional extension microphones, plug one end
of the 4P4C cable to the EXT1 or EXT2 jack on the phone. The other end
plugs into the microphone. See page 5 for the Connection Diagram.
3. Plug one end of the 8 strand cable (8P8C) into the POWER jack of the
phone and the other into the EXT jack of the Junction Box.
4. Plug the DC adapter into the DC INPUT of the Junction Box and the AC
adapter into a standard AC outlet.
SELF-DIAGNOSTIC:
Plugging in the conference phone initiates the self-diagnostic program.
• The green, red and blue indicator LEDs will flash sequentially.
• A series of tones will sound when the diagnostic program is complete.
3
4
EXT1
Telephone Wall Jack
3. Extension Microphone 2 (optional)
4. Extension Microphone cable (2x)
5. 21’ (6.5M) length 8 strand cable (8P8C Cable)
6. Junction Box
5
Interfaces
POWER: Power jack on the port bay of the Aura Professional™
EXT1: EXT1 jack for the extension Microphone
EXT2: EXT2 jack for the extension Microphone
LINE: Telephone Line jack on the Aura Professional™

1 MENU Button
2 FLASH/Select for Menu (in stand-by mode)
3 ON/OFF
4 REDIAL
5 Speaker VOLUME/ Call History (in stand-by mode)
6 MUTE/ Call History Delete (in stand-by mode)
7 HOLD
8 Keypad
Aura Professional™ Buttons and Keypad
FLASH
MENU
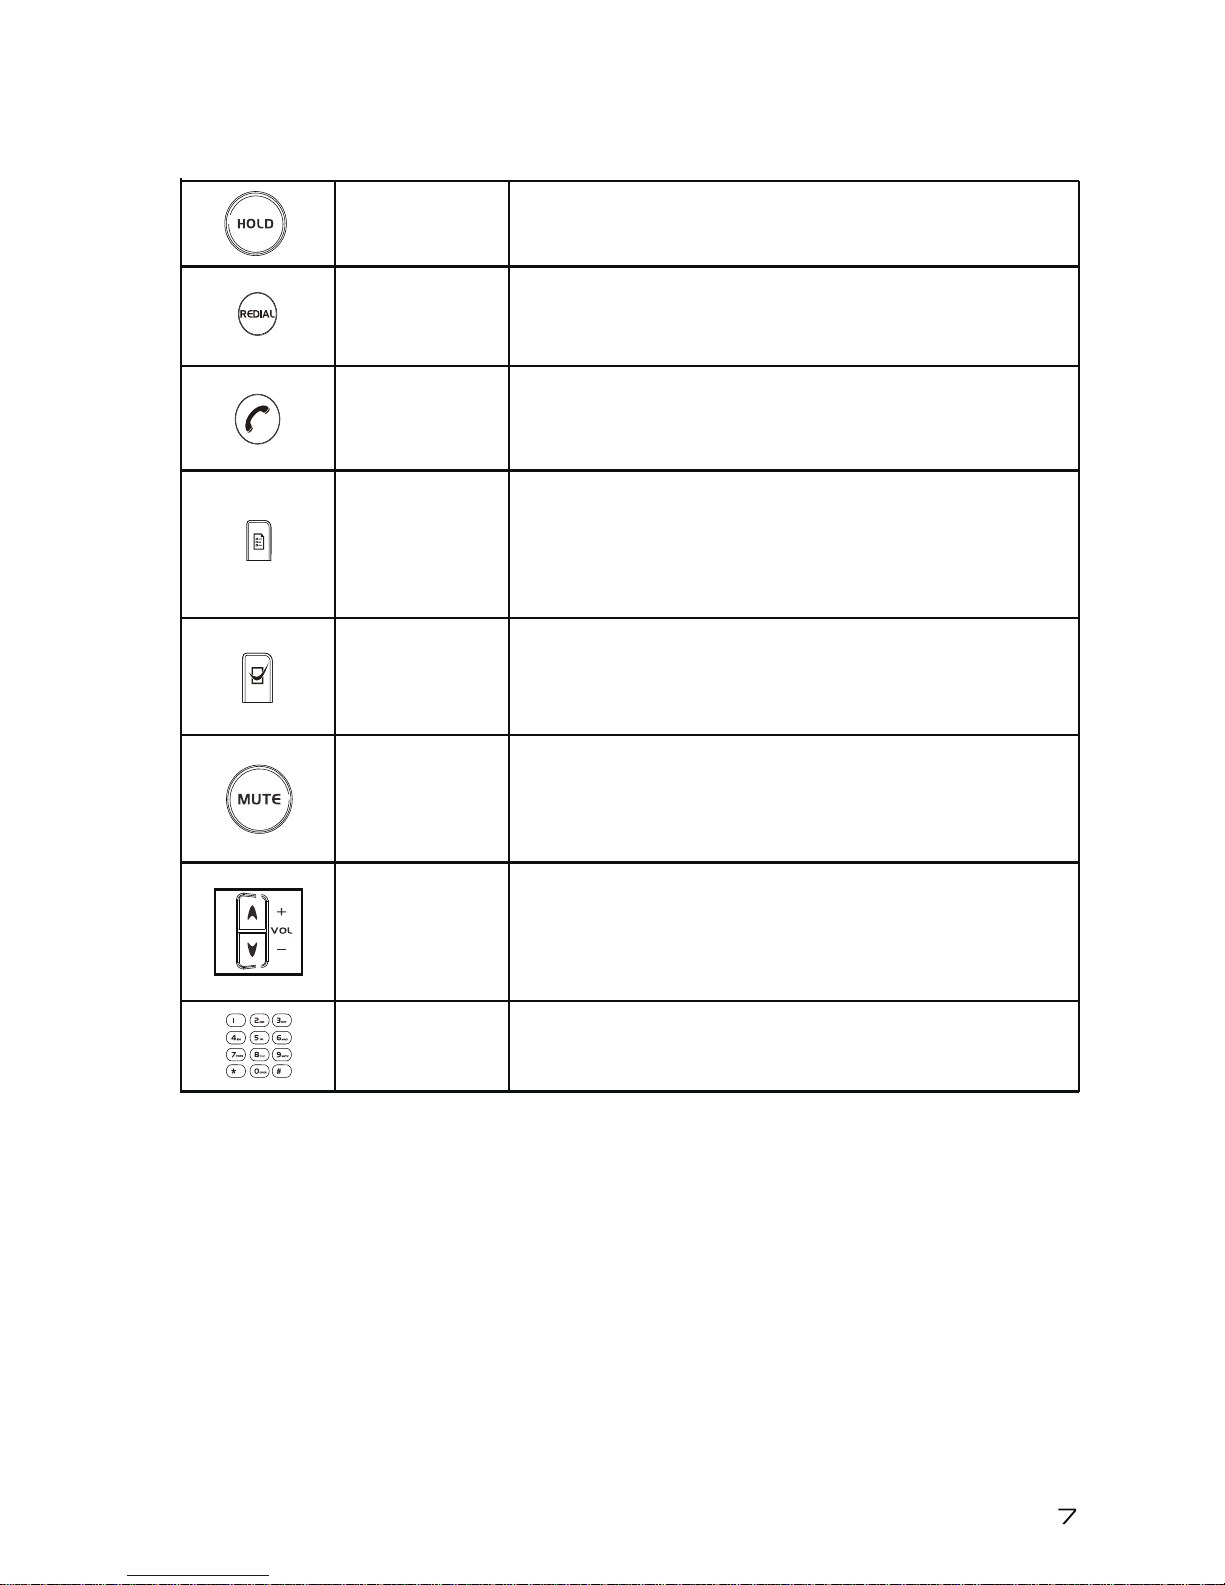
Button and Keypad Functions
HOLD
REDIAL
ON/OFF
MENU
SELECT
MUTE
VOLUME
UP/DOWN
KEYPAD
Put a call on Hold
Redial last call
Redial a number from call history
Answer an incoming call
Dial tone to make outgoing call
Display Menu settings and options
Flash function when on a call
In standby mode, choose a Menu item
Mute the microphones while on a call
In standby mode, delete call history
Adjust speaker volume
In standby mode, browse call history
Alphanumeric keypad
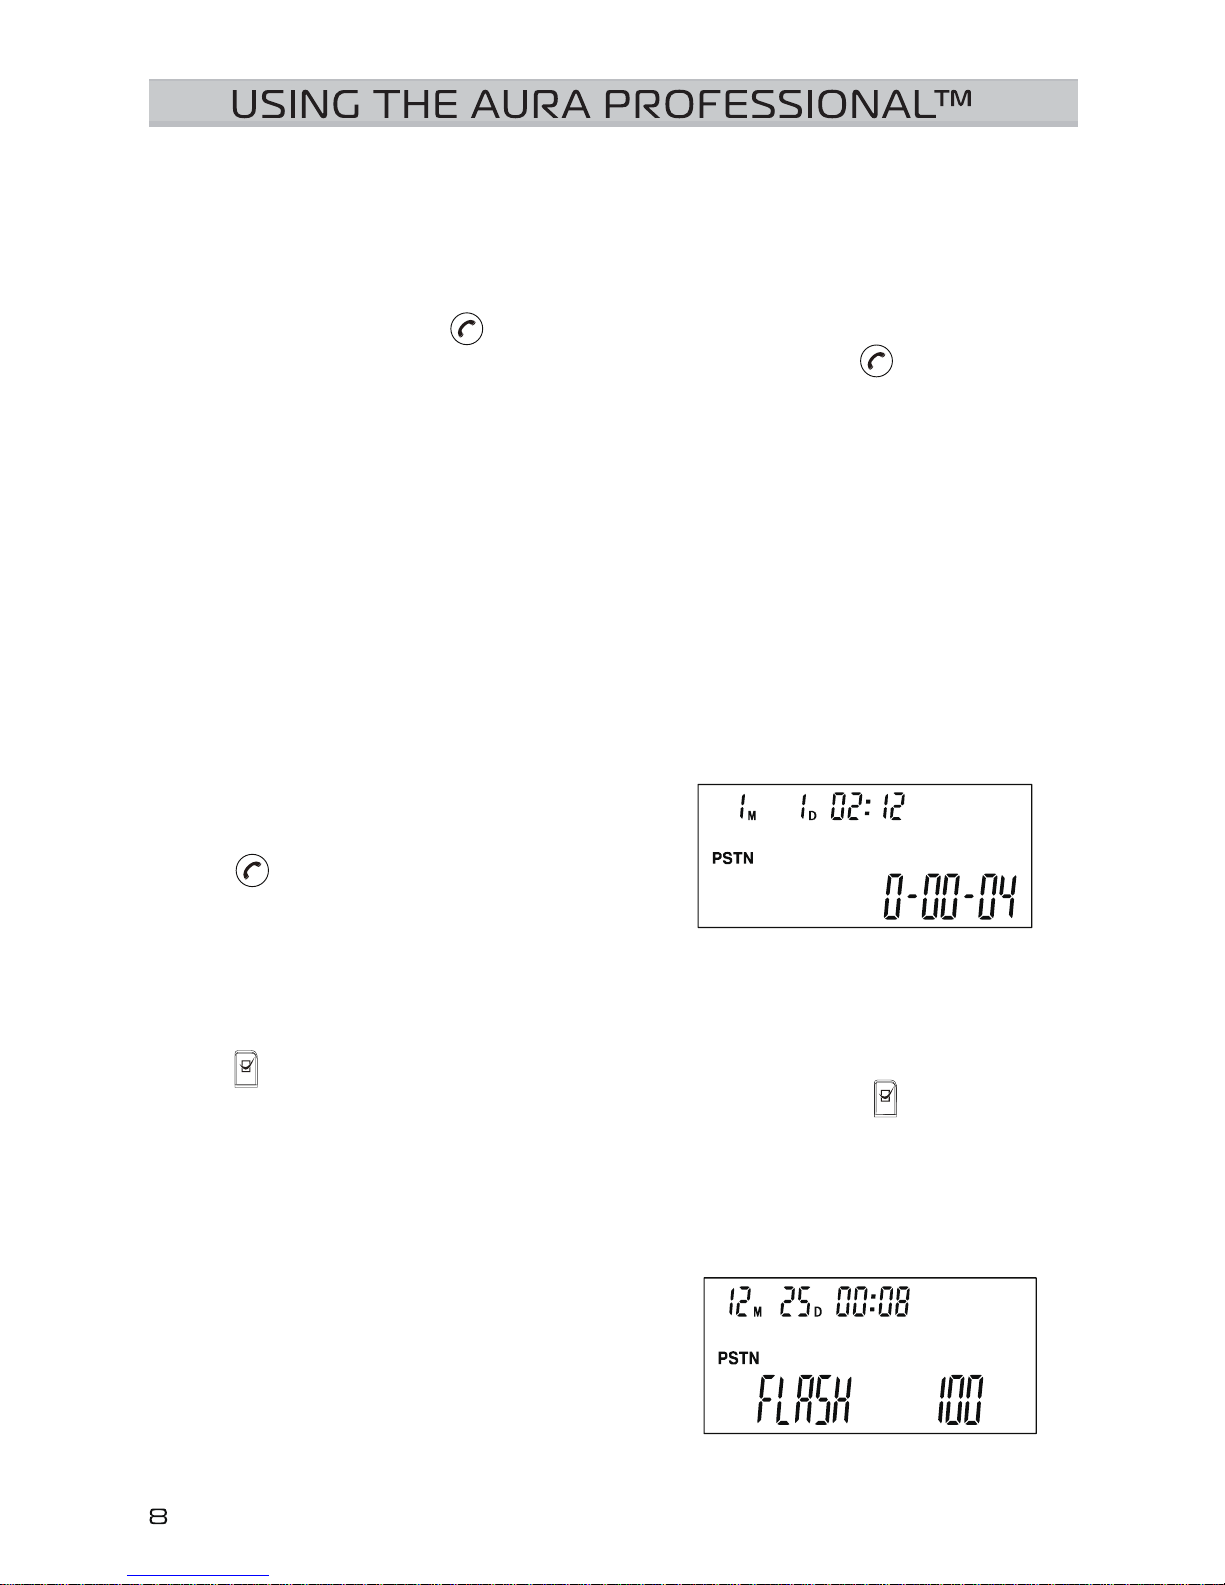
Making a Call
Place a call over an analog (PSTN) line
Direct Dial, Redial, Recall
1. Direct Dial
Press the PHONE button to get a dial tone. Dial the number. To cancel a
call in the process of dialing, press the PHONE button again .
Note: The Blue LEDs are always ON and the LCD shows PSTN on the
display. The microphones will only turn on after you have pressed any
number button in the process of dialing a number.
2. Redial last number
Press the REDIAL button. The last number called will be displayed and dialed.
3. Redial a previously dialed number
While in stand-by mode, press one of the ARROW buttons, up or down, to
display previously dialed numbers on the LCD screen. Use the ARROW up
and ARROW down buttons to scroll through the list until you find the number
you need. Press the REDIAL button and the phone will dial.
Answering a Call
The Red LEDs will blink when the phone
rings for an incoming call. Press the PHONE
button to answer the call. The LCD will
show PSTN.
Answering a Second Call
If there is another incoming call while you are on an existing call, you will
hear the Call Waiting tone. To answer the second call, press the FLASH
button . Your existing call will be placed on hold and you will be
connected to the second call. You can use the FLASH button to switch
between calls.
Note: This feature is based on your PBX system and may or may not be
available. The call waiting feature is also based on your individual system: you
should check with your telephone system administrator or service provider.
Note: By default the FLASH time is set to
600ms.

MUTE
MUTE
MUTE
Ending a Call
To end a call, press the PHONE button .
Call Mute
To Mute a call, press the MUTE button . This will turn the microphone
o. The Red LEDs will blink.
To resume, press the MUTE button again .
Call Hold
To place a call on Hold, press the HOLD button . This will turn o both
the microphone and the speaker. The Blue LEDs will blink.
To resume, press the HOLD button again .
Scrolling Through Call History in Stand-By Mode
Press the up and down ARROW buttons
(VOL + and VOL -) to scroll through the
last 20 dialed and incoming calls.
Deleting Call History in Stand-By Mode
While in Stand-By Mode, press the MUTE
button for 5 seconds to delete the entire
call history.
Call Timer
You can see the length of your call on the
LCD display.
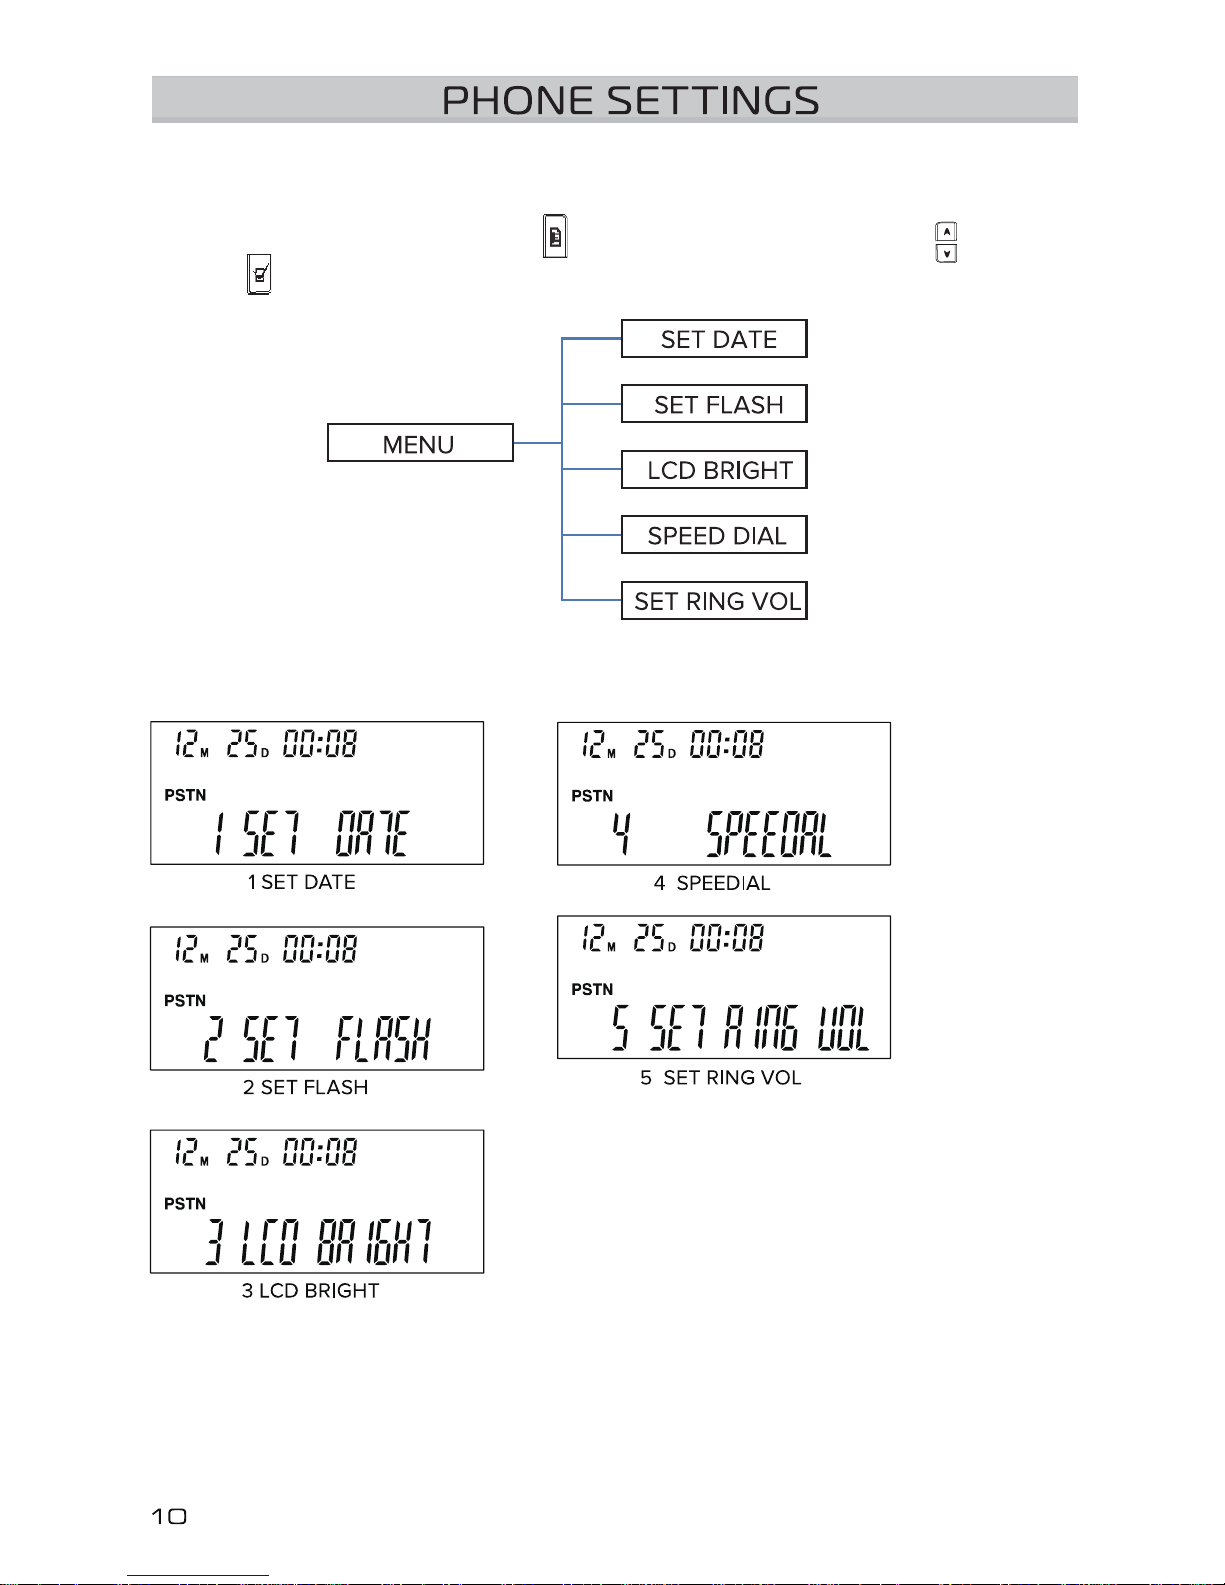
Menu
The Aura Professional™ settings can be accessed using the Keyboard and
Function buttons. Use the MENU , ARROW buttons (VOL+/VOL-) , and
FLASH to navigate through the Menu options and edit settings.
Setting and Editing Menu Functions
1. Set the date
Press the MENU button . The first option on the list is SET DATE. Press the
FLASH button to choose it. When the numbers begin to flash, use the
ARROW Up and Down buttons to set the date. Press the FLASH again
to set.
2. Set the FLASH time (time to switch between 2 calls)
Press the MENU button . Use the ARROW buttons to scroll to the
second option on the list, SET FLASH. Press the FLASH button to choose
it. Options are 90/100/120/180/300/500/600/900ms. Use the ARROW Up
and Down buttons to set the Flash time (Default is 100ms). Press the
FLASH again to set.
3. Adjust LCD Brightness
Press the MENU button . Use the ARROW buttons to scroll to the third
option on the list, SET BRIGHT. Press the FLASH button to choose it. Use
the ARROW Up and Down buttons to choose the LCD brightness level.
Press the FLASH again to set.
4. Speed Dial
Press the MENU button . Use the ARROW buttons to scroll to the fourth
option on the list, SPEEDDIAL. Press the FLASH button to choose it. Use
the ARROW Up and Down buttons to choose the number.
5. Set Ring tone Volume
Press the MENU button . Use the ARROW buttons to scroll to the fifth
option on the list, SET RING VOL. Press the FLASH button to choose it.
Use the ARROW Up and Down buttons to choose the Ring Tone
Volume. Volume has levels 1 to 12: 0 is no Ring Tone. Default setting is 7.
Press the FLASH button to set it.
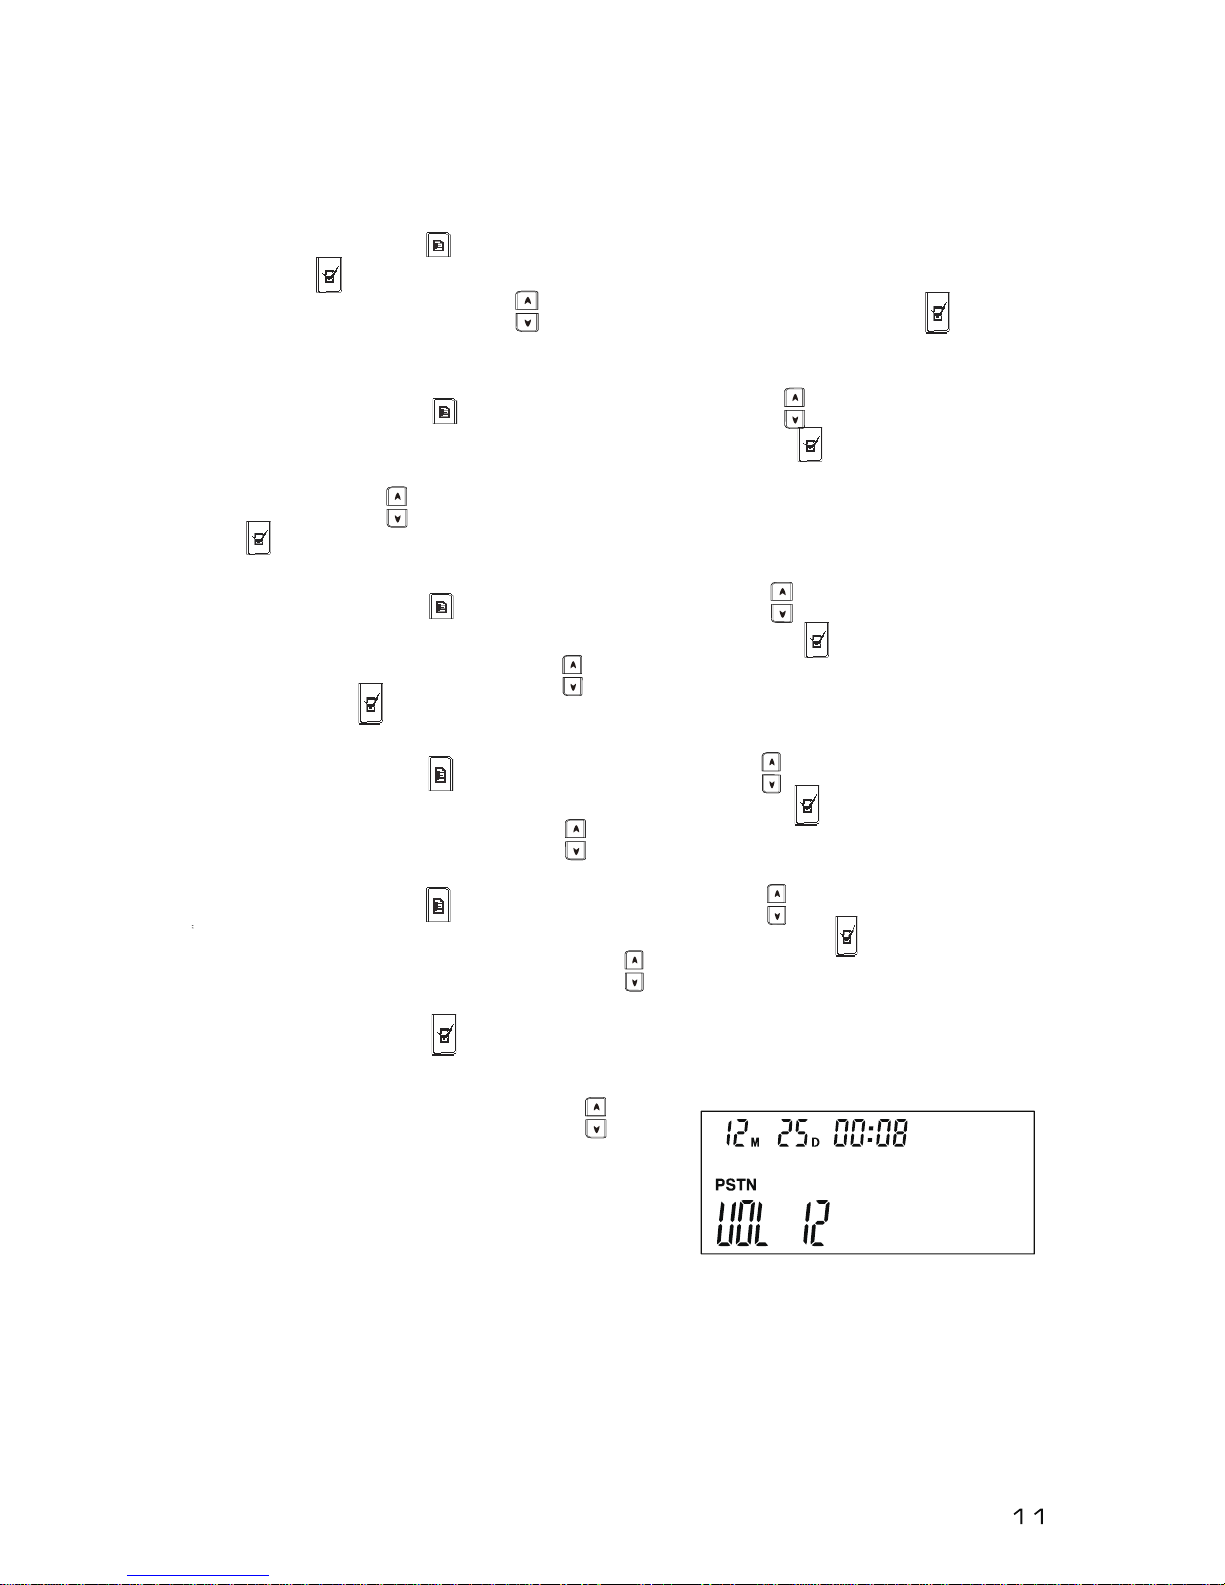
Speaker Volume Adjustment
1. Use the VOL + and VOL - buttons to
adjust the speaker volume while you are on a
call. Settings are from 1 to 12, and the volume
level will be displayed on the LCD screen.
The LEDs will blink Green while you are
scrolling between levels; a Red blinking LED
indicates no more adjustments can be made.
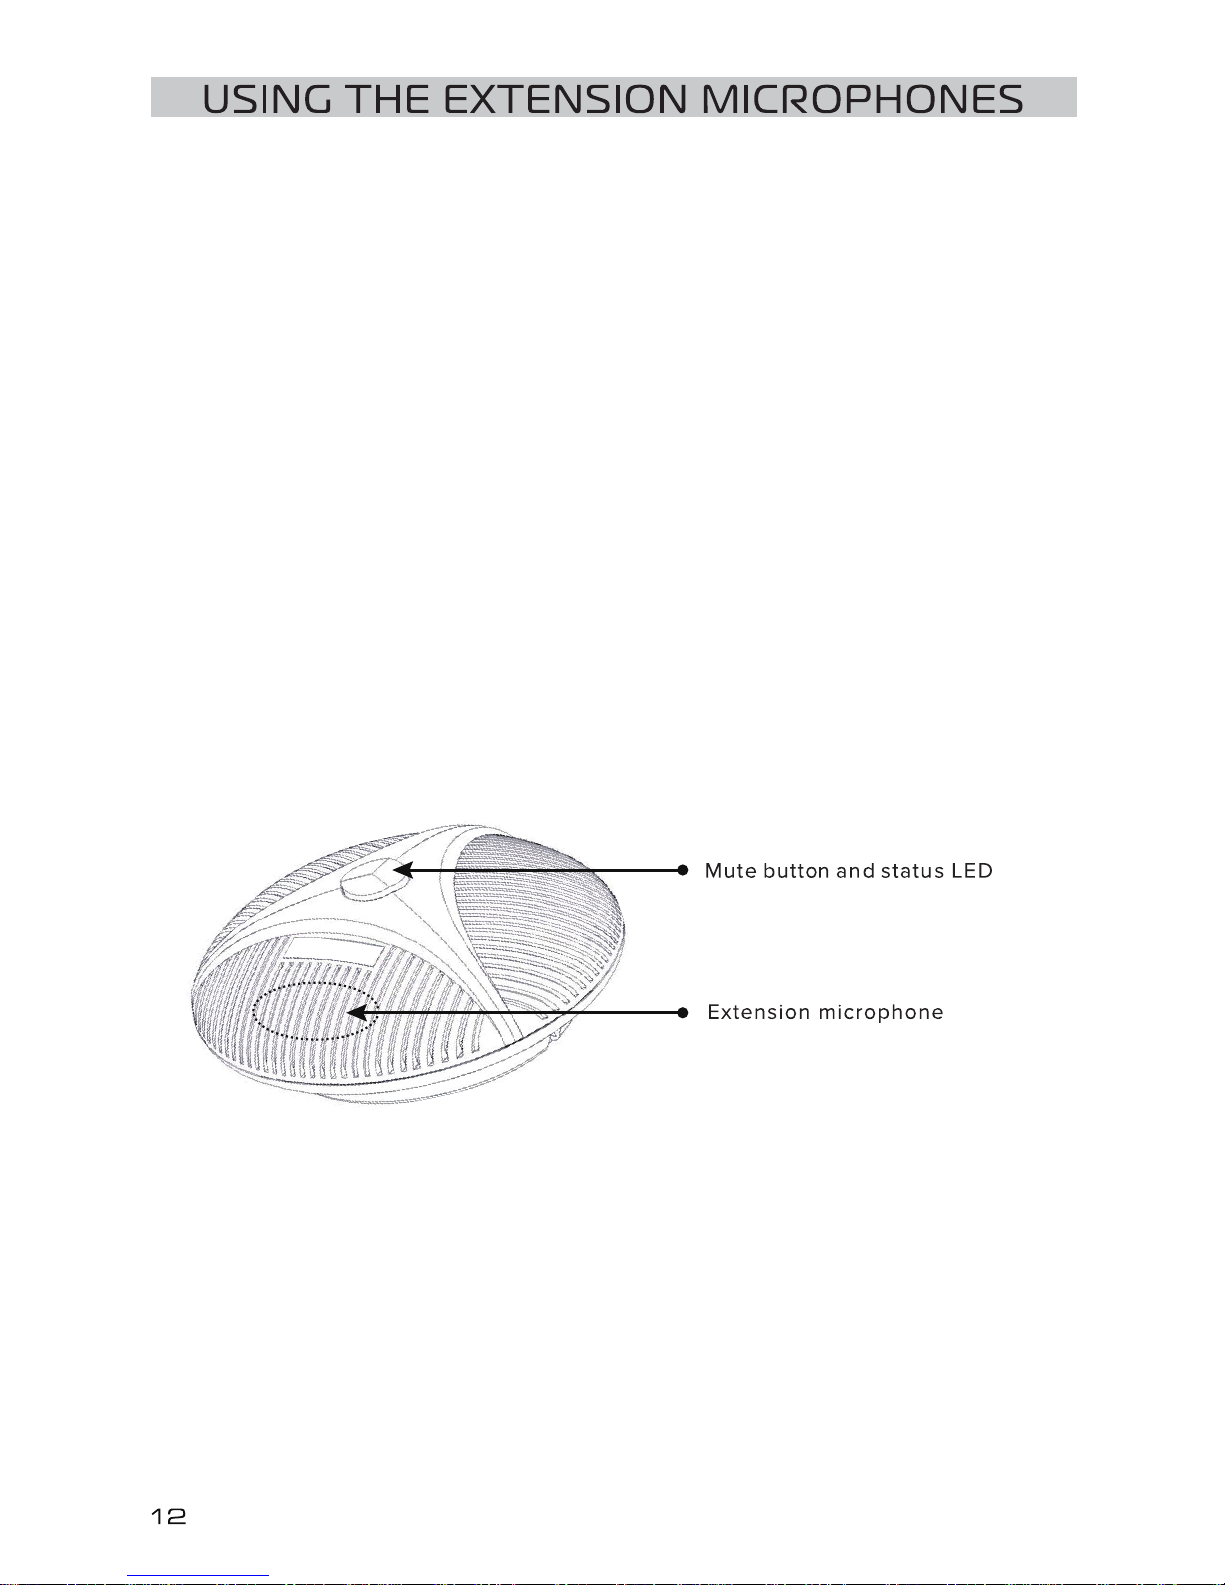
Using the Extension Microphones
1. Before attaching the optional External Microphones, power OFF the Aura
Professional™ Conference Phone by unplugging either the DC INPUT from
the Junction Box or the AC Adapter from the wall.
2. Plug the optional extension microphones cables into the EXT1 and EXT2
jacks of the conference phone. See page 5 for the connection diagram.
2. After the Microphones are installed, restore power to the conference
phone.
3. After the phone is finished booting up, and when you are on a call, the
microphone will pick up your voice the best if you are directly facing it. The
microphone location is shown in the diagram below.
4. There is a MUTE button and a status LED on the extension microphone.
The Green LED indicates the microphone is working.
The Red LED indicates the microphone is muted.

FEDERAL COMMUNICATION COMMISSION STATEMENT
Interference Statement
This device complies with Part 15 of the FCC Rules. Operation of this device is subject to the following
two conditions:
1. This device may not cause harmful interference, and
2. This device must accept any interference received, including interference that may cause undesired
operation.
NOTE: This device has been tested and found to comply with the limits for a Class B digital device
pursuant to Part 15 of the Federal Communications Commissions Rules and Regulations. These limits are
designed to provide reasonable protection against harmful interference when the equipment is operated
in a commercial environment. This equipment generates, uses, and can radiate radio frequency energy
and, if not installed and used in accordance with the instruction manual, may cause harmful interference
to radio communications. However, there is no guarantee that interference will not occur in a particular
installation. If this equipment does cause harmful interference to radio or television reception (which can
be determined by turning the equipment o and on), the user is encouraged to try to correct the
interference by one or more of the following measures:
• Reorient or relocate the receiving antenna.
• Increase the separation between the device and the receiver.
• Connect the device into an outlet on a circuit dierent from that to which the receiver is connected.
• Consult the dealer or an experienced radio/TV technician for help.
RF Exposure warning
This equipment must be installed and operated in accordance with provided instructions and the antenna(s) used for
this transmitter must be installed to provide a separating distance of at least 20 cm from all persons and must not be
co-located or operated in conjunction with any other antenna or transmitter. End users and installers must be provided
with antenna installation instructions and transmitter operating conditions for satisfying RF exposure compliance.
Part 68 Information
This equipment complies with Part 68 of the FCC rules and the requirements adopted by the ACTA. On the underside
of this equipment is a label that contains, among other information, a product identifier in the format
US:AAAEQ##TXXXX. If requested, this number must be provided to the telephone company.
A plug and jack used to connect this equipment to the premises wiring and telephone network must comply with the
applicable FCC Part 68 rules and requirements adopted by the ACTA. A compliant telephone cord and modular plug is
provided with this product. It is designed to be connected to a compatible modular jack that is also compliant. See
installation instructions for details.
The Ringer Equivalence Number (REN) is used to determine the number of devices that may be connected to a
telephone line. Excessive RENs on a telephone line may result in the devices not ringing in response to an incoming
call. In most but not all areas, the sum of RENs should not exceed five (5.0). To be certain of the number of devices
that may be connected to a line, as determined by the total RENs, contact the local telephone company. The REN for
this product is part of the product identifier that has the format US:AAAEQ##TXXXX. The digits represented by ## are
the REN without a decimal point (e.g., 03 is a REN of 0.3).
If the Aura Professional™ Conference Phone causes harm to the telephone network, the telephone company will notify
you in advance that temporary discontinuance of service may be required. But if advance notice isn’t practical, the
telephone company will notify you as soon as possible. Also, you will be advised of your right to file a complaint with
the FCC if you believe it is necessary.
The telephone company may make changes in its facilities, equipment, operations or procedures that could aect the
operation of this equipment. If this happens, the telephone company will provide advance notice in order for you to
make necessary modifications to maintain uninterrupted service.
The Aura Professional™ Conference Phone is not intended to be repaired by the user. If you experience any trouble
with your Aura Professional™ Conference Phone, please contact Spracht at +1 650-215-7500, or at www.spracht.com
for repair and/or warranty information. If the equipment is causing harm to the telephone network, the telephone
company may request that you disconnect the equipment until the problem is resolved.
Connection to party line service is subject to state taris. Contact the state public utility commission, public service
commission or corporation commission for information.
If your home has specially wired alarm equipment connected to the telephone line, ensure the installation of the Aura
Professional™ Conference Phone does not disable your alarm equipment. If you have questions about what will disable
alarm equipment, consult your telephone company or a qualified installer.
NOTE: It is highly recommended that the AC Adapter be plugged in to a surge arrestor, rather than directly into the wall
plug. Telephone companies report that electrical surges, typically lightning transients, are very destructive to customer
terminal equipment connected to AC power sources. This has been identified as a major nationwide problem.
Table of contents
Other Spracht Conference Phone manuals

Spracht
Spracht AURA SOHO CP-2016-007 User manual

Spracht
Spracht Aura Soho User manual

Spracht
Spracht Aura Mobile BT User manual

Spracht
Spracht Voice Center cp-2010 User manual

Spracht
Spracht CP-2016-004 User manual

Spracht
Spracht Aura Professional UC User manual

Spracht
Spracht Voice Center CP-2012 User manual

Spracht
Spracht Aura Soho User manual

Spracht
Spracht Aura Professional CP-3010 User manual


