Sprint Phone User manual

©2011 Sprint. SPRINT and the logo are trademarks of Sprint.
Other marks are the property of their respective owners.
8/1/11
www.sprint.com
User Guide
Sprint Phone Connect

Consejo: Para encontrar esta guía para usuarios en español,
por favor visita a www.sprint.com y haz clic en
Support > Devices.
To find this user guide in Spanish, please visit
www.sprint.com and click Support > Devices.

Table of Contents
Introduction . . . . . . . . . . . . . . . . . . . . . . . . . . . . . . . i
Overview . . . . . . . . . . . . . . . . . . . . . . . . . . . . . . . . . . i
Features . . . . . . . . . . . . . . . . . . . . . . . . . . . . . . . . . ii
Section 1: Getting Started . . . . . . . . . . . . . . . . . 1
1A. Basic Installation . . . . . . . . . . . . . . . . . . . . . 2
Package Contents . . . . . . . . . . . . . . . . . . . . . . . . . . 2
Battery Installation . . . . . . . . . . . . . . . . . . . . . . . . . . 3
Setting Up The Device . . . . . . . . . . . . . . . . . . . . . . . 4
E911 Information . . . . . . . . . . . . . . . . . . . . . . . . . . . . 4
Wall Mount Installation . . . . . . . . . . . . . . . . . . . . . . . 5
LED Indicator Lights . . . . . . . . . . . . . . . . . . . . . . . . . 5
Audio Signal Heard on Phone . . . . . . . . . . . . . . . . 6
Section 2: Device Basics . . . . . . . . . . . . . . . . . . 7
2A. Basic Operation . . . . . . . . . . . . . . . . . . . . . . 8
Power ON / OFF . . . . . . . . . . . . . . . . . . . . . . . . . . . . 8
Activation . . . . . . . . . . . . . . . . . . . . . . . . . . . . . . . . . . 8
Setting Up Your Voicemail . . . . . . . . . . . . . . . . . . . 9
Getting Help . . . . . . . . . . . . . . . . . . . . . . . . . . . . . . 10
Making Calls . . . . . . . . . . . . . . . . . . . . . . . . . . . . . . 10
Answering Calls . . . . . . . . . . . . . . . . . . . . . . . . . . . 11
Reset Settings . . . . . . . . . . . . . . . . . . . . . . . . . . . . 11
TTY/TDD . . . . . . . . . . . . . . . . . . . . . . . . . . . . . . . . . 12
Section 3: Sprint Service . . . . . . . . . . . . . . . . . 13
3A. Advanced Settings . . . . . . . . . . . . . . . . . . 14
Call ID . . . . . . . . . . . . . . . . . . . . . . . . . . . . . . . . . . . 14
Call Waiting . . . . . . . . . . . . . . . . . . . . . . . . . . . . . . . 14
Three-Way Calling . . . . . . . . . . . . . . . . . . . . . . . . . 15
Voicemail Service . . . . . . . . . . . . . . . . . . . . . . . . . 15
Troubleshooting . . . . . . . . . . . . . . . . . . . . . . . . . . . 17
Specifications . . . . . . . . . . . . . . . . . . . . . . . . . . . . . 18
Section 4: Safety and Warranty
Information . . . . . . . . . . . . . . . . . . . . . . . . . . . . . . 19
4A. Important Safety Information . . . . . . . . 20
General Precautions . . . . . . . . . . . . . . . . . . . . . . . 20
Maintaining Safe Use of and Access to Your
Device . . . . . . . . . . . . . . . . . . . . . . . . . . . . . . . . . . . 21
Caring for the Battery . . . . . . . . . . . . . . . . . . . . . . 22
Tip: Looking for something? If you don’t see it in the
headings listed here, try the Index on page 29.

Radio Frequency (RF) Energy . . . . . . . . . . . . . . . 23
Owner’s Record . . . . . . . . . . . . . . . . . . . . . . . . . . . 25
4B. Manufacturer’s Warranty . . . . . . . . . . . . 26
Manufacturer’s Warranty . . . . . . . . . . . . . . . . . . . . 26
Index . . . . . . . . . . . . . . . . . . . . . . . . . . . . . . . . . . . 29

i
Introduction
This User Guide introduces you to Sprint®service and
all the features of your new device. It’s divided into four
sections:
⽧Section 1: Getting Started
⽧Section 2: Device Basics
⽧Section 3: Sprint Service
⽧Section 4: Safety and Warranty Information
Overview
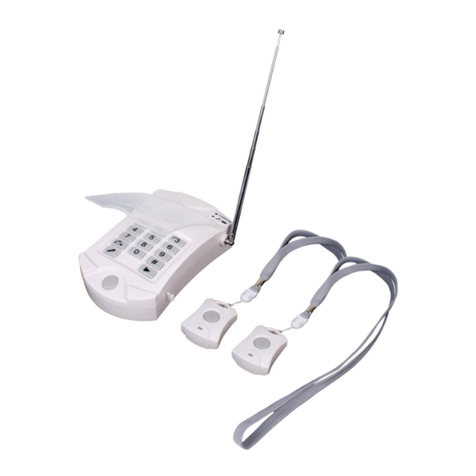
Sprint Phone Connect is a dual-band (800/1900Mhz)
fixed wireless voice device that provides a seamless
service comparable to a land line. Your device is
designed to provide simple, carefree phone service for
a home or business. Your device’s E911 function
accurately relays your location in case of an
emergency. With Sprint Phone Connect, you can
switch from landline to wireless phone service without
losing any of the features and dependability of your
previous landline phone system.
WARNING: Please refer to Important Safety Information
to learn about information that will help you
safely use your device. Failure to read and
follow the Important Safety Information in
this user guide may result in serious bodily
injury, death, or property damage.

ii
Features
䢇TTY/TDD Telephone Support
䢇Multicolored LED Indicators (Signal, Mode and
Power)
䢇2 RJ-11 Bridged Ports (Supports up to Four Phones)
䢇Dual-Tone Multifrequency Generation
䢇Desktop Use or Wall Mounting
䢇Call Waiting, Three-way Calling, and Call Forwarding
䢇Call Restriction, Caller ID, and Call Waiting Caller ID
䢇Over the Air Service Provisioning (IS-683A)

Section 1
Getting Started

2 1A. Basic Installation
⽧Package Contents (page 2)
⽧Battery Installation (page 3)
⽧Setting Up The Device (page 4)
⽧E911 Information (page 4)
⽧Wall Mount Installation (page 5)
⽧LED Indicator Lights (page 5)
⽧Audio Signals Heard on Phone (page 6)
Package Contents
After opening the package, check to make sure that
you have all the parts shown below. If any item is
missing or broken, please contact Sprint Customer
Service.
1. Sprint Phone Connect device
2. Antenna
3. Power Adapter
4. Backup Battery
5. Get Started Guide and Important Information
Booklet (including Terms & Conditions of Service)
6. Stand
7. RJ-11 Phone Cord
1A. Basic Installation
CAUTION: Use only the power adapter provided. Using
another power adapter may cause
permanent damage to your device.

1A. Basic Installation 3
Basic Installation
Battery Installation
Your device operates on either AC current or its internal
battery. However, you should use AC current whenever
possible, reserving the battery for power outages.
1. Open the battery cover on the bottom of the
device.
2. Connect the battery power cable to the device.
3. Insert the battery pack in the right position between
the hold bars.
4. Close the battery cover.

4 1A. Basic Installation
Setting Up The Device
1. Connect the antenna by screwing it into the
connector on the back of the device.
2. Connect a wired or cordless telephone to the
device using the supplied RJ-11 phone cord.
3. Plug the power adapter cable into the device.
4. Plug the power adapter into a wall outlet.
E911 Information
Your device features an embedded Global Positioning
System (GPS) chip necessary for utilizing E911
emergency location services where available. During
the emergency call, all the LEDs on the terminal will
blink and your location can then be determined by the
911 operator.
Note: Use only wired or cordless telephones that conform
to FCC part 68 requirements. Noncompliant
telephones may not work properly.
WARNING: Do not connect this device to your telephone
wall outlet. This configuration is not supported
unless you have taken steps to disconnect
existing landline wiring coming into your
home or office.
Important: Always report your location to the 911 operator
when placing an emergency call. Some
designated emergency call takers, known as
Public Safety Answering Points (PSAPs) may
not be equipped to receive GPS location
information from your device.

1A. Basic Installation 5
Basic Installation
Wall Mount Installation
1. Make two mounting hole guide marks to match the
screw holes on the back of the device.
2. Drill two holes and insert screws (not included) at
the guide marks.
3. Tighten the screws until the heads protrude about
1/4 inch from the wall.
4. Plug in the power adapter cable and run the
power cable inside the groove, if necessary.
5. Connect the antenna. Hang the device on the
screws using the two holes on the back.
6. Push the device down until it securely locks into
place.
LED Indicator Lights
The three LED lights on the front of your device let you
know your device’s status at any given time.
Power – Color
Solid – In battery mode: Fully charged
In AC mode: Connected
Blinking – Charging battery
Solid – Battery low
Blinking – Battery level critically low or error
OFF – Battery missing or defective
Signal – Color
Solid – Strong signal
Solid – Weak signal

6 1A. Basic Installation
Audio Signals Heard on Phone
Mode/MSG – Color
Solid – A phone is off the hook or in use.
Blinking – Incoming call.
Blinking – Voicemail waiting.
E911 Call (AGPS)* – Color
Blinking –During emergency call
Sound Description Remarks
Normal
dial tone
Standard dial
tone
Your device is working
properly.
Voicemail
message
tone
Wavering beep When you receive voice
messages you will hear
this tone. The "MODE"
LED will blink red also.
If you have a voice mail
message waiting when
you need to make a call,
you need to wait for the
dial tone before you can
begin dialing.
No Service
tone
Extended beep Your device is not working
correctly.
Howler
tone
Fast beep Your phone’s handset is
off-hook. Place the
handset back on the
phone to cancel this
sound.

Section 2
Device Basics

82A.BasicOperation
⽧Power ON / OFF (page 8)
⽧Activation (page 8)
⽧Setting Up Your Voicemail (page 9)
⽧Getting Help (page 10)
⽧Making Calls (page 10)
⽧Answering Calls (page 11)
⽧Reset Settings (page 11)
⽧TTY/TDD (page 12)
Power ON / OFF
Power up the device:
1. Make sure the switch on the back of the device is
in the “Off” position.
2. Plug the power adapter into a wall outlet.
3. Plug the power adapter cable into the power
connector on the back of the device.
4. Slide the power switch to the “On” position.
Activation
To activate your Sprint Phone Connect:
1. Turn on your device.
2. The device will begin the activation process.
3. Wait 3—5 minutes for activation to complete.
4. Turn your Sprint Phone Connect off. Wait 10
seconds, and then turn it back on.
2A. Basic Operation
Note: When you turn on the device, at first the Power LED
glows green. It will then remain green or change to
red, depending on the backup battery charge. The
Signal LED will initially be off. Once your device has
acquired a signal, the Signal LED will glow green,
or red, depending on signal strength.
Note: Hands Free Activation ( HFA ) is automatic on this
device. Manual activation is usually not necessary.

2A. Basic Operation 9
Basic Operation
Setting Up Your Voicemail
Your device automatically transfers all unanswered
calls to your voicemail, even if your device is in use or
turned off. You should set up your Sprint Voicemail and
personal greeting as soon as your device is activated.
Always use a password to protect against unauthorized
access.
1. Dial your Sprint voicemail number.
2. Follow the system prompts to:
䢇 Create your password.
䢇 Record your name announcement.
䢇 Record your greeting.
For more information about using your voicemail, see
Voicemail Service.
Note: If you purchased your device at a Sprint Store, it is
probably activated and ready to use. If you
received your device in the mail, it is designed to
activate automatically. To confirm your activation,
make a phone call.
Note: Voicemail Password — Sprint strongly
recommends that you create a password when
setting up your voicemail to protect against
unauthorized access. Without a password, anyone
who has access to your phone is able to access
your voicemail messages.

10 2A. Basic Operation
Getting Help
Manage Your Account
Online: www.sprint.com
䢇Access your account information.
䢇View and pay your bill.
䢇Enroll in Sprint online billing and automatic
payment.
䢇Purchase accessories.
䢇Shop for the latest Sprint phones.
䢇View available Sprint service plans and options.
From Any Phone
䢇Sprint Customer Service: 1-888-211-4727.
䢇Business Customer Service: 1-888-788-4727.
For more information or to see the latest in products
and services, visit us online at www.sprint.com
Making Calls
1. Make sure the device is turned on.
2. Lift the handset on any connected phone. You
should hear a dial tone.
3. Dial a number as your usually would.
4. Wait for about three seconds while your device
connects with the number you dialed.
Note: You can dial phone numbers with a maximum
of 32 digits, including and .

2A. Basic Operation 11
Basic Operation
Answering Calls
When connected to your Sprint Phone Connect, your phone
will ring exactly as if would it connected to a landline.
䢇Lift the handset on any connected phone to answer
a call.
Reset Settings
Default Reset
If you want to clear any changes you have made to
your Sprint Phone Connect’s settings and reset it to the
default settings:
1. Lift the handset on any connected phone.
2. Press .
3. Enter the four-digit lock code (default is “0000”).
4. Press to reset. You will hear an error tone if the
reset was unsuccessful.
Activation Reset
To reset your device’s activation over the Sprint network:
1. Lift the handset on any connected phone.
2. Press .
3. Enter the six-digit MSL code. (The default code is
“000000.”)
4. Press to reset.
PRL Update
This feature can be used to update your device’s PRL
(preferred roaming list).
1. Lift the handset on any connected phone.
2. Press .
3. Enter “0000.”
4. Press to update your PRL. If the update was
unsuccessful, you will hear an error tone.
Note: Be sure your device shows it is getting a strong
signal when you update your PRL.

12 2A. Basic Operation
TTY/TDD
Mode Setting
Configure your device for TTY use. The default setting
is OFF.
䢇Lift the handset on any connected TTY/TDD phone
and choose one of the following options:
•Press for TTY Full
Mode.
•Press for TTY Talk
Mode.
•Press for TTY Hear
Mode.
•Press to turn TTY
off.
Note: Visit www.sprint.com for detailed information about
using TTY.

Section 3
Sprint Service

14 3A. Advanced Settings
⽧Call ID (page 14)
⽧Call Waiting (page 14)
⽧3-Way Calling (page 15)
⽧Voicemail Service (page 15)
⽧Troubleshooting (page 17)
⽧Specifications (page 18)
Call ID
Caller ID allows people to identify a caller before
answering the phone by displaying the number of the
incoming call. If you do not want your number
displayed when you make a call, follow these steps.
1. Press .
2. Enter a phone number.
To permanently block your number, call Sprint
Customer Service.
Setting Caller ID Mode
If the phone you have connected to your Sprint Phone
Connect has an LCD display, the caller's number will
appear by default. To change this setting:
䢇Lift the handset of any connected phone.
•Press to disable the
Caller ID feature.
•For FSK (frequency shifting keying) type phones,
press to re-enable
Caller ID.
Call Waiting
When you’re on a call, Call Waiting alerts you to
incoming calls.
To use call waiting:
1. When you hear a beep from the receiver on any
connected phone during a call, it means a second
caller is trying to connect.
3A. Advanced
Settings
Note: FSK is the device default.
Table of contents
Other Sprint Telephone manuals

