manuals.online logo
Brands
  1. Home
  2. •
  3. Brands
  4. •
  5. SPT
  6. •
  7. Dehumidifier
  8. •
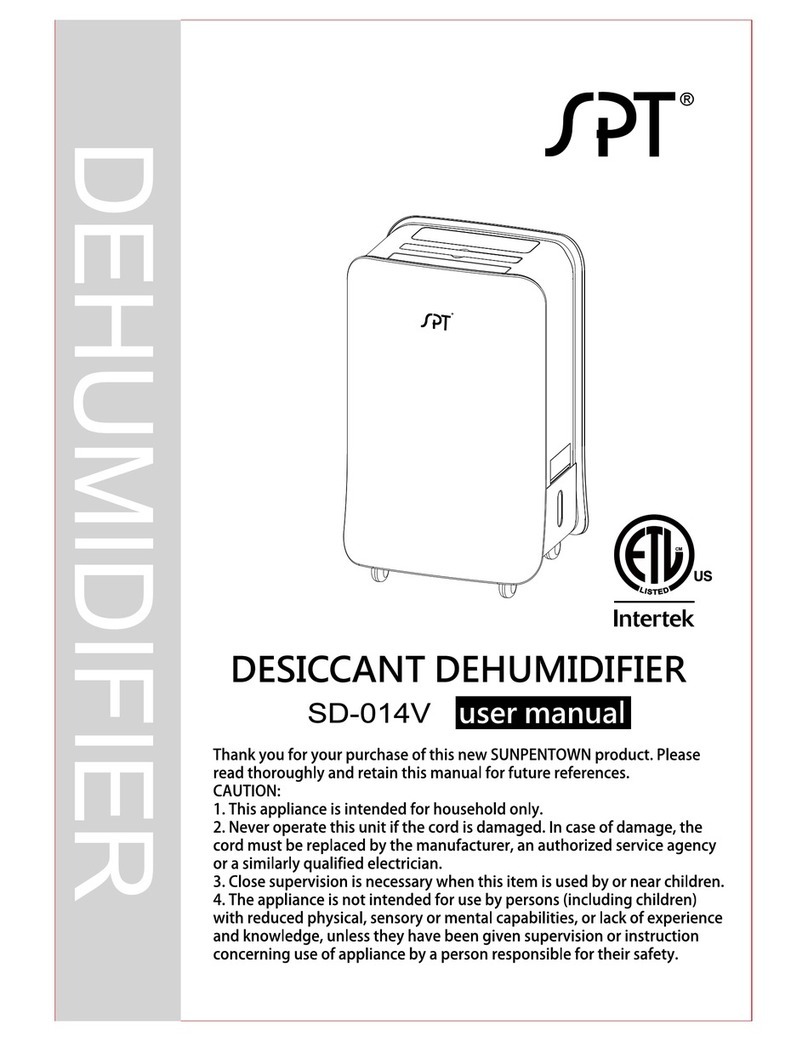
  9. SPT SD-014V User manual

SPT SD-014V User manual

Intertek
DESICCANT DEHUMIDIFIER
SD-O14V
Thank you for your purchase of this new SUNPENTOWN product. Please
read thoroughly and retain this manual for future references.
CAUTION:
1. This appliance is intended for household only.
2. Never operate this unit if the cord is damaged. In case of damage, the
cord must be replaced by the manufacturer, an authorized service agency
or a similarly qualified electrician.
3. Close supervision is necessary when this item is used by or near children.
4. The appliance is not intended for use by persons (including children)
with reduced physical, sensory or mental capabilities, or lack of experience
and knowledge, unless they have been given supervision or instruction
concerning use of appliance by aperson responsible for their safety.
Pleasereadallinstructionsbeforeusingthisproduct.Savetheseinstructionsfor
easyreference.Whenusingelectricalappliancesbasicprecautionsshouldalways
befollowedtoreducebreakage,riskoffire,electricshockandinjurytopersons
includingthefollowing:
•Readall instructions before operating the dehumidifier.
• Place unit where it is not easily knocked over by persons in the household.
• ALWAYS switch unit off when not in use and before unplugging.
• ALWAYS unplug unit before servicing.
• ALWAYS allow unit to stand upright.
• DO NOT use any product with a damaged cord or plug, or if product
malfunctions, isdropped or damaged in any manner.
• DO NOT use unit at the following locations:
- Next to or near a heating source
- Where combustible gases or vapors are present
- Outdoors, or where may expose unit to rain
- Area where oil or water is likely to splash
- Under direct sunlight
- Near a bath, shower or swimming pool
- Greenhouse.
• NEVERuse unit unless it isfully assembled.
• DO NOT use unit without the filter installed.
• DO NOT run power cord under carpets and DO NOT cover with throw rugs.
Arrange cord so it will not be tripped over.
• DO NOT allow foreign objects to enter unit, as this may cause electric shock or
damage to the dehumidifier.
• Place unit near a power outlet and avoid using an extension cord.
• DO NOT block, nor cover the air inlet and outlet of unit.
• The dehumidifier has a polarized plug (one blade is wider than the other). To
reduce the risk of shock, this plug is intended to fit in a polarized outlet only one
way. If the plug does not fit fully in the outlet, reverse the plug. If it still does not
fit, contact qualified personnel to install the proper outlet. DO NOT try to alter the
plug in any way.
• A loose fit between the plug and the AC outlet (receptacle) may cause
overheating and distortion of the plug. Contact a qualified electrician to replace
loose or worn receptacles.
• DO NOT sit, stand on, or place heavy objects on unit.
WARNING!To reduce the riskof fire or electric shock, DO NOTuse this product with any
solid-state speed control device.
Air Intake
30cm(12in)
60cm (24in)
Air Outlet
HHIHwuH11'
JDDD_DDO_
40cm (16in)
30cm (12in)
30cm (12in)
Only run unit on a flat surface. Keep unit away from walls and furniture
with the safety distances instructed above, so the operation of the unit
won' t get obstructed.
A.ControlPanel
B.Handle
C.AirOutlet
D.WaterTank
f_T °
E.Air Intake
F.Casters
G. Filter Set
H. Power Cord
JG
6 7
4 3 2 1
i. ON/OFF Button: Pressonce to turn on unit, press again to turn off.
NOTICE: This product uses heating system. After powering off, the fan
continues to run for an additional 2 minutes before completely shutting off.
This isto exhaust remaining heat inside the unit.
2. HUMIDITY Button: Pressthe button to select desired humidity.
A. 60% - A normal and comfortable humidity for most human bodies.
B. 50% - Drier but still acceptable.
C.40% - Providing dry air, preventing winter dewdrops on walls or windows.
D. Continuous- Unit continuously removes moisture from the air (allthree
HUMIDITY LEDlights are off). This isthe default setting.
Note: When adesired humidity isselected and the target humidity has been
reached, unit will go into STANDBYmode.
3. SPEED Button: Pressto change fan speed and heating output.
A. HIGH: Fanoperates at high speed with full 600W heating output.
B. MED: Fanoperates at med speed with 400W heating output.
C. LOW: Fanoperates at low speed with 200W heating output.
D. AUTO: Default setting. Under AUTO mode, unit automatically adjusts fan
speed (aswell asheating output) based on the present relative humidity.
With different target of humidity selected, the AUTO mode works differently
as shown in the following table.
AUTOmodeinstructiontable
60%
5O%
40%
Con_nuous
Above 80% 80%~71%
Above 70% 70%~61%
Above 60% 60%~51%
Above 60% 60%~51%
70%~61% 60% and below
60%~51% 50% and below
50%~41% 40% and below
50% and below X
NOTICE:
• Under CONTINUOUS mode (no desired humidity selected), unit
continues to run at LOW speed after the relative humidity reaches
50%. Unit does not go into standby mode.
• Standby mode: Both fan and heater stop operation. Without the
water tank being full or unit shut off due to set time, the fan will
come on once every hour to detect the humidity.
• In any condition, once the room temperature hits 109°E the heating
system automatically shuts-off until cool down.
4. TIMER Button: Pressthe button to set up an operation period for unit. Timer
can be setfrom I through 7 hours (accumulated by 1,2,4 hours).
5. FILTERRESETButton: When unit' s VOC removing filter reachesI year
lifespan,the LEDlight illuminates as reminder to replacefilter. After replacing
the filter, press and hold the button for 3 secondsto turn off the LEDlight and
resetthe lifespan counter.
6. FULLLight: Bucket full indicator. This light illuminates when unit' swater tank
isfull and needs to be emptied. Unit will automatically stop operation. Carefully
remove water tank and dispose water. Replace the tank and unitwill resume
operation at previous setting.
7. CHECK Light: Abnormal status indicating light. When the CHECKlight is on,
please check ifunit issitting on a fiat surfaceor ifthere' sanything blocking
the air intake/outlet area. To turn offthe CHECKlight, carefullycheck unit' s
statusand reconnect the power cord to the electric outlet.
I WATERTANK ]
• When water tank isfull, unit will stop operation and the full bucket indicating
light (FULL LED)will illuminate.
• Never remove the water tank while unit is in operation.
Gently pull the water tank out
and hold it with two hands to
remain balanced,
Pour the water out.
Replace the tank and unit will
resume operation at previous
setting,
CONTINUOUSDRAINAGE]
[WARNING] Topreventthe riskof electricshock,make sureto turn offthe power
and unplug the unit beforemodifying the water tank for continuousdrainage.
• Remove water tank.
• Use ascrew driver or other applicable tools to carefully remove the plastic drain
hole cover located at the bottom left of unit.
• Remove the rubber plug of the tank and connect the tank' sdrain hole with
hose. Carefully keep the rubber plug for future applications of the tank.
• Run the other end of the hose inside out through unit' s drain hole and replace
water tank.
Water tank
Drain hole
_ Rubber plug
Drain hose installation view A
Drain hose installation view B
NOTICE: Under continuous drainage, the water tank must remain properly installed
for unit to operate.
When unit' sVOC removing filter reaches the 1year lifespan, the FILTERRESET' s
LEDlight illuminates as reminder to replace filter. Please follow instructions below
for filter replacement:
1.Turn off and unplug
the dehumidifier
2.Release the filter set
3.Carefully remove the PPfilter
from the filter frame,then remove
and discard the old VOC filter.
/
4.Unpack and install the
new VOC filter to the
filter frame.
5,Reposition the PPfilter. &Replace the filter set.
After the new filter is properly installed (step 6), press and hold the button for 3
seconds to turn off the LEDlight and to reset the lifespan calculation.
[WARNING] To prevent the risk of electric shock, always turn off the power and
unplug the unit before servicing.
Aside from the regular VOC filter replacement, please inspect the PP mesh filter
periodically to remove dirt build-ups. This is to ensure performance of the unit
and to prevent safety concerns.
Removethe filter setand
takeout the VOCfilter
_\f \,
\ J
Carefully wash the PP filter and filter frame with
warm water or clean by a vacuum with low speed
If your unit gets dirty from the outside, you can always use a soft damp cloth to
gently wipe the external surface. DO NOT pour or splash water on the unit or use
abrasive cleaners.
........\j f_T
_Y
Model SD-O14V
Type Desiccant Dehumidifier
Working Temp 33.8OF~104OF
Range
Input voltage AC 120V/60Hz
Capacity 12 pints/day (80°1:, RH 60%)
Power 615W at high speed
Consumption
Water Tank Size 8.45 pints
Fan Speed High, Med, Low, Auto
Humidity Setting 40%, 50%, 60%, Continuous
Off-Timer 1~7 hours
Filter System Plastic Pre-filter, Aluminum VOC filter
Tip-over auto shut-off
Safety System Full bucket auto shut-off
Overheat auto shut-off
Fully portable with handle and casters
Others Filter change reminder for VOC filter
Drain hose connection (hose included)
Dimension 13.5 x 11.3 x 21.9 inches
Unit weight 18.5 Ibs
10
If this product is found to be faulty as a result of faulty materials or workmanship
within one year from date of purchase, it will be repaired free of charge.
This guarantee issubject to the following terms:
•Sunpentown must be notified of the fault.
• Proof of purchase must be presented toSunpentown' s nominated
representative.
•The warranty will be void if the product is modified, misused or repaired by an
unauthorized person.
•The warranty after repair will not be extended beyond the original one-year
period.
•All replacement parts will be new or reconditioned.
• Parts,which are replaced, become the property of Sunpentown.
•The warranty applies for the use of the product in the USAonly.
What is NOT COVERED:
• Warranty does not include freight charges.
•Incidental or consequential damage caused by possible defects with this
product.
• Damage to product caused by improper power supply voltage, accident, fire,
floods or acts of nature.
• Failureof product resulting from unauthorized modifications to the product.
•Improper installation or failure to perform the necessary maintenance.
This GUARANTEEis in addition to your Statutory Rights
SUNPENTOWN INTERNATIONAL INC.
14625 Clark Ave, City of Industry, CA 91745
Tel:1-800-330-0388
[email protected]
www.sunpentown.com

Other manuals for SD-014V

1

Other SPT Dehumidifier manuals

SPT SD-31E User manual

SPT

SPT SD-31E User manual

SPT SD-014V User manual

SPT

SPT SD-014V User manual

SPT SD-31E User manual

SPT

SPT SD-31E User manual

SPT SD-350TI User manual

SPT

SPT SD-350TI User manual

SPT SD-30E User manual

SPT

SPT SD-30E User manual

SPT SD-30E User manual

SPT

SPT SD-30E User manual

SPT SD-46 User manual

SPT

SPT SD-46 User manual

SPT SD-46 User manual

SPT

SPT SD-46 User manual

SPT SD-65E User manual

SPT

SPT SD-65E User manual

Popular Dehumidifier manuals by other brands

Dorosin ERS-860L user manual

Dorosin

Dorosin ERS-860L user manual

Haier HD-1003 Operation manual

Haier

Haier HD-1003 Operation manual

Demargo DM1020NF Instructions for installation and operation

Demargo

Demargo DM1020NF Instructions for installation and operation

Broan B98DHV Installation & operation instructions

Broan

Broan B98DHV Installation & operation instructions

Gree 13-06090 owner's manual

Gree

Gree 13-06090 owner's manual

Mycond DESS-80 Manual instruction

Mycond

Mycond DESS-80 Manual instruction

GE ADEL30 owner's manual

GE

GE ADEL30 owner's manual

Wood’s WPF100 operating instructions

Wood’s

Wood’s WPF100 operating instructions

thermastor Santa-Fe Classic Installer's & owner's manual

thermastor

thermastor Santa-Fe Classic Installer's & owner's manual

thermastor Santa-Fe 4021400 Installer's & owner's manual

thermastor

thermastor Santa-Fe 4021400 Installer's & owner's manual

Amana D965E Use & care guide

Amana

Amana D965E Use & care guide

EUROM LO10.100H Instruction booklet

EUROM

EUROM LO10.100H Instruction booklet

izzy Avra IZ-9050 instruction manual

izzy

izzy Avra IZ-9050 instruction manual

Kenmore 580.53650 owner's manual

Kenmore

Kenmore 580.53650 owner's manual

Toshiba TDDP5012ES2C Owner's manual & installation manual

Toshiba

Toshiba TDDP5012ES2C Owner's manual & installation manual

Vortice DEUMIDO COMPACT Instruction booklet

Vortice

Vortice DEUMIDO COMPACT Instruction booklet

INVENTOR EP3-ION16L user manual

INVENTOR

INVENTOR EP3-ION16L user manual

Keystone KSTAD50B owner's manual

Keystone

Keystone KSTAD50B owner's manual

manuals.online logo
manuals.online logoBrands
  • About & Mission
  • Contact us
  • Privacy Policy
  • Terms and Conditions

Copyright 2025 Manuals.Online. All Rights Reserved.