Spy-Shop CAMZ16 User manual


www.SPY-SHOP.COM
Quick guide
1) Charge the device using AC or car adapter.1) Charge the device using AC or car adapter.
2) Do Insert a SD card and turn on the device by pressing " ON / OFF "- flashes 2) Do Insert a SD card and turn on the device by pressing " ON / OFF "- flashes 2) Do Insert a SD card and turn on the device by pressing " ON / OFF "- flashes 2) Do Insert a SD card and turn on the device by pressing " ON / OFF "- flashes
The green LED and the camera begins recording automatically (if you notice a device
different color LEDs, see its importance to the No.4)
3) The camera can be set to three modes - tracking mode, movement mode and custom 3) The camera can be set to three modes - tracking mode, movement mode and custom
regime. You can change only when the camera is turned off. Make the change lever on the side of the device (see.
The description on page No.2)
For custom setting mode, you need to install it on your PC program called " widget ". The program For custom setting mode, you need to install it on your PC program called " widget ". The program For custom setting mode, you need to install it on your PC program called " widget ". The program
can be downloaded on the www.zetta.com.hk (see. Page # 6)
4) You can watch the recorded video on your PC using the included USB cable, 4) You can watch the recorded video on your PC using the included USB cable,
or by inserting the SD card.
Detailed manual
First Package contentsFirst Package contents
•The main camera
•USB cable
• AC adapter
• User manual
Second product descriptionSecond product description

www.SPY-SHOP.COM
Third FunctionThird Function
•Loop record - after filling the card overwrites the recorded image
•Timestamp - timestamp inserted into the video,
• Detection of vibration - will start recording only when recorded vibrations
•Motion detection - Recording starts only when movement is detected.
•Voice Activity Detection - Recording starts only when the recorded voice
• Automatic mode - you can choose different scenarios auto on / off,
•Day or Night mode - You can choose day or night mode as needed.
•Automatic file distribution without gaps - split a file without spaces during every 10/15/20 minutes
of recording,
•Orientation - use when turning the camera upside down,
•Resolution - the choice 1280720 resolution (720p) or 640x360 (360p) video and audio
• Setting the frame rate - setting frame rate reduction, to save memory on the card,
• Configurable video quality - fast / medium / slow.
4th charging4th charging
The camcorder comes with an internal rechargeable battery. If you use the camera for the first time or have not
used it for a long time is needed to fully charge the battery at least 6 hours and then set the current date and
time in the widget (see. " Program widget for PC '). You can charge the camera via USB cable to your PC time in the widget (see. " Program widget for PC '). You can charge the camera via USB cable to your PC time in the widget (see. " Program widget for PC '). You can charge the camera via USB cable to your PC
using the AC adapter or car charger.
Charging via USB
Connect the device to your PC using the supplied USB cable. Once connected to a PC the device will function as a
mass storage device. If the device is connected to a PC camera function is not available.
Charging using the AC or car adapter
Connect your device using the included USB cable, and then insert the USB cable into a car adapter.
For network charging, connect the device using an AC adapter. During charging via AC adapter and car
camera functions available.
www.SPY-SHOP.COM
5th recording5th recording
Turn on the camera by pressing " ON / OFF "(Pg. Description on page No.2) Turn on the camera by pressing " ON / OFF "(Pg. Description on page No.2) Turn on the camera by pressing " ON / OFF "(Pg. Description on page No.2)
start recording
Hold " ON / OFF "Until the green LED (approximately 2 seconds). The camera starts recording Hold " ON / OFF "Until the green LED (approximately 2 seconds). The camera starts recording Hold " ON / OFF "Until the green LED (approximately 2 seconds). The camera starts recording
immediately, the green LED blinks slowly.
end of recording
To end recording, hold " ON / OFF "Until the green LED goes out. To end recording, hold " ON / OFF "Until the green LED goes out. To end recording, hold " ON / OFF "Until the green LED goes out.
TIP: Always before removing the SD card, turn off the device. TIP: Always before removing the SD card, turn off the device.
6th LED - explanations6th LED - explanations
Without connecting the adapter
• Green LED - the camera is turned on,
•Red LED lights up - the lack of an SD card, the card is bad, the card is full, the battery is discharged,
•The green LED flashes - camera recording,
• Intermittent flashing green / red LED - battery is low on record.
With the adapter connected
•Orange LED diode - the device is charging, but does not record,
•Green LED - the device is fully charged, the camera does not record,
•Blinks amber / green LED - the device is charging and the camera is recording.
•Flashing green LED - the device is fully charged and the camera is recording.
• Red LED - SD card is missing, the card is bad, the card is full.
The connection to the PC
•Orange LED diode - the device is charging.
• Green LED - the device is charged.

7th regime change7th regime change
The camera can be set to three modes - tracking mode, movement mode and custom mode.
Make the change button on the side of the device.
TIP: For custom setting mode, you need to install on your PC a program called " widget ". The program can be TIP: For custom setting mode, you need to install on your PC a program called " widget ". The program can be TIP: For custom setting mode, you need to install on your PC a program called " widget ". The program can be TIP: For custom setting mode, you need to install on your PC a program called " widget ". The program can be
downloaded on the page www.zetta.com.hk
Properties modes (presets custom mode is indicated in parentheses):
tracking
mode
moving mode custom mode
video quality high high (High) / Medium / Low
Distinction 640x360 1280720 1280x720 / (640x360)
fps high high (High) / Low
Interior lighting 50Hz 50Hz (5OHz) / 60Hz
Day / night
regime
Daily Daily (Daily) / Night / Automatic
switching
Orientation Normal Normal (Normal) / Upside down
timestamp Allowed Allowed (Allowed) / Disabled
loop
recording
Allowed Allowed (Allowed) / Disabled
The time length of
the recording
20min 15min 10min / (15min) / 20min
LED turned turned (On) / off
The
sensitivity of
voice control
prohibited prohibited High / Medium / Low / (Disabled)
sensitivity control
vibration
unavailable unavailable High / Medium / (Low) / Disabled
Standby
vibrations
unavailable unavailable Quick awakening / (Investigations
energy)
detection sensitivity
motion
prohibited Medium High / Medium / Low / (Disabled)
Automatic on /
off
prohibited prohibited Scheduled recording / Vehicle in
motion / Stationary vehicle /
moving and stationary
vehicle / (Forbidden)
TIP: For longer recording time, select a lower quality video recording 640x360. TIP: For longer recording time, select a lower quality video recording 640x360.

When the camera is connected to the vehicle using the car adapter, you can select the following auto on /
off:
Vehicle in motion: Recording starts automatically when the vehicle is in motion as soon as the vehicle Vehicle in motion: Recording starts automatically when the vehicle is in motion as soon as the vehicle
stops, recording stops.
Stationary vehicle: The camera automatically records when the vehicle is stationary, while the vehicle is in motion to stop Stationary vehicle: The camera automatically records when the vehicle is stationary, while the vehicle is in motion to stop
recording.
The vehicle in motion and stationary vehicle: The camera is automatically recorded as the vehicle moves and when the vehicle stops. The vehicle in motion and stationary vehicle: The camera is automatically recorded as the vehicle moves and when the vehicle stops.
TIP: If the camera is already recording can not switch to another mode, the camera is needed to turn off. TIP: If the camera is already recording can not switch to another mode, the camera is needed to turn off.
8th PC program Widget8th PC program Widget
For custom setting mode, it is necessary to visit the site www.zetta.com.hk, select the tab " Support " and subsequently " DownloadsFor custom setting mode, it is necessary to visit the site www.zetta.com.hk, select the tab " Support " and subsequently " DownloadsFor custom setting mode, it is necessary to visit the site www.zetta.com.hk, select the tab " Support " and subsequently " DownloadsFor custom setting mode, it is necessary to visit the site www.zetta.com.hk, select the tab " Support " and subsequently " Downloads
". Here you can download according to your operating system PC program called " widget "And install it. ". Here you can download according to your operating system PC program called " widget "And install it. ". Here you can download according to your operating system PC program called " widget "And install it.
TIP: If changes are made custom mode must always be connected to the device via USB cable to the PC. TIP: If changes are made custom mode must always be connected to the device via USB cable to the PC.
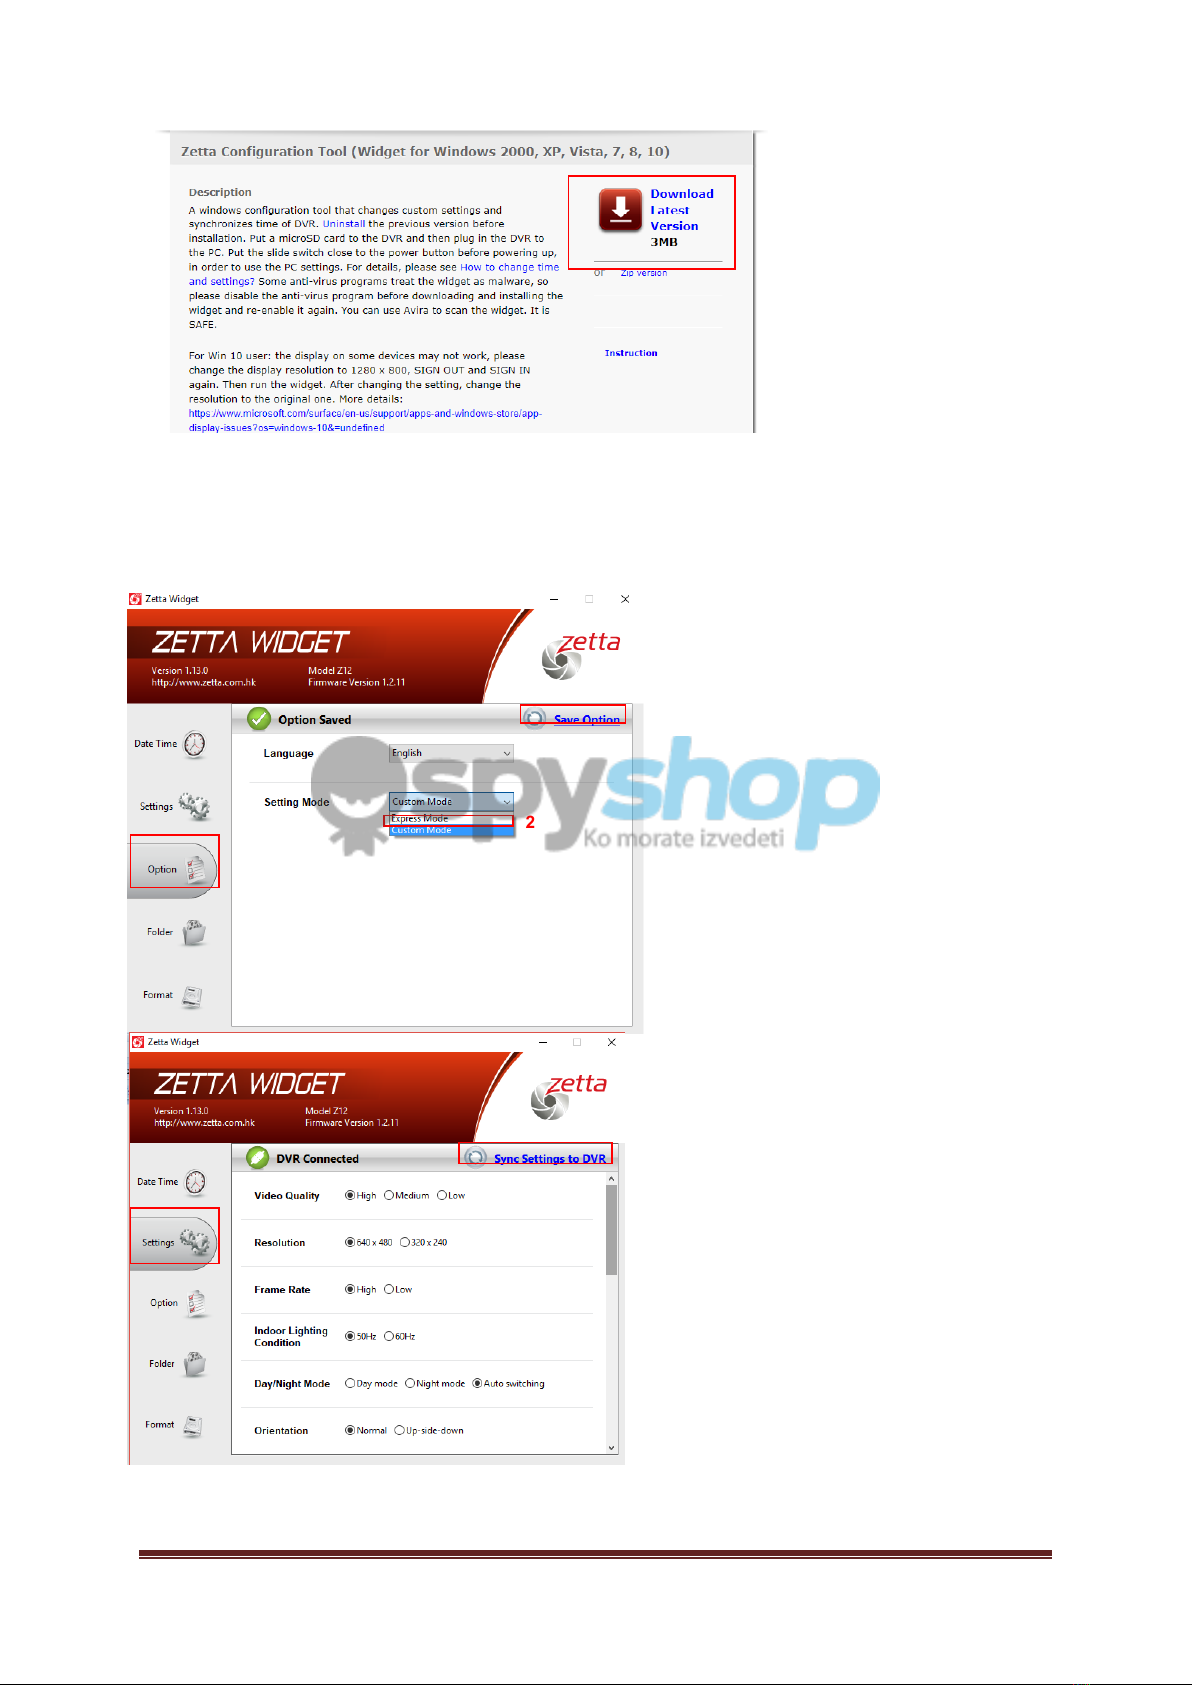
After successful installation of the program and possible customization mode, open the program in the section " Option "Then After successful installation of the program and possible customization mode, open the program in the section " Option "Then After successful installation of the program and possible customization mode, open the program in the section " Option "Then
select" Custom mode "And then save this change by pressing" Save Option " In the right corner. Now you can make any select" Custom mode "And then save this change by pressing" Save Option " In the right corner. Now you can make any select" Custom mode "And then save this change by pressing" Save Option " In the right corner. Now you can make any select" Custom mode "And then save this change by pressing" Save Option " In the right corner. Now you can make any select" Custom mode "And then save this change by pressing" Save Option " In the right corner. Now you can make any
adjustments in its own mode. For these adjustments, select the section " Settings " adjustments in its own mode. For these adjustments, select the section " Settings " adjustments in its own mode. For these adjustments, select the section " Settings "
3
2
1
Any change is always necessary to save the button " Sync Settings to DVR " top right. Any change is always necessary to save the button " Sync Settings to DVR " top right. Any change is always necessary to save the button " Sync Settings to DVR " top right.
9th FAQ - Frequently Asked Questions9th FAQ - Frequently Asked Questions
"How do I restart the device?"
The machine will restart by pressing " reboot "Found on the bottom of the device. To restart and hold for 2 The machine will restart by pressing " reboot "Found on the bottom of the device. To restart and hold for 2 The machine will restart by pressing " reboot "Found on the bottom of the device. To restart and hold for 2
seconds the button.
"When you connect the device to PC, PC says that the device was not found or detected. Why?"
Disconnect the USB cable from the PC and try again.
"How can I play recorded videos?"
Video can be played using the included USB cable to connect to your PC. Or using an SD card, which you
put into your PC. Video belongs in the "ZETTA".
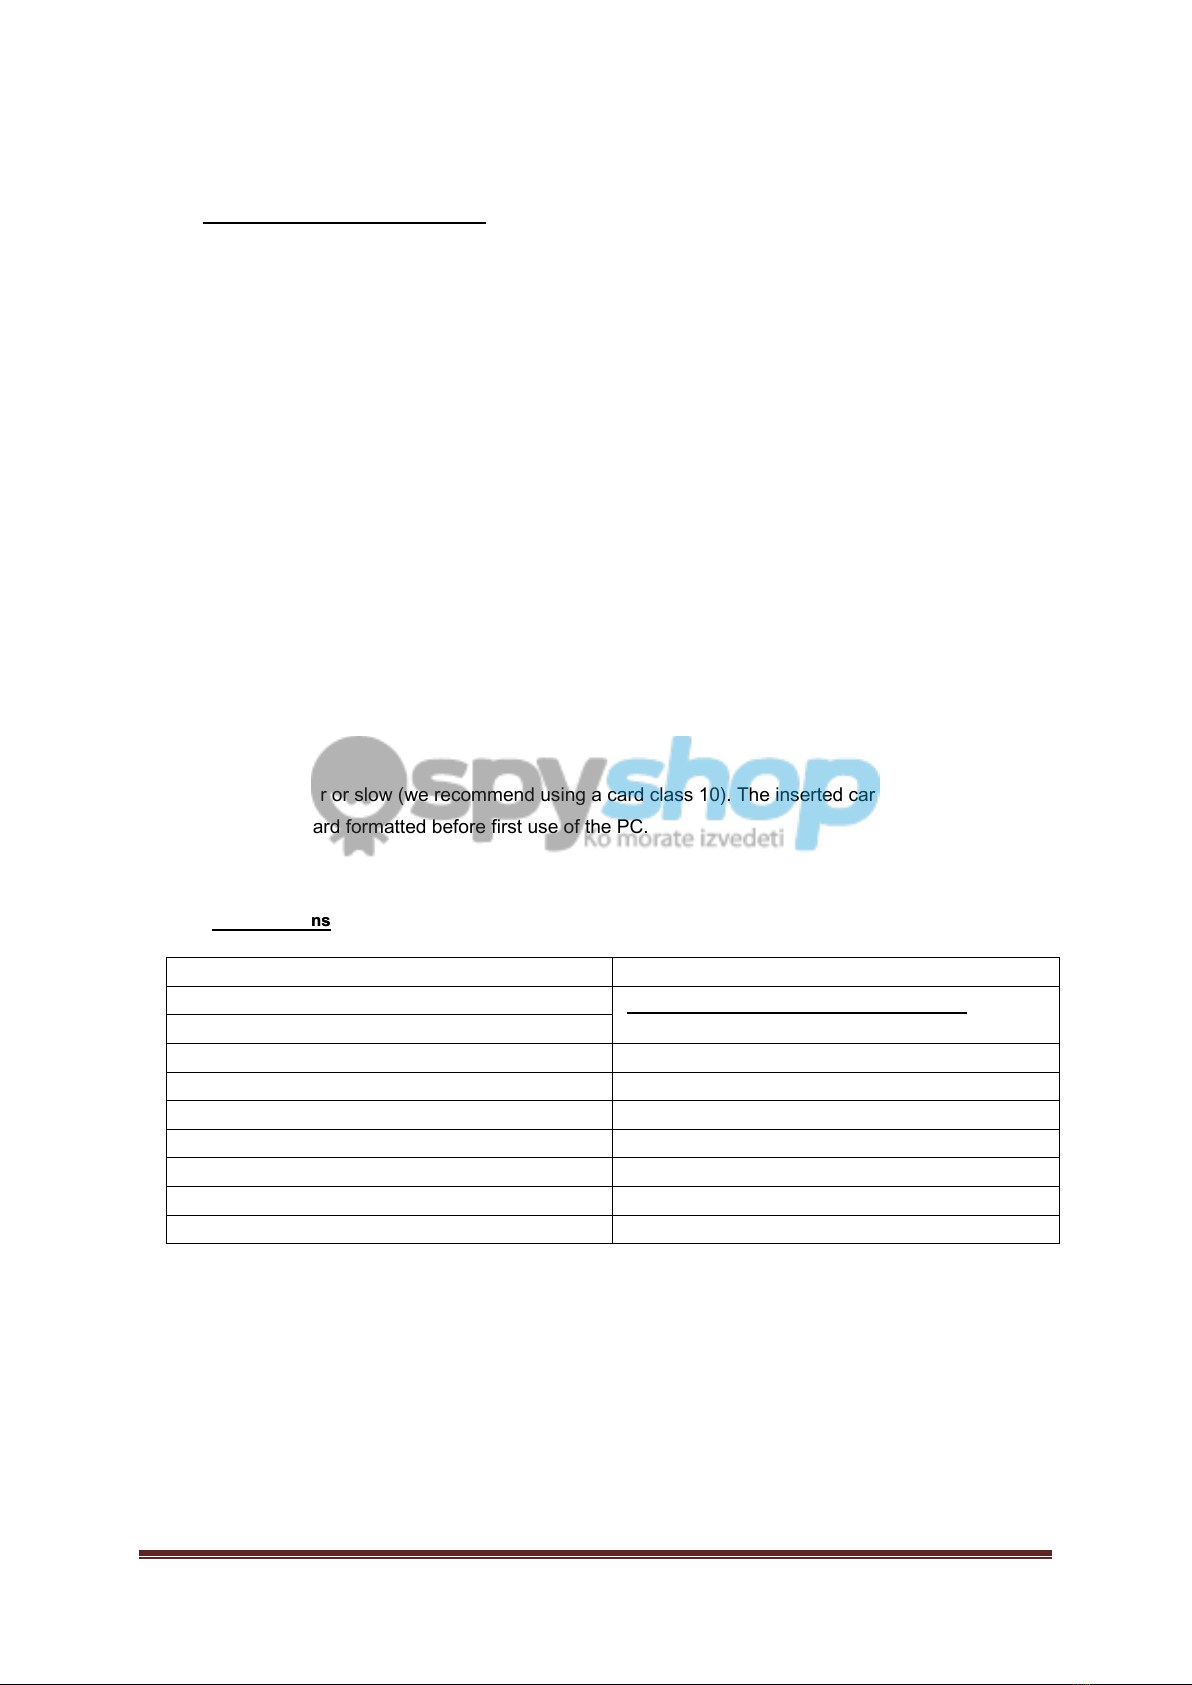
"The recorded video is slow or hacks"
Insertion may be poor or slow (we recommend using a card class 10). The inserted card is not formatted,
it is recommended card formatted before first use of the PC.
10th Specifications10th Specifications
Maximum capacity of SD cards 64 gigabytes
video resolution HD 720p (1280x720) or 360p (640x360)
video format AVI
Supported operating systems for PC Windows 2000 / XP / Vista / 7/8, Mac OS X
Time endurance record approximately 10h
standby time 90 days (in the run mode of vibration)
camera angle 160 °
battery capacity 1200 mAh
recording capacity 30min / approximately 0.1 gigabytes
dimensions device 10.2 x 4.3 x 1.9 cm

.


