manuals.online logo
Brands
  1. Home
  2. •
  3. Brands
  4. •
  5. Canon
  6. •
  7. Digital Camera
  8. •
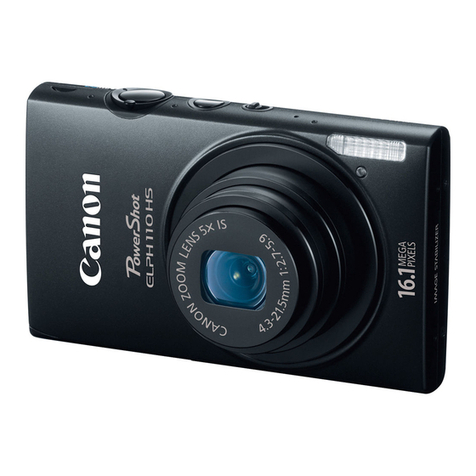
  9. Canon PowerShot SD1400IS IXUS130 User manual

Canon PowerShot SD1400IS IXUS130 User manual

Other manuals for PowerShot SD1400IS IXUS130

2

This manual suits for next models

2

Other Canon Digital Camera manuals

Canon PowerShot G1X Mark II User manual

Canon

Canon PowerShot G1X Mark II User manual

Canon PowerShot G5X User manual

Canon

Canon PowerShot G5X User manual

Canon PowerShot SX1 IS User manual

Canon

Canon PowerShot SX1 IS User manual

Canon PowerShot S1IS User manual

Canon

Canon PowerShot S1IS User manual

Canon RebelT3i EOS 600D User manual

Canon

Canon RebelT3i EOS 600D User manual

Canon IXUS 110 IS User manual

Canon

Canon IXUS 110 IS User manual

Canon PowerShot SX500 IS User manual

Canon

Canon PowerShot SX500 IS User manual

Canon EOS 7D Mark II (G) User manual

Canon

Canon EOS 7D Mark II (G) User manual

Canon PowerShot S100 DIGITAL ELPH User manual

Canon

Canon PowerShot S100 DIGITAL ELPH User manual

Canon PowerShot S330 Digital ELPH User manual

Canon

Canon PowerShot S330 Digital ELPH User manual

Canon Powershot Pro70 Installation instructions

Canon

Canon Powershot Pro70 Installation instructions

Canon Powershot S70 User manual

Canon

Canon Powershot S70 User manual

Canon Powershot S60 User manual

Canon

Canon Powershot S60 User manual

Canon REBEL SL1 EOS 100D User manual

Canon

Canon REBEL SL1 EOS 100D User manual

Canon GP series User manual

Canon

Canon GP series User manual

Canon PowerShot A2200 User manual

Canon

Canon PowerShot A2200 User manual

Canon PowerShot A95 User manual

Canon

Canon PowerShot A95 User manual
Canon F-1 User manual

Canon

Canon F-1 User manual

Canon EOS 5D MARK IV User manual

Canon

Canon EOS 5D MARK IV User manual

Canon EOS 60D User manual

Canon

Canon EOS 60D User manual

Canon PowerShot S230 DIGITAL ELPH User manual

Canon

Canon PowerShot S230 DIGITAL ELPH User manual

Canon PowerShot A560 User guide

Canon

Canon PowerShot A560 User guide

Canon EOS-1D X User manual

Canon

Canon EOS-1D X User manual

Canon EOS REBEL T5I EOS 700D User manual

Canon

Canon EOS REBEL T5I EOS 700D User manual

Popular Digital Camera manuals by other brands

Xiaomi 70mai Dash Cam Lite user manual

Xiaomi

Xiaomi 70mai Dash Cam Lite user manual

Samsung PL70 Quick start manual

Samsung

Samsung PL70 Quick start manual

GE E1680W user manual

GE

GE E1680W user manual

Tevion MD 86497 user guide

Tevion

Tevion MD 86497 user guide

Exakta VX Features

Exakta

Exakta VX Features

Kodak Digital Science DC120 user guide

Kodak

Kodak Digital Science DC120 user guide

Nikon FM3A Specifications

Nikon

Nikon FM3A Specifications

Vectra Fitness H1 Quick reference guide

Vectra Fitness

Vectra Fitness H1 Quick reference guide

Nikon COOLPIX 775 quick start guide

Nikon

Nikon COOLPIX 775 quick start guide

Olympus IR 500 - 4MP Digital Solutions Camera Manuel de Référence

Olympus

Olympus IR 500 - 4MP Digital Solutions Camera Manuel de Référence

Samsung EC-L100ZBBA brochure

Samsung

Samsung EC-L100ZBBA brochure

FujiFilm FINEPIX BL01124-201 owner's manual

FujiFilm

FujiFilm FINEPIX BL01124-201 owner's manual

Panasonic DMC-L10KPP Service manual

Panasonic

Panasonic DMC-L10KPP Service manual

Hyundai Electric HYU-CC-CHBF12001 Quick installation guide

Hyundai Electric

Hyundai Electric HYU-CC-CHBF12001 Quick installation guide

Sony DSC-WX80 specification

Sony

Sony DSC-WX80 specification

Nikon Nuvis S - Point & Shoot instruction manual

Nikon

Nikon Nuvis S - Point & Shoot instruction manual

Olympus CAMEDIA C-3030ZOOM overview

Olympus

Olympus CAMEDIA C-3030ZOOM overview

Teledyne Piranha4 user manual

Teledyne

Teledyne Piranha4 user manual

manuals.online logo
manuals.online logoBrands
  • About & Mission
  • Contact us
  • Privacy Policy
  • Terms and Conditions

Copyright 2025 Manuals.Online. All Rights Reserved.

CaHOH
_owerShet -_D 7500/-_ i % /
D|OiT_L GLPH "_US ]30
Camera User Guide
.....Make sure you read this guide before using the camera.
.....Store this guide safely so that you can use it in the future.
Youcanmakethemainsubject,suchaspeople,appearbrightbyhavingthe
cameraprovidetheappropriateillumination with the flash. At the same time,
you can use a slow shutter speed to brighten the background that the light
from the flash cannot reach.
Choose _*.
After pressing the ), button, press the ,_),
buttons to choose _*, then press the @
button again.
Once set, _* will appear on the screen.
2 Shoot.
Even if the flash fires, ensure that the
subject does not move until the shutter
sound ends.
90
Correcting th_
{i,Contrast)
The camera can detect areas in the scene, such as faces or backgrounds,
that are too bright or dark and automatically adjust them to the optimum
brightness when shooting. Also, when the overall image is lacking in
contrast, the camera will automatically correct the image for a sharper
impression when shooting.
Choose [i=Contrast].
Press the MENUbutton, choose the 0
tab, and then choose the [i-Contrast]
menu item. Press the ,_ buttons to
choose [Auto].
Once set, Cl will appear on the screen.
91
You can automatically correct red-eye that occurs in images taken with the
flash.
i:] Choose [Flash Settings].
Press the MENU button to choose [Flash
Settings] in the O tab, then press the @
button.
_ Adjust the setting.
Press the Av buttons to choose [Red-
Eye Corr.] and press the 4_ buttons to
choose [On].
Once set, @ will appear on the screen.
92
When the camera detects the possibility that people have their eyes shut,
[] appears.
Choose [Blink Detection].
Press the MENUbutton, choose the 0
tab, and then choose the [Blink Detection]
menu item. Press the ,_ buttons to
choose [On].
2Shoot.
.... When a person with shut eyes is detected,
a frame and [] appear.
93
You can set the shutter speed to a range between 1 and 15 seconds to
shoot long exposures. However, you should attach the camera to a tripod to
prevent the camera from moving and blurring the image.
Choose **__.
Follow Steps 1 - 2 on p. 54 to choose *_.
Choose the shutter speed.
Press the A button.
Press the 4 _ buttons to select the shutter
speed, then press the @ button.
__dConfirm the exposure.
When you press the shutter button
halfway, the exposure for the chosen
shutter speed will appear on the screen.
94
You can change the look of an image when shooting. However, depending
on shooting conditions the image may become coarse, or the colors may not
come out as expected.
You can choose to retain a single color and change the rest to black and
white in a composition.
Choose!A.
Follow Steps 1 - 2 on p. 54 to choose ,fA.
_2 Press the DISP. button.
...............The unchanged image and the Color
Accent image will both display.
The color for default settings is green.
Specify the color.
Position the center frame so it is filled with
the color you want and press the 4 button.
The specified color will be recorded.
Speoit.er nge oolors.
Press the Av buttonsto change the
range of colors to be retained.
Choose a negative value to limit the range
of colors. Choose a positive value to
extend the range of colors to similar
colors.
Pressing the DISR button accepts the
setting and restores the shooting screen.
Recorded color
95
Changing the Color and Shooting
You can swap one color in an image for another when recording it. You can
only swap one color.
iJ Choose _S.
Follow Steps 1 - 2 on p. 54 to choose ,_S.
_) Press the DISP. button.
.... The unchanged image and the Color
Swap image will both display.
:: The default setting is to change green to
gray.
_Specify the color to be swapped.
Position the center frame so it is filled with
the color you want and press the ,_ button.
The specified color will be recorded.
:_i:l.Specify the target color.
Position the center frame so it is filled with
the color you want and press the ), button.
The specified color will be recorded.
96
Changing the Color and Shooting
=,_Specify the range of colors to be
swapped.
Press the A'_ buttons to change the
range of colors to be retained,
Choose a negative value to limit the range
of colors. Choose a positive value to
extend the range of colors to similar
colors.
Pressing the DISP.button accepts the
setting and restores the shooting screen.
97
Large subjects can be split into several shots that can later be merged
together using the included software on a computer to create a panoramic
image.
';:1 Choose r_ or I_.
Follow Steps 1 - 2 on p. 54 to choose rQ
or _L1.
2 Take the first shot.
...............The exposure and white balance will be
set with the first shot,
_i_Take subsequent shots.
Overlap part of the first shot when taking
the second shot.
Minor discrepancies in the overlapping
portions will be corrected when the
images are merged.
Up to 26 shots can be recorded with the
same procedures.
_Finish shooting.
Press the @ button,
_Merge the images on acomputer.
........ For details on how to merge the images,
refer to the Software Guide.
98