urmet domus 1092 User manual

+
DS1092-351A
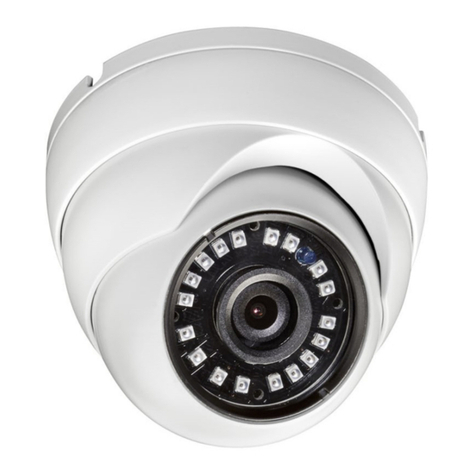
BALL CAMERA AHD 1080P DAY & NIGHT
1/3” OTTICA GRANDANGOLO 2,2MM CON LED IR
1080P AHD DAY & NIGHT BALL CAMERA
1/3” 2,2MM WIDE ANGLE LENS WITH IR LED
AHD 1080P TAG & NACHT KUGELKAMERA
1/3-ZOLL 2,2 MM- WEITWINKEL OBJEKTIV MIT IR-LEDS
CAMÉRA MINI-DÔME AHD 1080P DAY & NIGHT
1/3” OBJECTIF GRAND ANGLE 2,2MM A DIODES IR
CÁMARA MINIDOMO AHD 1080P DÍA/NOCHE
1/3” OBJETIVO GRAN ANGULAR 2.2MM CON LEDS IR
Sch./Ref./Typ/Réf. 1092/276HA
GUIDA RAPIDA
QUICK GUIDE
SCHNELLANLEITUNG
GUIDE RAPIDE
GUÍA RÁPIDA
Mod.
1092

2
DS1092-351A
BASE DI FISSAGGIO
CORPO TELECAMERA
CALOTTA DI
PROTEZIONE
INSTALLAZIONE
•Prima d’iniziare l’installazione, assicurarsi che tutte le unità da collegare non siano alimentate.
•Allentare le tre viti di blocco presenti sulla calotta di protezione utilizzando la chiave in dotazione per
scorporare la telecamera come in figura.
•Fissare la base alla superficie di appoggio per mezzo di 2 viti. Se non si prevede la posa dei cavi di
collegamento a scomparsa, utilizzare l’asola presente sulla base per far fuoriuscire i cavi di
collegamento presenti sul corpo della telecamera senza pizzicarli compromettendone il corretto
funzionamento.
•Avvicinare la calotta di protezione alla base di fissaggio e stringere senza serrare le tre viti di blocco
alla base di fissaggio.
•Regolare l’inclinazione della telecamera rispetto al punto di ripresa delle immagini desiderato.
•Stringere saldamente le 2 viti di blocco per mantenere la posizione selezionata.
•Collegare l’uscita video all’utilizzatore previsto.
•Alimentare la minidome.
COMANDI E REGOLAZIONI
ITALIANO
TASTO DI ACCESSO AL
MENU LUNGO IL CAVO
DELLA TELECAMERA
ALTO
BASSO
DESTRA
SINISTRA SET

DS1092-351A
3
SELEZIONE DELL’USCITA VIDEO
La telecamera 1092/276HA ha la possibilità di utilizzare 4 diverse uscite video, sempre sullo stesso
connettore BNC:
•Uscita video ad alta definizione 1080P AHD (Analog High Definition)
•Uscita video ad alta definizione 720P AHD (Analog High Definition)
•Uscita video interlacciata standard CVBS
•Uscita video in modalità COMET
La pressione per pochi secondi del tasto di accesso al menu verso DESTRA seleziona l’uscita video in
1080P AHD, mentre una pressione per pochi secondi verso SINISTRA seleziona l’uscita video CVBS.
Premendo il tasto verso l’ ALTO è anche possibile selezionare l’uscita video a 720P (con conseguente
taglio dell’immagine). Premendo il tasto verso DESTRA si riseleziona l’uscita video in 1080P.
L’uso della modalità video COMET viene ottenuta, con il segnale video in CVBS, tramite selezione di
un’opzione del menu OSD (menu ADJUST).
NOTA BENE: l’opzione COMET è presente solo con l’uscita video CVBS. La presenza o assenza di questa
opzione indica perciò se la telecamera sta utilizzando l’uscita video CVBS o l’uscita video AHD.
ATTENZIONE:
in caso di assenza di immagini sul dispositivo (monitor o DVR) collegato,
verificare che l’uscita video selezionata sia quella prevista dal dispositivo.
Nel caso in cui non si riesca a visualizzare le immagini su un DVR con ingressi sia AHD che
CVBS, provare i seguenti passi:
1. Lasciare un’unica telecamera connessa sul canale 1 del DVR
2. Premere per alcuni secondi il pulsante a destra e sinistra sino a che appare
l’immagine
3. In caso non appaia ancora nulla, premere il pulsante verso il basso e verificare sul
menu del DVR il tipo di ingresso selezionato

4
DS1092-351A
UTILIZZO DEL MENU
La telecamera 1092/276HA utilizza un menù a più livelli che consente di abilitare/disabilitare o variare le
impostazioni.
Per accedere al menù principale è necessario, a telecamera accesa e funzionante, agire sul tasto di
regolazione posto sul cavo di collegamento della microcamera.
Nota Bene
Il pulsante di attivazione del menù OSD è di tipo joystick per
agevolare le operazioni di selezione.
DESCRIZIONE DEL SISTEMA DEI MENU
Una volta impartito il comando di accesso al menu premendo il tasto al centro, apparirà a monitor la
finestra iniziale di accesso.
È possibile selezionare le voci visualizzate premendo il tasto verso il basso.
Una volta selezionata la voce di interesse, è possibile variare il parametro premendo il tasto verso destra
scegliendo fra le opzioni disponibili visualizzabili premendo ripetutamente il tasto.
Il simbolo o indica che selezionando la voce ad esso abbinata si accederà ad un successivo
sottomenu nel quale sarà possibile eseguire ulteriori variazioni.
Per confermare le variazioni effettuate e uscire dai menu o dai sottomenu, selezionare la voce EXIT
SAVE&END e premere il tasto centrale.
Per ripristinare la configurazione di fabbrica selezionare la voce EXIT RESET e premere il tasto
centrale.
Guida rapida e manuale completo del dispositivo sono disponibili al seguente
indirizzo:
Guida rapida e manuale completo sono altrsi disponibili per il DOWNLOAD dal sito URMET nella sezione
LIBRETTI DI ISTRUZIONE

DS1092-351A
5
Mount fixing screw
Camera body
Protective
dome
INSTALLATION
•Make sure that no units are powered before starting the installation procedure.
•Unscrew the fixing base from the ring lock to separate the camera, as in figure.
•Fix the base to the surface with 2 screws. If it is not planned an hidden installation of connection
cables, use the slot present on the base to draw out the connection cables present on the camera
body, without pinching them, in order to avoid malfunction.
•Bring the cover near the fixing base and screw the ring lock to the fixing base without tightening.
•Adjust the camera slant as regards the desired image capture point.
•Connect the video output to the utility.
•Power the camera.
OPERATING FEATURES
TO SELECT THE VIDEO OUTPUT
The 1092/276HA camera may use 4 different video outputs, which are on the same BNC connector:
•High-definition 1080P AHD (Analog High Definition) video output
•High-definition 720P AHD (Analog High Definition) video output
•CVBS standard interlaced video output
•Video output in COMET mode
ENGLISH
PUSH BUTTON TO ACCESS
TO THE MENU ALONG THE
CAMERA CABLE
UP
DOWN
RIGHT
LEFT SET

6
DS1092-351A
If pressing the menu access button to the RIGHT for a few seconds, you can select the 1080P AHD video
output. If pressing it for a few seconds to the LEFT, you can select the CVBS video output.
Pressing the button to UP it is also possible to select the video output to 720P (with reduction of the angle
view). Pressing the button to the RIGHT, the 1080P video output is selected again.
You can enter the COMET video mode if you select an OSD menu item and if the video signal is in CVBS
(ADJUST menu).
NOTE: COME option is available only with the CVBS video output.
The presence or absence of this option therefore permits to identify if the camera is using the CVBS or
AHD video output.
MENU USE
The camera ref. 1092/276HA uses a multi-level menu that allows to enable/disable or change camera
settings.
Press the adjustment button on the micro camera connection wire while the camera is on and operating to
use the button and access the main menu.
Important note:
•
The OSD menu activation button is joystick type; it
is used to make selection operations easier.
MENUS SYSTEM DESCRIPTION
Once the menu access command has been performed pressing the central button, the access first screen
will be displayed.
Displayed items can be selected by pressing the down button.
Once the item has been selected, the parameter can be changed using the right button and choosing
among the available options, that can be displayed by pressing repeatedly the button.
By selecting the item associated to the symbols or it is possible to access to the next submenu,
where other changes can be performed.
To quit the menu or the submenu and confirm the executed changes, select the item EXITSAVE&END
and press the central button.
To reactivate the default values select the item EXITRESET and press the central button.
Quick guide and complete user manual of the product are available
at the following link
Quick guide and complete user manual of the product are also available for DOWNLOAD from the URMET
website under the section USER MANUALS.
ATTEN
TION:
case of missing video on the connected device (monitor or DVR), verify that the
selected video output matches with the one selected on the device
In case of missing images in a DVR with AHD and CVBS inputs, try the following steps:
1. Leave a single camera connected to the channel 1 of the DVR
2. Press the button for few seconds to right and left until the image appears on the
screen
3. If case of missing image again, press the button to down verify the type of input
selected on the DVR menu
DS1092-351A
7
BEFESTIGUNGSBASIS
KAMERAGEHÄUSE
SCHUTZKAPPE
INSTALLATION
•Stellen Sie vor der Installation sicher, dass alle anzuschließenden Einheiten nicht versorgt werden.
•Die drei an der Schutzkappe vorhandenen Arretierschrauben mit Hilfe des mitgelieferten Schlüssels
lockern, um die Kamera wie in der Abbildung ersichtlich zu zerlegen.
•Die Basis mit 2 Schrauben an der Auflagefläche befestigen. Falls keine verdeckte Verlegung der
Anschlusskabel vorgesehen ist, das an der Basis vorhandene Langloch für den Austritt der am
Kameragehäuse vorhandenen Anschlusskabel verwenden. Darauf achten, dass sie nicht
eingeklemmt werden, damit die korrekte Funktion nicht beeinträchtigt wird.
•Die Schutzhaube an die Befestigungsbasis heranführen und anziehen, ohne die drei
Arretierschrauben ganz an der Befestigungsbasis festzuziehen.
•Die Neigung der Kamera in Bezug auf den gewünschten Aufnahmepunkt der Bilder einstellen.
•Die drei Arretierschrauben nun ganz festziehen, damit die gewählte Position eingehalten wird.
•Den Videoausgang an den vorgesehenen Verwender anschließen.
•Die Kuppelkamera mit Strom versorgen.
STEUERUNGEN UND EINSTELLUNGEN
TASTE FÜR DEN
MENÜZUGRIFF LÄNGS DES
KAMERAKABELS
OBEN
UNTEN
RECHTS
LINKS SET
DEUTSC
H

8
DS1092-351A
AUSWAHL DES VIDEOAUSGANGS
Die Kamera 1092/276HA bietet Ihnen die Möglichkeit, 4 verschiedene Videoausgänge mit demselben
BNC-Steckverbinder zu verwenden:
•Hochauflösender 1080P AHD-Videoausgang (Analog High Definition)
•Hochauflösender 720P AHD-Videoausgang (Analog High Definition)
•Interlaced Standard-Videoausgang CVBS
•Videoausgang im COMET-Modus
Drückt man die Taste für den Menüzugriff einige Sekunden nach RECHTS, wird der Videoausgang in
1080P AHD ausgewählt, drückt man ihn einige Sekunden lang nach LINKS, wird der Videoausgang CVBS
ausgewählt.
Durch Betätigen der Taste HOCH ist es ebenfalls möglich den Videoausgang auf 720p umzuschalten (mit
verringerter Bildansicht). Durch Bewegen nach RECHTS wählen Sie die 1080P Videodarstellung aus.
Der COMET-Videomodus lässt sich mit auf CVBS eingestelltem Videosignal durch Auswahl einer Option
des OSD-Menüs (Menü ADJUST) anwenden.
HINWEIS: Die Option COMET liegt nur mit dem CVBS-Videoausgang vor.
Das Vorhandensein bzw. Nichtvorhandensein dieser Option zeigt demnach an, ob die Kamera den CVBS-
Videoausgang oder den AHD-Videoausgang verwendet.
VERWENDUNG DES MENÜS
Bei der Kamera 1092/276HA kommt ein Menü mit mehreren Ebenen zur Anwendung, über das die
Einstellungen aktiviert/deaktiviert oder geändert werden können.
Für den Zugriff auf das Hauptmenü muss die am Anschlusskabel der Mikrokamera angebrachte
Einstelltaste bei eingeschalteter und funktionsfähiger Kamera
betätigt werden.
Hinweis
Um die Auswahlvorgänge zu erleichtern, handelt es sich bei der Aktivierungstaste des OSD-Menüs um
eine Joystick-Taste.
ACHTUNG:
Falls Bilder am angeschlossenen Gerät fehlen (Monitor oder DVR), ist zu
überprüfen, dass es sich bei dem gewählten Videoausgang um den vom Gerät vorgesehenen
Ausgang handelt.
Falls es nicht gelingt, die Bilder auf einem DVR sowohl mit AHD- als auch mit CVBS-Eingängen
anzuzeigen, die folgenden Schritte ausführen:
1. Nur eine einzige Kamera am Kanal 1 des DVR angeschlossen lassen.
2. Einige Sekunden lang die Taste nach rechts und nach links drücken, bis das Bild
erscheint.
3. Falls immer noch nichts erscheint, die Taste nach rechts drücken und auf dem Menü
des DVR den gewählten Eingangstyp überprüfen.

DS1092-351A
9
BESCHREIBUNG DES MENÜ-SYSTEMS
Nachdem Sie den Befehl für den Zugriff auf das Menü durch Drücken der in der Mitte befindlichen Taste
erteilt haben, erscheint das Ausgangsfenster für den Zugriff.
Die angezeigten Optionen können ausgewählt werden, indem Sie die Taste nach unten drücken.
Nach Auswahl des gewünschten Stichpunktes besteht die Möglichkeit, den Parameter zu ändern, indem
die Taste nach rechts gedrückt wird. Sie haben die Auswahl aus verfügbaren Optionen, die durch
wiederholtes Drücken der Taste angezeigt werden.
Das Symbol oder gibt an, dass man bei Auswahl des damit verbundenen Stichpunktes auf ein
nachfolgendes Untermenü zugreift, das die Ausführung weiterer Änderungen ermöglicht.
Zum Bestätigen der vorgenommenen Änderung und zum Verlassen der Menüs oder der Untermenüs den
Stichpunkt EXIT SAVE&END auswählen und die mittlere Taste drücken.
Zum Zurücksetzen auf die Werkskonfiguration den Stichpunkt EXIT RESET auswählen und die mittlere
Taste drücken.
Die Schnellanleitung, sowie die komplette Bedienungsanleitung stehen
unter dem folgenden Link zur Verfügung:
Die Schnellanleitung, sowie die komplette Bedienungsanleitung stehen außerdem im Bereich DOWNLOAD
auf der URMET Homepage in der Sektion USER MANUALS zur Verfügung (Die Webseite wird in Englisch
dargestellt).

10
DS1092-351A
BASE DE FIXATION
CORPS CAMÉRA
CALOTTE DE
PROTECTION
INSTALLATION
•Avant de procéder à l’installation, s’assurer qu’aucune des unités à brancher n’est alimentée.
•Desserrer les trois vis de blocage présentes sur la calotte de protection en utilisant la clé fournie à cet
effet, pour démonter la caméra comme indiqué sur la figure.
•Fixer la base à la surface d’appui au moyen de 2 vis. Si la pose de câbles de branchement enfouis
n’est pas prévue, utiliser l’ouverture présente à la base pour faire sortir les câbles de branchement
présents sur le corps de la caméra sans les écraser pour ne pas compromettre le bon
fonctionnement.
•Approcher la calotte de protection de la base de fixation et visser les trois vis de blocage sur la base
de fixation (sans serrer).
•Régler l’inclinaison de la caméra pour l’orienter de façon à obtenir les images voulues.
•Serrer à fond les deux vis de blocage pour bloquer la caméra dans la position réglée au point
précédent.
•Brancher la sortie vidéo au dispositif prévu.
•Alimenter la caméra mini-dôme.
COMMANDES ET RÉGLAGES
FRANÇAIS
TOUCHE D’ACCÈS AU
MENU LE LONG DU CÂBLE
DE LA CAMÉRA
HAUT
BAS
DROITE
GAUCHE SET

DS1092-351A
11
SÉLECTION DE LA SORTIE VIDÉO
La caméra 1092/276HA permet d’utiliser 4 sorties vidéo différentes sur le même connecteur BNC :
•Sortie vidéo à haute définition 1080P AHD (Analog High Definition)
•Sortie vidéo à haute définition 720P AHD (Analog High Definition)
•Sortie vidéo interface standard CVBS
•Sortie vidéo en modalité COMET
Une pression de quelques secondes sur la touche d’accès au menu vers la DROITE permet de
sélectionner la sortie vidéo en 1080P AHD, alors qu’une pression de quelques secondes vers la GAUCHE
permet de sélectionner la sortie vidéo CVBS.
Appuyer sur la touche vers le HAUT pour pouvoir également sélectionner la sortie video à 720P (à noter la
réduction du champ de vision). Appuyer sur la touche vers la DROITE pour sélectionner la sortie video à
1080P.
L’utilisation de la modalité vidéo COMET est obtenue, avec le signal vidéo en CVBS, à travers la sélection
d’une option du menu OSD (menu ADAPTER).
NB : l’option COMET est présente uniquement avec la sortie vidéo CVBS.
La présence ou l’absence de cette option indique par conséquent que la caméra utilise la sortie vidéo
CVBS ou la sortie vidéo AHD.
ATTENTION
:
en cas d’absence d’images sur le dispositif (écran ou DVR) branché, s’assurer
que la sortie vidéo sélectionnée est celle prévue par le dispositif.
Dans le cas où il s’avérerait impossible de visualiser les images sur un DVR, aussi bien avec
entrées AHD et CVBS, procéder comme suit :
1. Maintenir une unique caméra branchée sur le canal 1 du DVR.
2. Appuyer pendant quelques secondes sur le bouton à droite et à gauche jusqu’à ce
que l’image apparaisse.
3. Si l’image n’apparaît pas, appuyer sur le bouton vers le bas et contrôler le type
d’entrée sélectionnée dans le menu du DVR.

12
DS1092-351A
UTILISATION DU MENU
La caméra 1092/276HA utilise un menu à plusieurs niveaux qui permet d’activer/désactiver les réglages
ainsi que de les modifier.
Pour accéder au menu principal, il est nécessaire, alors que la caméra est allumée et en marche,
d’appuyer sur le bouton de réglage présent sur le câble de
branchement de la micro-caméra.
Nota bene
Le bouton d’activation du menu OSD est de type joystick pour faciliter les opérations de sélectionner.
DESCRIPTION DU SYSTÈME DES MENUS
Une fois la commande d’accès au menu transmise, en appuyant sur la touche centrale, la fenêtre initiale
d’accès s’affiche sur l’écran.
Il est possible de sélectionner les options visualisées en appuyant sur la touche vers le bas.
Une fois l’option voulue sélectionnée, il est possible de modifier le paramètre en appuyant sur la touche
vers la droite à plusieurs reprises jusqu’à ce que soit sélectionnée l’option voulue parmi toutes les options
disponibles.
Le symbole ou indique qu’en sélectionnant l’option qui lui est associée, l’on accède ensuite à un
sous-menu qui permet d’effectuer d’autres modifications.
Pour confirmer les modifications apportées et pour quitter les menus ou les sous-menus, sélectionner
l’option EXIT SAVE&END et appuyer sur la touche centrale.
Pour rétablir la configuration par défaut, sélectionner l’option EXIT RESET et appuyer sur la touche
centrale.
Le guide rapide et le manuel d'utilisation complet du produit sont disponibles
sur le lien suivant
Guide rapide et manuel d'utilisation complet du produit sont également disponibles en téléchargement
(DOWNLOAD) à partir du site Web URMET dans la section USER MANUALS (Le site web est en anglais).

DS1092-351A
13
B
ase de fijación
Cuerpo de la cámara
Carcasa de
protección
INSTALACIÓN
•Antes de empezar el cableado, asegurarse de que todas las unidades que se deben conectar no
tengan alimentación.
•Afloje los dos tornillos presentes en la carcasa de protección con la llave suministrada, para separar
la cámara como muestra la figura.
•Fije la base con los 2 tornillos suministrados. Si la instalación no es empotrada, utilice las ranuras
existentes en la base para no pellizcar el cable y provocar un funcionamiento indebido.
•Acerque la carcasa de protecciòn a la base de fijaciòn y apriete los dos tornillos sin bloquearlos
completamente.
•Ajuste la inclinación de la cámara en función del ángulo de visión deseado.
•Apriete fuertemente los dos tornillos de bloqueo para mantener la posición seleccionada
•Conecte la salida de vídeo al equipo.
•Dar alimentación a la cámara.
CARACTERÍSTICAS DE FUNCIONAMIENTO
ESPAÑOL
BOTÓN DE ACCESO AL
MENÚ EN EL CABLE DE LA
CÁMARA
ABAJO
DERECHA
IZQUIERDA
AJUSTE
ARRIBA

14
DS1092-351A
SELECCIÓN DE LA SALIDA DE VÍDEO
La cámara 1092/276HA tiene 4 salidas de vídeo diferentes, siempre por conector BNC:
•Salida de vídeo de alta definición 1080P AHD (Analog High Definition)
•Salida de vídeo de alta definición 720P AHD (Analog High Definition)
•Salida de vídeo CVBS entrelazada
•Salida de vídeo en modo COMET
Si pulsa el botón de acceso al menú a la DERECHA durante unos segundos, seleccionará la salida de
vídeo 1080P AHD. Si lo pulsa durante unos segundos a la IZQUIERDA, seleccionará la salida de vídeo
CVBS.
Pulsando el botón hacia ARRIBA es posible también seleccionar la salida vídeo a 720P (con consiguiente
riducción del campo visual). Si pulsa el botón hacia la DERECHA, seleccionar la salida vídeo a 1080P.
Puede introducir el modo de vídeo COMET si selecciona una opción en el menú OSD (menú ADJUST), y
la señal de vídeo es CVBS.
NOTA: la opción COMET sólo está disponible para la salida de vídeo CVBS.
Por tanto, la presencia o no de esta opción indica si la cámara está utilizando la salida de vídeo CVBS o
AHD.
UTILIZACIÓN DEL MENÚ
La cámara Ref. 1092/276HA dispone de un menú de varios
niveles para habilitar, deshabilitar o cambiar la configuración
de la cámara.
Para acceder al botón del menú principal, mientras la cámara está encendida y funcionando, desenrosque
la tapa frontal para acceder a los ajustes.
Nota:
El botón de activación del menú OSD es de tipo joystick para realizar las operaciones más fácilmente.
ADVERTENCIA:
si no hay vídeo en el equipo conectado (monitor o DVR), compruebe que la
salida de vídeo seleccionada coincide con la seleccionada en el equipo.
Si no hay imagen en un DVR con entradas AHD y CVBS, siga los siguientes pasos:
1. Deje una única cámara conectada al canal 1 del DVR
2. Pulse el botón durante unos segundos a DERECHA e IZQUIERDA hasta que la
imagen aparezca en pantalla
3. Si sigue sin haber imagen, pulse el botón hacia ABAJO y verifique el tipo de entrada
seleccionada en el menú del DVR

DS1092-351A
15
DESCRIPCIÓN DEL SISTEMA DE MENÚS
Tras pulsar el botón central para entrar en el menú, se mostrará la primera pantalla. Puede seleccionar los
elementos mostrados pulsando el botón hacia abajo.
Una vez seleccionado el elemento deseado, para cambiar el parámetro pulse el botón derecho y elija entre
las opciones existentes, que se muestran al pulsar varias veces el botón.
Al seleccionar el elemento asociado con el símbolo o podrá acceder al siguiente submenú, donde
podrá realizar otros cambios.
Para salir del menú o del submenú y confirmar los cambios realizados, seleccione EXITSAVE&END y
pulse el botón central. Para restaurar los valores por defecto, seleccione EXIT RESET y pulse el botón
central.
La guía rápida y el manual de usuario completo del producto está
disponible en el siguiente link
La guía rápida y el manual de usuario completo del producto también están disponibles para DOWNLOAD
en la página web de URMET bajo la sección USER MANUALS (La página web está en inglés).

16
DS1092-351A
DS1092-351A
Area tecnica
servizio clienti +39. 011.23.39.810
http://www.urmet.com
e-mail: info@urmet.com
MADE IN CHINA
Prodotto in Cina su specifica URMET
Made in China to URMET specification
URMET S.p.A.
10154 TORINO (ITALY)
VIA BOLOGNA 188/C
Telef. +39. 011.24.00.000 (RIC.AUT.)
Fax +39. 011.24.00.300 - 323
Other manuals for 1092
36
Table of contents
Languages:
Other urmet domus Digital Camera manuals

urmet domus
urmet domus 1092/163 User manual

urmet domus
urmet domus 1051 User manual

urmet domus
urmet domus 1092/252H User manual

urmet domus
urmet domus 1096/201 User manual

urmet domus
urmet domus 1092/221M User manual

urmet domus
urmet domus 1099/214 User manual

urmet domus
urmet domus 1092 User manual

urmet domus
urmet domus 1092/253H User manual

urmet domus
urmet domus 1092 User manual

urmet domus
urmet domus 3300/410 User manual