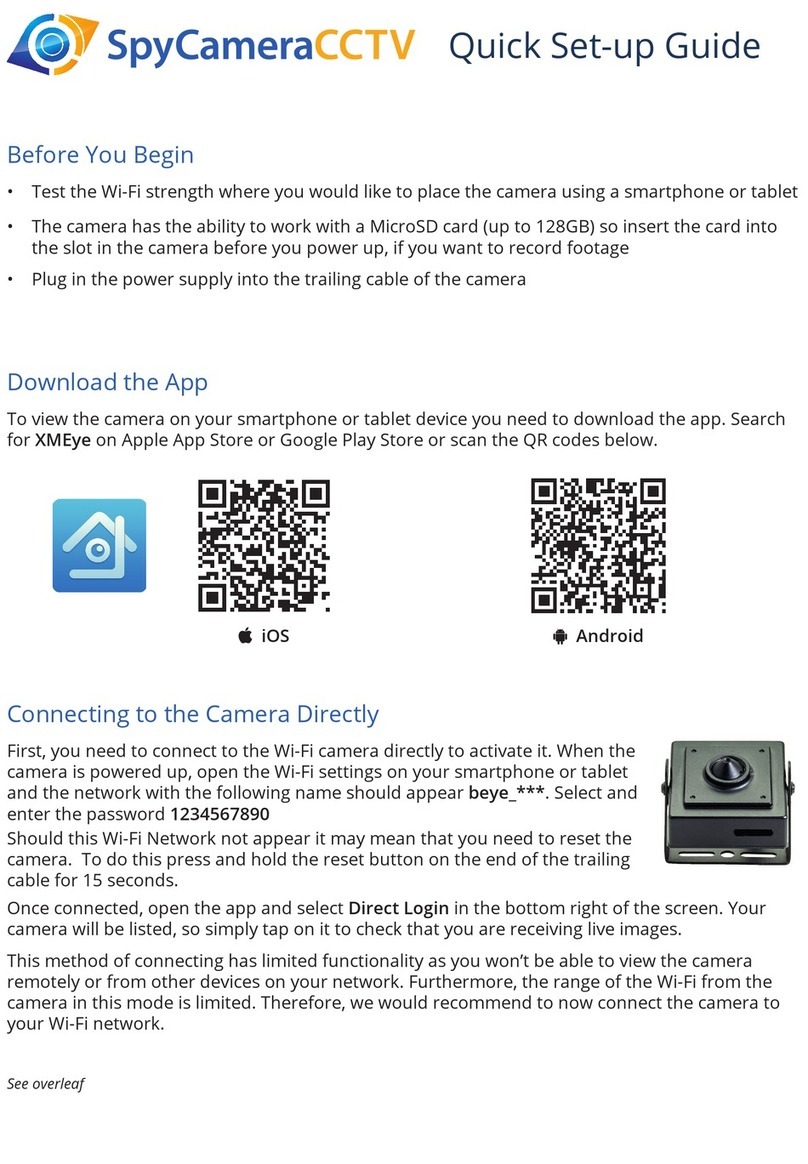
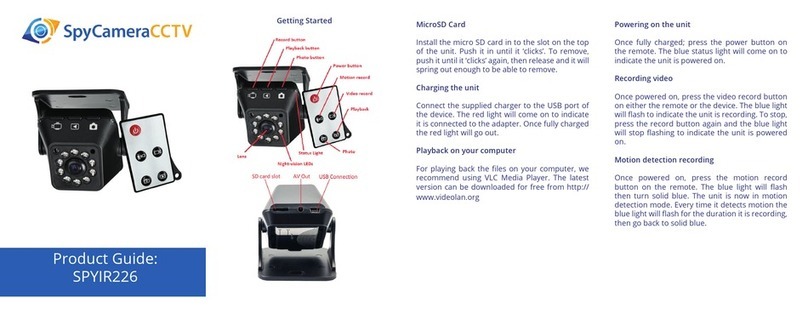
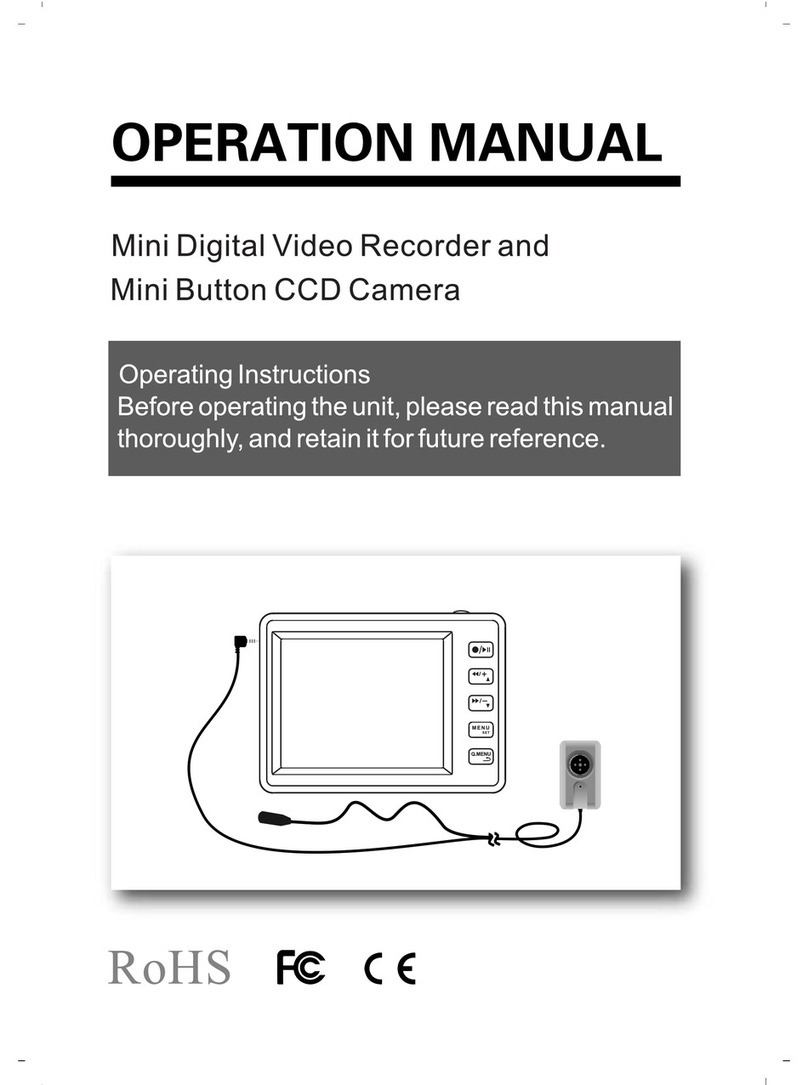
SpyCameraCCTV 1CHDVRD1 User manual

1CHDVRD1 USER MANUAL
These instructions apply to unit model 1CHDVRD1 only.
Please read carefully before use.

2
Description
Description....................................................................
Features.........................................................................
Notes..............................................................................
Packing List...................................................................
Technical Specications..............................................
Diagram........................................................................
Connection Diagram
BNC Cable...................................................................
RCA Cable...................................................................
Wireless Cable...........................................................
SD Card.......................................................................
Operation Instructions
Turn On/O.................................................................
Start Recording............................................................
Play Video....................................................................
Switch Channels..........................................................
Delete Files...................................................................
Menu Interface
Menu
1. File Browse..............................................................
2. Video Setting..........................................................
2.1 Resolution............................................................
2.2 Frame Rate...........................................................
2.3 Image Quality.......................................................
3. Record Setting.......................................................
3.1 Boot Rec................................................................
3.2 Pre. Rec.................................................................
3.3 Motion Detection.................................................
3.4 Schedule...............................................................
3.5 Overwrite..............................................................
3.6 Clip Length............................................................
4. Advanced Settings
4.1 OSD........................................................................
4.2 ID Setting...............................................................
5. System Setting........................................................
5.1 Time.......................................................................
5.2 Time Zone.............................................................
5.3 Language..............................................................
5.4 Format..................................................................
5.5 Reset.....................................................................
5.6 Card info...............................................................
Troubleshooting
Troubleshooting.......................................................
Important Notes.......................................................
03
03
03
04
05
06
07
08
09
10
11
11
11
11
11
12
12
12
13
13
13
13
14
14
15
16
16
16
17
17
17
17
18
18
18
18
19
19

3
Description
This Mini wireless DVR is packed with advanced features that are normally only seen on
very professional CCTV DVRs such as Scheduled Record, Motion Detection with Pre-Re-
cord and a Maximum recording Frame-Rate of 30FPS. This mini DVR supports full D1 res-
olution recording, and high capacity SD card up to 32GB. It works well with either wired
CCTV camera or 2.4GHz wireless cameras, supports with both PAL or NTSC TV Standards,
and is an ideal security surveillance solution for your car, your shop, your home, your
oce, your garden, and many more.
Features
• 4 Wireless Channels, 1 Wired Channel Input - Up to 4 Wireless 2.4GHz cameras can
be used with this Mini DVR and 1 CCTV camera can be directly plugged in via the AV-In
plug on the unit. It can also power 1 wired camera directly!
• Automatic Wireless Channel Switching - You can set the DVR to automatically switch
between the 4 wireless channels while recording. Alternatively (and the most common
set up) you can set the channel manually to record 1 camera.
• 3 Recording Modes - Manual Record, Motion Detection and scheduled Record. This
gives you the ultimate exibility in setup.
• Audio & Video Recording Simultaneously - Able to record 1 channel video & audio
simultaneously.
• Adjustable Pre-Record Feature - 5 or 10 second pre-record options make sure you
never miss a moment!
• Boot Recording - Allows instant recording from power up in an emergency.
• High Resolution D1 Recording - 720*480@30FPS for amazing quality!
• 32GB SD Card Supported - With automatic overwrite function.
• Footage Date/Time Stamping - Recorded footage and pictures can have the date and
time displayed on them.
• Fine Tunable Motion Sensing - The motion detection record mode can be ne tuned
by use of the “Zoning” Feature and sensitivity parameter.
• NTSC and PAL Compatible - Works with both UK and US TV standards.
• Easy Menu System - Easy to setup, operate and maintain.
• Multiple Language Options - English, Portuguese and Chinese optional.
• USB connectivity – Plug into your PC to access footage instantly, no card reader
required!
Notes
1.Connect all parts before you turn on the power
2. Before you insert or pull out the SD card, make sure you have turned o the power
3. Keep water or any liquid away from the equipment in order to avoid short circuits
4. Please avoid any kind of abnormal operation, such as pressing dierent buttons at the
same time; it might cause malfunction to the equipment
5. Use only the included AC/DC adapter supplied with the DVR unit.

4
What you’ll need..
RCA Cable Setup
Wireless Connection Setup
BNC Cable Setup
Mainframe
Mainframe
Mainframe Power Supply Camera Power Supply
BNC Cable
RCA Cable
Power Supply, AV-IN
and AV-OUT cable
Power Supply, AV-IN
and AV-OUT cable
Female to Female RCA Phono
Adaptor (x2 required if using
audio)
RCA to BNC Adaptor
Female to Female
RCA Phono Adaptor
BNC Male to RCA
Adaptor Connector

5
Technical Specications
Product Code 1CHDVRD1
Work Voltage DC12V
Work Current 400mA
Working Temperature -10C ~+50C
Working Humidity 15%~80%
Frequency 2.4GHz
Storage Media SD
Maximum Memory Supported 32GB
Compression Format MPEG4
Video Format ASF
Record Mode Motion Detect, Manual Record,
Scheduled Record
Motion Detection 20 Seconds
Boot Record Yes/No
Pre Event Record 5seconds/10seconds/o
Record Quality 3 Rating Adjustable
Video Resolution 720*480/640*480/320*240
Frame Rate 5FPS/10FPS/15FPS/30FPS
Video Input 1 wired and 4 wireless channels
Record Signal 1 Channel Video and Audio
Video Output 1 Channel Video and Audio
TV Standard PAL and NTSC
File Overwrite Optional
Compatible Camera Common CMOS & CCD Camera
Dimensions 130*107*26mm
Menu Language English/\Portuguese/Chinese
Net Weight 0.5kg
Note: Specications in this instruction are subject to technical
changes without notice

6
Diagram
Up
Left
OK
Down
Right CH1 ~ 4 (Wireless Channel Switch)
REC (Record)
PLAY (Play/Pause)
STOP (Stop/Exit)
MENU (Enter Menu)
Button Function

7
Connection Diagram - BNC Cable
Necessery Wires
Optional Wires
TV Monitor
(Audio Optional)
(Audio Optional)
Power Out (PW Out)
Video Input (AV-IN)
Video Out (AV-OUT)
Power Input (PW-IN)
CH1 ~ 4 (Wireless Channel Switch)
REC (Record)
PLAY (Play/Pause)
STOP (Stop/Exit)
MENU (Enter Menu)

8
Necessery
Optional Wires
TV Monitor
(Audio Optional)
Power Out (PW Out)
Video Input (AV-IN)
Video Out (AV-OUT)
Power Input (PW-IN)
(Audio Optional)
Connection Diagram - RCA Cable

9
Necessery Wires
Optional Wires
TV Monitor
Power Input (PW-IN)
Video Out (AV-OUT)
Wireless Connection

10
SD Card Instruction
Important Notes:
• Electrostatic buildup on the human body
can damage the SD card. Please avoid
touching the metal part of the card.
• Turn o the power before you insert or pull
out the SD card.
• Keep the write-protect switch unlocked.
• 1CHDVRD1supports up to 32GB SD card-
formatted in FAT or FAT32.
• Please format the SD card before use.

11
Operations Instructions
Turn On/O
1. Turn On: After all parts are correctly connected, turn the power switch to the “ON”
position;
2. Turn O: Turn the power switch to the “OFF” position when the DVR unit is working.
Start Recording
This DVR supports 3 Record Modes: Manual Record, Motion Detection and Scheduled
Record;
1. Manual Record- in Preview Mode, press “SHOT” to start recording. The recording will
not stop until you press “Mode”;
2. Motion Detection- If Motion Detection is turned on, after a motion is detected, the DVR
will start recording automatically and the recording will last for 20 seconds;
3. Scheduled Record- If Scheduled Record is turned on; the DVR will start recording when
it comes to the starting time and stop when it ends.
Play Video
There are two ways that you can play the recorded video clips as follows;
1. In Preview Mode, press “DISP” to view the last video le. Press “DISP” again to play the
last le;
2. Press “MENU” to enter the menu interface, select “File Browse” to view the Files List, use
“UP” or “DOWN” to select the target le, and press “DISP” to play;
3. When one le is nished, it will go back to the Files List.
Switch Channels
NOTE: On boot, the DVR will automatically return to the last channel it was used on,
regardless of whether a wired or wireless camera was being used.
1. You can manually set the DVR to the channel required with the button labeled “WIRED
- CH4”
2. When you arrive at “CH4”, pressing the channel button again will set the DVR to
“Automatic Cycle” mode. It will automatically cycle through the 4 wireless channels (1-4)
every 6 seconds.
3. In “Automatic Cycle” mode, if the “REC” button is pressed or motion is detected, the
DVR will start to record the currently active channel. The 6 second timer for rotating
through the channels will pause until the recording is stopped or the motion event ends,
after which the channel cycling will continue.
4. There are 5 LED indicators on the DVR which tell you which channel the DVR is currently
on: “Wired” = Wired Camera Channel, CH1 = Wireless Camera 1, CH2 = Wireless Camera
2, CH3 = Wireless Camera 3 and nally CH4 = Wireless Camera 4.
Delete Files
1. Press “MENU” to enter the menu interface, select “File Browse” to view the Files List,
use “UP” or “DOWN” to select the target le, press “Menu” and select “YES” to conrm the
deletion.
Tip: if you need to delete all video les, then you can format the SD card.

12
Press “MENU” to enter “Main Menu” as fol-
lows. Press “UP” or “Down” to select the de-
sired item, press “OK” to enter the submenu,
or press “STOP” to exit.
1. File Browse
On this page, you can see all video les that are
stored in the SD card. Press “UP” or “DOWN” to
select the target les and press “STOP” to go back
to the previous page. When a le is selected, press
“OK” to conrm and then press “PLAY” to play; or
Press “MENU” and then select “YES” to execute the
deletion.
2. Video Setting
On this page, you can set the Resolution, Frame
Rate and Image Quality, and the manners in which
these settings are done will aect the length of
the recording time of the SD card. Press “UP” or
“DOWN” to select the desired item, press “OK” to
see the options and then again select the desired
item and press “OK” to conrm. Press “STOP” to
go back to the previous page when a setting is
done.
2.1 Resolution
Press “UP” or “DOWN” to select the desired item,
press “OK” to save, and press “STOP” to go back to
the previous page.

13
2.2 Frame Rate
Press “UP” or “DOWN” to select the desired
item, press “OK” to save, and press “STOP” to
go back to the previous page.
2.3 Image Quality
Press “UP” or “DOWN” to select the desired
item, press “OK” to save, and press “STOP” to
go back to the previous page.
3. REC Settings
On this page, you can set Boot Record, Pre-
Event Record, Motion Detection, Schedule,
Overwrite and Clip Length. Press “UP” or
“DOWN” to select the desired item, press
“OK” to see the options and then again select
the desired item and press “OK” to conrm.
Press “STOP” to go back to the previous page
when a setting is done.
3.1 Boot REC
When Boot Record is turned on, the DVR
will start recording automatically when the
power is on. The recording will not stop until
you Press “STOP”. Press “UP” or “DOWN” to
select the desired item, press “OK” to save,
and press “STOP” to go back to the previous
page.
YES--Turn on Boot Record;
NO --Turn o Boot Record

14
3.2 Pre Event Record
“Pre Event Record” is a very useful feature of this
device. It means the DVR is able to record 5 or
10 seconds before manual/motion recording is
triggered. This means you will not miss any vital
footage.
Press “UP” or “DOWN” to select the desired item,
press “OK” to save, and press “STOP” to go back
to the previous page.
3.3 Motion Detection
“Motion Detection” is an important feature that
can help save vital storage space on the SD card.
Once there is motion detected, the DVR will
start recording automatically and stop after 20
seconds.
N.B Motion Detection and Scheduled Recording
cannot be used together; please only set one or
the other
3.3.1 Active
Press “UP” or “DOWN” to select the desired item,
press “OK” to save, and press “STOP” to go back
to the previous page.
Yes--Turn on Motion Detection
No--Turn o Motion Detection
3.3.2 Mask Area
Press “UP”, “DOWN”, “LEFT” or “RIGHT” to move,
and press “OK” to mark the area you don’t want
to detect. Even if there is a motion in the marked
area, no recording will happen.

15
3.3.3 Sensitivity
Press “UP” or “DOWN” to select the desired item,
press “OK” to save, and press “STOP” to go back
to the previous page.
3.4 Schedule
Schedule refers to Scheduled Record. If it is
turned on; the DVR will start recording when it
comes to the starting time and stop when it ends
according to the scheduled time.
3.4.1 Active
Press “UP” or “DOWN” to select the desired item,
press “OK” to save, and press “STOP” to go back
to the previous page.
Yes-- Turn on Scheduled Record
No-- Turn o Scheduled Record
3.4.2 Scheduled Time
Press “LEFT” or “RIGHT” to locate the desired
position and press “UP” or “DOWN” to change the
number. Press “STOP” to the previous page.

16
3.5 Overwrite
This setting is very important if you want to keep
the DVR recording all the time and never stop.
Press “UP” or “DOWN” to select the desired item,
press “OK” to save, and press “STOP” to go back
to the previous page.
3.6 Clip Length
Press “UP” or “DOWN” to select the desired item,
press “OK” to save, and press “STOP” to go back
to the previous page.
4. Advanced Setting
On this page, you can set OSD and ID for the
video. Press “UP” or “DOWN” to select the desired
item, press “OK” to see the options. select the
desired item and press “OK” to conrm. Press
“STOP” to go back to the previous page when a
setting is done.
4.1 OSD
Here you can decide whether the Date Time, ID,
SD card icon and other icons would be shown
on the video; Press UP or DOWN to select the
desired item, press “OK” to save or “Stop” to go
back to the previous page.

17
4.2 ID Setting
Press “LEFT” or “RIGHT” to locate the desired
position and press “UP” or “DOWN” to change the
number or letter. Press “STOP” to go back to the
previous page.
5. System Setting
On this page, you can set time, language, format
SD or restore factory settings. Press “UP” or
“DOWN” to select the desired item, press “OK” to
see the options and then again select the desired
item and press “OK” to conrm. Then press
“STOP” to go back to the previous page.
5.1 Time
Press “LEFT” or “RIGHT” to locate the desired
position and press “UP” or “DOWN” to change the
number. Press “STOP” to go back to the previous
page.
5.2 Time Zone
Press “LEFT” or “RIGHT” to locate the desired
position and press “UP” or “DOWN” to change the
number. Press “STOP” to go back to the previous
page.

18
5.3 Language
There are three languages optional, English,
Chinese and Portuguese.
Press “UP” or “DOWN” to select the desired
item, press “OK” to save, and press “STOP” to
go back to the previous page.
5.4 Format
If you’ve just inserted a SD Card that has been
taken from other device, or want to delete all
les in the SD card, you will need to do this
operation. Press “UP” or “DOWN” to select the
desired item, press “OK” to save, and press
“STOP” to go back to the previous page.
Yes -- Format the SD card
No –Exit
5.5 Reset
Press “UP” or “DOWN” to select the desired
item, press “OK” to save, and press “STOP” to
go back to the previous page.
Yes -- Format the SD card
No –Exit
5.6 Card Info
Here you see information of the SD card, like
Total size, Usage Size and Remaining space.

19
Troubleshooting
1. No Image; No Sound;
Solution:
a) Check whether both the DVR and cameras are connected to the power supply;
b) Make sure the A/V cable is correctly connected.
2. Image with snowakes and noisy sound;
Solution:
a) Check that the channel of receiver is corresponding to the camera;
b) Check if the cameras are placed in the working distance or the signal is blocked by
some barrier (walls. doors windows etc.)
3. Ghost Image with normal sound;
Solution:
a) Check the distance of the camera, and objects that might interfere with the signal;
b) If you are using 2 cameras, make sure the cameras on are on dierent channels.
4. Black Image with normal sound;
Solution:
a) Check the TV Standard (PAL or NTSC) is set to the correct standard for the TV it is being
used on. For TV’s in the EU, this will normally be PAL.
5. Lots of 20 second recordings;
Solution:
a) When set on motion record, the DVR will record in 20 seconds blocks, this is the normal
operation of the DVR.
b) Motion recording will be triggered by any motion, including motion caused by rain and
objects moving in the wind. These can be masked out to reduce false recordings. See
section 3.3.2 for more information on setting up the Mask Area.
6. Other abnormal or unexpected activity;
Solution:
a) Take a look at the support videos on our YouTube channel, http://youtube.com/
spycameracctv
b) Give our technical guys a call on 0117 325 2470, Option 2, or send them an email;

Table of contents
Other SpyCameraCCTV Security Camera manuals

