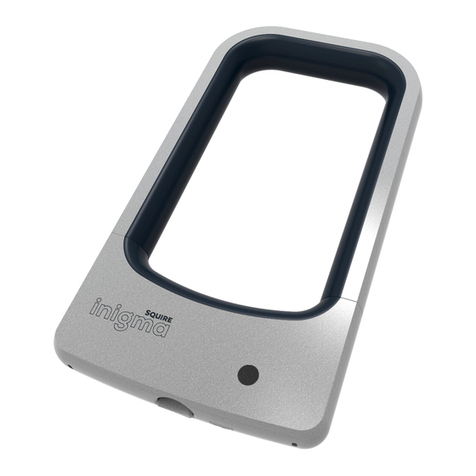
Squire STRAPLOK COMBI 10 User manual

UK
Henry Squire & Sons Limited
Hilton Cross Business Park, Featherstone, Wolverhampton, WV10 7QZ, England
+44 (0)1902 308052 www.squirelocks.co.uk
How to set your own code
STEP 1
Set the lock by
aligning the
combination number
to the factory preset
combination 0-0-0
with the Guide Line.
(Figure 1)
STEP 2
Rotate the Reset
Button 150 degrees
counter clockwise to
the reset condition
(Figure 2)
STEP 3
Set your desired
combination
(Figure 3)
STEP 4
Rotate the Reset
Button 150 degrees
clockwise to it's
original position.
Verify your new
combination before
using the lock. Then
your lock is ready to
use (Figure 4)
Dial

Henry Squire & Sons Limited
Hilton Cross Business Park, Featherstone, Wolverhampton, WV10 7QZ, England
+44 (0)1902 308052 www.squirelocks.co.uk
ES
Cómo programar tu propio código
PASO 1
Ajustar el candado
alineando los números
de la combinación a la
Línea guía con la
combinación
preestablecida 0-0-0.
(Figura 1)
PASO 2
Girar el Botón de
restablecimiento 150
grados hacia la
izquierda para poder
restablecerlo (Figura
2)
PASO 3
Establecer la
combinación
deseada
(Figura 3)
PASO 4
Rotar el Botón de
restablecimiento 150
grados hacia la derecha
dejándolo en su posición
original. Comprobar la
nueva combinación antes
de usar el candado. El
candado estará listo para
usarse (Figura 4)
El tamaño de sujeción mínimo
recomendado es de
aproximadamente 7-8cm
Pulsador
Dial
Botón de
restablecimiento
Brida
Posición
original
Posición de
restablecimiento
Posición de
restablecimiento
Posición
original
Botón de
restablecimiento Botón de
restablecimiento

Henry Squire & Sons Limited
Hilton Cross Business Park, Featherstone, Wolverhampton, WV10 7QZ, England
+44 (0)1902 308052 www.squirelocks.co.uk
FR
Comment définir votre propre code
ÉTAPE1
Réglez le cadenas en
alignant les chiffres
sur la ligne de
référence pour former
la combinaison
préréglée en usine 0-
0-0. (Figure 1)
ÉTAPE2
Tournez le bouton de
réinitialisation de 150
degrés dans le sens
inverse des aiguilles
d'une montre jusqu'à
l'état de
réinitialisation (Figure
2)
ÉTAPE3
Formez la
combinaison
souhaitée
(Figure3)
ÉTAPE4
Tournez le bouton de
réinitialisation de 150
degrés dans le sens des
aiguilles d'une montre
jusqu'à sa position
initiale. Vérifiez votre
nouvelle combinaison
avant d'utiliser le
cadenas. Votre cadenas
est alors prêt à l'emploi
(Figure 4)
La fourchette de verrouillage
minimum recommandée est
d'environ 7 à 8 cm
Bouton de
commande
Cadran
Bouton de
réinitialisation
Attache de câble
Position
initiale
Position
initiale
Position de
réinitialisation
Position de
réinitialisation
Bouton de
réinitialisation Bouton de
réinitialisation

Henry Squire & Sons Limited
Hilton Cross Business Park, Featherstone, Wolverhampton, WV10 7QZ, England
+44 (0)1902 308052 www.squirelocks.co.uk
NL
Hoe uw eigen code in te stellen
STAP 1
Stel het slot in door
het combinatiegetal
met de referentielijn
uit te lijnen met de in
de fabriek
voorgeprogrammeerd
e combinatie 0-0-0.
(Afbeelding 1)
STAP 2
Draai de Resetknop
150 graden tegen de
klok in naar de
resetstand
(Afbeelding 2)
STAP 3
Stel uw gewenste
combinatie in
(Afbeelding 3)
STAP 4
Draai de Resetknop
150 graden met de
klok mee naar zijn
oorspronkelijke
positie. Controleer uw
nieuwe combinatie
voordat u het slot
gebruikt. Uw slot is nu
klaar voor gebruik
(Afbeelding 4)
Het aanbevolen minimum
sluitbereik is ongeveer 7-8cm
Drukknop
Draaiknoppen Resetknop
Kabelband
Afbeelding 1
Originele
positie
Originele
positie
Resetpositie
Resetpositie
Afbeelding 2 Afbeelding 3 Afbeelding 4
Resetknop Resetknop

Henry Squire & Sons Limited
Hilton Cross Business Park, Featherstone, Wolverhampton, WV10 7QZ, England
+44 (0)1902 308052 www.squirelocks.co.uk
DE
Einstellung des persönlichen Codes
SCHRITT 1
Zur Einstellung des
Schlosses richten Sie die
Zahlenkombination auf
die werkseitig
voreingestellte
Kombination 0-0-0 an der
Markierungslinie aus.
(Abbildung 1)
SCHRITT 2
Den Reset-Knopf um
150 Grad gegen den
Uhrzeigersinn in den
Reset-Zustand drehen
(Abbildung 2)
SCHRITT 3
Die gewünschte
Kombination
einstellen.
(Abbildung 3)
SCHRITT 4
Den Reset-Knopf um 150
Grad im Uhrzeigersinn in
seine ursprüngliche
Position drehen. Vor
Benutzung des Schlosses
die neue Kombination
überprüfen. Nun ist Ihr
Schloss einsatzbereit
(Abbildung 4).
Die empfohlene Schließlänge
beträgt etwa 7-8 cm
Druckknopf
Auswahl
Reset-Knopf
Kabelbinder
Abbildung 1 Abbildung 2 Abbildung 3 Abbildung 4
Ursprüngliche
Position
Ursprüngliche
Position
Reset-Position
Reset-Position
Reset-Knopf Reset-Knopf

Henry Squire & Sons Limited
Hilton Cross Business Park, Featherstone, Wolverhampton, WV10 7QZ, England
+44 (0)1902 308052 www.squirelocks.co.uk
PL
Jak ustawić własny kod
KROKI 1
Ustaw zamknięcie
poprzez ustawienie
kombinacji fabrycznej
0-0-0 w linii kodu.
(Rysunek 1)
KROK 2
Obróć przycisk
resetowania o
150stopni w lewo do
położenia resetowania
(Rysunek2)
KROK 3
Ustaw własną
kombinację
(Rysunek 3)
KROK 4
Obróć przycisk resetowania o
150stopni w prawo do
pierwotnego położenia.
Sprawdź nową kombinację
przed użyciem blokady.
Blokada jest gotowa do
użycia (Rysunek 4)
Zalecana minimalne odległość
zamknięcia wynosi około 7-8 cm
Przycisk
Pokrętło
bębenkowe
Przycisk resetowania
Opaska kablowa
Rysunek 1 Rysunek 2 Rysunek 3 Rysunek 4
Przycisk
resetowania
Przycisk
resetowania
Pozycja
oryginalna
Pozycja
oryginalna
Pozycja
zresetowana
Pozycja
zresetowana

Henry Squire & Sons Limited
Hilton Cross Business Park, Featherstone, Wolverhampton, WV10 7QZ, England
+44 (0)1902 308052 www.squirelocks.co.uk
PT
Como definir o seu próprio código
PASSO 1
Ajuste a trava
alinhando o número
da combinação com a
combinação
predefinida de fábrica
0-0-0 com a Linha
Guia. (Figura 1)
PASSO 2
Gire o botão de
redefinição em 150
graus no sentido anti-
horário para a
condição de
reinicialização
(Figura 2)
PASSO 3
Defina a Combinação
desejada
(Figura 3)
PASSO 4
Gire o botão Redefinição
a 150 graus no sentido
horário para sua posição
original. Verifique sua
nova combinação antes
de usar o cadeado. Então
sua fechadura está
pronta para uso (Figura 4)
O intervalo mínimo de
travamento recomendado é de
cerca de 7-8 cm
Botão Tátil
Indicador
Botão de
redefinição
Braçadeira
Botão de
redefinição Botão de
redefinição
Posição
original
Posição
original
Posição de
reposição
Posição de
reposição

Henry Squire & Sons Limited
Hilton Cross Business Park, Featherstone, Wolverhampton, WV10 7QZ, England
+44 (0)1902 308052 www.squirelocks.co.uk
RU
Как установить свой код
ШАГ 1
Установите блокировку,
набрав кодовую
комбинацию,
соответствующую
предустановленной
заводской комбинации
0-0-0, и совместив ее с
направляющей линией.
(Рисунок 1)
ШАГ 2
Поверните кнопку
сброса на 150 градусов
против часовой стрелки,
установив ее в
положение сброса
(Рисунок 2)
ШАГ 3
Установите желаемую
комбинацию
(Рисунок 3)
ШАГ 4
Поверните кнопку
сброса на 150 градусов
по часовой стрелке,
установив ее в исходное
положение. Проверьте
новую комбинацию,
прежде чем
пользоваться замком.
Теперь замок готов к
использованию
(Рисунок 4)
Рекомендуемый минимальный
диаметр зоны обхвата составляет
около 7–8 см
Нажимная кнопка
Диск набора
Кнопка сброса
Стяжка
Кнопка сброса Кнопка сброса
(Рисунок 1) (Рисунок 2) (Рисунок 3) (Рисунок 4)
Исходное
положение
Исходное
положение
Положение
сброса
Положение
сброса

Henry Squire & Sons Limited
Hilton Cross Business Park, Featherstone, Wolverhampton, WV10 7QZ, England
+44 (0)1902 308052 www.squirelocks.co.uk
IT
Come impostare il codice personale
FASE 1
Impostare il lucchetto
allineando le rotelle
sul codice 0-0-0,
preimpostato di
fabbrica, con la linea
guida. (Figura 1)
FASE 2
Ruotare il tasto tasto
reset di 150° in senso
antiorario fino a
raggiungere la
posizione di reset
(Figura 2)
FASE 3
Impostare la
combinazione
desiderata
(Figura 3)
FASE 4
Ruotare il tasto reset
di 150° in senso orario
e riportarlo nella
posizione iniziale.
Verificare la nuova
combinazione prima di
utilizzare il lucchetto.
Il lucchetto è pronto
per l’uso (Figura 4)
La misura minima di bloccaggio
raccomandata è 7-8 cm.
Pulsante
Tasto reset
Rotella
Fascetta
Tasto reset Tasto reset
Posizione
iniziale
Posizione
iniziale
Posizione
di reset
Posizione
di reset
Table of contents
Languages:
Other Squire Bicycle Accessories manuals