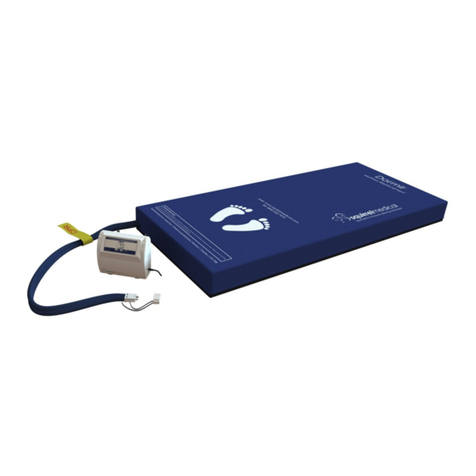
Squirrel Medical Diamond MRS User manual

Squirrel Diamond MRS
Instructions for Use
For use by clinicians
IMPORTANT!
Read the instructions in this booklet thoroughly prior to use.
Keep these instructions for future reference.

Page 2 of 40
Copyright Squirrel Medical®2018 - E&OE
Contents
1. Introduction ____________________________________________________________________________ 3
1.1 Foreword______________________________________________________________________________________ 3
1.2 Product Models & SWL _______________________________________________________________________ 4
1.3 Warning Symbols _____________________________________________________________________________ 5
2. Intended Use ___________________________________________________________________________ 6
2.1 Contra Indications ____________________________________________________________________________ 6
2.2 General warnings _____________________________________________________________________________ 7
3. General Product Description ___________________________________________________________ 8
3.1 The Diamond System_________________________________________________________________________ 8
3.2 Product Description __________________________________________________________________________ 9
3.2.1 Identification of Pump Parts _________________________________________________________________ 9
3.2.2 Identification of Mattress Parts _____________________________________________________________10
4. Installation _____________________________________________________________________________11
4.1 Unpacking____________________________________________________________________________________ 11
4.2 Assemble the Diamond MRS ________________________________________________________________ 11
5. Diamond MRS Operation ______________________________________________________________15
5.1 Pre-Use Routine _____________________________________________________________________________ 15
5.2 Diamond Digital Pump 8900 Controls ______________________________________________________ 16
5.3 Using the Diamond 8900 Pump_____________________________________________________________ 16
5.3.1 User Weight Guide ___________________________________________________________________________ 17
5.4 Alarms & Indicators__________________________________________________________________________ 18
5.5 CPR Valve ____________________________________________________________________________________ 19
5.6 Mattress Transfer Mode_____________________________________________________________________ 20
6. Storage & Transport ___________________________________________________________________21
6.1 Preparing the Mattress for storage _________________________________________________________ 21
7. Cleaning and Decontamination ________________________________________________________22
7.1 Cleaning Precautions ________________________________________________________________________ 22
7.2 Cleaning the Mattress _______________________________________________________________________ 23
7.2.1 Disinfecting the Mattress ____________________________________________________________________24
7.2.2 Laundering Mattress Cover__________________________________________________________________24
7.3 Cleaning the Pump __________________________________________________________________________ 25
7.3.1 Disinfecting the Pump _______________________________________________________________________25
8. Routine Maintenance __________________________________________________________________26
8.1 Spare Parts __________________________________________________________________________________ 27
8.2 Changing the Air Filter _______________________________________________________________________ 28
8.3 Changing the Fuse ___________________________________________________________________________ 29
8.4 Service Manual ______________________________________________________________________________ 30
8.5 Decommissioning Procedures ______________________________________________________________ 30
8.6 Warranty _____________________________________________________________________________________ 30
8.7 Product Returns _____________________________________________________________________________ 30
9. Troubleshooting _______________________________________________________________________32
10. Technical Specifications________________________________________________________________34
10.1 Safe Working Conditions ____________________________________________________________________ 34
11. Appendix ______________________________________________________________________________36
11.1 Guidance and manufacturer’s declaration – electromagnetic emissions __________________ 36
11.2 Guidance and manufacturer’s declaration – electromagnetic immunity __________________ 37
12. Contact Squirrel Medical_______________________________________________________________39

Nov 2018
Issue 1.06
Page 3 of 40
1. Introduction
1.1 Foreword
Thank you for purchasing a Squirrel Medical Mattress
Replacement System. In doing so, you have chosen a quality
MRS which has been designed to provide excellent
functionality in a safe manner.
To ensure the MRS is always operated correctly and safely
please read this document thoroughly and strictly follow all
the assembly, operating, cleaning and maintenance
instructions.
ALWAYS keep these instructions with the Diamond for reference
•Do ensure that you fully read & understand these Instructions for Use
•Do ensure the Diamond is assembled and installed in accordance with these
Instructions for Use
•Ensure the Diamond MRS is always used as intended, see 2 - Intended Use,
Page 6
•Always ensure the Diamond MRS is installed and commissioned as intended.
See 2 - Intended Use, Page 6

Page 4 of 40
Copyright Squirrel Medical®2018 - E&OE
1.2 Product Models & SWL
The Diamond MRS is a pressure redistributing (active) mattress replacement
system. It is comprised primarily of two components –the Pump and the Mattress.
These instructions cover the following models;
Model
Description
Safe Working Load
PUMP8900
Diamond MRS Pump
The Pump is responsible for the inflation cycle of
the mattress component of the system.
N/A
DIA302
Standard Diamond MRS Mattress
This is the standard supplied mattress with the
Diamond MRS, and the model used for illustration
throughout this manual
Size: 88cm x 198 cm x 12.5cm
MIN: 30KG
MAX: 200KG
DIA306
Diamond Long MRS Mattress
Identical to the Standard Diamond mattress, but
20cm longer, for taller occupants.
Size: 88cm x 218cm x 12.5cm
MIN: 30KG
MAX: 200KG
DIA304
Diamond Wide MRS Mattress
Identical to the Standard Diamond mattress, but
30cm wider.
Size: 118cm x 198cm x 12.5cm
MIN: 30KG
MAX: 243KG
Please note that only the PUMP8900 and DIA302 system is used for illustration throughout this
document.

Nov 2018
Issue 1.06
Page 5 of 40
1.3 Warning Symbols
WARNINGS given in this manual identify possible hazards in procedures or
conditions, which if not correctly followed, could result in death, injury or other
serious adverse reactions.
Cautions given in this manual identify possible hazards in procedures or
conditions, which if not followed, could result in equipment damage or failure,
and indicate moderate risk.
Electrical Hazard symbol indicates a hazard due to electrical voltage, which if
not correctly followed could result in death, serious injury or fire.
Weight Hazard symbol appears when there is a potential weight related
hazard. This could be a component/packaging weight, or a caution about
Patient/User weight or loading.
Biological Hazard symbols appear wherever there is a risk of infection, cross-
contamination or disinfection.

Page 6 of 40
Copyright Squirrel Medical®2018 - E&OE
2. Intended Use
The Diamond Mattress Replacement System is intended to be used as an aid to assist in
the managed treatment and prevention of pressure ulcers when used in conjunction with a
patient care plan and/or pressure ulcer prevention program and must not be considered
or relied upon as an independent curative device.
All patients must be clinically risk assessed before being prescribed the Diamond Mattress
Replacement System and used with clinical guidance.
The Care Provider is responsible for ensuring that the person(s) setting up and using the
Diamond System are trained and competent in its use.
Support surfaces alone neither prevent nor heal pressure ulcers. They
are to be used as part of a total management plan for the prevention and
treatment of pressure ulcers (NPUAP, EPUAP & PPPIA 2014)
2.1 Contra Indications
SPINAL INJURIES
The Diamond MRS provides alternating therapy and should not be used with
patients that have spinal injuries and/or unstable fractures of the spine. Patients
with other fractures and burns should undergo a thorough medical
examination/risk assessment before being prescribed its use.
The clinical evidence relating to the effectiveness of this product can be found in Squirrel
Medicals Guide to Pressure Area Care. This can be obtained at: www.squirrelmedical.com

Nov 2018
Issue 1.06
Page 7 of 40
2.2 General warnings
WARNING: DO NOT modify your Diamond MRS, its components or any of its
accessories in any way; doing so could result a potential hazard.
Do not use mattress transfer mode with a patient in the bed.
The transport mode is designed to transport a semi inflated mattress NOT a
patient.
Do not use as an overlay.
The Squirrel Diamond MRS is a mattress replacement and must not be used
as an overlay.
The intended Safe Working Load (SWL) of a Diamond MRS must never be
exceeded, and is determined by the mattress fitted. See 1.2 - Product
Models & SWL, page 4.
The Diamond MRS’s are designed for use only in the UK and Ireland.
Particular caution should be given to the tampering with the controls by
unsupervised children.
The Diamond MRS is not intended for use in the proximity of high-frequency
surgical equipment and/or defibrillators.
The Diamond MRS is not intended to be sterile.
Never smoke in bed, and always keep naked flames away from the Diamond
MRS.

Page 8 of 40
Copyright Squirrel Medical®2018 - E&OE
3. General Product Description
3.1 The Diamond System
The Diamond MRS is a pressure redistributing (active) mattress replacement
system. It is designed for persons up to 200Kg (or 243Kg if using the ‘Wide’ DIA304 variant) at
high risk of developing pressure ulcers. The Diamond System comprises of 2 parts, the fully
alternating mattress base and a compact light weight pump, which provides the air supply
to the mattress. The system should be used in conjunction with a pressure ulcer prevention
program and must not be relied upon as an independent curative device.
The clinical evidence relating to the effectiveness of this product can be found in Squirrel
Medicals Guide to Pressure Area Care. This can be obtained at: www.squirrelmedical.com.
CE Compliance
The Squirrel Diamond MRS complies with European Directive 93/42/EEC concerning
medical devices and has been designed and manufactured to comply with the following
standards:
IEC 60601-1:2005 Medical electrical equipment
General requirements for basic safety and essential performance.
EN 60601-1-2:2007 Medical electrical equipment
General requirements for basic safety and essential performance.
Collateral standard. Electromagnetic compatibility. Requirements
and tests.

Nov 2018
Issue 1.06
Page 9 of 40
3.2 Product Description
The Diamond MRS is comprised of two main parts, the mattress and the pump. Both
parts are identifiable by a serial number and part number or name.
The model of this Diamond pump is: PUMP8900
The model of this Diamond Mattress is: DIA301
▪The serial number of the 8900 Pump can be found on the back of the pump housing.
▪The mattress serial number can be found on the white label, which is located on the
inside of the mattress base at the head end.
3.2.1 Identification of Pump Parts
Diamond 8900 Pump
1
Diamond Pump unit
6
Hook Covers
2
Control Panel
7
Air Filter
3
Tube Set Connector Socket
8
Diamond Extra Deep Pump Hook
4
Fuse Holder
9
Serial Number Label
5
Standard Pump Hooks (fitted)
10
Power Cord with Plug
1
10
3
2
4
8
5
6
7
9

Page 10 of 40
Copyright Squirrel Medical®2018 - E&OE
3.2.2 Identification of Mattress Parts
Diamond Mattress (Model DIA302 illustrated)
1
Mattress Top Cover
7
Foam Mattress Base
2
Tube Set
8
Tube Set Connector Plug
3
CPR Valve
9
Connector Lock
4
Diamond Stacked Air Cells (x15)
10
Transport Cap
5
Diamond ‘Ventilation’ Air Cells (x9)
11
Mattress Basement
6
Head Cells (x5) (not shown)
5
2
3
4
8
10
9
1
7
11
6

Nov 2018
Issue 1.06
Page 11 of 40
4. Installation
4.1 Unpacking
Carefully open the boxes and unpack all components.
While unpacking, be aware some of the larger components are heavy. See
10 Technical Specifications, Page 34. If required, please take precautions
before attempting to lift or move any items.
To avoid danger of suffocation, keep packaging and plastic bags away from
babies and children.
4.2 Assemble the Diamond MRS
1
Check that you have the parts
1 x Diamond Mattress
1 x Squirrel Diamond Pump 8900
1 x Instructions for Use
1 x Standard Pump Hook (pre-attached to pump)
1 x Extra Deep Pump Hook
2
Mount the pump to the foot board of the bed
Unfold the Standard Pump Hooks and hang the
pump over the foot board of the bed. It should be a
snug fit. If they are too loose there is a risk of the
pump falling to the floor and suffering impact
damage.
2b
OPTIONAL STEP –Exchange as required
If the Standard Pump Hooks are not deep enough
to fit the footboard of your bed, fit the optional
Extra Deep Pump Hook.
▪Remove 8 x screws in hook covers, illustrated
▪Remove hook covers
▪Exchange Pump Brackets as required
▪Replace covers and all 8 screws securely.

Page 12 of 40
Copyright Squirrel Medical®2018 - E&OE
Each time the Diamond MRS is set up, specific attention must be drawn to
any potential dangers which can occur despite correct operation. Before putting
the Diamond MRS into service for the first time, the Instructions for Use must be
read conscientiously and in detail by the User / Care personnel.
3
Fit the Mattress
Correct Mattress orientation on a Bed
Position the Mattress onto the bed with the tube set towards the foot end of the bed.
Also, the print on the mattress should be face up, with the image of ‘feet’ towards the
foot end.
Correct Mattress strap locations
Secure the mattress on to the bed frame using the black nylon straps that are located
on the mattress base (shown in RED, above). Ensure that the straps do not impede
moving parts. Pull straps to tighten and tuck the loose end of the nylon strap up and out
of the way. Once fitted, check that the Bed still profiles without the straps snagging on
any framework.
Foot
End
Head
End

Nov 2018
Issue 1.06
Page 13 of 40
Make sure that the power cable and tube set are routed so it does not snag the bed or
cause a trip hazard.
NEVER route the tube set on the floor between the castors at the Head or Foot
Ends of an adjustable height bed. Doing so and raising a bed will pull the tubes
apart and damage your unit.
ALWAYS route any cabling around the sides of the bed, or around the castors
4
Connect the Pump and Mattress Push the male tube
set connector into the female port (situated at the side of
the pump) until so that the two red arrows align (1).
Rotate the connector anti-clockwise until the Connector
Lock is aligned with the ‘LOCK’ text on the Pump (2). Slide
the lock towards the Pump (3) and the connector will be
fitted correctly (4). To detach, Slide the lock away from the
pump, rotate the Connector clockwise and pull.
Never release the tube set connector whilst a patient is
on the mattress!
5
Check CPR Valve
Ensure that the CPR valve on the tube set is closed.
To do this, press the plastic caps attached to the
yellow CPR tag down tightly onto the red connector
opening in the tube set.
1
4
3
2

Page 14 of 40
Copyright Squirrel Medical®2018 - E&OE
6
Check Mattress Assembly
Ensure that the mattress cover is zipped into place.
There are zips all the way around the mattress
cover, and they should all be fastened.
7
Setup Complete!
Plug the pump into a power socket ensuring
that electric cables are routed so they do not
pose a trip hazard.

Nov 2018
Issue 1.06
Page 15 of 40
5. Diamond MRS Operation
5.1 Pre-Use Routine
Each time after you have set up the Diamond MRS, check the following before proceeding
with normal operation:
Pre-Use Checklist
1
Check that these Instructions for Use (IFU) are easily accessible.
2
Check that the pump hooks are the correct size for the footboard and that
the pump is attached to the footboard of the bed.
3
The power cable is not being strained, cut or crushed. Also check it has not
been damaged prior to use.
4
The pump has power.
5
The pump is set to the correct patient weight setting.
6
The mattress is attached correctly to the bed frame and check that the
mattress straps are not impeding moving parts of the bed.
7
Check that the CPR valve is closed.
8
Check that the tube set connector that attaches to pump is fitted correctly.
The red arrows should be aligned, and the Securing /lock should be slid
into place.
9
Check the mattress tubing is not damaged, and is routed correctly without
kinks.
10
The mattress cells are inflating alternately.
The Power Failure Alarm must be tested at least once per year, and also after
any prolonged period of storage before commissioning the Pump for use. See
5.4 - Alarms & Indicators, page 18

Page 16 of 40
Copyright Squirrel Medical®2018 - E&OE
5.2 Diamond Digital Pump 8900 Controls
5.3 Using the Diamond 8900 Pump
1
ON/OFF
Button
Pressing the ON/OFF button will toggle the pump on & off. The green
light will illuminate when the pump is running.
2
CYCLE TIME
Select
Pressing the CYCLE TIME button will increment the cycle time of the
system from 10, 15, 20, 25 and then back to 10 minutes, as
displayed by the 4 corresponding lights.
(NOTE: Only functions when running in Alternating Mode)
3
THERAPY
Mode Select
Pressing the THERAPY button will toggle between Alternating and
Static modes. Current mode is displayed with the corresponding
lights.
•Alternating Mode –The Air Cells in the Mattress will inflate and
deflate alternately. The rate at which this occurs can be
adjusted using the CYCLE TIME button.
•Static Mode –All the Air Cells in the mattress are inflated at
the same time, providing a stable surface.
NOTE:Static Mode will automatically revert back to Alternating
Mode after 20 minutes
4
COMFORT
Setting
The and buttons adjusts the pressure in the mattress between
10 different levels; 1 being soft, 10 being firm. Refer to 5.3.1 User
Weight Guide, page 17.
NOTE: Will not function when running in AutoFirm mode
5
POWER
FAILURE Light
This light will flash accompanied by a sounder if the Pump is
disconnected from the mains power while running.
3
1
9
6
5
7
2
4
8

Nov 2018
Issue 1.06
Page 17 of 40
6
LOW
PRESSURE
Light
This light is lit when the pressure in the mattress is too low.
It will flash and be accompanied by an audible alarm if the system
detects a prolonged period of low pressure.
7
Alarm Mute
Button
Pressing the Alarm Mute Button will temporarily silence the audible
alarm of either the Low Pressure or Power Failure warnings. Any
corresponding warning lights will remain lit (or flashing) until the
issue has been resolved.
8
AUTOFIRM
The AutoFirm function allows for the rapid inflation of the mattress
to facilitate patient treatment on a firm surface. It can also be used
to provide a stable surface prior to entering or exiting the bed.
AutoFirm inflates all cells to their maximum inflation level in a non-
alternating mode for a period of 20 minutes. After this time has
elapsed, the pump will revert to its previous settings.
9
Panel Safety
Lock
After 5 minutes of inactivity, the control panel will automatically lock
to prevent accidental or unauthorised adjustments. To operate any
controls, press and hold the PANEL LOCK button for 4 seconds or
until the corresponding light goes out.
NOTE: Even when locked, the ON/OFF button and ‘ Alarm Mute’ button
can still be operated
5.3.1 User Weight Guide
Comfort
Setting
Occupant Weight
Standard & Long Mattresses
DIA302 & DIA306
Wide Mattress
DIA304
1
30Kg - 50Kg
30Kg - 50Kg
2
50Kg - 65Kg
50Kg –70Kg
3
65Kg - 80Kg
70 Kg –90Kg
4
75Kg - 85Kg
90Kg –110Kg
5
80Kg - 100Kg
110Kg –130Kg
6
95Kg - 115Kg
130Kg –150Kg
7
115Kg - 140Kg
150Kg –170Kg
8
140Kg - 160Kg
170Kg –190Kg
9
160Kg - 180Kg
190Kg –210Kg
10
180Kg - 200Kg
210Kg –243Kg
Caution: These weights are approximate and should be varied
according to the comfort and clinical needs of the patient.

Page 18 of 40
Copyright Squirrel Medical®2018 - E&OE
5.4 Alarms & Indicators
There will be an audible alarm sound for the following reasons:
Power Failure alarm
In the event of a power failure an audible alarm will sound.
This will be accompanied by the ‘Power Failure’ light flashing on the pump control panel.
Check that:
•The power socket has not been turned off.
•The plug has not been pulled out or partially out of the power socket.
•There has not been a general power cut to the building or the patient’s bedroom.
Restore the power by replacing the plug in the socket.
Note - when power is restored the pump will automatically turn itself back on and starts to
re-inflate the mattress to the previous settings.
The Power Failure Alarm must be tested at least once per year, and also after
any prolonged period of storage before commissioning the Pump for use.
TO TEST: With the Pump powered and operating, switch off at the wall socket. If
no alarm sounds, leave the pump running for 60 minutes to recharge internal
batteries, then repeat the test. If the alarm still does not sound, take the pump out
of use until it has been serviced.
Low Pressure alarm
In the event of low pressure within the mattress an audible alarm will sound.
This will be accompanied by the Low Pressure light flashing on the pump control panel.
Check that:
•The tube set connector is securely located into the Diamond 8900 Pump and no air
is escaping. The ‘LOCK’ on the connector should be engaged.
•The CPR valve on the tube set is held firmly in place and that no air is escaping.
If the mattress continues to indicate low pressure, it will be unable to alternate
the pressure in the cells. This could lead to a pressure ulcer. The patient should
be transferred to an alternative operational MRS whilst the mattress is
inspected and/or repaired.

Nov 2018
Issue 1.06
Page 19 of 40
5.5 CPR Valve
In the event of cardiac arrest:
The CPR is a mechanism that allows for the rapid
deflation of the mattress. It is within the tube set. It can
be identified by a bright yellow nylon Strap that is
connected to a valve on the Tube Set.
If the mattress is to be deflated pull the yellow CPR Strap
firmly ensuring that air flows freely from this area.
Press down to seal before each use
In an emergency, pull CPR Strap to open valves
and quickly deflate mattress
⚫
⚫

Page 20 of 40
Copyright Squirrel Medical®2018 - E&OE
5.6 Mattress Transfer Mode
This mode allows for some air to be sealed inside the mattress base allowing the mattress
to be transferred to different locations e.g. for cleaning and servicing without deflating.
Do not use mattress transfer mode with a patient in the bed.
The transfer mode must not be used if a patient is using the mattress.
Disconnect the Tube Set connector from the pump and attach the transport cap into place.
1. Align the red arrows and locate the Transport cap over the Tube Set Connector.
2. Pressing the Transport Cap tightly against the Tube Set Connector, twist them anti-
clockwise to each other (so that the ‘LOCK’ text is aligned with the Connector Lock)
3. Slide the Connector lock towards the Transport Cap to secure into place.
1
2
3
Table of contents
Other Squirrel Medical Medical Equipment manuals
Popular Medical Equipment manuals by other brands
F.Bosch Medizintechnik
F.Bosch Medizintechnik FB2405 user manual
DJO
DJO ULTRASLING IV AND manual

Cantel
Cantel ENDODRY Service manual

mind alive
mind alive Oasis Pro Operator's manual

Olympic Medical
Olympic Medical BILI-BASSINET 58110 instruction manual

Leica Geosystems
Leica Geosystems CM1950 Supplemental sheet
