St George DEO-7 User manual
MODEL:
DEO-7,
DEO-7R, DEO-7S
Appliance
Operation
Manual
INCLUDING INSTALLATION
AND
CLEANING

WELCOME
TO
ST
GEORGE
St
George
is
a
proud
Australian
company
with
a
heritage
of
innovation
and
quality
that
spans
almost
50
years.
Our
success
now
extends
to
Ltd
markets
abroad
as well
as
at home,
and
this
has
confirmed
our
reputation
as
being
at
the
forefront
of
appliance
excellence.
The
elegant
simplicity
of
the
St
George
designs, combined
with
their
high
performance
features,
mean
they
will
remain
contemporary
for
many
years
to
come.
#5737

APPLIANCE
OPERATION
MANUAL
(INCLUDING
INSTALLATION
&
CLEANING INSTRUCTIONS)
DOUBLE
WALL
OVEN
(Model:
DEO-7,
DEO-7R,
DEO-7S)

I
i
I

CONTENTS
1
KNOWING
YOUR
St
George
ELECTRIC DOUBLE WALL
OVEN
................................. 4
1.1
Features
&
Benefits
of
O
ven
........................... ...............................
1.2
C
leaning
M
ade
Sim
ple
.................................................. ............... 4
1.3
O
ven
Function M
odes
...............
................ .................................
1.4 G
rill
Function
Mode
..................................
................................
1.5
Manual
&
A
utom
atic
Settings
........................ .................................
1.6
c
es
o
i
s
...........
Accessories.................................................... 5...
2.
USING
THE
OVEN
FOR
THE FIRST
TIME
.
....
.
........................... .......... ......... 6
3.
CONTROL
PANEL
OPERATION
...............-.................................. ........ 7
D
ia
g
ra
m
. . . . . . . . . .. . . . . . . .. . . . . . . . .. . . . . . . . .. . . . . . . .. . . . . . . . .. . . . . . . .. 9... . . . . . . . . . . .
3.1
o
e
O
... ... ...
......
Pow
er.. ... .... ...
.....
.... .... ... ..
O
n.. ... .. ... .. .. .. .. .. 7.....
3.2
Setting
the
Clock Tim
e.................................................. .............. . 7
3.3
U
P&
DO
W
N
arrow
buttons
........................................................... 8
3.4
eti
g
n
A
l rSetting.........
........
an........Alarm.............Tim
e.................... 0
3.5
ve
N/
F
b
toOven............ON/OFF.................button..........................
10..
3.6
Setting
an
Oven
Cooking
Mode
, ....................................... ................-
10
3.7
Oven
Temperature
Control
Knobs
......... .......................... ...................
1
1
3.9
rilb
tt
n
. .. . ..
Grill.
. .. . . .. . . .. . . . . ..
button.
.. . . .. . . .. . . .. . . .. . . .. . . .. . . .. . . .. . . ..
1
3.1
0
Roast Probe
O
peration
If
Fitted
-... ....... ..............-. ........ ........... 11
3.11
o
plton
o
C
okCompletion......
..............
of.......Cooking......................... 13..
1
3.11
Indicator
Lights
-
O
ven
Tem
p
.........................................................
13
CONTENTS
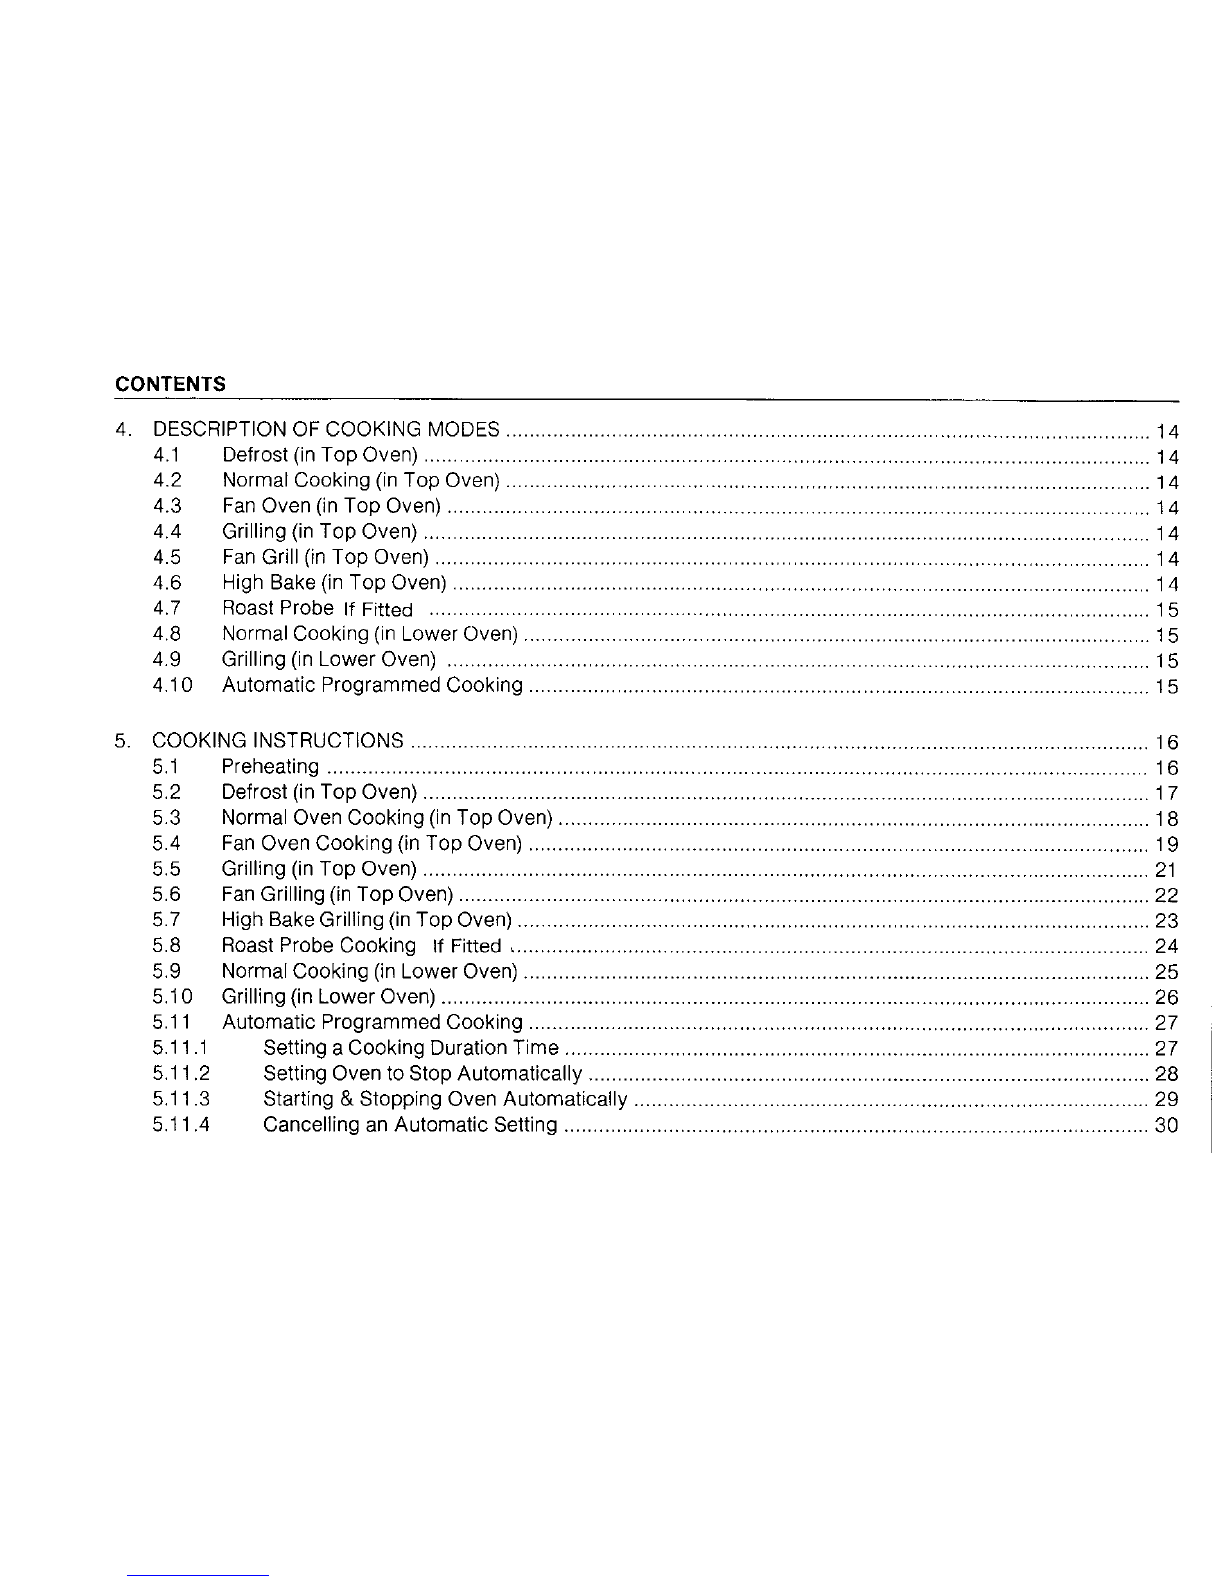
4.
DESCRIPTION
OF
COOKING
MODES
.................................... .................. 14
4.1
efo
t
i T
pODefrost...................(in..........Top..........Oven)...............
14...1
4.2
Norm
al
Cooking
(in
Top
Oven)
........................................................ 14
4.3
anO
en(n
o
Fan
........
Oven............(in.........Top..........Oven)............. 14...1
4.4
rilng
(n
o
O
e)rilling...................(in........
Top..........Oven).............. 14...1
4.5
F n
G
rl
(n
ToFan)........Grill.............(in..........Top.........Oven)....
........
14...1
4.6
High
Bake
(in
Top
O
ven)
....................................... -.................... 14
4.7
oa
tPr
b
I
iRoast..............Probe..............If........Fitted................
15...1
4.8
Norm
al
Cooking
(in
Lower
Oven)
..................... ................ ................. 15
4.9
G
ili
g
(i oGrilling...................(in.........Lower.............Oven).................
5
4.10
Automatic
Programmed
Cooking.............................................................................
15
5.
COOKING
INSTRUCTIONS
...........................................................................................
16
5.1
Preheating
.....................................................................................................
16
5.2
Defrost
(in
Top
Oven)..........................................................................................1
7
5.3
Normal
Oven
Cooking
(in
Top
Oven)
.........................................................................
18
5.4
Fan
Oven
Cooking
(in
Top
Oven).............................................................................
19
5.5
Grilling
(in
Top
Oven)..........................................................................................
21
5.6
Fan
Grilling
(in
Top
Oven)
.....................................................................................
22
5.7
High
Bake
Grilling
(in
Top
Oven)
...
..........................................................................
23
5.8 Roast Probe
Cooking
If
Fitted
...............................................................................
24
5.9
Normal
Cooking
(in
Lower
Oven)
.............................................................................
25
5.10
Grilling
(in
Lower
Oven)........................................................................................
26
5.11
Automatic
Programmed
Cooking.............................................................................
27
5.11
.1
Setting
a
Cooking
Duration
Time
........................................................................
27
5.11
.2
Setting
Oven to Stop
Automatically
...................................................
..................
28
5.11
.3
Starting
&
Stopping
Oven
Automatically................................................................
29
5.11
.4
Cancelling
an
Automatic
Setting
........................................................................
30
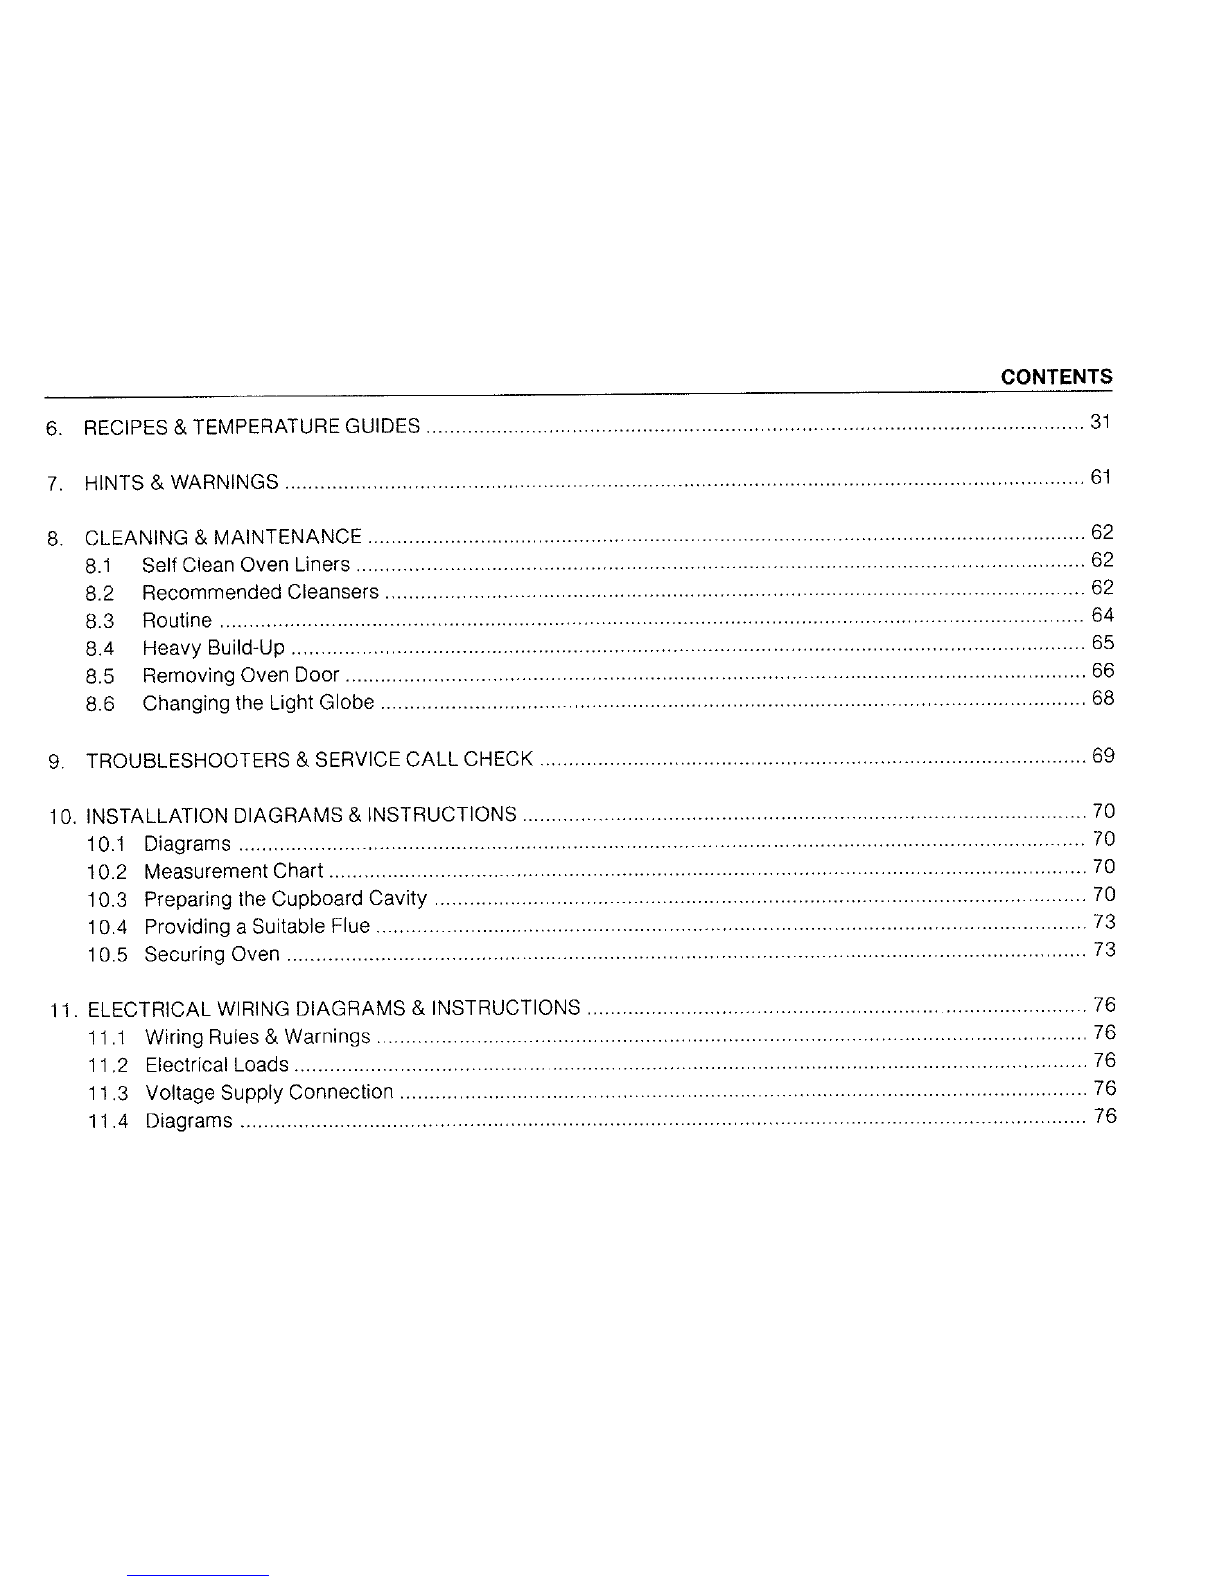
CONTENTS
6.
RECIPES
&
TEMPERATURE
GUIDES
.............................. I...... ..........
I.......3
7.
C
E
NI
G
&
MA
N E
ACHINTS......................&........WARNINGS..........................6
8.2
Recom
m
ended Cleansers
......
.......... *........
.....................................
62
8.3Routine
...............................
...............................
..................................................................................
........
.... ... .... .... .... .... .... ... .... .... .... .... .... .. 6
9.
TROUBLESHOOTERS
&
SERVICE
CALL
CHECK..................................................
69
10.
INSTALLATION
DIAGRAMS
&
INSTRUCTIONS..............._.................................
70
10.2
M
easurement
................................................
Chart..... ..................... 70
10.3
Preparing
the
Cupboard
Cavity.........................................................7
10.4
Providing
a
Suitable
Flue
.......................................... ......... ........... 7
11.
ELECTRICAL
WIRING
DIAGRAMS
&
INSTRUCTIONS
...............................
............
76
11.1
iin
W
iringgs
...................
Rules............&....Warnings...................76....7
11.2
l
c
ri
a
Electrical........
.........
.................
Loads.......................... 76...7
11.3
ota
e
Voltagein..................Supply.............Connection...................
.76....7
11.4
a
ra
s
...................
Diagram
s.......................
.....
.......... 76...........7
KNOWING
YOUR
ST
GEORGE
ELECTRIC
DOUBLE WALL OVEN
St
George
-
DEO-7,
DEO-711,
DEO-7S
Double
Wall
Oven
1
KNOWING
YOUR
ST
GEORGE
ELECTRIC
DOUBLE
WALL
OVEN
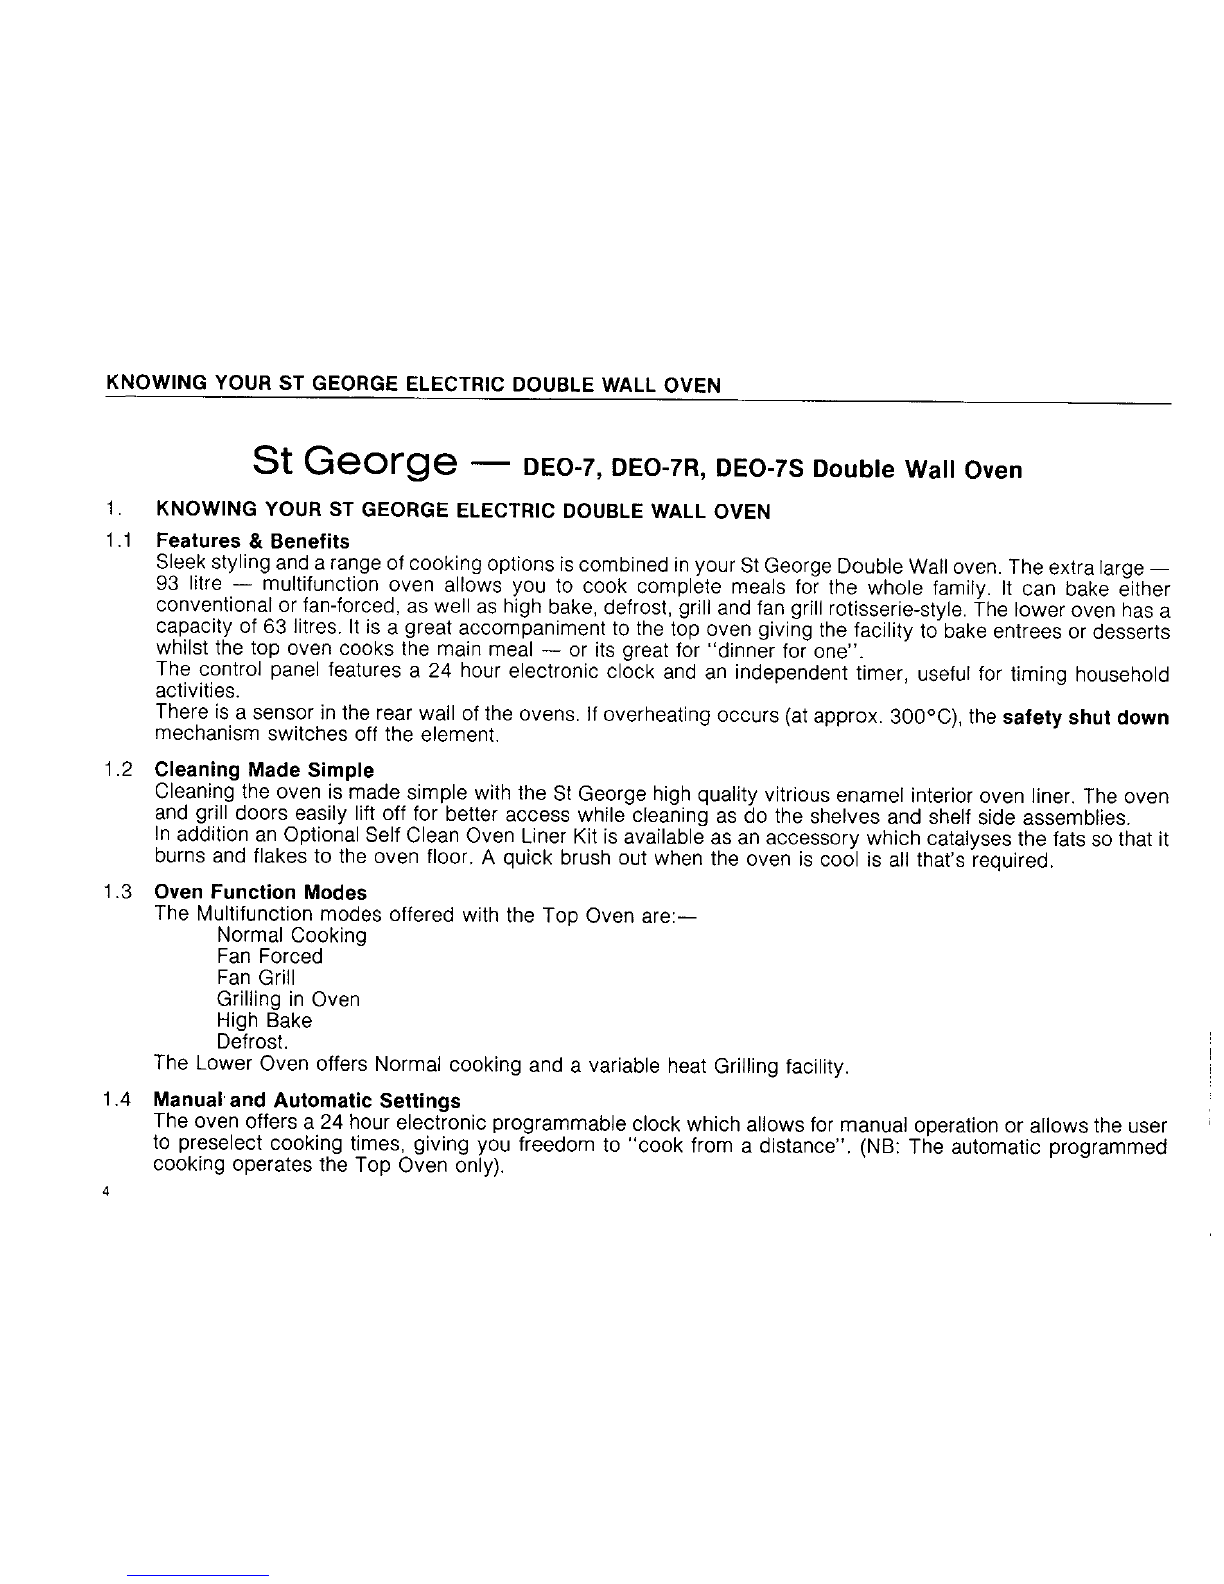
1.1
Features
&
Benefits
Sleek
styling
and
a
range
of
cooking
options
is
combined
in
your
St
George
Double
Wall
oven.
The
extra
large
-
93 litre
-
multifunction
oven
allows
you
to
cook
complete
meals
for
the
whole
family.
It
can
bake
either
conventional
or
fan-forced,
as
well
as
high bake,
defrost,
grill
and
fan
grill
rotisserie-style.
The
lower
oven
has
a
capacity
of
63
litres.
Itisa
great
accompaniment
to the
top
oven
giving
the
facility
to
bake
entrees
or
desserts
whilst
the
top oven
cooks
the
main meal
-
or
its
great
for
"dinner
for
one".
The
control
panel
features
a
24 hour
electronic clock
and
an
independent
timer,
useful for
timing
household
activities.
There
isa
sensor
in
the rear
wall
of
the
ovens.
If
overheating
occurs
(at
approx.
300
0
C),
the
safety
shut
down
mechanism
switches
off
the
element.
1.2
Cleaning
Made
Simple
Cleaning
the
oven
is
made
simple
with the
St
George
high
quality
vitrious
enamel
interior
oven
liner.
The
oven
and
grill
doors
easily
lift
off
for better
access
while
cleaning
as
do
the
shelves
and shelf
side
assemblies.
In
addition
an
Optional
Self
Clean
Oven
Liner
Kit
is
available
as
an
accessory
which catalyses
the
fats
so
that
it
burns
and
flakes
to
the
oven
floor,
A
quick
brush
out when
the
oven
is
cool
is
all
that's required.
1
.3
Oven
Function
Modes
The
Multifunction
modes offered
with
the
Top Oven
are:-
Normal
Cooking
Fan
Forced
Fan
Grill
Grilling
in
Oven
High
Bake
Defrost.
The
Lower
Oven offers
Normal
cooking
and
a
variable
heat
Grilling
facility.
1.4
Manual
and
Automatic
Settings
The
oven offers
a
24 hour
electronic
programmable
clock
which allows
for
manual operation
or
allows
the
user
to
preselect
cooking
times,
giving
you
freedom
to
'cook
from
a
distance".
(NB:
The
automatic
programmed
cooking
operates
the
Top
Oven only).
4
KNOWING
YOUR
ST
GEORGE ELECTRIC
DOUBLE
WALL
OVEN
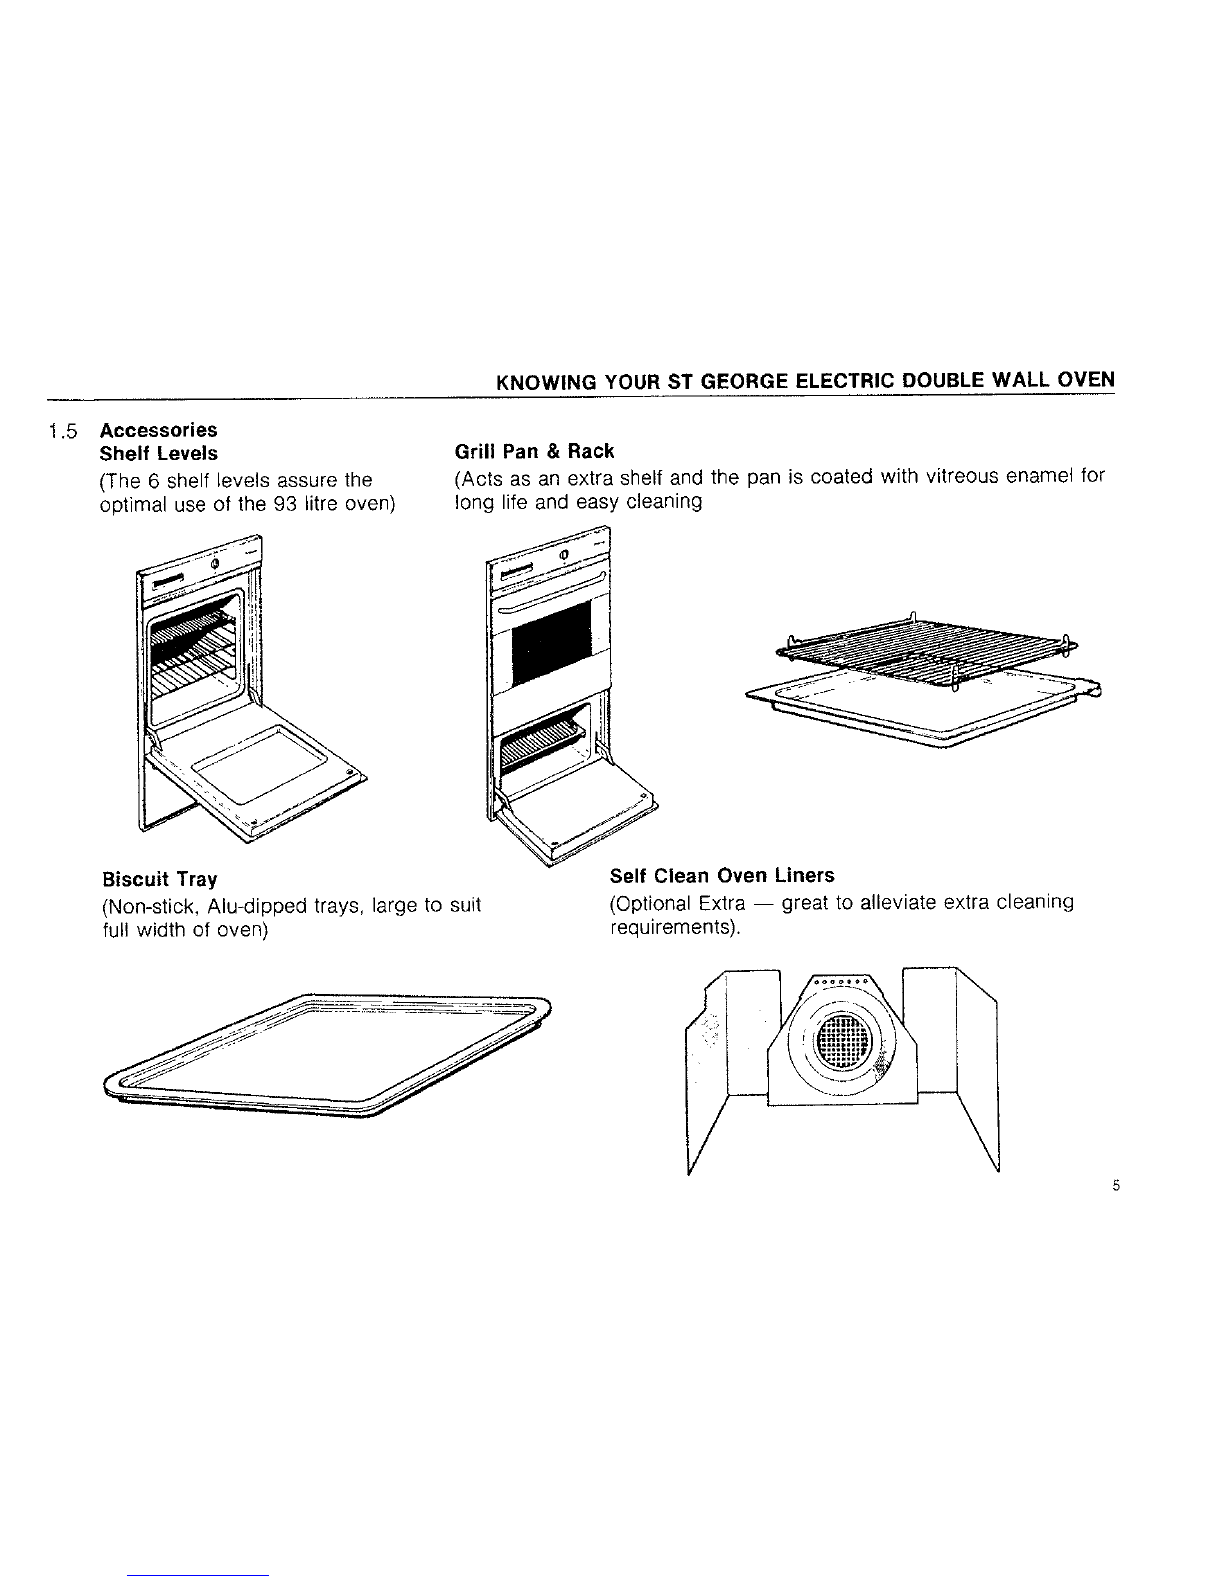
1.5
Accessories
Shelf
Levels
Grill
Pan
&
Rack
(The
6
shelf
levels
assure
the
(Acts
as an
extra
shelf
and
the
pan
is
coated
with
vitreous
enamel
for
optimal
use
of
the
93
litre
oven)
long
life
and
easy
cleaning
Biscuit
Tray
Self
Clean Oven
Liners
(Non-stick,
Alu-clipped trays,
large
to
suit
(Optional
Extra
-
great
to
alleviate
extra
cleaning
full
width
of
oven)
requirements).
5
USING
THE
APPLIANCE
FOR
THE FIRST TIME
2.
USING
THE
APPLIANCE
FOR
THE
FIRST
TIME
The first
time
you
heat
up
the
oven
and
grill
compartment
a
fine
oil
film
on
the
elements
and
surface will
be
given
off
as
smoke.
This
isa
normal
action
and
the
oil
may
be
removed by
the
following
procedure:-
Top
Oven:
1
.Set
the
Clock
Time
to
use
the
oven
function
modes
(see
3.2)
2.
Set
the
Alarm
for
1
hour
3.
Press the
Mode
button
to
select
Fan
Oven
4.
Set
the
Oven
Temperature
Control knob
to
1
800
C
5.
With
the
oven
door
closed,
leave
the
oven
on
these
settings
for
approximately
one
hour
or
until
all
the
smoke
has
disappeared.
Lower
Oven:
6.
Press
the
Grill
button
to
select
Lower
Oven.
7.
Set
the
Oven
Control
Knob
I1to
1
800C.
8.
With
the
oven
door
closed,
leave
the
oven
on
this
temperature
setting
for
approximately
one
hour
or
until
all
the
smoke
has
disappeared.
Both
ovens
are
now
ready
for
cooking.
Cleaning
Reflective
Glass
models:
After
installation
-
all
adhesive
labels,
advertising,
tape
etc should
be
removed
immediately.
A
quick
diluted
wash
with
Ammonia
and
water should
rinse
away
any
remaining
adhesive.
After cleaning,
the
glass must
be
thoroughly
rinsed.
(See
7.3
Cleaning
Routine).
6
CONTROL
PANEL
OPERATION
3.
CONTROL
PANEL
OPERATION
3.1
Power
ON
When
the unit
is
powered
up, the
time
will
be
set
to
"0:00"
and
the
time
alarm
will
sound.
Press
any
button
to
cancel
the
alarm.
3.2
Setting
the
Clock
This
Electronic
Clock
has
a
24 hour
display
(eg:
9am
is
9.00;
midday
is
12.00:
6pm
is
18.00)
1
.
Press the
"Reset"
button
and
hold
it
down
for
more
than
3
seconds.
2.
The
colon
(:)
will stop
flashing
after
the
3
seconds
has
elapsed
and
will
remain
on
while
the
time
is
adjusted.
3.
The
time
can
then
be
altered
by
pressing
the
"UP"
or
"DOWN"
arrows
as
required.
7

CONTROL
PANEL
OPERATION
3.3
Altering
Times
by
the
"UP"
or
"DOWN"
arrow
buttons
1
.
To
alter
a
time,
press
the
required button (either
"Timer",
"Start",
"Stop"
or
'Reset").
2.
The
appropriate symbol
for
the
selected function
will
be
displayed
and
will
remain
displayed
for
at
least
two
seconds
after
the
button
is
released.
3.
While
the
symbol
is
displayed,
the
"UP"
or
"DOWN"
arrow button
can
be
pressed
to
adjust
the
displayed
time.
Itis,
therefore,
only necessary
to
press
one
button
at
a
time
to
alter
the
times.
If
no
symbol
is
displayed
(or
the
colon
(:)is
flashing)
no
time
can
be
altered.
If
the
"UP"
or
"DOWN"
arrows
are
held
down,
the
time
will
change
in 1
minute steps
every
0.5
seconds.
After
the
button
is
held
down
for
more
than
5
seconds,
the
time
will
change
in10
minute steps.
If
the
button
is
released
then
quickly
pressed
again,
the
time
will
again
change
in 1
minute steps.
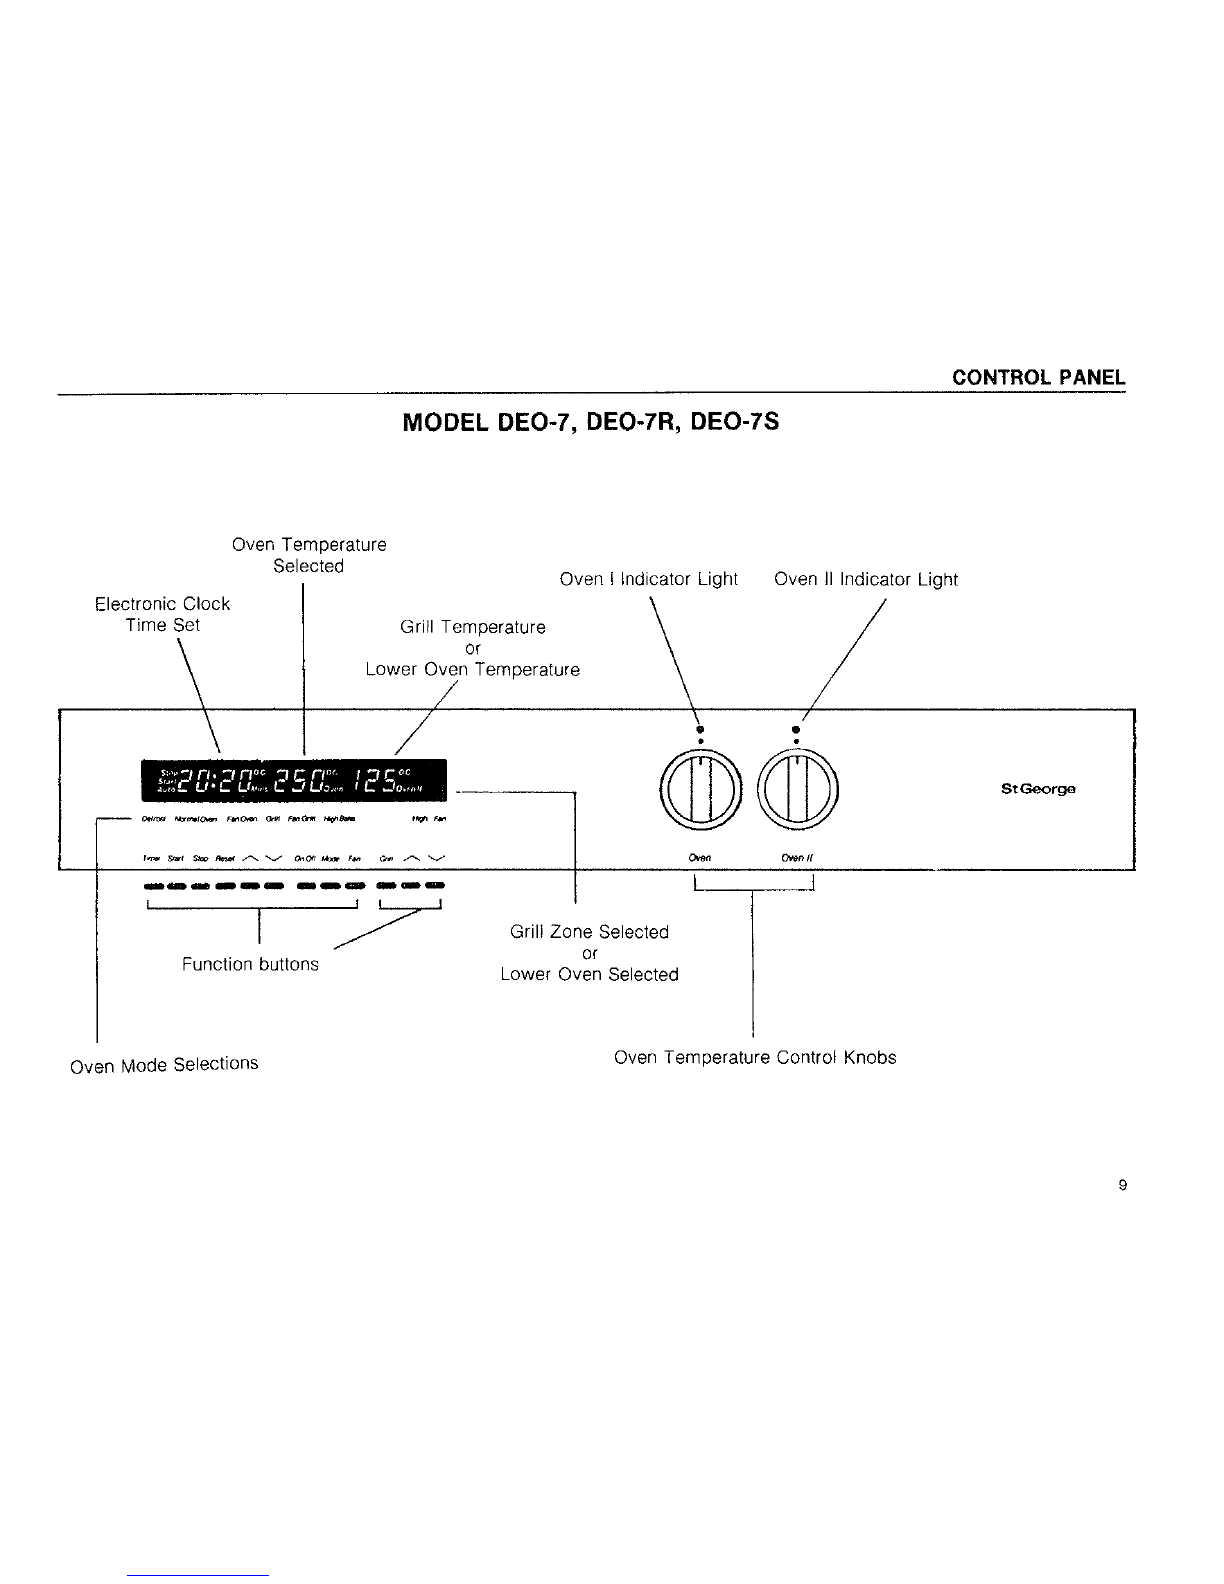
CONTROL
PANEL
MODEL
DEO-7,
DEO-7R,
DEO-7S
Oven
Temperature
Selected
~~~~Oven
I
Indicator
Light
Oven
II
Indicator
Light
Electronic Clock
Time
Set
Grill
Temperature
or
Lower
Oven
Temperature
~~~~~~~~~~ ~~~~~~~~~St
Gerge
Grill Zone
Selected
Function buttons
Lower
Oven
Selected
Oven Mode
Selections
Oven
Temperature
Control
Knobs
CONTROL
PANEL
OPERATION
3.4
Setting
an
Alarm
Time
1.
Press
the
"Timer"
button. The
symbol
"Mins"
will
be
displayed
on
the
bottom
right
hand
side
of
the
clock
time.
2.
The
time
span
required
before
the
alarm
sounds may
then
be
set
by
pressing
the
"UP"
or
"DOWN"
arrow
buttons
as
required.
When
the
time
has
elapsed,
the
timer
alarm
will
sound
(three short
beeps).
Press
any button
to
cancel
the
alarm.
EG:
The
time
is1
0:00
am.
One
wants
the alarm
to
sound
in15
minutes
time.
Therefore
to
set
the alarm
time
-
Press
"Timer"
button
-
the
symbol
"Mins"
will
be
displayed.
Press
the
"UP"
or
"DOWN"
arrow
buttons
until
the
clock
shows
0:1
5
(eg:
15
minutes).
The alarm
will
now
sound
in
15
minutes time.
3.5
Oven
"On/Off"
button
1
.
To
turn
the
oven
on,
press
the
"On/Off"
button.
2.
To
turn
the
oven
off,
press
this
button
once
again.
All
illuminated lights
for
the
oven,
except
for
the
clock
time,
will
be
also
turned
off.
(NB:
The
Grill
in
the
lower
oven
compartment
may
be
operated even when
the oven
'On/Off"
button
is
turned
oft).
3.6
Setting
an
Oven
Cooking Mode
1
.Press the
On/Off
button
to
operate
the
oven.
One
of the
Mode
lights
will
illuminate.
2.
Then
press
the "Mode"
button.
The
next
cooking
mode
will
then
be
illuminated.
Continue
pressing
the
"Mode"
button
until the
desired
cooking
mode
is
selected.
The modes that
can
be selected
(in
order)
are
"Defrost",
"Normal
Oven",
"Fan
Oven",
"Grill",
"Fan
Grill"
and
"High
Bake".
In
modes
other
than
"Defrost"
and
"Grill",
the
selected
oven
temperature
will
be
displayed.
To alter
the
cooking
temperature,
turn
the
Oven
Temperature
Control
Knob
to
the
required
temperature.
NB:
Defrost
does
not
operate
under temperature;
Grill
Oven
operates
a
preset
temperature
which
cannot
be
altered.
10
CONTROL
PANEL OPERATION
3.7
Oven
Temperature
Control
Knob
The
Oven
Temperature
Control
Knob
is
located
to
the
right
at
the
clock.
One
for
the
Top Oven marked
"Oven
I"
and
the second
for
the
Lower
Oven
marked
"Oven
11".
Turn
the
control
clockwise
to
select
the
temperature.
The
temperature
selected
will
illuminate
in
an
orange
colour
and
in
digital
form
within
the
programmer, immediately
to
the
right
of
the
clock
time.
3.9
Grill
Button
Press the
"Grill"
button.
The
next
cooking
mode
will
then
be
shown.
Press the
"Grill"
button
until
the
desired
cooking
mode
is
selected.
The
modes that
may
be
selected
(in
order)
are
"Grill",
"Grill
Half",
"Oven
11"
and
"Off".
Ifa
Grill
mode
has
been
selected
the
currently
selected
grill
heat
level
will
be
displayed
on
the
right
hand
side
of
the
display.
The
grill heat
level
can
be
altered
by
pressing
the
"UP"
or
"DOWN"
buttons
immediately
to
the right
of
the
"GRILL" button.
A
grill
heat level
of
'9'
has
the grill
turned
on
fully,
while
the
level
of
'C
has
the
grill
element
turned
off.
The
"Grill
Half"
selects
only
the
centre
grill
element,
while
"Grill" selects
both the
centre
and
outer
grill
elements.
If
the
Oven
II
mode
is
selected
-
turn
the
Oven
11
Temperature Control
Knob
to
select
the
temperature
required.
When
cooking
is
completed,
turn the
grill
compartment
off
by
pressing
the
"Grill"
button
until
the
right
hand
side
of
the
display
is
blank.
3.1
0
Roast
Probe
Operation
(RPO)
If
Fitted
The
Roast
Probe
Operation
shares
the
same
digit
display
on
the
control
panel
as
does
the
Timer
function.
(Timer/Roast
Probe
display
illuminated
in a
pale blue
colour).
In
the
RPO
the
2
digits
to
the
left
of
the
display
indicate
the
Roast
Probe
Set
Temperature
(RPST)
and
the
2
digits
to
the
right
of
these
indicate
the
temperature
at
which
the
Roast
Probe
is
currently
operating.

CONTROL
PANEL OPERATION
3.1
0
Roast
Probe
Operation
(RPO)
Continued
1
.The
RPO
commences
in
either
of
two
ways:-
i)
when
the
roast
probe
is
plugged
into
the
socket (top
left
hand
side)
with
either
the
Normal
Oven
Mode
or
Fan
Oven Mode
already
activated.
ii)
when the
Normal Oven Mode
or
Fan
Oven
Mode
is
activated
with
the
roast
probe already
plugged
into
the
socket
(top
left hand side).
2.
Once
the
RPO
commences
the
timer
display
will
be
hidden
momentarily
and
the
symbol
"P"
appears
in
the
display.
After
a
duration
of
3
seconds,
the
"P"
will
be
replaced
by
the roast
probe
temperature.
3.
Once
the
FP"
has
appeared,
the
RPST
can
be
selected
by
pressing
the
UP
and
DOWN
arrows.
By
pressing
either
of
these
buttons
the
RPST
is
displayed
to
the
left
in
flashing
mode,
If
the
UP
or DOWN
arrows
are
held
continuously
the
RPST
will
be
changed
by
1
00
for
every
0.4
seconds. After
the
button
is
held
down
for
more
than
10
seconds
the
RPST
will
change
1000C
for
every
0.4
seconds
until
the
limit
is
reached.
When
the
UP
or
DOWN
arrows
are
released
the
RPST
will
remain
displayed
for
another
2
seconds
and
then
disappear.
To
see
the
RPST
displayed,
press
either
UP
or
DOWN
arrows
for
a
duration
not
longer
than
0.4
seconds.
This
will
display
the
RPST,
but
will
not
alter
the
temperature
set.
4.
Turn
Oven
Temp
Control
to
required
temperature.
5.
Once
the roast
probe
is in
operation,
the
heating
elements
within the
oven
will
cycle
as
per
normal
oven
mode,
or
fan
oven
mode,
whichever
has
been
selected.
6.
The
RPO
is
completed
once
the
roast
probe
temperature
reaches
or
exceeds
the
RPST.
The
Oven will
automatically
turn
off
at
this
time,
and the
oven
temperature
displayed
to
the
very
right
of
the
display
panel
will
also
turn
off.
An alarm
will sound
continuously
for
3
minutes
and
the
roast
probe
temperature
will
flash
continuously
on
the
display
panel
until
any
one
of
the
buttons
on
the
control
panel
are
pressed
(except
the
UP
arrow),
or
when
the
roast
probe
is
disengaged
from
the
meat
joint.
The
flashing roast probe
temperature
will
then
be
replaced
by
the
timer
mode
and the
oven
will
remain
off.
During
the
first
3
minutes
of
the
alarm
sounding,
the RPTS
may
be
adjusted
if
required.
By
pressing
the
UP
arrow
the
alarm
will
be
terminated,
the
oven
will
turn
back
on
and the
RPST
and the
current roast
probe
temperature
will
be
displayed,
allowing
the
RPST
to
be
altered.
1
2
CONTROL
PANEL
OPERATION
3.1
0
Roast Probe
Operation
(RPO)
Continued
NB:
1)
The
effective
temperature
range
covered
by
the
roast
probe
temperature
measurement
is
from
300
to
900
celsius.
2)
When the
oven
is
first
powered
up,
the
RPST
is
initialized
to
600C.
The
allowable
range
for
adjustment
is
from
300C
to
9900.
3)
There
isa
minimum
delay
of
15
seconds
from
when
the
RPO
is
activated
before
the
first
comparison
between
the RPST and the
roast
probe
temperature
can
be
conducted.
4) If
the
roast
probe
is
disconnected
while
the
RPO
is
activated,
the
display
panel
will revert
back
to
the
Timer
display.
The
time
from
disconnection
of
the
roast
probe
to
the
timer
returning
to
the
display
will
be
less
than
2
seconds.
5) If
the
oven
is
turned
off
(by
the
On/Off
button)
before
the
roast
probe
temperature reaches
the
RPST,
the
display
planel
will revert back
to
the
Timer
display.
6)
The
colon(:)
for
the timer
indication
will
be
hidden
while
the
roast probe
temperature
is
displayed.
7)
Automatic
Programmed
Cooking
is
applicable
with the
Roast
Probe
operation.
3.11
Completion
of
Cooking
When
cooking
is
completed,
turn
the
oven
off
by
pressing
the
"On/Off"
button.
3.1
2
Indicator
Lights
Oven
Temp
-
this
light will illuminate
when
the
oven
is
heating
up.
Once
the
oven
has
reached
the
temperature
set,
the
light
will
cycle
ON
and
OFF
as
the
temperature
is
maintained.
The
light
glows
when
any
of
the
oven
modes
are
used
(eg.
defrost,
gritl,
high
bake
etc.)

DESCRIPTION
OF
COOKING
MODES
4.
DESCRIPTION
OF
COOKING
MODES
4.1
Defrost
(in
Top
Oven)
This
mode
offers
a
healthy
clean
means
to
defrost
frozen
foods.
Rather
than
leaving
foods
in
the
open
air the
food
can
be
placed
in
the
oven
and
defrosted without
any
means
of
heat,
reducing
the
likelihood
of
growing
bacteria.
4.2
Normal
Cooking
(in
Top
Oven)
In
this
traditional
mode
the
oven
heat
is
provided
by
the
outside
ring
of
the
top
oven
element
and
a
concealed
element
under
the
oven
base and
is
most suitable
when
cooking
on
one
rack
only.
4.3
Fan
Oven
(in
Top
Oven)
In
this
mode
the
oven
fan
circulates
heat
from
an
element
surrounding
the
fan
to
give
a
more
even
temperature
throughout
the
oven.
This
allows
more
than
one
tray
of food
to
be
cooked
at
the
same time with
similar
cooking
results.
4.4
Grilling
in
Oven
(in
Top
Oven)
This
mode
uses
the
infrared
heat of
the top
inner
element to
cook
foods
to
your
requirement.
Speed
of
cooking
can
be
changed
by
lowering
the
grill
tray
and
shelf.
This
oven
grilling
facility
is
additional
to
the
separate grill
in
the
lower
compartment.
4.5
Fan
Grill
(in
Top Oven)
In
this
mode
the
cooking
uses
the
infrared
heat from
the
grill
element
plus
the
heat
circulated
by
the
fan.
This will
give
an
appearance
and
flavour similar
to
food cooked
on
a
rotisserie.
Cooking
takes
place
with
food
positioned
on
the
centre shelf
or
below.
4.6
High
Bake
(in
Top Oven)
The
High
Bake
mode
isa
function
which
uses
a
high
temperature
from
the
concealed
element
under
the
oven
base,
the
element
surrounding
the fan and
the
fan
circulating
and
distributing
heat
evenly throughout
the
oven.
High
Bake
promotes
a
very
quick
pre-heat (approx.
10
mins)
and
achieves
quick
cooking results
for
hors
d'oeuvres,
pastry
foods,
and
especially
Pizza.
1
4

DESCRIPTION
OF
COOKING
MODES
4.7
Roast
Probe
If
Fitted
Roast
Probe
operation
is
available
in
Normal
Oven
Mode
and
Fan
Oven Mode only.
The
probe
is
manufactured
of
stainless
steel
and
is
placed
into the
fleshiest
part
of
the
meat
joint, plugged
into
a
socket
within
the
oven
compartment
and
activated
through
the
temperature selection
in
the
control
panel.
The
Roast
Probe
Operation
promotes
a
carefree
and
simple method
of
cooking
roasts.
NB3:
Roast
probe
operation
is
available
in
the
top
oven only).
4.8
Normal
Cooking
in
Lower
Oven
In
this
traditional
mode
the
oven
heat
is
provided
by
top
and
bottom elements
and
is
most
suitable
when
cooking
on
one
rack only.
4.9
Grilling
in
Lower
Oven
In
this mode
the
heat
is
supplied
by
a
Dual
or Half
grill
facility.
The
dual
element allows
for
variable
heat
control.
4.10
Automatic
Programmed
Cooking
The
Top
oven only
can
be
set
to
turn
on and
off
automatically
at
preset
times.
The
Automatic
settings
mode
is
generally
used
when
cooking
is
left
unattended.
(Automatic
cooking
is
suitable
only
for
NORMAL
OVEN.
FAN
OVEN, HIGH BAKE
and
DEFROST
settings.
is
COOKING
INSTRUCTIONS
5.
COOKING
INSTRUCTIONS
5.1
Preheating
Preheating
the
oven
is
not
essential,
but
often you
will
achieve
better
results
if
you
do.
Some
foods
for
example
cakes
and
pastry
are
better
cooked
in a
preheated
oven.
Other
foods,
for
example
casseroles,
cook just
as
well
if
they
start off
in a
cold
oven.
The
oven
takes
approximately
15-20
minutes
to
reach
1800C
on
the
NORMAL
OVEN
or
FAN
OVEN
setting,
1
2-1
5
minutes
on
the
FAN
GRILL
setting
and
about
1
0
minutes
on
HIGH
BAKE.
To
obtain
maximum
efficiency
in
preheating
the
top
oven,
St
George
recommends
the
following
procedure:
1.
Turn
the
Oven
Mode Control
Knob
to
FAN GRILL
2.
Turn Oven Temp
Control
Knob
to
required
temperature.
Your preselected
temperature
will
be
reached
in
approximately
12
minutes.
The
OVEN
TEMP
Indicator
Light
will
glow.
When
the
oven
has
reached
the
set
temperature
the
light will
go
out
and
the
oven
is
preheated.
During
cooking
the
light
cycles
on and
off
as
the
temperature
is
maintained.
(WARNING:
If
intending
to
cook
using
a
mode other
than
FAN
GRILL
remember
to turn
the
Oven
Mode
Control
Knob
to
the
required
setting
before
placing
the
food
in
the
oven.)
To
preheat
the
Lower
oven:
1
.Press
the
"Grill" button
until
"Oven
11"
is
illuminated
on
the
programmer.
2.
Turn
the
Oven
II
Temperature
Control
knob
to
required temperature.
All
other
buttons should
be
in
the OFF
position.
The
OVEN TEMP
Indicator
Light
glows.
When
the
oven
has
reached the
set
temperature
the
light
goes
out
and
the
oven
is
preheated.
During
cooking
the
light
cycles
on and
off
as
the
temperature
is
maintained.
1
6
This manual suits for next models
3
Table of contents
Other St George Oven manuals


Popular Oven manuals by other brands


Beko
Beko OIM22301 user manual

Hotpoint Ariston
Hotpoint Ariston FK 93J X/HA S operating instructions

Electrolux
Electrolux air-o-convect Natural Gas Hybrid Convection Oven... Short form specification

Hoover
Hoover HON602X User instructions

Electrolux
Electrolux EOB5454TAX user manual

GE
GE JKS10 Technical service guide


