St George UEO1A User manual

Electric
Multi-Function
Oven
MODELS: UEO1A/2A, DEO1A/2A
and UES-2A
Appliance Operation Manual
INCLUDING INSTALLATION AND CLEANING

WELCOME TO ST GEORGE
St George is a proud Australian
company with a heritage of
innovation and quality.
Our success extends to
domestic and overseas markets,
confirming our reputation at the
forefront of appliance excellence.
The elegant simplicity and high
performance features of
St George designs, will
remain contemporary in
many years to come.
In the interests of product innovation, consumer safety and continual improvement, St George reserves the right to change accessories
and inclusions and alter specifications without notice.

1
CONTENTS
1. KNOWING YOUR St George ELECTRIC WALL OVEN
1.1 Important Points ...................................................................................................................................... 3
1.2 Installation Checks and Warnings ........................................................................................................... 3
1.3 Features and Benefits ............................................................................................................................. 6
Accessories ............................................................................................................................................. 5
2. USING THE APPLIANCE FOR THE FIRST TIME
2.1 Power On ................................................................................................................................................. 7
2.2 Burning In ................................................................................................................................................ 7
3. CONTROL PANEL OPERATION
Diagrams.................................................................................................................................................. 9
3.1 One Handed Operation ........................................................................................................................... 8
3.2 Setting the Time of Day ........................................................................................................................... 8
3.3 Manual Operation .................................................................................................................................... 8
3.4 Changing the Alarm Tone ........................................................................................................................ 8
3.5 Using the Alarm Timer ............................................................................................................................. 10
3.6 Mode Switch............................................................................................................................................ 11
3.7 Oven Temperature Control ...................................................................................................................... 11
3.8 Grill Control.............................................................................................................................................. 12
3.9 Roast Probe Operation............................................................................................................................ 13
4. COOKING MODES AND INSTRUCTIONS
4.1 Roasting Hints and General Guide.......................................................................................................... 14
4.2 Preheating................................................................................................................................................ 17
4.3 Defrost ..................................................................................................................................................... 18
4.4 Normal Oven............................................................................................................................................ 19
4.5 Classic Bake (UEO DEO Models) .......................................................................................................... 20
4.6 Fan Assist (UEO DEO Models) .............................................................................................................. 20

2
CONTENTS
4.7 Fan Oven ................................................................................................................................................. 21
4.8 High Bake (UEO DEO Models) .............................................................................................................. 22
4.9 Fan Grill.................................................................................................................................................... 23
4.10 Grill........................................................................................................................................................... 25
4.11 Normal Oven Cooking in Secondary Oven (DEO Models)..................................................................... 26
4.12 Grilling in Lower Compartment (DEO Models)....................................................................................... 27
4.13 Roast Probe Cooking (UEO DEO Models) ............................................................................................ 28
4.14 Automatic Programmed Cooking............................................................................................................ 30
5. CLEANING AND MAINTENANCE
5.1 Recommended Cleaners ......................................................................................................................... 33
5.2 Routine Cleaning ..................................................................................................................................... 35
5.3 Spills, Spatters and Accidents ............................................................................................................... 36
5.4 Cleaning the Roast Probe ....................................................................................................................... 37
5.5 Removing Oven Door .............................................................................................................................. 38
5.6 Self Clean Oven Liners ............................................................................................................................ 39
5.7 Changing the Light Globe ....................................................................................................................... 39
5.8 Trouble Shooting Guide........................................................................................................................... 40
6. CABINET INSTALLATION INSTRUCTIONS
6.1 Measurements ......................................................................................................................................... 42
6.2 Preparing the Cupboard Cavity............................................................................................................... 42
6.3 Providing a Suitable Flue......................................................................................................................... 46
6.4 Securing the Oven ................................................................................................................................... 46
7. ELECTRICAL CONNECTION INSTRUCTIONS
7.1 Wiring Rules and Warnings ..................................................................................................................... 48
7.2 Electrical Loads ....................................................................................................................................... 48
7.3 Voltage Supply Connection ..................................................................................................................... 49

3
KNOWING YOUR ST GEORGE ELECTRIC WALL OVEN
1. KNOWING YOUR ST GEORGE ELECTRIC WALL OVEN
1.1 Important Points
Thank you for purchasing a St George appliance that we are sure will provide many years of great cooking experiences.
If you haven’t had the pleasure of cooking with St George previously, you may find that it has different features and
characteristics to your last appliance. It is essential you read this operation manual thoroughly to fully understand all of
the various functions and operations. The aim is to encourage you to experiment with your cooking and take advantage
of the features St George offers.
The versatility of your new appliance means most foods will cook successfully using alternative functions. The key to
achieving results that best suit your personal taste is experimentation.
This manual should be retained for future reference. Should ownership of the appliance be transferred, please ensure that
the manual is also passed onto the new owner.
1.2 Installation Checks and Warnings
In the interests of your safety and the care of your new appliance, please take time to carefully read this manual before
installing and using the appliance. In particular your attention is drawn to the following: -
Incorrect installation of the appliance as a result of not following the detailed specifications can affect the appliances
performance. Ovens incorrectly installed may invalidate the warranty and we strongly recommend that the oven
cavity, venting and wiring be prepared as described in the specifications. This is critical to appearance, oven
performance and safety. For installation details, please refer to Cabinet Installation Instructions.
A licensed electrician with relevant qualifications must perform electrical work when installing or servicing the appliance.
The supply cable and fuse rating must be suitable for the appliance. You must never repair or replace any part of the
appliance unless specifically recommended in the operation manual. For installation details, please refer to Electrical
Connection Instructions.
VENTILATION SLOTS AND AIR VENTS MUST NOT BE COVERED OR OBSTRUCTED IN ANY WAY
DON’T USE ALUMINIUM FOIL ON THE BASE OF OVENS
The use of aluminium foil on the base of the oven to collect spills and improve cleaning is not recommended. The bottom
element of St George ovens is concealed under the base of the oven liner (not exposed). Foil or dishes with reflective
qualities must never be placed on the base of the oven during cooking as the concentration of the direct and reflected
heat will damage the enamel surface. Damage resulting from such use is not covered under the provisions of the warranty.
Refer to Cleaning and Maintenance for care instructions for your new appliance.
INITIAL HEAT UP
Some smoke and smell may be noticed during the initial heat up cycle (see Using the Appliance for the First Time). This
should quickly dissipate. If abnormal levels of smoke are observed (i.e. it is not food that is burning) have the appliance
thoroughly checked.

4
KNOWING YOUR ST GEORGE ELECTRIC WALL OVEN
LEAVE SECONDARY OVEN DOOR OPEN DURING GRILLING
The oven door for the secondary oven (DEO models only) MUST REMAIN FULLY OPEN during grilling.
DON’T USE THE GRILL PAN HANDLE FOR LIFTING
The grill pan handle provided should only be used to assist in sliding the grill pan in and out of the oven compartments. AT NO
TIME MAY IT BE USED FOR LIFTING THE GRILL PAN, ESPECIALLY WHEN THE PAN IS LADEN WITH FOOD.
DON’T USE THE APPLIANCE AS A SPACE HEATER
The appliance must never be used for warming or heating the surrounding room or for drying clothes or textiles or other items
not specifically recommended in the operation manual. Combustible materials or products must never be placed on or near the
appliance.
DO NOT LEAVE CHILDREN ALONE
Children must not be left unsupervised in the area where the appliance is in use. The appliance gets hot during use and retains
heat for some time after being turned off. Children must never be allowed to sit or stand on any part of the appliance.
DO NOT SPRAY AEROSOLS IN THE VICINITY OF THE APPLIANCE WHILST IT IS IN OPERATION
OVEN CARE – ACIDIC FOODS
Certain foods can cause severe corrosion of enamel and metal finishes if the oven surface is not completely cleaned after use.
This is particularly so around the joins in the oven liner and the chrome racks and shelves.
Examples of these are vinegar, sour milk, citrus fruits, olives, strong salt solutions and fruit juices. Regular inspection will
alleviate the likelihood of this type of damage occurring. Some oven cleaners can also have a detrimental effect on vitreous
enamel surfaces.
POLYUNSATURATED OILS
The excessive use of polyunsaturated oils in cooking can cause deposits of solidified oils on the inside surfaces of the oven and
are extremely difficult to remove from glass and enamel finishes. Their use, where possible should be minimised.
AEROSOLS
DO NOT SPRAY AEROSOLS IN THE VICINITY OF THIS APPLIANCE WHILE IT IS IN OPERATION.
The use of aerosol cans such as insect spray, deodorants, repellents, stove cleaners, hair spray, paint and food preservatives
etc., must be avoided in the proximity of your oven, especially near controls or switches. Some aerosols contain chemicals that
cause rapid corrosion of metals and enamels. This normally shows in the form of white staining of the vitreous enamel or rusting.
Damage of this kind is not covered in the appliance warranty.
OVEN CLEANERS
We recommend a non-caustic oven cleaner be used at all times. Any residue of oven cleaner should be thoroughly removed to
avoid corrosion of metal finishes.
•NEVER use the oven to dry out oven cleaners as they can produce a highly corrosive chemical reaction that will attack the
enamel.

5
KNOWING YOUR ST GEORGE ELECTRIC WALL OVEN
Grill & Pan Rack
(Acts as an extra shelf and the
pan is coated with vitreous
enamel for long life and easy
cleaning)
•NEVER activate any element or burner on the appliance (except oven light) while there is oven cleaner in the oven compartment.
WEAR PROPER APPAREL WHEN USING THE APPLIANCE
Loose fitting, hanging or highly flammable garments (such as synthetics) should never be worn while using the appliance.
USE ONLY DRY POT HOLDERS
Moist or damp pot holders on hot surfaces may result in burns from steam. Do not allow pot holders to touch hot heating
elements. Do not use a towel or bulky cloth when handling hot cooking utensils used in the appliance.
DON’T USE OVEN OR GRILL COMPARTMENTS FOR STORAGE
Items, particularly flammable materials, must never be stored in an oven or near surface units.
DO NOT USE WATER ON GREASE FIRES
Fats, oils or other substances will ignite if they become too hot. Fires or flames should be smothered using flameproof material
or extinguished using a dry chemical or another suitable fire retardant.
USE AUTOMATIC PROGRAMMED COOKING ONLY IN SUITABLE MODES
Automatic programmed cooking is available in the main oven only and suitable only in the following modes (where applicable):
- Normal Oven, Classic Bake, Fan Assist, Fan Oven, High Bake and Fan Grill modes.
ONLY PLACE COOKWARE ON OVEN SHELVES
Other surfaces of the appliance, for example trims, are not totally resistant to hard or sharp materials or direct heat and may be
damaged by such use.
Self Clean Oven Liners
Optional Extra — great to alleviate
extra cleaning requirements).
Accessories Shelf Levels
(The 6 shelf levels assure the
optimal use of the 92 litre oven)

6
KNOWING YOUR ST GEORGE ELECTRIC WALL OVEN
1.3 Features and Benefits
A range of cooking options is combined in your St George wall oven. St George’s extra large ovens allow you to
cook everything from small simple dishes for one, to complete dinners for the whole family. The multi-function
modes available in the main oven (up to 9) give you the ability to defrost food, bake either conventional or fan-
forced, with a high bake option (UEO and DEO models only) for pastry foods, as well as conventional grilling or fan
grilling for excellent rotisserie style flavour.
The lower compartment of the DEO models offer a variable heat grilling facility. The secondary ovens (DEO only)
also offer conventional oven cooking. This allows you to cook smaller meals, bake entrees or desserts, or grill
separately while cooking a meal in the main oven.
The control panel features a 24-hour electronic clock that incorporates an independent timer, useful for timing
household activities. The electronic oven controller allows manual operation or the ability to program cooking
times, giving you the freedom to cook meals to suit your own schedules.
NOTE: Automatic programmed cooking operates in the main oven only.
Cleaning the oven interior is made simple with St George’s high quality vitreous enamel. For easy access the oven
doors either fully open (side opening) or easily lift off and the in-oven parts are removable. (refer to Cleaning and
Maintenance for complete care instructions)
If over heating occurs, however unlikely, there are safety systems that re-set or shut down the unit.

7
USING THE APPLIANCE FOR THE FIRST TIME
2. USING THE APPLIANCE FOR THE FIRST TIME
After installation remove all notification labels (not grill or electrical warning labels), advertising, tape, packaging,
etc. A quick diluted wash with Ammonia and water should rinse away any adhesive residue. Eucalyptus oil (small
amounts) is also good for removing adhesive residue. Thoroughly rinse cleaned surfaces and wipe them dry using
a clean, soft cloth.
NOTE: People with sensitivity to cleaning chemicals must take the necessary precautions. St George recommends wearing
protective gloves while cleaning the appliance.
2.1 Power On
The time of day is displayed in digital 24-hour format (e.g. 18:00 is 6:00 p.m.). When power is first applied the time
of day (0:00) and AUTO flashes in the display.
Pressing the Reset button cancels power-up mode and automatically places the unit in manual mode.
2.2 Burning In
Before cooking in the appliance an initial pre-heat is required to burn off the fine oil film used to protect the
elements during shipping. The first time you heat up the oven (or grill) the oil will be given off as smoke (some
smell may also be noticeable), which is perfectly normal.
1. Set the oven for manual operation by pressing the Reset button.
2. Select Fan Oven on the mode switch and set the main oven temperature to 180°C.
3. With the oven door closed, leave the oven on for approximately 1 hour or until the smoke has disappeared.
4. Change the selection on the mode switch to Fan Grill and leave for a further 20 minutes or until the smoke has
disappeared.
5. For the DEO models, with the secondary oven door open, set the grill control to it’s maximum setting
and leave on for at least 20 minutes or until the smoke has disappeared.
After completing the above turn the oven/s off. The oven/s are now ready for cooking and grilling.
NOTE: The secondary oven (DEO models) may be burned in at the same time as the main oven.

8
CONTROL PANEL OPERATION
3. CONTROL PANEL OPERATION
3.1 One Handed Operation
The oven timer control has been designed so that it requires only one hand to operate any of it’s various functions.
To alter any of the functions or settings you need only to press the relevant button/s. The selected function will
remain active for a few moments allowing you to adjust the setting. The or buttons can be pressed to adjust
the displayed time.
When the or buttons are pressed singularly the time will change in 1 minute steps. If the or buttons are
held down the time will change more rapidly.
When you are finished the selection will be set and the display will revert to the time of day.
NOTE: The AUTO symbol may flash and/or the symbol may be displayed if those functions have been inadvertently
set. To cancel any AUTO settings press the Reset button. To cancel the timer function, press the Timer button and
set the alarm time back to zero. If an alarm sounds, pressing any of the 4 left hand buttons will cancel it.
3.2 Setting the Time of Day
The time of day can be set at any time by pressing the Reset button. Once pressed the time can then be set by
pressing the or buttons. The unit will then commence timing from the selected time on the display.
NOTE: If the unit is in automatic mode, resetting the time of day will cancel any automatic settings.
3.3 Manual Operation
Pressing the Reset button at any time after turning power on (see 2.1 above) will cancel any automatic setting in
memory and allow the unit to be used manually. The indicator will be displayed to show manual operation has
been set.
3.4 Changing the Alarm Tone
The alarm tone can be changed to either one of 3 selections. Simply press the button singularly to cycle
through the available selections.
NOTE: This only works if no other function is active when the button is pressed.
<
<
<
<
<
<
<
<
<
<

9
OVEN
250
200
150
100
70
Fan
Oven Fan
Assist
Classic
Bake
Normal
Oven
Defrost
Light
Grill
Fan
Grill
High
Bake
MODE
Timer Cook Stop Reset
Oven
Grill
CONTROL PANEL OPERATION
Timer Cook Stop Reset
Oven
Oven II
OVEN
250
200
150
100
70
OVEN II
250
200
150
100
70
Fan
Oven Fan
Assist
Classic
Bake
Normal
Oven
Defrost
Light
Grill
Fan
Grill
High
Bake
MODE GRILL
Full
8
4
6
Low
2
DEO
UEO

10
CONTROL PANEL OPERATION
3.5 Using the Alarm Timer
The alarm timer can be used independently of other clock functions. Very handy for letting you know when to turn
food, when basting is required or when a batch of food (when cooking multiple batches) is ready without interrupting
the oven operation. The alarm timer is also very useful for timing other household activities.
To set the alarm timer press the Timer button to display the time remaining until the alarm sounds. The alarm time
can then be set by pressing the or buttons. The symbol will be displayed to show an alarm time has been
set. When you are finished selecting an alarm time the display will revert back to the time of day. The remaining
time to the alarm can be displayed momentarily and altered using the Timer and buttons. To cancel the alarm
timer simply reset the alarm time to zero. The symbol will no longer show and the display will revert back to the
time of day.
Once the alarm time has elapsed the alarm will sound. Pressing any of the four left-hand buttons will cancel the
alarm and the indicator will no longer be displayed. If not manually cancelled the alarm will automatically
cancel after a few minutes.
NOTE: Whilst the alarm time is displayed pressing the or buttons will change the alarm time setting.
If the Reset button is pressed to cancel any alarms, any automatic settings in memory will be cancelled and the
unit will return to manual operation.
<
<
<
<
<
<

11
CONTROL PANEL OPERATION
3.6 Mode Switch
This switch selects the mode of cooking you require and may be turned in either direction to give you the following
selections:
UEO DEO Models
Light Defrost
Normal Oven (conventional oven)
Classic Bake Fan Assist
Fan Oven High Bake
Fan Grill Grill
The Light selection is included to assist when cleaning the oven interior. The oven illumination lamp will remain on
at all times on any selection except off. This provides an extra safety precaution to indicate that the oven has
been left on.
3.7 Oven Temperature Control
This control allows you to select the temperature to be maintained during cooking. Turn the control clockwise to
switch power on and select your required temperature. An indicator light will show when the oven is heating and
will cycle on and off as the temperature is maintained. The indicator light will operate this way when any oven
mode with temperature control is used (i.e. Fan Oven, Normal Oven, Classic Bake, Fan Assist, High Bake or Fan
Grill).
The control can only be turned anti-clockwise to the off position.
NOTE: For DEO models the secondary oven thermostat overrides the grill control if both controls are on at the same
time.

12
CONTROL PANEL OPERATION
3.8 Grill Control
Grilling in the oven is controlled by setting the mode switch to Grill. The speed of cooking may be varied by
altering the grill pan and rack positions.
The separate grill control (DEO Models) is used to select the heat desired for grilling in the lower compartment
only. The control may be turned in either direction.
NOTE: For DEO models the secondary oven thermostat overrides the grill control if both controls are on at the same
time.

13
CONTROL PANEL OPERATION
3.9 Roast Probe Operation
WARNING: This mode of cooking is suitable only for Normal Oven, Classic Bake, Fan Assist, Fan Oven or High Bake
modes. Use of the probe sensor in either Grill or Fan Grill modes will damage the probe.
The roast probe operation shares the same digit display as does the timer functions and operates only in the
main oven. The roast probe must be plugged into its socket within the oven compartment to display the current
temperature of the roast probe sensor in the left-hand pair of digits. The Roast Probe Set Temperature (RPST)
will be displayed in the right hand pair of digits and can be adjusted by pressing the or buttons.
NOTE: The RPST can be set between 0°C and 99°C, however, it is not recommended to set the RPST above 85°C as
this gives inconsistent results and may result in the burning of food.
Once the temperature of the roast probe’s sensor reaches or exceeds the RPST the oven will automatically turn
off and the alarm will sound. The alarm can be cancelled by pressing any of the 4 left-hand buttons. If not
manually cancelled the alarm will self cancel after a few minutes. To cancel the roast probe function, remove the
roast probe from its socket.
For complete details refer to Roast Probe Cooking.
NOTE: Whenever the roast probe is plugged in, the RPST is re-set to 80°C.
The time is not displayed when the roast probe is plugged in. If the roast probe is disconnected the display
reverts back to the time of day.
Automatic programmed cooking can be used with the roast probe.
<
<

14
COOKING MODES AND INSTRUCTIONS
4. COOKING MODES AND INSTRUCTIONS
4.1 Roasting Hints and General Guide
When roasting or baking, position food near the centre of the oven. This will vary on the size of the food to be
cooked or if other foods are to be cooked at the same time. Cooking times may vary slightly depending on, for
example, the size and thickness of meat or the presence of bone or stuffing.
The temperature for roasting meats and poultry will usually range between 170°C and 200°C. These temperatures
will normally prevent excessive shrinkage and moisture loss. An exception is roast pork which is placed in a hot
oven (around 220°C to 230°C) for the first 15-25 minutes to obtain a crisp crackling, after which the temperature
is reduced to 180°C to 200°C for the remaining cooking time. Of course these temperatures and times will vary
according to your own personal taste.
Bake meat and vegetables in baking dishes that allow the heat to circulate evenly and brown the food to your own
taste. When cooking more than one dish of food at the same time place the cooking utensils so that they do not
touch each other or the sides of the oven. To allow free circulation of heat, do not arrange pans directly above
each other, stagger their positions if possible.
When using the oven to bake a complete meal at one time, for example meat, vegetables and dessert, place the
meat in the lower part of the oven and place the vegetables and dessert above. Note that the cooking times and
temperatures when cooking this way should be similar for each of the dishes. The oven temperature may also
need to be increased slightly to account for the larger volume of food being cooked. Please note that not all types
of food are suitable for cooking together. (e.g. some desserts are not suitable to be cooked with meat)
Make use of retained heat whenever possible. For example, after baking a dinner there should be sufficient
retained heat to dry herbs, breadcrumbs and biscuits or fruit.

15
COOKING MODES AND INSTRUCTIONS
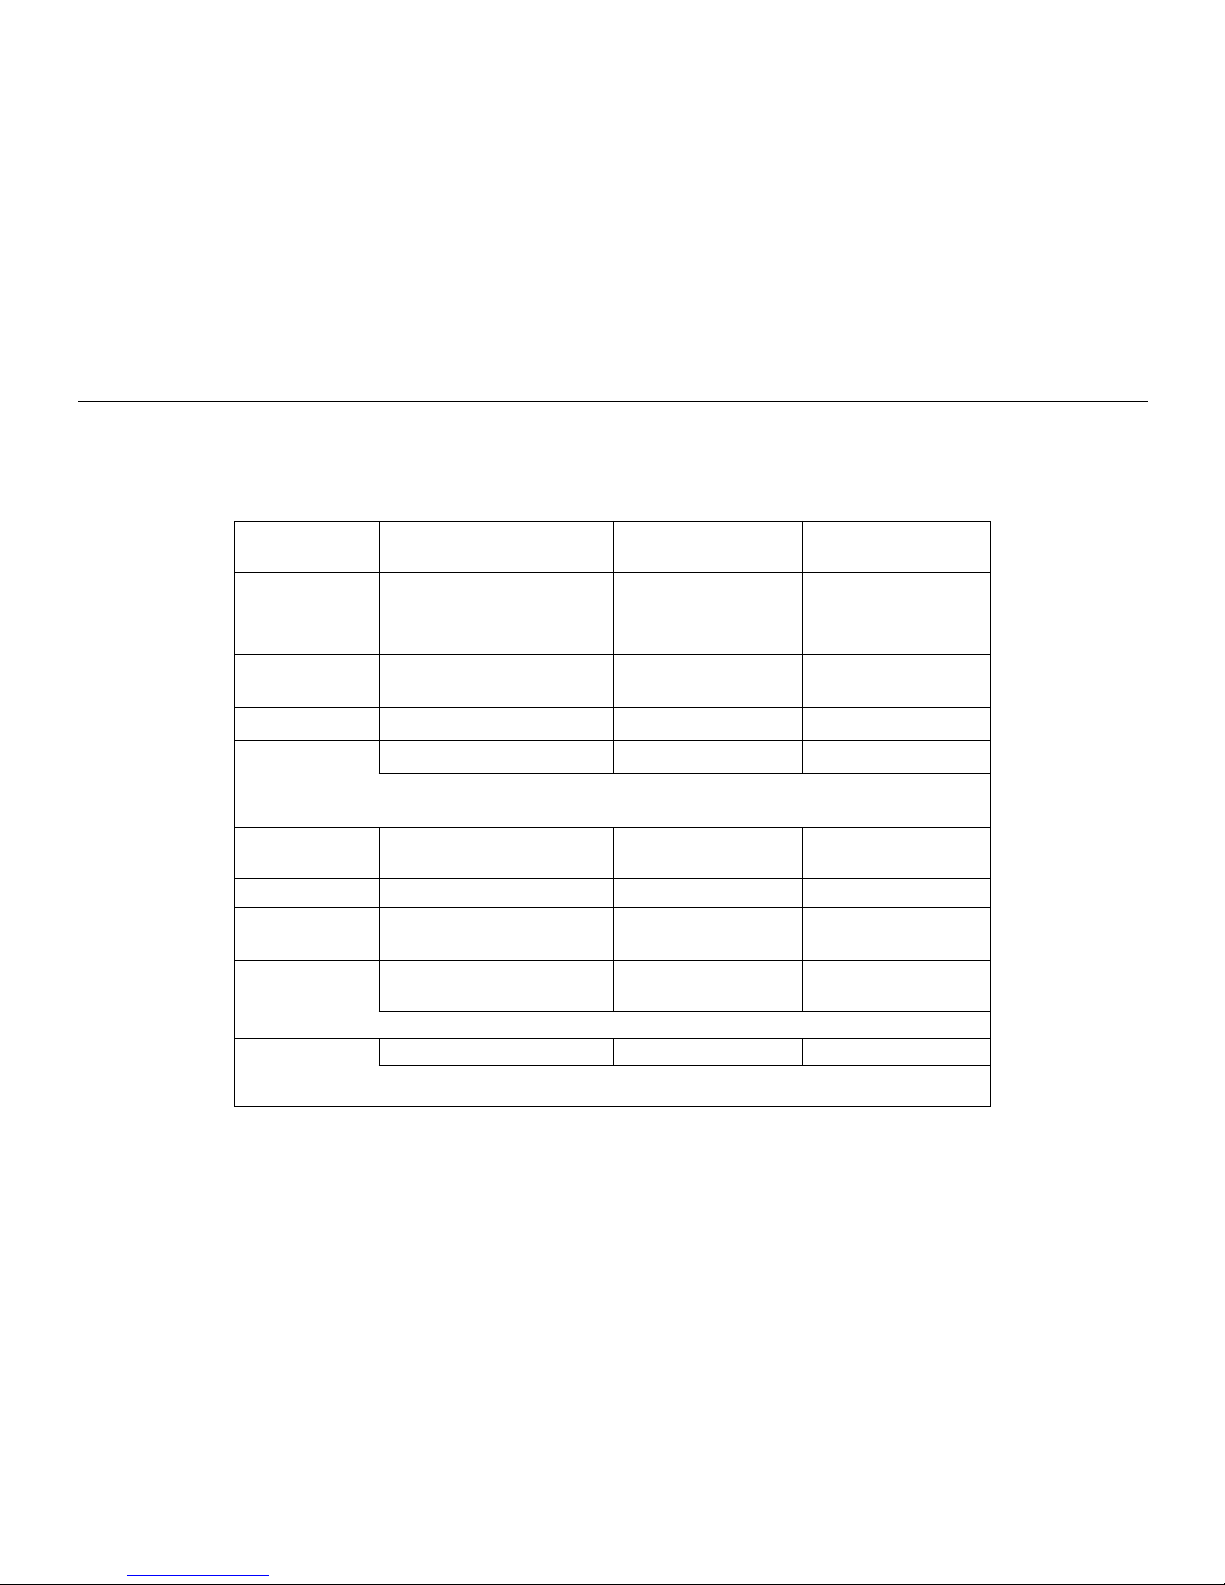
These Cooking Charts are intended as a guide only.
Temperatures and cooking times may be varied to suit individual tastes.
OVEN TEMPERATURE °CGENERAL TIMES FOODS SUITABLE
130°and under Very Slow small meringues, pavlova,
baked custard, re-heating
130°– 150°Slow rich fruit cake
light fruit cake
150°– 180°Moderate casseroles
deep butter cakes
180°– 200°Moderately Hot shallow butter cakes, sponges
biscuits, meat loaf, baked fish
200°– 230°Hot swiss roll, patty cakes
rock cakes, shortcrust pastry
230°and over Very Hot scones, choux pastry
16
COOKING MODES AND INSTRUCTIONS
TEMPERATURE GUIDE
APPROXIMATE ROASTING TIMES FOR MEAT, POULTRY & FISH
TYPE OF MEAT CUTS OF MEAT TIME/KG OVEN TEMPERATURE
°C
BEEF Standing Rib, Rolled Sirloin 60 mins per kg 180°–200°
Bolar Blade, Corned Topside
Fillet, Scotch fillet 40 mins per kg 180°–200°
VEAL Shoulder or leg (with bone
or rolled) 40-50 mins per kg 180°–200°
LAMB Leg, Shoulder (loin or rolled) 40-50 mins per kg 180°–200°
PORK Leg Loin 90 mins per kg 220°–230°/180°–200°
*Pork Legs should be cooked at higher temperature for first 15-25 minutes then reduced to lower
*temperature for remaining cooking time.
TYPE OF CUTS/SIZE TIME/500g OVEN TEMPERATURE
POULTRY/FISH °C
CHICKEN Whole or Pieces 30 mins per 500g 180°–200°
DUCK 1.4 - 1.9kg 30 mins per 500g 180°–200°
+ 35 mins extra
TURKEY* 2.5 - 10.0kg 30 mins per 500g 180°–200°
+ 35 mins extra
*Turkeys should be well basted and turned during cooking.
FISH* Whole or Fillets 10 mins per 500g 170°–190°
*In Normal Oven mode, fish should be covered for the first 3/4 of the cooking time to help
*retain moisture
These Cooking Charts are intended as a guide only.
Temperatures and cooking times may be varied to suit individual tastes.

17
COOKING MODES AND INSTRUCTIONS
4.2 Preheating
Preheating the oven is not essential, but you will achieve better results if you do. Some foods, particularly cakes
and pastry, are better cooked in a preheated oven. Other foods, for example casseroles, cook just as well when
cooked in a non-preheated oven but may need longer cooking times.
To preheat the main oven:
1. Set the mode required for preheating.
2. Set the oven to the desired temperature.
For your cooking convenience use Fan Oven or High Bake modes for fast, efficient preheating of the main oven.
Please note that any food or other cooking utensils placed in the oven during preheating will affect the preheating
time. The preheat time may also vary with installations.
WARNING: When using an alternative cooking mode for faster preheat, be sure to turn the cooking mode to your
required setting before placing food in the oven.
HINT: To allow for heat loss while placing food into the oven, preheat the oven 10-20°C higher and then reduce the
temperature to your required cooking temperature.
Always preheat the oven when cooking multiple dishes at the same time.
To preheat the secondary oven (DEO Models)
1. Set the oven to the desired temperature. The oven will preheat to 180°C in 15-20 minutes.
PREHEATING GUIDE (for 180°C setting)
Cooking Mode Preheat time (mins)
Normal Oven 25-30
Fan Oven 15-20
High Bake 8-12

18
COOKING MODES AND INSTRUCTIONS
4.3 Defrost
The Defrost mode offers a clean and healthy means to defrost frozen food. Food left in the open is exposed to
contamination by pets and insects. With the Defrost setting, food placed in the oven defrosts without heat,
reducing the likelihood of growing bacteria. The circulation of air in the oven achieves effective thawing. The oven
does not provide any heat on this setting which prevents food extremities from over-thawing, or even cooking,
like they tend to do in a microwave.
All foods may be defrosted using this method but it is especially good for meat and fish fillets and delicate frozen
foods such as cream cheesecakes or cakes with cream filling, icing or frosting. The time taken to defrost foods
will vary, depending on the volume and weight of the food. As a general guide the defrosting time for meat should
be approximately 15-20 minutes per kg.
Using Defrost Mode
1. Adjust oven shelves to correct position (this mode is most effective when food is placed near the centre of
the oven).
2. Select Defrost on the mode switch.
3. When defrosting is complete, turn the oven off.
NOTE: A temperature cannot be set when Defrost mode is selected.
To prevent spoilage of food, do not use Defrost for longer than necessary (periodically check food during defrosting).
If food is not to be cooked immediately when defrosting is complete, remove the food from the oven and place
into a refrigerator until needed.
This manual suits for next models
4
Table of contents
Other St George Oven manuals


Popular Oven manuals by other brands


AEG
AEG BE2000000 user manual

Wolf
Wolf L Series SO30F Design guide

BALAY
BALAY 3HB568XP instruction manual

Smeg
Smeg ALFA341XM Instructions for installation and use

Whirlpool
Whirlpool AKG 65901 IX Instructions for use

VERDER
VERDER CARBOLITE GERO HTCR 4/28 Installation, operation and maintenance instructions