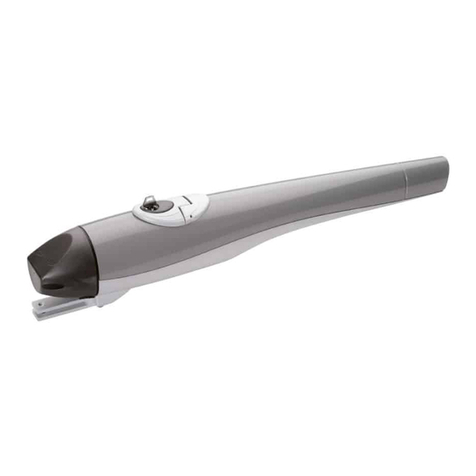
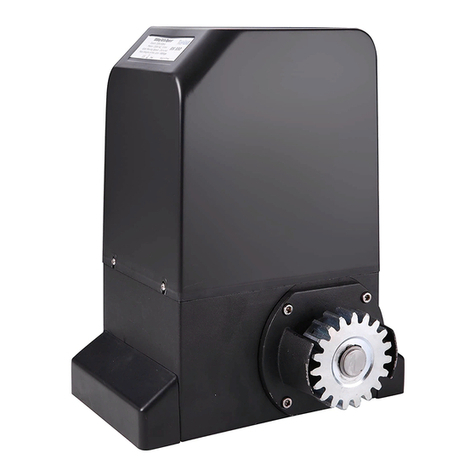
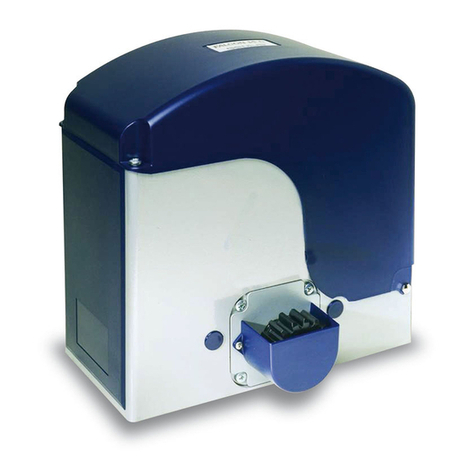
Stagnoli HERCULES 230V User manual

Istruzioni Instructions Anleitungen Instrucciones Инструкция , Instrukcja
1
I - Motoriduttore elettromeccanico per cancelli scorrevoli
GB - the electromechanical gear motor for sliding gates
F - Motoréducteur électromécanique pour portails coulissants
D - Elektromechanisches Getriebe für Schiebetore
E - Motorreductor electromecánico para portones correderos
RUS - Автомат коткатным воротам Инструкция монтажа
PL - Automat do bramy przesuwnejInstrukcja montażu
HERCULES

Istruzioni Instructions Anleitungen Instrucciones Инструкция , Instrukcja
2
ZEUS
4x1
1xRG 58
2x1
3x1
2x1.5
3x1.5
ARGO
HERCULES
ATLAS
ASM
PEGASUS

Istruzioni Instructions Anleitungen Instrucciones Инструкция , Instrukcja
3
• Il presente manuale è destinato solamente al personale tecnico qualificato per
l’installazione e non all’utilizzatore finale; è compito dell’installatore informare
successivamente l’utilizzatore, sulle modalità d’uso dell’automatismo, sui possibili pericoli
che ne possono derivare e sulla necessità di una manutenzione periodica.
• L’installazione deve essere effettuata solo da personale qualificato e rispettando le vigenti
normative riguardanti le chiusure automatizzate. In particolare la conformità
dell’installazione prevede il rispetto della direttiva 89/392 e delle norme EN 12453 e
EN 12445.
• HERCULES è stato realizzato appositamente per gestire l’automazione di cancelli scorrevoli,
quindi, è vietato utilizzare il prodotto per scopi diversi da quelli previsti o in modo improprio.
• Utilizzare componenti originali. La ditta Stagnoli non si assume alcuna responsabilità per
danni dovuti all’ utilizzo di componenti non originali.
• Accertarsi che la struttura del cancello sia solida e adatta ad essere motorizzata.
• Accertarsi che il cancello durante il suo movimento non subisca punti di attrito, ne abbia la
possibilità di deragliare .
• Prima di intervenire sul dispositivo, assicurarsi che l’alimentazione sia staccata.
• Collegare il cavo della tensione solo a linee di alimentazione dotate di adeguate protezioni
elettriche; in particolare prevedere un dispositivo per assicurare la disconnessione
onnipolare dalla rete, con una distanza tra i contatti di almeno 3.5 mm.
• Valutare con particolare attenzione i dispositivi di sicurezza da installare ed il luogo in cui
devono essere posizionati, inoltre, inserire sempre un dispositivo di arresto di emergenza che
permetta il distacco obbligato dell’alimentazione.
• Le operazioni di manutenzione e in particolare l’accesso alle parti interne del motoriduttore
devono essere svolte solo ed esclusivamente da personale qualificato.
• L’irreversibilità del motoriduttore evita l’installazione di elettroserrature e in caso di
black-out, il dispositivo di sblocco protetto da chiave personalizzata permette che il
cancello venga aperto e chiuso manualmente.

Istruzioni Instructions Anleitungen Instrucciones Инструкция , Instrukcja
4
Caratteristiche tecniche
Il motoriduttore elettromeccanico HERCULES di Stagnoli, è adatto per automatizzare cancelli
scorrevoli fino a 500 kg di peso e viene fornito nelle versioni con motore a 230Vac e a 24Vdc. E’
disponibile inoltre la versione a catena per Hercules 24 Vdc.
Nella tabella seguente sono riportate le caratteristiche dei vari modelli:
Dati tecnici HERCULES 230V HERCULES 24V
Alimentazione 230V~ / 50 Hz 230V~ / 50 Hz
Corrente max. assorbita (A) 1,5 1
Alimentazione motore 230V~ 24V –––––
Potenza max. motore (W) 200 W 150 W
Condensatore 10 µF -
N° giri motore (rpm) 1400 1500
Rapporto di riduzione 1/28 1/28
Temperatura operativa (°C) -20 ↔+60 -20 ↔+70
Termoprotezione (°C) 150° -
Ciclo di lavoro (%) RESIDENZIALE (30) INTENSIVO (70)
Livello di protezione IP 44 44
Forza di spinta max. 450 N 450 N
Peso max. cancello 500 kg 500 kg
Peso (Kg) 12 12

Istruzioni Instructions Anleitungen Instrucciones Инструкция , Instrukcja
5
Fissaggio della piastra di fondazione
Prima di fissare a terra la piastra di fondazione,
predisporre una o più guaine per il passaggio cavi
(fig.1)
Dopo aver verificato le condizioni ottimali per il
collocamento della piastra, piegare le zanche in
posizione verticale ed annegare la piastra nel
calcestruzzo (fig.1). E’ comunque obbligatorio
annegare la piastra di fondazione nel
calcestruzzo quando il cancello supera i 250 kg di
peso, o l’automazione lavora in condizioni
gravose.
Fig.1
Manovra manuale:
per eseguire la manovra manuale procedere nel seguente modo (fig.2):
1) Scorrere all’indietro il copri serratura
2) Ruotare in senso orario la chiave
3) Tirare la maniglia, fino a portarla perpendicolare al motore
Fig.2
Dimensioni e ingombri
Prima di procedere all’installazione verificare
la zona di collocazione del motoriduttore in
funzione degli ingombri necessari (fig.3).
Fig.3
3
2
1
293 234
52.5
295

Istruzioni Instructions Anleitungen Instrucciones Инструкция , Instrukcja
6
Installazione del motoriduttore
Svitare le due viti laterali per togliere il coperchio
(fig.4)
Posizionare Hercules sulla piastra di fondazione
facendo attenzione a centrare il sistema
antislittamento (fig.5).
Fissare il motoriduttore alla piastra di fondazione
tramite le apposite viti, prima di serrare
completamente le viti regolare la distanza di
Hercules dal cancello.
Prendere il primo settore di cremagliera e
posizionarlo sopra l’ingranaggio, verificare che tra
l’ingranaggio e la cremagliera ci sia un gioco di
almeno 1mm, fissarla al cancello con le viti.
Controllare il corretto posizionamento facendo
scorrere l’anta manualmente (fig.6).
Fig.4
Fig.5 Fig.6
Proseguire nel fissaggio della
cremagliera rimanente, utilizzando uno
spezzone di cremagliera per rispettare il
passo tra una giunzione e l’altra (fig.7).
Posizionare le staffe finecorsa sulla
cremagliera e facendo scorrere l’anta
regolare la posizione delle staffe in
funzione dell’apertura e chiusura
desiderata, dopodiché fissare le staffe
in modo definitivo.
1mm
Fig.7

Istruzioni Instructions Anleitungen Instrucciones Инструкция , Instrukcja
7
Attention!
• This manual is for qualified installers only and not for the end user. It is the installer’s job to
explain to the user how the automatism works, about possible hazards related to it and
the need for periodical maintenance.
• Installation must be carried out by qualified personnel only, in compliance with current
standards concerning automatic closing mechanisms; particularly the installation has to
comply with the 89/392 directive and the EN 12453 and EN12445 regulation.
• HERCULES is made specifically to control the automation of sliding gates and therefore it is
forbidden to use it for any other purposes or improperly.
• Use original components only. Stagnoli is not liable for damages if any other components
are used.
• Make sure that the gate structure is solid and suitable to be motorised.
• Make certain that when the gate is moving there are no points of friction and there is no
chance of it derailing.
• Make absolutely certain the power is disconnected before carrying out any work on the
device.
• Connect the power lead only to supply lines with adequate electrical protection; more
specifically mount a device to guarantee disconnection of all phases from the mains that
has a distance of at least 3.5 mm between the contacts.
• Be particularly careful when evaluating the safety devices to install and their location.
Always install an emergency stop device that will cut power off in the case of necessity.
• Only qualified personnel must be allowed to service the unit.
• The irreversibility of the gearmotor avoids the installation of electronic locks and in case
of black-out, the manual key release allows easy opening and closing of the gate.

Istruzioni Instructions Anleitungen Instrucciones Инструкция , Instrukcja
8
Technical features
Stagnoli’s HERCULES gearmotor is particularly suitable for sliding gates up to 500 kg and is
available in the 230Vac and 24Vdc versions. HERCULES 24Vdc is available in the chain drive
version too.
The following table lists the features of the various models:
Technical data HERCULES 230V HERCULES 24V
Supply power 230V~ / 50 Hz 230V~ / 50 Hz
Max. input current (A) 1.5 1
Motor supply power 230V~ 24V –––––
Max. motor power (W) 200 W 150 W
Capacitor 10 µF -
Rpm 1400 1500
Reduction ratio 1/28 1/28
Working temperature (°C) -20 ↔+60 -20 ↔+70
Thermal overload protection (°C) 150° -
Work cycle (%) RESIDENTIAL (30) INTENSIVE (70)
IP protection level 44 44
Maximum thrust force 450 N 450 N
Maximum gate weight 500 Kg 500 Kg
Weight (Kg) 12 12

Istruzioni Instructions Anleitungen Instrucciones Инструкция , Instrukcja
9
3
2
1
Anchoring the foundation plate
Before commencing to anchor the foundation
plate to the ground, first prepare one or two
sheaths for passing the cables through (Fig.1)
After having verified the optimum conditions for
placing the plate, bend the fish-tail clamps
vertically and concrete the plate in (Fig.1).
However it is still compulsory to bury the
foundation plate in concrete when the gate
weighs more than 250 kg or if the automation
has to work in particularly arduous conditions.
Fig.1
Manual manoeuvre: To move the gate manually proceed as described below (Fig.2):
1. Slide the lock cover back
2. Turn the key clockwise
3. Pull the handle until it is perpendicular to the motor
Fig.2
Dimensions and room
Prior to installing, check the area
where the gear motor is to go
keeping in mind the room
needed (Fig. 3).
Fig.3
293 234
52.5
295

Istruzioni Instructions Anleitungen Instrucciones Инструкция , Instrukcja
10
Installing the gear motor
Unscrew the two side screws to remove the top (Fig.4).
Position Hercules on the foundation plate, taking care
to centre the antiskid device (Fig.5).
Fix the gear motor to the foundation plate with the
screws but before tightening them completely, adjust
the distance between Hercules and the gate.
Take the first sector of the rack and position it on top of
the gear, check there is a clearance of at least 1 mm
between the gear and rack; fix it to the gate with the
screws.
Check the correct position by moving the gate by
hand (Fig.6).
Fig.4
Fig.5 Fig.6
Fix the rest of the rack, utilising a piece
of rack to maintain the pitch between
joints (Fig.7).
Position the limit switch brackets on
the rack and, sliding the gate, adjust
the position of the brackets according
to the opening and closing wanted.
Now fix the brackets permanently.
Fig.7
1mm

Istruzioni Instructions Anleitungen Instrucciones Инструкция , Instrukcja
11
Attention !
• Le présent manuel n’est destiné qu’à du personnel technique qualifié et non pas à
l’utilisateur final ; c’est l’installateur qui doit fournir à l’utilisateur toutes les explications
nécessaires à propos des modalités d’utilisation de l’automatisme et des dangers
pouvant dériver de cette utilisation et qui doit l’informer de la nécessité d’effectuer une
maintenance périodique.
• L’installation ne doit être effectuée que par du personnel qualifié et dans le respect des
normes en vigueur en ce qui concerne les fermetures automatisées. La conformité de
l’installation prévue le respect de la directive 89/392 et des normes EN 12453 et EN 12445.
• HERCULES a été conçu pour la gestion de portails coulissants, ne pas utiliser le produit
dans un but différent de celui prévu ou de manière inappropriée.
• N’utiliser que des composants originaux. L’entreprise Stagnoli ne s’assume aucune
responsabilité pour des dommages provoqués par l’emploi de composants non
originaux.
• Vérifier si la structure du portail est solide et si elle peut être motorisée.
• Vérifier si le portail ne présente aucun point de friction pendant le mouvement et s’il n’a
aucune possibilité de dérailler.
• Avant d’intervenir sur le dispositif s’assurer que l’alimentation est bien débranchée.
• Ne brancher le câble d’alimentation qu’à des lignes d’alimentation avec des protections
électriques adéquates. il faut prévoir en particulier un dispositif pour assurer la
déconnexion omnipolaire du réseau, avec une distance d’au moins 3.5 mm entre les
contacts.
• Les opérations de maintenance ne doivent être effectuées seulement et uniquement que
par du personnel qualifié.
• Evaluer avec une attention particulière les dispositifs de sécurité à installer et l’endroit de
leur mise en place, en outre il faut prévoir un dispositif d’arrêt d’urgence permettant la
coupure obligatoire de l’alimentation.
• L’irréversibilité du motoréducteur évite l’installation de la serrure électrique et en cas de
black-out le déverrouillage à clé personnalisé permet l’ouverture et la fermeture
manuelle du portail.

Istruzioni Instructions Anleitungen Instrucciones Инструкция , Instrukcja
12
Caractéristiques techniques
Le motoréducteur électromechanique HERCULES de Stagnoli est indiqué pour des portails
coulissants jusqu’à 500 kg et est disponible dans les versions 230Vac et 24Vdc. La version à
24Vdc est disponible aussi avec chaîne.
Le tableau suivant reporte les caractéristiques des différents modèles:
Données techniques HERCULES 230V HERCULES 24V
Alimentation 230V~ / 50 Hz 230V~ / 50 Hz
Courant absorbé max. (A) 1,5 1
Alimentation moteur. 230V~ 24V –––––
Puissance moteur max.(W) 200 W 150 W
Condensateur 10 µF -
N° tours moteur (rpm) 1400 1500
Rapport de réduction 1/28 1/28
Température opérationnelle (°C) -20 ↔+60 -20 ↔+70
Protection thermique (°C) 150° -
Cycle de travail (%) RESIDENTIEL (30) INTENSIF (70)
Niveau de protection IP 44 44
Force de poussée max. 450 N 450 N
Poids max. portail 500 Kg 500 Kg
Poids (Kg) 12 12

Istruzioni Instructions Anleitungen Instrucciones Инструкция , Instrukcja
13
Fixation de la plaque de fondation
Avant de fixer à terre la plaque de fondation,
mettre en place une ou plusieurs gaines pour le
passage des câbles (fig.1)
Après avoir vérifié les conditions optimales pour la
mise en place de la plaque, plier les agrafes en
position verticale et noyer la plaque dans le béton
(fig.1). Il est cependant obligatoire de noyer dans
le béton la plaque de fondation lorsque le portail
pèse plus de 250 kg, ou si l’automation doit se faire
dans des conditions difficiles.
Fig.1
Manœuvre manuelle :
pour effectuer la manœuvre manuelle procéder de la manière suivante (fig.2)
1. Faire glisser en arrière les couvre-serrures
2. Tourner la clé dans le sens des aiguilles d’une montre
3. Tirer la poignée, jusqu’à la mettre en position perpendiculaire par rapport au moteur
Fig. 2
Dimensions et encombrements
Avant d’effectuer l’installation vérifier la
zone où doit être installé le motoréducteur
en tenant compte des encombrements
nécessaires (fig.3).
Fig.3
3
2
1
293 234
52.5
295

Istruzioni Instructions Anleitungen Instrucciones Инструкция , Instrukcja
14
Installation du motoréducteur
Dévisser les deux vis latérales pour enlever le
couvercle (fig.4)
Mettre Hercules sur la plaque de fondation en
veillant à ce que le système anti-glissement soit bien
centré (fig.5).
Fixer le motoréducteur à la plaque de fondation à
l’aide des vis prévues à cet effet, avant de serrer les
vis régler la distance d’Hercules par rapport au
portail.
Prendre le premier secteur de crémaillère et le placer
au-dessus de l’engrenage, vérifier s’il y a un jeu d’au
moins 1mm entre l’engrenage et la crémaillère, la
fixer au portail avec les vis.
Contrôler la position correcte en faisant glisser le
battant manuellement (fig.6).
Fig.4
Fig.5 Fig.6
Continuer la fixation de la
crémaillère restante, en utilisant un
tronçon de crémaillère pour
respecter le pas entre une jonction
et l’autre (fig.7).
Mettre les étriers de fins de course
sur la crémaillère et en faisant glisser
le battant régler la position des
étriers en fonction de l’ouverture et
fermeture désirées, après quoi fixer
les étriers de manière définitive.
Fig.7
1mm

Istruzioni Instructions Anleitungen Instrucciones Инструкция , Instrukcja
15
Achtung!
• Diese Anleitungen sind nur für das Fachpersonal bestimmt, das für die Installation
qualifiziert ist, und nicht für den Endkunden. Der Installateur hat dann den Anwender
über die Verwendung des Antriebes, über mögliche Gefahren, die daraus entstehen
können, sowie über die Notwendigkeit der Instandhaltung zu informieren.
• Die Installation darf nur von qualifiziertem Fachpersonal unter Beachtung der im
Automatisierungsbereich geltenden Sicherheitsnormen ausgeführt werden. Insbesondere
muss die Installation laut Richtlinie 89/392 und EN 12453 und EN 12445 Norm durchgeführt
werden.
• HERCULES wurde speziell zum Steuern von Antrieben für Schiebetore entwickelt.
Jeder von der bestimmungsgemäßen Verwendung abweichende Einsatz des
Produktes sowie jede unsachgemäße Verwendung sind untersagt.
• Nur Originalbauteile verwenden. Die Firma Stagnoli haftet nicht bei Schäden durch
die Verwendung von Fremdbauteilen.
• Stellen Sie bitte sicher, dass das Tor stabil gebaut ist und dafür geeignet ist,
motorgetrieben zu werden.
• Stellen Sie bitte sicher, dass das Tor bei den Bewegungen nicht reibt und entgleist.
• Bevor Sie Arbeiten an der Vorrichtung ausführen, überprüfen Sie bitte, ob die
Vorrichtung spannungslos geschaltet ist.
• Verbinden Sie das Spannungskabel nur an Netzanschlüsse, die mit entsprechenden
elektrischen Sicherheitsvorrichtungen ausgestattet sind. Insbesondere muss eine
Vorrichtung zur Ausschaltung aller Kontakten vom Netzanschluss vorgesehen werden, bitte
lassen Sie einen 3.5 mm Abstand zwischen den Kontakten.
• Wählen Sie die Sicherheitseinrichtungen und deren Installationsstellen sehr sorgfältig
aus. Setzen Sie immer eine NOT-AUS-Vorrichtung zum Abschalten der
Spannungsversorgung ein.
• Die Nichtumkehrbarkeit des Getriebes vermeidet die Installation vom Elektroschloss und im
Fall von Blackout kann das Tor durch die Notentriegelung mit personalisiertem Schlüssel
mühelos geöffnet und geschlossen werden.

Istruzioni Instructions Anleitungen Instrucciones Инструкция , Instrukcja
16
Technische Daten
Der elektromechanische Getriebe HERCULES der Fa. Stagnoli ist für Schiebetore bis 500 Kg
Gewicht besonders geeignet und lieferbar in der 230Vac und 24Vdc Ausführungen. Der
HERCULES 24Vdc ist lieferbar auch mit Kettenführung.
In der folgenden Tabelle sind die Eigenschaften der verschiedenen Ausführungen aufgeführt.
Technische Daten HERCULES 230V HERCULES 24V
Versorgung 230V~ / 50 Hz 230V~ / 50 Hz
Max. Stromaufnahme (A) 1,5 1
Motor-Spannungsversorgung 230V~ 24V –––––
Max. Motorleistung (W) 200 W 150 W
Kondensator 10 µF -
Motordrehzahl (U/min) 1400 1500
Untersetzungsverhältnis 1/28 1/28
Betriebstemperatur (°C) -20 ↔+60 -20 ↔+70
Wärmeschutz (°C) 150° -
Arbeitszyklus (%) 30 70
IP-Schutzklasse 44 44
Max. Schubkraft 450 N 450 N
Max. Torgewicht 500 Kg 500 Kg
Gewicht (kg) 12 12

Istruzioni Instructions Anleitungen Instrucciones Инструкция , Instrukcja
17
Befestigung der Fundamentplatte
Vor der Bodenbefestigung der
Fundamentplatte verlegen Sie bitte einen
oder mehrere Mantel zur Kabelführung (Abb.
1).
Nach Überprüfung der optimalen
Bedingungen zur Verlegung der Platte
biegen Sie bitte die Verankerungsdübel
senkrecht und betonieren Sie die Platte ein
(Abb. 1). Bei einem Torgewicht über 250 kg
muss auf jeden Fall die Bodenplatte
einbetoniert werden, da andernfalls der
Antrieb unter hohen Belastungen arbeitet.
Abb. 1
Handbedienung:
Zur Handbedienung gehen Sie bitte folgendermaßen vor (Abb. 2):
1. Schieben Sie die Schlossabdeckung nach hinten
2. Drehen Sie den Schlüssel in den Uhrzeigersinn
3. Ziehen Sie am Griff, bis er senkrecht zum Motor steht
Abb. 2
Abmessungen und Raumbedarf
Vor der Installation überprüfen Sie den
Aufstellungsort des Getriebes in Bezug auf
den entsprechenden Raumbedarf (Abb. 3).
Abb. 3
3
2
1
293 234
52.5
295

Istruzioni Instructions Anleitungen Instrucciones Инструкция , Instrukcja
18
Getriebeinstallation
Schrauben Sie die zwei Seitenschrauben ab, um die
Abdeckung abzunehmen (Abb. 4).
Stellen Sie Hercules auf die Bodenplatte und achten Sie
darauf, dass das Gleitschutzsystem zentriert wird (Abb. 5).
Befestigen Sie das Getriebe mit den entsprechenden
Schrauben an die Bodenplatte. Bevor Sie die Schrauben
fest anziehen, stellen Sie bitte den Abstand zwischen
Hercules und Tor ein.
Legen Sie das erste Zahnstangensegment auf das
Zahnradgetriebe und überprüfen Sie, dass zwischen
Zahnradgetriebe und Zahnstange ein Mindestspiel von 1
mm vorhanden ist. Befestigen Sie die Zahnstange mit den
Schrauben an das Tor.
Schieben Sie den Flügel manuell und überprüfen Sie
dabei die richtige Lage (Abb. 6).
Abb. 4
Abb. 5 Abb. 6
Befestigen Sie die übrige
Zahnstange und verwenden Sie ein
Zahnstangenstück, um die Teilung
zwischen den Verbindungen
einzuhalten (Abb. 7).
Legen Sie die Endanschlagbügel auf
die Zahnstange und schieben Sie
den Flügel, um die Bügellage je
nach gewünschter Öffnung und
Schließung einzustellen. Danach
befestigen Sie die Bügel definitiv.
Abb. 7
1mm

Istruzioni Instructions Anleitungen Instrucciones Инструкция , Instrukcja
19
¡ Atención !
• El presente manual está destinado solamente para el personal técnico calificado para la
instalación y no para el usuario final; instalador es la persona responsable que debe
informar succesivamente al usuario sobre el modo de uso del aparato, sobre el peligro
relacionado con su uso y sobre la necesidad del mantenimiento periódico.
• Instalación debe estar realizada sólo por el personal calificado respetando las normas
vigentes referentes a las cerraduras automáticas. Especialmente realizando la
instalación hay que respetar la Directiva 89/392 y las nornas EN 12453 y EN 12445
• Antes de usar el dispositivo asegurarse que la alimentación está cortada.
• Conectar el cable de la tensión sólo a la línea de alimentación dotada de adecuada
protección eléctrica; especialmente prever la presencia de un dispositivo para asegurar
la desconexión omnipolar de la red, con una distancia entre los contactos de al menos
3.5 mm
• Valorar con la atención particular los dispositivos de seguridad para instalar y el lugar
donde deben estar posicionados, además siempre instalar un dispositivo de bloqueo de
emergencia que permite separación obligada de la alimentación.
• Utilizar componentes originales. La empresa Stagnoli no asume ninguna responsabilidad
por daños debidos al uso de los componentes no originales.
• Está prohibido tocar el dispositivo con las manos y con los pies húmedos y mojados, hay
que evitar la exposición del dispositivo a los agentes atmosféricos.
• Dispositivo debe estar destinado sólo al uso para el cual está especialmente concebido,
uso de este producto con objetivos diferentes del mencionado o de modo impropio
puede resultar peligroso.
• Las operaciones de mantenimiento y eventual sustitución de la lámpara de cortesía
deben estar realizadas sólo y exclusivamente por el personal calificado
• Asegurarse que la estructura de la cancela sea sólida, equilibrada y adecuada para ser
activada, asegurarse que la cancela durante su movimiento no encuentra puntos de
fricción.

Istruzioni Instructions Anleitungen Instrucciones Инструкция , Instrukcja
20
Características técnicas
El motorreductor electromecánico HERCULES de Stagnoli es adecuado para la automatización
de portones correderos hasta 500 kg de paso. Está disponible también la versión de cadena
para Hercules 24 Vdc.
En la tabla a continuación se indican las características de los distintos modelos:
Datos técnicos HERCULES 230V HERCULES 24V
Alimentación 230V~ / 50 Hz 230V~ / 50 Hz
Corriente max. absorbida (A) 1,5 1
Alimentación del motor 230V~ 24V –––––
Potencia max. motor (W) 200 W 150 W
Condensador 10 µF -
Nro. vueltas motor (rpm) 1400 1400
Relación de reducción 1/28 1/28
Temperatura de funcionamiento (°C) -20 ↔+60 -20 ↔+70
Protección térmica (°C) 150° -
Ciclo de trabajo (%) residencial (30) intensivo (70)
Nivel de protección IP 44 44
Fuerza de empuje máx. 450 N 450 N
Peso máx. portón 500 kg 500 kg
Peso (Kg) 12 12
Other manuals for HERCULES 230V
1
This manual suits for next models
1
Table of contents
Languages:
Other Stagnoli Gate Opener manuals

