manuals.online logo
Brands
  1. Home
  2. •
  3. Brands
  4. •
  5. Stairmaster
  6. •
  7. Fitness Equipment
  8. •
  9. Stairmaster CORE HEALTH & FITNESS BOXMASTER PRO TOWER User manual

Stairmaster CORE HEALTH & FITNESS BOXMASTER PRO TOWER User manual

OWNER'S
MANUAL
CORE HEALTH & FITNESS
BOXMASTER PRO TOWER
Page 1
TABLE OF CONTENTS
IMPORTANT SAFETY INSTRUCTIONS................................................................................................................2
IMPORTANT LABEL LOCATIONS ........................................................................................................................4
PRODUCT SPECIFICATIONS ................................................................... 4
ASSEMBLY ........................................................................................................................6
OPTIONAL BASE 400-1120 ................................................................. 13
OPTIONAL KICK PAD 731-5674 ................................................................. 16
MAINTENANCE ......................................................................................................................17
TOOLS ................................................................. 17
MAINTENANCE SCHEDULE ................................................................. 18
REPLACEMENT PARTS ......................................................................................................................19
SUPPORT & SERVICE ......................................................................................................................19
Page 2
Before using this product, it is essential to read the ENTIRE Owner’s Manual and ALL
installation instructions. The Owner’s Manual describes equipment assembly and instructs
members on how to use correctly and safely.
Read all warnings posted on the machine.
Health related injuries may result from incorrect or excessive use of exercise equipment.
Core Health & Fitness strongly recommends you to encourage your members to discuss their
health program or fitness regimen with a health care professional, especially if you or they
have not exercised for several years, are over 35, or have known health conditions.
WARNING!
WARNING: to reduce the risk of serious injury to
persons using this equipment, read and follow all of
these warnings:
24 in (0.6 m)
Fig. 1 Required Clearance
1. Assemble and operate the unit on a solid level
surface. Position the machine with a minimum of
24 inches (0.6 meters) of clearance on one side
to allow for ease of mounting and dismounting.
Leave a minimum of 19.7 inches (0.5 meters)
between two adjacent units. These dimensions
are the recommended minimum distances.
The actual area for access and passage shall be
the responsibility of the facility and should take
into account this training envelope, Americans
with Disabilities Act Accessibility Guidelines
(ADAAG) requirements and any required local
codes or regulations (www.access-board.gov/
ada).
2. This equipment is designed for use in a
commercial gymnasium or health club. To ensure
the proper use of the equipment in a safe manner,
all users of the equipment should read this
manual before using the machine. This machine
should be made a part of your club training
program in order that the equipment is used by
your members in a safe manner as intended. In
addition to instructing the club members in the
proper use of the equipment, the club member
should obtain a complete physical examination
form their health care provider before beginning
any exercise program.
3. The safety and integrity of this machine can only
be maintained when the equipment is regularly
examined for damage and wear and repaired.
It is the sole responsibility of the owner of this
equipment to ensure that regular maintenance
is performed. Worn or damaged parts must be
replaced immediately or the equipment removed
from service until the repair is made.
4. Use only replacement components supplied by
Core Health & Fitness. Substitutes are forbidden
and will void all warranties.
5. This machine is not intended to be used by
persons with reduced physical, sensory, or
mental capabilities or lack of experience and
knowledge, unless given instruction and under
the personal supervision concerning use of the
machine by a person responsible for their safety.
6. Keep children away.
7. Ensure all adjustment and locking features are
properly secured before using the equipment.
IMPORTANT SAFETY INSTRUCTIONS
Page 3
8. When adjusting any seat, knee stabilization pad,
range of motion limiter, foothold pad or any other
type of adjuster, make certain that the adjusting
pin is fully engaged in the hole to avoid injury. If
any of the adjustment devices are left projecting,
they could interfere with the user’s movement.
9. Wear proper exercise clothing and athletic shoes
during a workout. Avoid wearing loose clothing.
Tie back long hair and keep towels away from
the moving parts. Face forward at all times and
never attempt to turn around while the machine is
moving.
10. Do not over exert yourself during exercise. Stop
exercising if you feel pain or tightness in your
chest, become short of breath or feel faint. If you
feel pain or experience any abnormal symptoms,
stop exercising and consult your health care
provider.
11. It is the purchaser’s sole responsibility to properly
instruct its end users and supervising personnel
as to the proper operating procedures of all
equipment.
SAVE THESE INSTRUCTIONS
Page 4
This page shows the location of the warning labels and communication stickers placed on the equipment as part of the manufacturing process. It is critical that
owners maintain the integrity and placement of these stickers. If you find any stickers missing or damaged the replacement numbers are shown on the support
site and following pages. See Support and Service to order replacements.
731-0517
731-9123
731-0512
731-2430
731-5349
050-5577
731-5351
731-5348
Fig. 2
PRODUCT SPECIFICATIONS
SKU: 9BM-K9601-26CSS Desc: Boxmaster Pro, Tower
Unit Weight Width Length Height
246 lbs
112 kg
33 in
84 cm
30 in
76 cm
82 in
208 cm
IMPORTANT LABEL LOCATIONS
Page 5
050-5577
STICKER,NOTICE TO OIL
731-0512
STICKER,CAUTION,PINCH
731-0517
STICKER, WARNING, BOLT
DOWN
731-9123
BOX MASTER PRO STICKER
731-5348
STICKER, CAUTION, DO NOT HIT
BACK OF PAD
731-5349
STICKER, CAUTION, WEAR
PROPER WRIST WRAPS/
GLOVES
731-5351
STICKER, CAUTION, DO NOT
LEAN ON UNIT/HOLD SPRINGS
731-2430
STICKER,WARNING, STANDARD INSTRUCTIONS
Notice: images are not to scale
Page 6
All equipment MUST be secured (bolted and tightened) to a solid, level surface, using all of the anchoring
holes provided, to stabilize and eliminate rocking or tipping over. Shim any mounting surface that does not rest
thoroughly on the floor using flat washers, DO NOT force the foot to contact the ground with anchors.
Fasteners must have a minimum of 500 lbs. tensile capacity, be a bolt of grade 2 or better and be installed per
the bolt manufacturer’s specifications.
Due to the wide variety of flooring on which equipment may be anchored or installed and differences in
applicable local building codes, Core Health & Fitness is not responsible for any damage to the flooring that
may result due to anchoring or installing equipment to the floor and for compliance with local building codes.
Only licensed contractors or certified installers should be used to insure proper anchoring, installation, and
compliance with local building code.
Required Tools:
• Metric Allen Key Set
• Metric Open-Ended Wrench Set
• Large Adjustable Crescent Wrench
PACKAGING REMOVAL:
Unit is heavy and requires two people for assembly.
Carefully remove all packaging materials that wrap the equipment.
DO NOT USE A KNIFE OR BOX CUTTER AS YOU MAY DAMAGE THE EQUIPMENT.
ASSEMBLY
Page 7
PROCEDURE
731-9333 731-5331
731-9334731-9336
731-9120731-0373
731-9115731-9116
731-9332
731-9117
731-9335
731-9119
731-9118
Fig. 3
1. Align Boxing Pad (731-9118) against Spring Arm (731-5331) and install three socket head cap screws (731-
5331) and three M6 Plain Washers (731-0373) and tighten.Repeat the process for the remaining Boxing
Pads and Spring Arms pictured in Figure 3.
Page 8
2. Install twelve Socket Head Screws (731-5330)
and twelve M8 Plain Washers (731-0355)
into the Mount Plate of the Median Spring
Arm (731-9113). Place the Median Pad Cover
(731-9122) onto the Median Spring Arm and
secure top of pad to the velcro tabs.
731-0355 731-9113731-5330731-9122
Fig. 4
3. Install the T-Handle Pull Pin (731-5314) into
the Upper Adjustment Frame (731-9112).
731-9112 731-5314
Fig. 5
Page 9
4. Slide the Upper Adjustment Frame (731-9112)
onto the Base Tower (731-9326).
731-9326
731-9112
Fig. 6
Page 10
5. Install the Gas Spring (731-5316) into the
Upper Adjustment Frame (731-9112) and the
Base Tower (731-9326).
731-9326 731-5316
731-9112
Fig. 7
6. Install the three Adjustment Handles (731-
5313) into the Upper Adjustment Frame (731-
9112).
731-9112
731-5313
Fig. 8
Page 11
731-9333
731-9334
731-0350
731-9336
731-3898
731-9335731-9113
731-9332731-5329
Fig. 9
7. Align Spring Arms to corresponding Arm Mount Plates and install using twenty-four M10 socket head cap
screws (731-0350), twenty-four split lock washers (731-3898), and twenty-four M10 fender washers (731-
5329).
Page 12
9. Assembly is complete.
Fig. 11
8. Align the Number 12 Boxing Pad (731-9121)
against the Pad Mount Plate of the Upper
Adjustable Frame (731-9112). Install using six
socket head cap screws (731-5331) and six
M6 plain washers (731-0373).
731-9121 731-0373731-9112 731-5331
Fig. 10
Page 13
Horizontal Fixed Plates
Riser Plates
Fig. 12
1. Place the two Horizontal Fixed Plates flat against the Riser Plates.
2. Place the two Vertical Fixed Plates over the
Horizontal Fixed Plates. Then place the Upper
Fixed Plate over the Vertical Fixed Plates.
Upper Fixed Plate
Vertical Fixed Plates
Fig. 13
OPTIONAL BASE 400-1120
Page 14
3. Install twelve M8 25mm socket head
cap screws (731-0390) into the Vertical
Fixed Plates. Install four M8 50mm
socket head cap screws (731-5340)
into the Upper Fixed Plate.
731-5340731-0390
4. Position the Boxmaster unit over top
of the weld studs and lower the plate
base holes through the weld studs.
Tighten eight of the hex nuts (731-
5338) over the weld studs.
Weld Studs
731-5338
9BM-K9601
Fig. 14
Fig. 15
Page 15
Fig. 16
5. Assembly is complete.
Page 16
OPTIONAL KICK PAD 731-5674
1. Slide the Kick Pad (731-5674) against the
tower base of the Boxmaster and tie the
straps.
2. Assembly is complete.
9BM-K9601
731-5674
Fig. 17
Fig. 18
Page 17
TOOLS
Working on this product will require basic and/or sometimes specialty tools based on the type of service that
will be performed at any time. To assist, we recommend having the tools listed available when performing
maintenance.
Tool
Metric Allen Key Set Screwdriver Set, Phillips
Metric Open-Ended Wrench Set Screwdriver Set, Flat
Large Adjustable Crescent Wrench Torque Wrench
Metric Socket Set
MAINTAIN ALL EQUIPMENT: Preventative maintenance is the key to smooth operating equipment as well
as keeping the product in safe operating condition. Failure to conduct preventative maintenance by the owner
may cause the product to operate in an unsafe manner. Equipment needs to be inspected and maintained at
regular intervals per the preventative maintenance schedule provided in this manual.
Cleaning
Keeping your Strength units clean is an important component of preventative maintenance and the overall
aesthetics of your product. While your clients will appreciate clean equipment free of sweat, dirt and other
contaminants proper care and cleaning will extend the life of your product and reduce premature aging and
wear. See the maintenance schedule for recommended frequency.
• For general cleaning: A solution of 10% mild soap with warm water applied with a soft damp cloth OR
Formula 409 applied to a cloth then wiped onto the upholstery.
Note – do not use cleaners that contain solvents, alcohol or abrasives.
• For disinfecting: 1:10 Bleach/Water mix. After cleaning, rinse area with clean water, then dry with a
clean, lint-free cloth. Failure to remove chemical residue will cause discoloration of the coated fabric
surface to manifest earlier in the life cycle of the product
• Inclusion in this document does not imply “fit for use.” Customers should first determine if products are
appropriate for use on their surfaces
• Should other cleaning methods or products be employed, carefully try them in an inconspicuous area
to determine potential damage to the material. Never use harsh solvents or cleaners which are intended
for industrial applications. To clean stained or soiled areas, a soft white cloth is recommended. Avoid
use of paper towels.
CAUTION: Cleaning products may be harmful/irritating to your skin, eyes, etc. Use protective
gloves and eye protection. Do not inhale or swallow any cleaning product. Protect surrounding area/
clothing from exposure. Use in a well-ventilated area. Follow all product manufacturer’s warnings.
CORE Health and Fitness cannot be held responsible for damage or injuries resulting from the use or
misuse of cleaning products.
MAINTENANCE
Page 18
MAINTENANCE SCHEDULE
With durable, high performance components, this equipment is designed for heavy usage with minimal
maintenance required. To keep it in top condition, perform regular daily, weekly and monthly preventive
maintenance routines outlined below.
The safety and integrity of this machine can only be maintained when the equipment is regularly examined for
damage and wear and repaired. It is the sole responsibility of the owner of this equipment to ensure that regular
maintenance is performed. Worn or damaged parts must be replaced immediately or the equipment removed
from service until the repair is made.
Daily Weekly Monthly Bi-Annually
Inspect
Fasteners X
Upholstery X
Labels X
Main Frame X
General Maintenance
Lubricate Adjustment Levers X
Lubricate Post Slide Assembly X
Cleaning
Upholstery X
Main Frame X
Inspection
Visual inspection of your units will insure a safe environment for your clients and alert you to any issues that
may require maintenance prior to equipment failure. Proper, timely visual inspection is a critical component to
the long term care of your product.
• Fasteners, hardware and attachments should be checked monthly for looseness. Tighten as required
using appropriate tools.
• Main frame should be inspected every six months for signs of unusual wear, corrosion or structural
integrity issues.
• Upholstery should be inspected for wear or damage monthly and replaced as needed.
Page 19
Replacement parts for this unit are available through SUPPORT & SERVICE. Parts listed are shown on the
following pages and interactive drawings available on Core Connect. Listed parts may change, please check
Core Connect for latest versions and other SKU’s covered by this manual:
REPLACEMENT PARTS
LABELS AND LANYARD 20
FRAME COMPONENTS 21
SPRING ARMS 22
BOXING PADS 23
MIDDLE PAD 24
Part Number Qty Description
050-5577 1STICKER,NOTICE TO OIL
731-0350 24 Screw, M10X1.5, 25mm, SHC, HK
731-0355 12 WASHER,PLAIN,M8,NARROW
731-0373 24 WASHER,PLAIN,M6
731-0512 8STICKER,WARNING,PINCH
731-0517 1STICKER, WARNING, BOLT DOWN
731-2430 1STICKER,WARNING,STANDARD INSTRUCTIONS
731-3898 24 WASHER,M10,LOCK,SPLIT
731-5313 3ADJUSTABLE HANDLE, BM
731-5314 1T-HANDLE, PULL PIN, BM
731-5316 1GAS SPRING ASSY, BM
731-5329 24 WASHER, M10, FENDER, NP
731-5330 12 SCREW,M8x1.25,25,SHC,HK,AS,12.9,ZP,FT
731-5331 24 1/4”-20 x 3/4”, SHC, HK, CS NP
731-5348 6STICKER, CAUTION, DO NOT HIT BACK OF PAD
731-5349 1
STICKER, CAUTION, WEAR PROPER WRIST WRAPS/
GLOVES
731-5351 3
STICKER, CAUTION, DO NOT LEAN ON UNIT/HOLD
SPRINGS
731-7975 1ASSY, LANYARD, BOXMASTER
731-9112 1WELD, ADJUST, FRAME, BMP
731-9113 1WELD, MEDIAN PAD, BMP
731-9115 1BOXING PAD 1, BMP
731-9116 1BOXING PAD 2, BMP
731-9117 1BOXING PAD 3, BMP
731-9118 1BOXING PAD 4, BMP
731-9119 1BOXING PAD 10, BMP
731-9120 1BOXING PAD 11, BMP
731-9121 1BOXING PAD 12, BMP
Part Number Qty Description
731-9122 1MEDIAN PAD COVER, BMP
731-9123 1BOX MASTER PRO STICKER
731-9332 1WELD, LOWER LEFT, PAD, BMP
731-9333 1WELD, LOWER RIGHT, PAD, BMP
731-9334 1WELD, TOP OUTSIDE, RIGHT ARM, BMP
731-9335 1WELD, TOP OUTSIDE, LEFT ARM, BMP
731-9336 1WELD, TOP, CENTER ARMS, BMP

Other Stairmaster Fitness Equipment manuals
Stairmaster SC916 StairClimber User manual
Stairmaster

Stairmaster SC916 StairClimber User manual

Stairmaster CORE HEALTH & FITNESS 4G User manual
Stairmaster

Stairmaster CORE HEALTH & FITNESS 4G User manual

Stairmaster FREECLIMBER 4200 PT User manual

Stairmaster

Stairmaster FREECLIMBER 4200 PT User manual

Stairmaster Air Fit Upper Body User manual
Stairmaster

Stairmaster Air Fit Upper Body User manual

Stairmaster Core Health & Fitness 10G User manual
Stairmaster

Stairmaster Core Health & Fitness 10G User manual

Stairmaster FreeClimber User manual

Stairmaster

Stairmaster FreeClimber User manual
Stairmaster AirFit User manual

Stairmaster

Stairmaster AirFit User manual
Stairmaster FreeClimber User manual

Stairmaster

Stairmaster FreeClimber User manual
Stairmaster 4100PT User manual

Stairmaster

Stairmaster 4100PT User manual
Stairmaster 8G Gauntlet User manual

Stairmaster

Stairmaster 8G Gauntlet User manual

Stairmaster Core Health & Fitness 10G User manual

Stairmaster

Stairmaster Core Health & Fitness 10G User manual

Stairmaster Gauntlet User manual

Stairmaster

Stairmaster Gauntlet User manual
Stairmaster Core Health & Fitness 10G User manual
Stairmaster

Stairmaster Core Health & Fitness 10G User manual

Stairmaster SC916 StairClimber User manual

Stairmaster

Stairmaster SC916 StairClimber User manual

Stairmaster HIIT UBE User manual

Stairmaster

Stairmaster HIIT UBE User manual
Stairmaster StepMill 3 User manual

Stairmaster

Stairmaster StepMill 3 User manual

Stairmaster TwistLock Dumbbell User manual
Stairmaster

Stairmaster TwistLock Dumbbell User manual

Stairmaster 8G Gauntlet User manual

Stairmaster

Stairmaster 8G Gauntlet User manual
Stairmaster Core Health & Fitness HIIT ROWER User manual
Stairmaster

Stairmaster Core Health & Fitness HIIT ROWER User manual

Stairmaster 4400 CL Quick start guide

Stairmaster

Stairmaster 4400 CL Quick start guide

Stairmaster StepMill 5 User manual

Stairmaster

Stairmaster StepMill 5 User manual

Stairmaster SC5 StairClimber User manual

Stairmaster

Stairmaster SC5 StairClimber User manual

Stairmaster STEPMILL 7000 User manual

Stairmaster

Stairmaster STEPMILL 7000 User manual

Stairmaster STEPMILL 7000 User manual

Stairmaster

Stairmaster STEPMILL 7000 User manual

Popular Fitness Equipment manuals by other brands
Titan Fitness BTMCN 400789 Operator's manual

Titan Fitness

Titan Fitness BTMCN 400789 Operator's manual

Insportline Bumy BC450 user manual

Insportline

Insportline Bumy BC450 user manual

True Atlas HD owner's manual

True

True Atlas HD owner's manual

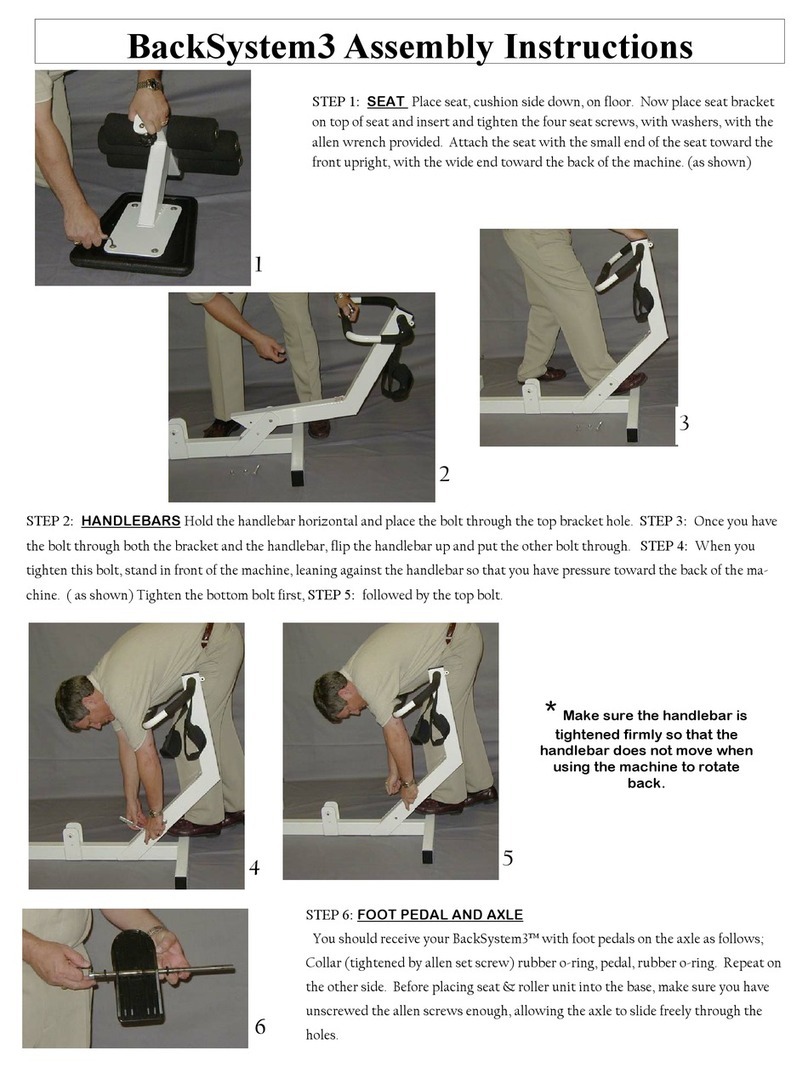
CDM Sport BackSystem3 Assembly instructions

CDM Sport

CDM Sport BackSystem3 Assembly instructions

Deltech Fitness DF7200 Assembly instructions

Deltech Fitness

Deltech Fitness DF7200 Assembly instructions

Kettler Delta XL manual

Kettler

Kettler Delta XL manual

U.N.O Fitness STR 1700 manual

U.N.O Fitness

U.N.O Fitness STR 1700 manual

Cascade 50500-00 owner's manual

Cascade

Cascade 50500-00 owner's manual

Slendertone ABS7 instruction manual

Slendertone

Slendertone ABS7 instruction manual

Force F-FOB owner's manual

Force

Force F-FOB owner's manual

Precor Resolute RSL 619 Getting started guide

Precor

Precor Resolute RSL 619 Getting started guide

Orbit OBA2123A owner's manual

Orbit

Orbit OBA2123A owner's manual

Skandika Fitness SIT-UP BANK Assembly instructions and user guide

Skandika Fitness

Skandika Fitness SIT-UP BANK Assembly instructions and user guide

Nautilus NS 75X Assembly manual

Nautilus

Nautilus NS 75X Assembly manual

Domyos PA 600 operating instructions

Domyos

Domyos PA 600 operating instructions
Casada PowerBoard 2.1 instruction manual

Casada

Casada PowerBoard 2.1 instruction manual

First Degree Fitness Pacific PLUS user guide
First Degree Fitness

First Degree Fitness Pacific PLUS user guide

SPORTS ART A911 owner's manual

SPORTS ART

SPORTS ART A911 owner's manual
manuals.online logo
manuals.online logoBrands
  • About & Mission
  • Contact us
  • Privacy Policy
  • Terms and Conditions

Copyright 2025 Manuals.Online. All Rights Reserved.