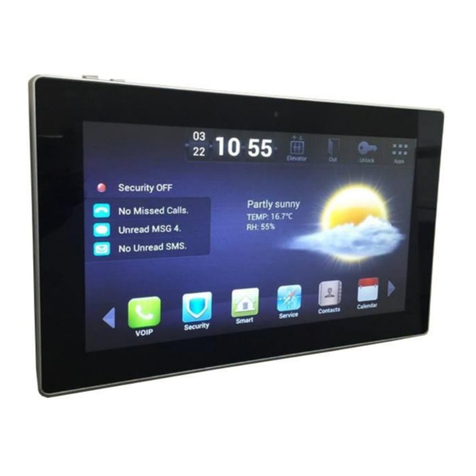
STAMONY ST-VP-400 User manual

ST-VP-400
BEDIENUNGSANLEITUNG
USER MANUAL
INSTRUKCJA OBSŁUGI
NÁVOD K POUŽITÍ
MANUEL D´UTILISATION
ISTRUZIONI PER L‘USO
MANUAL DE INSTRUCCIONES
1-FAMILY HOUSE VIDEO DOORPHONE
expondo.de

2 3
03.08.2020
INHALT | CONTENT | TREŚĆ | OBSAH | CONTENU | CONTENUTO | CONTENIDO
3
8
13
18
23
28
33
DEUTSCH
ENGLISH
POLSKI
ČESKY
FRANÇAIS
ITALIANO
ESPAÑOL
TECHNISCHE DATEN
Parameter Werte
Produktname 1-Familienhaus Video-
Türsprechanlage
Modell ST-VP-400
Monitor
Nennspannung [V~]/
Frequenz [Hz]
Eingang: AC 110-240V,
60-50Hz
Ausgang: DC 15V, 1200mA
Anzeige 7’’ TFT-LCD
Klingeltöne 16 polyphone Melodien
Betriebsabstand [m] 50
Betriebstemperatur [°C] -5 ~ +40
Betriebsfeuchte [%] 10 ~ 90
Abmessungen [mm] 200x140x23
Außenstation
Nennspannung [V~] DC 15V 1200mA
Kamera CMOS 540 TVL
Nachtsicht-LEDs LED 6
Drehwinkel der Kamera
[°]
120
Betriebstemperatur [°C] -20 ~ +50
Betriebsfeuchte [%] < 90
Abmessungen [mm] 100x150x30
PRODUKTNAME 1-FAMILIENHAUS VIDEO-TÜRSPRECHANLAGE
PRODUCT NAME 1-FAMILY HOUSE VIDEO DOORPHONE
NAZWA PRODUKTU WIDEODOMOFON DO DOMU JEDNORODZINNEGO
NÁZEV VÝROBKU ZVONEK S KAMEROU PRO RODINNÝ DŮM
NOM DU PRODUIT VISIOPHONE 1 APPARTEMENT
NOME DEL PRODOTTO VIDEOCITOFONO PER CASA UNIFAMILIARE
NOMBRE DEL PRODUCTO VIDEOPORTERO PARA 1 VIVIENDA
MODELL
ST-VP-400
PRODUCT MODEL
MODEL PRODUKTU
MODEL VÝROBKU
MODÈLE
MODELLO
MODELO
IMPORTEUR
EXPONDO POLSKA SP. Z O.O. SP. K.
IMPORTER
IMPORTER
DOVOZCE
IMPORTATEUR
IMPORTATORE
IMPORTADOR
ADRESSE VON IMPORTEUR
UL. NOWY KISIELIN-INNOWACYJNA 7, 66-002 ZIELONA GÓRA | POLAND, EU
IMPORTER ADDRESS
ADRES IMPORTERA
ADRESA DOVOZCE
ADRESSE DE L'IMPORTATEUR
INDIRIZZO DELL'IMPORTATORE
DIRECCIÓN DEL IMPORTADOR
Für einen langen und zuverlässigen Betrieb des Geräts muss
auf die richtige Handhabung und Wartung entsprechend
den in dieser Anleitung angeführten Vorgaben geachtet
werden. Die in dieser Anleitung angegebenen technischen
Daten und die Spezikation sind aktuell. Der Hersteller
behält sich das Recht vor, im Rahmen der Verbesserung der
Qualität Änderungen vorzunehmen.
ERLÄUTERUNG DER SYMBOLE
1. ALLGEMEINE BESCHREIBUNG
Diese Anleitung ist als Hilfe für eine sichere und zuverlässige
Nutzung gedacht. Das Produkt wurde strikt nach den
technischen Vorgaben und unter Verwendung modernster
Technologien und Komponenten sowie unter Wahrung der
höchsten Qualitätsstandards entworfen und angefertigt.
VOR INBETRIEBNAHME MUSS DIE ANLEITUNG
GENAU DURCHGELESEN UND VERSTANDEN
WERDEN.
Das Produkt erfüllt die geltenden
Sicherheitsnormen.
Gebrauchsanweisung beachten.
Recyclingprodukt.
ACHTUNG!, WARNUNG! oder HINWEIS!, um
auf bestimmte Umstände aufmerksam zu
machen (allgemeines Warnzeichen).
ACHTUNG! Warnung vor elektrischer
Spannung!
Nur zur Verwendung in geschlossenen Räumen.
(nur für interne Komponenten des Sets)
Die originale Anweisung ist die deutschsprachige Fassung.
Sonstige Sprachfassungen sind Übersetzungen aus der
deutschen Sprache.
2. NUTZUNGSSICHERHEIT
HINWEIS! In der vorliegenden Anleitung sind
Beispielbilder vorhanden, die vom tatsächlichen
Aussehen das Produkt abweichen können.
ACHTUNG! Lesen Sie alle Sicherheitshinweise und
alle Anweisungen durch. Die Nichtbeachtung der
Warnungen und Anweisungen kann zu elektrischen
Schlägen, Feuer und/oder schweren Verletzungen bis
hin zum Tod führen.
ACHTUNG! Obwohl das Gerät in Hinblick
auf Sicherheit entworfen wurde und über
Schutzmechanismen sowie zusätzlicher
Sicherheitselemente verfügt, besteht bei
der Bedienung eine geringe Unfall- oder
Verletzungsgefahr. Es wird empfohlen, bei der
Nutzung Vorsicht und Vernunft walten zu lassen.
3. NUTZUNGSBEDINGUNGEN
Das Gerät wird für die Sprachkommunikation zwischen
der Außenstation und dem Innenmonitor verwendet.
Außerdem können Sie das Kamerabild anzeigen und das
elektrische Schloss über den Innenmonitor önen.
Für alle Schäden bei nicht sachgemäßer Verwendung
haftet allein der Betreiber.
Die Begrie „Gerät“ oder „Produkt“ in den Warnungen
und Beschreibung des Handbuchs beziehen sich auf
1-FAMILIENHAUS VIDEO-TÜRSPRECHANLAGE.
a) Es ist verboten, Elemente der Video-Türsprechanlage
an andere als die vom Hersteller angegebenen
Installationen anzuschließen.
b) Führen Sie keine Metallgegenstände in Önungen
und Schlitze in Türsprechanlagekomponenten ein, da
dies zu Stromschlägen oder Bränden führen kann.
c) Wenn Sie nicht sicher sind, ob das Gerät
ordnungsgemäß funktioniert, wenden Sie sich an den
Service des Herstellers.
d) Reparaturen dürfen nur vom Service des Herstellers
durchgeführt werden. Führen Sie keine Reparaturen
auf eigene Faust durch!
e) Zum Löschen des Gerätes bei Brand oder Feuer, nur
Pulverfeuerlöscher oder Kohlendioxidlöscher (CO2)
verwenden.
f) Bewahren Sie die Gebrauchsanleitung für den
weiteren Gebrauch auf. Sollte das Gerät an Dritte
weitergegeben werden, muss die Gebrauchsanleitung
mit ausgehändigt werden.
g) Verpackungselemente und kleine Montageteile
außerhalb der Reichweite von Kindern aufbewahren.
h) Im Laufe der Nutzung dieses Werkzeugs einschlieβlich
anderer Werkzeuge soll man sich nach übrigen
Betriebsanweisungen richten.
i) Das Gerät ist kein Spielzeug. Kinder sollten in der
Nähe des Geräts unter Aufsicht stehen, um Unfälle zu
vermeiden.
j) Das Gerät muss regelmäßig gereinigt werden, damit
sich nicht dauerhaft Schmutz festsetzt.
k) Es ist untersagt, in den Aufbau des Geräts einzugreifen,
um seine Parameter oder Konstruktion zu ändern.
l) Interne Elemente von Video-Türsprechanlagen sollten
nicht in Räumen mit hoher Luftfeuchtigkeit, z.B.
Badezimmern, oder in der Nähe von Wärmequellen,
z.B. Rohren, Heizkörpern, installiert werden.
DE
BEDIENUNGSANLEITUNG

4 5
03.08.2020
Achtung! Befolgen Sie bei der Auswahl der Standorte der
Innenmonitore die Anweisungen in den Punkten 2 und 3.4.
3.2.3. ELEKTRISCHES SCHEMA
Außenstation Monitor
3.1. GERÄTEBESCHREIBUNG
KOMPONENTEN DES SETS
Bezeich-
nung
Abb Men-
ge
Monitor 1
Monitor-
halterung
1
Außensta-
tion
1
Regen-
schutz
1
Ladegerät 1
Dübel 7
Schraube 7
Schlüssel 1
Terminal
für
vieradrige
Kabel
4
AUFBAU DES MONITORS
1. Mikrofon
2. IR-LED
3. Kamera
4. Lautsprecher
5. Anruftaste
6. Anschluss
7. Lautstärkeregelung
8. Regenschutz
3.2. VORBEREITUNG ZUR VERWENDUNG
AUFBAU DES GERÄTES
3.2.1. MONTAGE DER AUSSENSTATION
1) Bringen Sie den Regenschutz gemäß den in der
Zeichnung angegebenen Maßen an der Wand an.
5) Schrauben Sie den Installationskasten an den
Regenschutz, befestigen Sie dann den vorderen
Teil der Außenstation und schrauben Sie die untere
Schraube an.
3.2.2. MONTAGE DER INNENMONITORS
Befestigen Sie die Monitorhalterung mit Schrauben an der
Wand. Schließen Sie die Verkabelung gemäß Schemata an
(Punkt 3.2.3.).
Nachdem Sie die Kabel angeschlossen haben, setzen Sie
den Monitor auf die Halterung, schließen Sie das Netzteil
an und stecken Sie es dann in eine Steckdose.
Kabel:
1. Audio
2. Erdunkskabel
3. Video
4. Stromversorgung
Beschreibung:
1. Die Anschlüsse 1, 2,3,4 der Außenstation sollten mit
den Anschlüssen 011, 012, 013, 014 am Innenmonitor
A und B verbunden werden.
2. Der Anschluss + - am Innenmonitor sollte an das
Ladegerät angeschlossen werden.
3. Anschluss 5,6 der Außenstation sollten an das
elektronische Schloss angeschlossen werden.
Kabeltyp: vier Verbindungskabel (vieradriges RVV-Kabel).
Max. Betriebsabstand 50 m.
3.3. ARBEIT MIT DEM GERÄT
3.3.1. KLINGELTONAUSWAHL
Drücken Sie das Kamerasymbol 1 4 Sekunden lang, um
einen Klingelton auszuwählen. Drücken Sie dann das
Türönungssymbol, um die Lautstärke einzustellen.
Um die Einstellungen zu übernehmen, drücken Sie das
Symbol für Gesprächsbeginn/-ende.
1
2
3
4
5
6
10
9
8
7
11
12
13
14
1. Mikrofon
2. Stummschaltungsanzeige
3. Sprachanrufanzeige
4. Leistungsanzeige
5. Bildschirm
6. Kameravorschau-Symbol 2
7. Kameravorschau-Symbol 1
8. Symbol zum Önen des Türschlosses
9. Symbol für Gesprächsbeginn/-ende
10. Interne Kommunikation
11. ▲
12. ▼
13. Menütaste
14. Rückkehrtaste
15. Außenstationsanschluss
16. Zusätzlicher Monitoranschluss
17. Stromanschluss
AUFBAU DER INNENSTATION
8
1
2
3
4
5
6
7
1
2 3 4
2) Entfernen Sie die Schraube unten an der Außenstation
mit dem mitgelieferten Schraubenschlüssel.
3) Trennen SiedieAußenstation vomInstallationskasten.
4) Schließen Sie das Kabel gemäß dem Schaltplan an
(Punkt 3.2.3.) und stellen Sie die Lautstärke ein.
5
DEDE

6 7
03.08.2020
Um den Kontrast einzustellen, drücken Sie erneut die
Menütaste. Auf dem Bildschirm wird „Color” angezeigt.
Erneutes Drücken der Menütaste schaltet die Einstellungen
auf Lautstärke um. Auf dem Bildschirm wird „Volume“
angezeigt. Nehmen Sie die Einstellungen ebenfalls mit den
Tasten vor .
3.4. REINIGUNG UND WARTUNG
a) Es ist verboten, das Gerät mit einem Wasserstrahl zu
besprühen oder in Wasser zu tauchen. (einschließlich
der Außenstation)
b) In Hinblick auf technische Ezienz und zur
Vorbeugung vor Schäden sollte das Gerät regelmäßig
überprüft werden.
c) Benutzen Sie einen weichen Lappen zur Reinigung.
Um den Monitor stumm zu schalten, drücken Sie 4
Sekunden lang auf das in der folgenden Abbildung
gezeigte Symbol. Die LED für den Stummschaltungsmodus
leuchtet oben auf dem Monitor auf. Wenn eine Verbindung
hergestellt ist, klingelt der Monitor nicht, nur das Bild ist
sichtbar.
3.3.2. HERSTELLUNG EINER VERBINDUNG
Drücken Sie die erste Taste an der Außenstation, um eine
Verbindung zu Monitor A herzustellen. Der Monitor gibt
dann entsprechend den Einstellungen einen Signalton ab,
und das von der Kamera der Außenstation aufgezeichnete
Bild wird angezeigt.
Um ein Gespräch mit einer Person druaßen zu beginnen,
drücken Sie auf das in der Abbildung gezeigte Symbol.
Gleichzeitig leuchtet die prachanrufanzeige oben auf dem
Monitor auf.
Um das Gespräch zu beenden, drücken Sie erneut auf das
in der Zeichnung angegebene Symbol.
Hinweis: Sie können die Lautstärke, die Helligkeit und den
Kontrast des Bildschirms während eines Gesprächs einstellen.
3.3.3. ÖFFNEN DER TÜR
Um die Tür zu önen, drücken Sie auf das in der folgenden
Abbildung gezeigte Symbol.
3.3.4. KAMERA
Um ein Bild von Kamera 1 oder 2 zu erhalten, drücken Sie
das Kamerasymbol mit der entsprechenden Nummer. Die
Anzeigezeit beträgt ca. 20 s, danach erlischt der Bildschirm.
Während das Kamerabild betrachtet wird, ist es möglich, die
Tür zu entriegeln, einen Sprachanruf entgegenzunehmen
und den Kontrast und die Helligkeit des Bildschirms
einzustellen.
Hinweis: Das Set enthält eine Kamera.
Wenn die zweite Kamera nicht angeschlossen ist, erscheint
ein blauer Bildschirm, wenn Sie das Symbol für Kamera 2
drücken.
3.3.5. EINSTELLUNG DER GESPRÄCHSLAUTSTÄRKE
SOWIE DER HELLIGKEIT UND DES KONTRASTS DES
BILDSCHIRMS
Drücken Sie die Menütaste, um während des Gesprächs
oder eines Kamerabildes Einstellungen vorzunehmen. Auf
dem Bildschirm wird „Brightness“ angezeigt. Stellen Sie die
Helligkeit mit den Tasten ein .
d) Verwenden Sie zur Reinigung kein Geschirrspülmittel,
Glasreiniger, Farbverdünner oder ätzende
Flüssigkeiten.
e) Installieren Sie die Innenstation nicht an einem Ort
mit hoher Luftfeuchtigkeit und Temperatur (z. B. in
der Nähe eines Kamins).
f) Vermeiden Sie Klopfen und Schlagen mit dem Hörer.
g) Wenn die Innenstation über einen längeren Zeitraum
nicht benutzt wird (z. B. wenn die Benutzer vereisen),
trennen Sie sie von der Steckdose.
ENTSORGUNG GEBRAUCHTER GERÄTE
Dieses Produkt darf nicht über den normalen Hausmüll
entsorgt werden. Geben Sie das Gerät bei entsprechenden
Sammel- und Recyclinghöfen für Elektro- und
Elektronikgeräte ab. Überprüfen Sie das Symbol auf dem
Produkt, der Bedienungsanleitung und der Verpackung.
Die bei der Konstruktion des Gerätes verwendeten
Kunststoe können entsprechend ihrer Kennzeichnung
recycelt werden. Mit der Entscheidung für das Recycling
leisten Sie einen wesentlichen Beitrag zum Schutz unserer
Umwelt. Wenden Sie sich an die örtlichen Behörden,
um Informationen über Ihre lokale Recyclinganlagen zu
erhalten.
DEDE

8 9
03.08.2020
TECHNICAL DATA
Parameter description Parameter value
Product name 1-family house video
doorphone
Model ST-VP-400
Monitor
Rated voltage [V~]/
Frequency [Hz] Input: AC110-240V, 60-50Hz
Output: DC15V, 1200mA
Display 7’’ TFT-LCD
Ringtones 16 polyphonic melodies
Working distance [m] 50
Working temperature [°C] -5 ~ +40
Working humidity [%] 10 ~ 90
Dimensions [mm] 200x140x23
Outdoor station
Rated voltage [V~] DC 15V 1200mA
Camera CMOS 540 TVL
Night vision LEDs 6
Camera rotation angle [°] 120
Working temperature [°C] -20 ~ +50
Working humidity [%] < 90
Dimensions [mm] 100x150x30
3.1. DEVICE DESCRIPTION
ELEMENTS OF THE SET
Name Fig. Quantity
Monitor 1
Monitor
handle
1
Outdoor
station
1
Rain
cover
1
Charger 1
Rawlplug 7
Screw 7
Wrench 1
Terminal
for 4-core
cables
4
MONITOR CONSTRUCTION
1
2
3
4
5
6
10
9
8
7
11
12
13
14
1. Microphone
2. Mute mode indicator
3. Voice call indicator
4. Power indicator
5. Screen
6. Camera preview icon 2
7. Camera preview icon 1
8. Door lock open icon
9. Conversation start / end icon
10. Internal communication
11. ▲
12. ▼
13. Menu buton
14. Return buton
15. Outdoor station connection
16. Additional monitor connection
17. Power connection Przyłącze zasilania
CONSTRUCTION OF AN OUTDOOR STATION
8
1
2
3
4
5
6
7
To increase the product life of the device and to ensure
trouble-free operation, use it in accordance with this user
manual and regularly perform maintenance tasks. The
technical data and specications in this user manual are
up to date. The manufacturer reserves the right to make
changes associated with quality improvement.
LEGEND
1. GENERAL DESCRIPTION
The user manual is designed to assist in the safe and
trouble-free use of the device. The product is designed and
manufactured in accordance with strict technical guidelines,
using state-of-the-art technologies and components.
Additionally, it is produced in compliance with the most
stringent quality standards.
DO NOT USE THE DEVICE UNLESS YOU HAVE
THOROUGHLY READ AND UNDERSTOOD THIS
USER MANUAL.
The product satises the relevant safety
standards.
Read instructions before use.
The product must be recycled.
WARNING! or CAUTION! or REMEMBER!
Applicable to the given situation. (general
warning sign)
ATTENTION! Electric shock warning!
Only use indoors. (only for internal components
of the set)
The original operation manual is written in German. Other
language versions are translations from the German.
2. USAGE SAFETY
PLEASE NOTE! Drawings in this manual are for
illustration purposes only and in some details may
dier from the actual product.
ATTENTION! Read all safety warnings and all
instructions. Failure to follow the warnings and
instructions may result in electric shock, re and/or
serious injury or even death.
ATTENTION! Despite the safe design of the device
and its protective features, and despite the use of
additional elements protecting the operator, there
is still a slight risk of accident or injury when using
the device. Stay alert and use common sense when
using the device.
3. USE GUIDELINES
The device is used for voice communication between the
outdoor station and the indoor monitor. It also allows you
to view the camera image and open the electric lock using
the internal monitor.
The user is liable for any damage resulting from
unintended use of the device.
The terms „device“ or „product“ are used in the warnings
and instructions to refer to 1-FAMILY HOUSE VIDEO
DOORPHONE.
a) Do not connect doorphone components to systems
other than those indicated by the manufacturer.
b) Do not insert metal objects into openings and slots
on the doorphone components, as it may result in
electric shock or re.
c) If there are any doubts as to the correct operation
of the device, contact the manufacturer‘s support
service.
d) Only the manufacturer‘s service point may repair the
device. Do not attempt any repairs independently!
e) In case of re, use a powder or carbon dioxide
(CO2) re extinguisher (one intended for use on live
electrical devices) to put it out.
f) Please keep this manual available for future reference.
If this device is passed on to a third party, the manual
must be passed on with it.
g) Keep packaging elements and small assembly parts in
a place not available to children.
h) If this device is used together with another equipment,
the remaining instructions for use shall also be
followed.
i) The device is not a toy. Children must be supervised to
ensure that they do not play with the device.
j) Clean the device regularly to prevent stubborn grime
from accumulating.
k) It is forbidden to interfere with the structure of
the device in order to change its parameters or
construction.
l) Indoor components of the doorphone should not
be installed in rooms with high humidity, such as
bathrooms and in the vicinity of heat sources, such as
pipes, radiators.
ENEN
USER MANUAL

10 11
03.08.2020
Caution: When choosing the mounting location for internal
monitors, refer to the guidelines in sections 2 and 3.4.
3.2.3. ELECTRIC SCHEMA
Outdoor station Monitor
1. Microphone
2. IR LED
3. Camera
4. Speaker
5. Call buton
6. Connector
7. Volume regulator
8. Rain cover
3.2. PREPARING FOR USE
ASSEMBLING THE DEVICE
3.2.1. OUTDOOR STATION INSTALLATION
1) Install a rain cover on the wall in accordance with the
dimensions given in the drawing.
5) Screw the installation box to the rain cover, then x
the front part of the outdoor station and tighten the
bottom screw.
3.2.2. INDOOR MONITOR INSTALLATION
Fasten the monitor holder to the wall with screws. Connect
the wiring according to the diagram (section 3.2.3)
After connecting the cables, place the monitor on the
holder, connect the power adapter, and then connect it to
the socket.
Cables:
1. Audio
2. Grounding
3. Video
4. Power supply
Description:
1. Ports 1,2,3,4 on the outdoor station should be
connected to terminals 011, 012, 013, 014 on the
indoor monitor.
2. Connection + - on the internal monitor should
connect to the charger.
3. Connections 5,6 at the outdoor station should be
connected to an electric lock.
Cable type: 4 connecting cables (4-wire RVV).
Maximum working distance: 50m.
3.3. DEVICE USE
3.3.1. RINGTONE SELECTION
To select the ringtone melody, press the camera preview
icon 1 for 4 seconds. Then press the door open icon to set
the volume.
To accept the settings, press the conversation start / end
icon.
1
2 3 4
2) Loosen the screw at the bottom of the outdoor
station using the wrench provided.
3) Separate the outdoor station from the installation
box.
4) Connect the cable in accordance with the connection
diagram (section 3.2.3) and adjust the volume.
5
To set the contrast, press the Menu button again. The
screen will show „Color“. Another press of the Menu button
will switch the settings to volume. The screen will show
„Volume“. Then you also need to make settings using the
buttons .
3.4. CLEANING AND MAINTENANCE
a) Do not spray the device with a water jet or submerge
it in water. (outdoor station also)
b) The device must be regularly inspected to check its
technical eciency and spot any damage.
c) Use a soft cloth for cleaning.
d) Do not use washing up liquid, window cleaner, paint
thinner or corrosive liquids for cleaning.
e) The indoor station should not be installed in a place
with high humidity and temperature (e.g. near a
replace).
f) Avoid knocking or knocking on the handset.
To mute the monitor, press the icon shown in the gure
below for 4 seconds. The LED indicating the mute mode will
light up on the top of the monitor. When the connection
is established, the monitor will not ring, only the image will
be visible.
3.3.2. CALLING
Press the rst button on the outdoor station to connect to
monitor A. The monitor will then emit sound in accordance
with the settings and the screen will show the image
recorded by the camera of the outdoor station.
In order to start a conversation with a person outside, press
the icon shown in the gure. At the same time, the voice
connection indicator on the top of the monitor lights up.
To end the conversation, press the icon indicated in the
drawing again.
Caution: During the conversation it is possible to set the
volume, brightness and contrast of the screen.
3.3.3. OPENING THE DOOR
To open the door, press the icon shown in the gure.
3.3.4. CAMERA PREVIEW
To get a preview from camera 1 or 2, press the camera
preview icon with the appropriate number. The view time
is about 20 seconds, after which the screen turns blank.
While previewing the camera image, it is possible to unlock
the door, receive a voice call and set the contrast and
brightness of the screen.
Caution: The set includes one camera.
If the other camera is not connected, a blue screen will
appear after pressing the camera preview icon 2.
3.3.5. SETTING THE CONVERSATION VOLUME AS WELL
AS THE SCREEN BRIGHTNESS AND CONTRAST
To make settings, during the conversation or preview the
camera image, press the Menu button. The screen will
show „Brightness“. Adjust brightness using the buttons
.
ENEN

12 13
03.08.2020
EN
g) If the indoor station is not used for a long time (e.g.
when users leave), unplug it.
DISPOSING OF USED DEVICES
Do not dispose of this device in municipal waste systems.
Hand it over to an electric and electrical device recycling
and collection point. Check the symbol on the product,
instruction manual and packaging. The plastics used
to construct the device can be recycled in accordance
with their markings. By choosing to recycle you are
making a signicant contribution to the protection of our
environment. Contact local authorities for information on
your local recycling facility.
PL
UWAGA! Pomimo iż urządzenie zostało
zaprojektowane tak aby było bezpieczne, posiadało
odpowiednie środki ochrony oraz pomimo użycia
dodatkowych elementów zabezpieczających
użytkownika, nadal istnieje niewielkie ryzyko
wypadku lub odniesienia obrażeń w trakcie pracy
z urządzeniem. Zaleca się zachowanie ostrożności
i rozsądku podczas jego użytkowania.
DANE TECHNICZNE
Dla zapewnienia długiej i niezawodnej pracy urządzenia
należy dbać o jego prawidłową obsługę oraz konserwację
zgodnie ze wskazówkami zawartymi w tej instrukcji. Dane
techniczne i specykacje zawarte w tej instrukcji obsługi są
aktualne. Producent zastrzega sobie prawo dokonywania
zmian związanych z podwyższeniem jakości.
OBJAŚNIENIE SYMBOLI
1. OGÓLNY OPIS
Instrukcja przeznaczona jest do pomocy w bezpiecznym
i niezawodnym użytkowaniu. Produkt jest zaprojektowany
i wykonany ściśle według wskazań technicznych przy
użyciu najnowszych technologii i komponentów oraz przy
zachowaniu najwyższych standardów jakości.
PRZED PRZYSTĄPIENIEM DO PRACY NALEŻY
DOKŁADNIE PRZECZYTAĆ I ZROZUMIEĆ NINIEJSZĄ
INSTRUKCJĘ
Instrukcją oryginalną jest niemiecka wersja instrukcji.
Pozostałe wersje językowe są tłumaczeniami z języka
niemieckiego.
2. BEZPIECZEŃSTWO UŻYTKOWANIA
UWAGA! Ilustracje w niniejszej instrukcji obsługi
mają charakter poglądowy i w niektórych szczegółach
mogą różnić się od rzeczywistego wyglądu produktu.
UWAGA! Przeczytać wszystkie ostrzeżenia
dotyczące bezpieczeństwa oraz wszystkie instrukcje.
Niezastosowanie się do ostrzeżeń i instrukcji może
spowodować porażenie prądem, pożar i/lub ciężkie
obrażenia ciała lub śmierć.
3. ZASADY UŻYTKOWANIA
Urządzenie służy do komunikacji głosowej pomiędzy
stacją zewnętrzną a monitorem wewnętrznym. Umożliwia
także podgląd obrazu z kamery oraz otwarcie zamka
elektrycznego za pomocą monitora wewnętrznego.
INSTRUKCJA OBSŁUGI
Opis parametru Wartość parametru
Nazwa produktu Wideodomofon do domu
jednorodzinnego
Model ST-VP-400
Monitor
Napięcie zasilania [V~]/
Częstotliwość [Hz]
Wejściowe: AC110-240V,
60-50Hz
Wyjściowe: DC15V, 1200mA
Wyświetlacz 7’’ TFT-LCD
Dzwonki 16 melodii polifonicznych
Odległość robocza [m] 50
Temperatura robocza [°C] -5 ~ +40
Wilgotność robocza [%] 10 ~ 90
Wymiary [mm] 200x140x23
Stacja zewnętrzna
Napięcie zasilania [V~] DC 15V 1200mA
Kamera CMOS 540 TVL
Noktowizyjne diody LED 6
Kąt obrotu kamery [°] 120
Temperatura robocza [°C] -20 ~ +50
Wilgotność robocza [%] < 90
Wymiary [mm] 100x150x30
Produkt spełnia wymagania odpowiednich
norm bezpieczeństwa.
Przed użyciem należy zapoznać się z instrukcją.
Produkt podlegający recyklingowi.
UWAGA! lub OSTRZEŻENIE! lub PAMIĘTAJ!
opisująca daną sytuację (ogólny znak
ostrzegawczy).
Termin „urządzenie” lub „produkt” w ostrzeżeniach i w opisie
instrukcji odnosi się do WIDEODOMOFONU DO DOMU
JEDNORODZINNEGO.
2.1. BEZPIECZEŃSTWO UŻYTKOWANIA
a) Zabronione jest podłączanie elementów domofonu
do instalacji innych niż wskazane przez producenta.
b) Nie należy wkładać metalowych przedmiotów
w otwory i szczeliny znajdujące się w elementach
domofonu, ponieważ może to doprowadzić do
porażenia prądem lub pożaru.
c) W razie wątpliwości czy urządzenia działa poprawnie,
należy skontaktować się z serwisem producenta.
d) Naprawy urządzenia może wykonać wyłącznie
serwis producenta. Nie wolno dokonywać napraw
samodzielnie!
e) W przypadku zaprószenia ognia lub pożaru, do
gaszenia urządzenia pod napięciem należy używać
wyłącznie gaśnic proszkowych lub śniegowych (CO2).
f) Zachować instrukcję użytkowania w celu jej
późniejszego użycia. W razie, gdyby urządzenie miało
zostać przekazane osobom trzecim, to wraz z nim
należy przekazać również instrukcję użytkowania.
g) Elementy opakowania oraz drobne elementy
montażowe należy przechowywać w miejscu
niedostępnym dla dzieci.
h) W trakcie użytkowania tego urządzenia wraz z innymi
urządzeniami należy zastosować się również do
pozostałych instrukcji użytkowania.
i) Urządzenie nie jest zabawką. Dzieci powinny być
pilnowane, aby nie bawiły się urządzeniem.
j) Należy regularnie czyścić urządzenie, aby nie dopuścić
do trwałego osadzenia się zanieczyszczeń.
k) Zabrania się ingerowania w konstrukcję urządzenia
celem zmiany jego parametrów lub budowy.
l) Elementów wewnętrznych domofonu nie należy
montować w pomieszczeniach o dużej wilgotności
np. łazienkach oraz w pobliżu źródeł ciepła np. rur,
grzejników.
UWAGA! Ostrzeżenie przed porażeniem
prądem elektrycznym!
Do użytku tylko wewnątrz pomieszczeń. (tylko
do wewnętrznych elementów zestawu).

14 15
03.08.2020
PL
3.1. OPIS URZĄDZENIA
ELEMENTY ZESTAWU
Nazwa Rysunek Ilość
Monitor 1
Uchwyt na
monitor
1
Stacja
zewnętrzna
1
Osłona
przeciw-
deszczowa
1
Ładowarka 1
Kołek
rozporowy
7
Wkręt 7
Klucz 1
Terminal
do kabli
4-żyłowych
4
BUDOWA MONITORA
Odpowiedzialność za wszelkie szkody powstałe
w wyniku użytkowania niezgodnego z przeznaczeniem
ponosi użytkownik.
1
2
3
4
5
6
10
9
8
7
11
12
13
14
1. Mikrofon
2. Wskaźnik trybu wyciszenia
3. Wskaźnik nawiązania połączenia głosowego
4. Wskaźnik mocy
5. Ekran
6. Ikona podglądu kamery 2
7. Ikona podglądu kamery 1
8. Ikona otwarcia blokady drzwi
9. Ikona rozpoczęcia/ zakończenia rozmowy
10. Komunikacja wewnętrzna
11. ▲
12. ▼
13. Przycisk menu
14. Przycisk powrotu
15. Przyłącze stacji zewnętrznej
16. Przyłącze dodatkowego monitora
17. Przyłącze zasilania
BUDOWA STACJI ZEWNĘTRZNEJ
8
1
2
3
4
5
6
7
PL
Uwaga: Podczas wyboru miejsca montażu monitorów
wewnętrznych należy kierować się wskazówkami zawartymi
w punkcie 2 i 3.4.
3.2.3. SCHEMAT ELEKTRYCZNY
Stacja zewnętrzna Monitor
1. Mikrofon
2. IR LED
3. Kamera
4. Głośnik
5. Przycisk połączenia
6. Złącze
7. Regulator głośności
8. Osłona przeciwdeszczowa
3.2. PRZYGOTOWANIE DO PRACY
MONTAŻ URZĄDZENIA
3.2.1. INSTALACJA STACJI ZEWNĘTRZNEJ
1) Zainstalować na ścianie osłonę przeciwdeszczową
zgodnie z wymiarami podanymi na rysunku.
5) Przykręcić skrzynkę instalacyjną do osłony
przeciwdeszczowej, a następnie zamocować przednią
część stacji zewnętrznej i przykręcić dolną śrubę.
3.2.2. INSTALACJA MONITORA WEWNĘTRZNEGO
Przmocować uchwyt na monitor do ściany za pomocą śrub.
Podłączyć okablowanie zgodnie ze schematem (pkt. 3.2.3.).
Po podłączeniu przewodów umieścić monitor na uchwycie,
podłączyć zasilacz, a następnie podłączyć go do gniazdka.
Przewody:
1. Audio
2. Uziemiający
3. Wideo
4. Zasilający
Opis:
1. Przyłącza 1,2,3,4 na stacji zewnętrznej powinny być
podłączone do przyłączy 011, 012, 013, 014, 015 na
monitorze wewnętrznym.
2. Przyłącze + - na monitorze wewnętrznym powinno
połączyć się z ładowarką.
3. Przyłącza 5,6 na stacji zewnętrznej powinny być
podłączone do zamka elektrycznego.
Typ kabla: 4 kable połączeniowe(4-żyłowe RVV).
Maksymalna odległość robocza: 50m.
3.3. PRACA Z URZĄDZENIEM
3.3.1. WYBÓR DZWONKA
W celu wybrania melodii dzwonka należy wcisnąć ikonę
podglądu kamery 1 przez 4 sekundy. Następnie wciskając
ikonę otwarcia drzwi należy ustawić głośność.
Aby zaakceptować ustawienia należy wcisnąć ikonę
rozpoczęcia/zakończenia rozmowy.
1
2 3 4
2) Załączonym kluczem odkręcić śrubę na dole stacji
zewnętrznej.
3) Oddzielić przednią część stacji zewnętrznej od
skrzynki instalacyjnej.
4) Podłączyć przewód zgodnie ze schematem połączeń
(pkt. 3.2.3.) i wyregulować głośność.
5

16 17
03.08.2020
Aby ustawić kontrast należy kolejny raz nacisnąć przycisk
Menu. Na ekranie pokaże się napis „Color”. Kolejne
wciśnięcie przycisku Menu przełączy ustawienia na
głośność. Na ekranie pokaże się napis „Volume”. Wówczas
również należy dokonać ustawień przyciskami .
3.4. CZYSZCZENIE I KONSERWACJA
a) Zabrania się spryskiwania urządzenia strumieniem
wody lub zanurzania urządzenia w wodzie. (również
stacji zewnętrznej)
b) Należy wykonywać regularne przeglądy urządzenia
pod kątem jego sprawności technicznej oraz
wszelkich uszkodzeń.
c) Do czyszczenia należy używać miękkiej ściereczki.
(jest to szczególnie ważne podczas czyszczenia
kamery oraz ekranu monitora)
PL
W celu wyciszenia monitora należy wcisnąć ikonę wskazaną
na poniższym rysunku przez 4 sekundy. Wówczas na górze
monitora zaświeci się dioda wskazująca tryb wyciszenia.
W momencie nawiązania połączenia monitor nie zadzwoni,
widoczny będzie jedynie obraz.
3.3.2. NAWIĄZYWANIE POŁĄCZENIA
Należy wcisnąć pierwszy przycisk na stacji zewnętrznej, aby
połączyć się z monitorem. Monitor wyda wówczas dźwięk
zgodny z ustawieniami a na ekranie pokaże się obraz
rejestrowany przez kamerę stacji zewnętrznej.
W celu nawiązania rozmowy z osobą na zewnętrza należy
wcisnąć ikonę wskazaną na rysunku . Jednocześnie na górze
monitora zaświeci się wskaźnik nawiązania połączenia
głosowego.
Aby zakończyć rozmowę należy ponownie wcisnąć
wskazaną na rysunku ikonę.
Uwaga: Podczas rozmowy istnieje możliwość ustawienia
głośności oraz jasności i kontrastu ekranu.
3.3.3. OTWARCIE DRZWI
W celu otwarcia drzwi należy wcisnąć ikonę wskazaną na
rysunku.
3.3.4. PODGLĄD KAMERY
Aby uzyskać podgląd z kamery 1 lub 2 należy wcisnąć ikonę
podglądu kamery z odpowiednim numerem. Czas poglądu
trwa ok. 20s, po tym czasie ekran wygasza się.
W czasie podglądu obrazu kamery możliwe jest
odblokowanie drzwi, odebranie połączenia głosowego
oraz ustawienie kontrastu i jasności ekranu.
Uwaga: Zestaw zawiera jedną kamerę. Aby zainstalować
drugą kamerę należy podłączyć ją do monitora B w
przyłączu „outdoor 2’’. Jeżeli druga kamera nie jest
podłączona, po wciśnięciu ikony podglądu kamery 2
pokaże się niebieski ekran.
3.3.5. USTAWIENIE GŁOŚNOŚCI ROZMOWY ORAZ
JASNOŚCI I KONTRASTU EKRANU
Aby dokonać ustawień, podczas rozmowy lub podglądu
obrazu kamery, należy wcisnąć przycisk Menu. Na ekranie
pokaże się napis „Brightness”. Regulacji jasności należy
dokonać za pomocą przycisków .
PL
d) Do czyszczenia nie należy używać płynu do naczyń,
płynu do szyb, rozcieńczalników do lakierów ani
żrących płynów.
e) Należy zwrócić uwagę na oświetlenie miejsca
montażu monitorów, ponieważ zbyt ostre światło
może spowodować nieczytelność obrazu.
f) Ekranu monitora nie należy dotykać mokrymi
rękoma.
g) Należy unikać stukania w ekran monitora oraz
rzucania, potrząsania lub uderzania monitorem.
USUWANIE ZUŻYTYCH URZĄDZEŃ.
Po zakończeniu okresu użytkowania nie wolno usuwać
niniejszegoproduktupoprzeznormalneodpadykomunalne,
lecz należy go oddać do punktu zbiórki i recyklingu
urządzeń elektrycznych i elektronicznych. Informuje o tym
symbol, umieszczony na produkcie, instrukcji obsługi lub
opakowaniu. Zastosowane w urządzeniu tworzywa nadają
się do powtórnego użycia zgodnie z ich oznaczeniem.
Dzięki powtórnemu użyciu, wykorzystaniu materiałów lub
innym formom wykorzystania zużytych urządzeń wnoszą
Państwo istotny wkład w ochronę naszego środowiska.
Informacji o właściwym punkcie usuwania zużytych
urządzeń udzieli Państwu lokalna administracja.

18 19
03.08.2020
TECHNICKÉ ÚDAJE
Popis parametru Hodnota parametru
Název výrobku Zvonek s kamerou pro
rodinný dům
Model ST-VP-400
Monitor
Jmenovité napětí
napájení [V~]/
Frekvence [Hz]
Vstup: AC110-240V, 60-50Hz
Výstup: DC15V, 1200mA
Displej 7’’ TFT-LCD
Zvonky 16 polyfonních melodií
Provozní vzdálenost [m] 50
Provozní teplota [°C] -5 ~ +40
Provozní vlhkost [%] 10 ~ 90
Rozměry [mm] 200x140x23
Venkovní stanice
Jmenovité napětí
napájení [V~] DC 15V 1200mA
Kamera CMOS 540 TVL
LED diody pro noční
vidění
6
Úhel otáčení kamery [°] 120
Provozní teplota [°C] -20 ~ +50
Provozní vlhkost [%] < 90
Rozměry [mm] 100x150x30
3.1. POPIS ZAŘÍZENÍ
PRVKY SOUPRAVY
Název Obr. Počet
Monitor 1
Držák
monitoru
1
Venkovní
stanice
1
Ochranný
kryt proti
dešti
1
Nabíječka 1
Hmoždinka 7
Šroub 7
Klíč 1
Svorkovnice
pro
čtyřžilové
kabely
4
POPIS MONITORU
1
2
3
4
5
6
10
9
8
7
11
12
13
14
1. Mikrofon
2. Indikátor režimu ztlumení
3. Indikátor navázání hlasového spojení
4. Indikátor napájení
5. Obrazovka
6. Ikona pro sledování záběru z kamery 2
7. Ikona pro sledování záběru z kamery 1
8. Ikona pro odemknutí zámku dveří
9. Ikona pro zahájení / ukončení hovoru
10. Vnitřní komunikace
11. ▲
12. ▼
13. Tlačítko menu
14. Tlačítko návratu
15. Přípojka pro venkovní stanici
16. Přípojka pro další monitor
17. Přípojka pro napájení
POPIS VENKOVNÍ STANICE
8
1
2
3
4
5
6
7
Pro zajištění dlouhého a spolehlivého fungování zařízení
pravidelně provádějte revize a údržbu v souladu s pokyny
uvedenými v tomto návodu. Technické údaje a specikace
uvedené v návodu jsou aktuální. Výrobce si vyhrazuje právo
provádět změny za účelem zvýšení kvality.
VYSVĚTLENÍ SYMBOLŮ
1. VŠEOBECNÝ POPIS
Návod slouží jako nápověda pro bezpečné a spolehlivé
používání výrobku. Výrobek je navržen a vyroben přesně
podle technických údajů za použití nejnovějších technologií
a komponentů a za dodržení nejvyšších jakostních norem.
PŘED ZAHÁJENÍM PRÁCE SI DŮKLADNĚ PŘEČTĚTE
TENTO NÁVOD A UJISTĚTE SE, ŽE JSTE POCHOPILI
VŠECHNY POKYNY.
Výrobek splňuje požadavky příslušných
bezpečnostních norem.
Před použitím výrobku se seznamte s návodem.
Recyklovatelný výrobek.
UPOZORNĚNÍ! nebo VAROVÁNÍ! nebo
PAMATUJTE! popisující danou situaci.
(všeobecná výstražná značka)
VAROVÁNÍ! Nebezpečí úrazu elektrickým
proudem!
Pouze k použití ve vnitřních prostorech. (pouze
pro vnitřní komponenty sestavy)
POZNÁMKA! I když zařízení bylo navrženo tak, aby
bylo bezpečné, tedy má vhodné bezpečnostní prvky,
tak i přes použití dodatečné ochrany uživatelem při
práci se zařízením nadále existuje malé riziko úrazu
nebo poranění. Doporučuje se zachovat opatrnost a
zdravý rozum při jeho používání.
Originálním návodem je německá verze návodu. Ostatní
jazykové verze jsou překladem z německého jazyka.
2. BEZPEČNOST POUŽÍVÁNÍ
POZOR! Obrázky v tomto návodu jsou pouze
ilustrační a v některých detailech se od skutečného
vzhledu výrobku mohou lišit.
POZNÁMKA! Přečtěte si tento návod včetně všech
bezpečnostních pokynů. Nedodržování návodu a
pokynů může vést k úrazu elektrickým proudem,
požáru anebo těžkému úrazu či smrti.
3. ZÁSADY POUŽÍVÁNÍ
Zařízení je určeno k hlasové komunikaci mezi venkovní
stanicí a vnitřním monitorem. Umožňuje také sledování
záběru z kamery a otevření elektrického zámku pomocí
vnitřního monitoru.
Odpovědnost za veškeré škody vzniklé v důsledku
použití zařízení v rozporu s určením nese uživatel.
Pojem „zařízení“ nebo „výrobek“ v bezpečnostních pokynech
a návodu se vztahuje na ZVONEK S KAMEROU PRO
RODINNÝ DŮM.
a) Je zakázáno připojovat prvky interkomu k jiným
instalacím, než jsou ty, které uvádí výrobce.
b) Nevkládejte kovové předměty do otvorů a štěrbin
umístěných v komponentech interkomu, mohlo by
dojít k úrazu elektrickým proudem nebo požáru.
c) Pokud máte pochybnosti o tom, zda zařízení funguje
správně, kontaktujte servis výrobce.
d) Opravy zařízení může provádět pouze servis výrobce.
Opravy neprovádějte sami!
e) V případě vzniku požáru k hašení zařízení pod
napětím používejte pouze práškové nebo sněhové
hasicí přístroje (CO2).
f) Návod k obsluze uschovejte za účelem jeho
pozdějšího použití. V případě předánání zařízení
třetím osobám musí být spolu se zařízením předán
rovněž návod k obsluze.
g) Obalový materiál a drobné montážní prvky
uchovávejte na místě nedostupném pro děti.
h) Pokud společně s tímto nástrojem používáte nějaké
další nářadí, pak musíte dodržovat také jeho návod k
použití.
i) Zařízení není hračka. Dohlížejte na děti, aby si nehrály
se zařízením.
j) Pravidelně čistěte zařízení, aby nedošlo k trvalému
usazovaní nečistot.
k) Nezasahujte do zařízení s cílem změnit jeho parametry
nebo konstrukci.
l) Vnitřní prvky interkomu by neměly být instalovány v
místnostech s vysokou vlhkostí, například
CZ
NÁVOD K OBSLUZE CZ

20 21
03.08.2020
Pro nastavení kontrastu je třeba opět stisknout tlačítko
Menu. Na obrazovce se zobrazí nápis „Color“. Dalším
stisknutím tlačítka Menu se přepnete do nastavení
hlasitosti. Na obrazovce se zobrazí nápis „Volume“.
Nastavení provedete také tlačítky .
3.4. ČIŠTĚNÍ A ÚDRŽBA
a) Je zakázáno zařízení polévat vodou nebo je do vody
ponořovat. (také u venkovní stanice)
b) Pravidelně provádějte revize zařízení a kontrolujte,
zda je technicky způsobilé a není poškozeno.
c) K čištění používejte měkký hadřík.
d) K čištění nepoužívejte tekuté prostředky na mytí
nádobí, prostředky na čištění skla, ředidla na barvy
ani žíravé kapaliny.
e) Vnitřní stanice by neměla být instalována v místě,
kde je vysoká vlhkost a vysoká teplota (např. v
blízkosti krbu).
Chcete-li ztlumit monitor, je třeba stisknout ikonu
zobrazenou na níže uvedeném obrázku na 4 sekundy.
Poté se v horní části monitoru rozsvítí LED dioda označující
režim ztlumení. V okamžiku navázání spojení monitor
nebude zvonit, ale bude viditelný pouze obraz.
3.3.2. NAVÁZÁNÍ SPOJENÍ
Stiskněte první tlačítko na venkovní stanici pro spojení
s monitorem. Monitor poté vydá zvuk v souladu s
nastavením a na obrazovce se objeví obraz zaznamenaný
kamerou venkovní stanice.
Pro zahájení hovoru s osobou venku je třeba stisknout
ikonu uvedenou na obrázku. Zároveň se v horní části
monitoru rozsvítí indikátor navázání hlasového spojení.
Pro ukončení hovoru je třeba opět stisknout ikonu
zobrazenou na obrázku.
Upozornění: Během hovoru je možno nastavit hlasitost a také
jas a kontrast obrazovky.
3.3.3. OTEVŘENÍ DVEŘÍ
Pro otevření dveří stiskněte ikonu uvedenou na obrázku.
3.3.4. ZÁBĚR Z KAMERY
Pro zobrazení záběru z kamery 1 nebo 2 je třeba stisknout
ikonu záběru z kamery s příslušným číslem. Doba zobrazení
trvá cca 20s, poté se obrazovka vypne.
Během zobrazení záběru z kamery je možno odemknout
dveře, přijmout hlasový hovor a nastavit kontrast a jas
obrazovky.
Upozornění: Sada obsahuje jednu kameru.
Pokud druhá kamera není připojena, po stisknutí ikony pro
zobrazení záběru z kamery 2 se zobrazí modrá obrazovka.
3.3.5. NASTAVENÍ HLASITOSTI HOVORU, JASU A
KONTRASTU OBRAZOVKY
Pro možnost nastavení během hovoru nebo zobrazení
záběru z kamery je třeba stisknout tlačítko Menu. Na
obrazovce se zobrazí nápis „Brightness“. Nastavení jasu
provedete pomocí tlačítek .
Upozornění: Při výběru místa pro montáž vnitřních
monitorů se řiďte pokyny uvedenými v bodě 2 a 3.4.
3.2.3. SCHÉMA ELEKTRICKÉHO ZAPOJENÍ
Venkovní stanice Monitor
1. Mikrofon
2. IR LED
3. Kamera
4. Reproduktor
5. Tlačítko hovoru
6. Konektor
7. Ovládání hlasitosti
8. Ochranný kryt proti dešti
3.2. PŘÍPRAVA K PRÁCI
MONTÁŽ ZAŘÍZENÍ
3.2.1. INSTALACE VENKOVNÍ STANICE
1) Na zeď naistalujte ochranný kryt proti dešti dle
rozměrů uvedených na obrázku.
5) Přišroubujte instalační krabici k ochrannému krytu
proti dešti a poté připevněte přední část venkovní
stanice a dotáhněte spodní šroub.
3.2.2. INSTALACE VNITŘNÍHO MONITORU
Pomocí šroubů připevněte držák monitoru na zeď. Zapojte
kabely dle schématu elektrického zapojení (bod3.2.3.)
Po zapojení kabelů umístěte monitor na držáku, připojte
napájecí zdroj a ten pak zapojte do zásuvky.
Kabely
1. Audio
2. Zemnící
3. Video
4. Napájecí
Popis:
1. Přípojky 1,2,3,4 na venkovní stanici by měly být
propojeny s přípojkami 011, 012, 013, 014, 015 na
vnitřním monitoru.
2. Přípojku + - na vnitřním monitoru je třeba připojit k
nabíječce.
3. Přípojky 5,6 na venkovní stanici by měly být zapojeny
do elektrického zámku.
Typ kabelu: 4 spojovací kabely (čtyřžilové RVV).
Maximální provozní vzdálenost: 50 m.
3.3. PRÁCE SE ZAŘÍZENÍM
3.3.1. VÝBĚR MELODIE ZVONĚNÍ
Pro výběr vyzváněcí melodie zvonění je třeba stisknout
ikonu zobrazení záběru z kamery 1 na 4 sekundy. Poté
stisknutím ikony pro otevření dveří nastavte hlasitost.
Pro potvrzení nastavení je třeba stisknout ikonu pro
zahájení / ukončení hovoru.
1
2 3 4
2) Pomocí dodaného klíče povolte šroub ve spodní
části venkovní stanice.
3) Oddělte venkovní stanici od instalační krabice.
4) Připojte kabel dle schématu elektrického zapojení
(bod 3.2.3) a nastavte hlasitost.
5
CZ CZ

22 23
03.08.2020
f) Vyhněte se klepání a bouchání sluchátkem.
g) Pokud vnitřní stanice není delší dobu používána
(např. během delší nepřítomnosti uživatelů) je třeba
ji odpojit ze zásuvky.
LIKVIDACE OPOTŘEBENÝCH ZAŘÍZENÍ
Po ukončení doby používání nevyhazujte tento výrobek
společně s komunálním odpadem, ale odevzdejte jej k
recyklaci do sběrny elektrických a elektronických zařízení.
O tom informuje symbol umístěný na zařízení, v návodě
k obsluze nebo na obalu. Komponenty použité v zařízení
jsou vhodné pro zužitkování v souladu s jejich označením.
Díky zužitkování, recyklaci nebo jiným způsobům využití
opotřebených zařízení významně přispíváte k ochraně
životního prostředí. Informace o příslušné sběrně
opotřebených zařízení poskytne místní obecný nebo
městský úřad.
DÉTAILS TECHNIQUES
Description
des paramètres Valeur des paramètres
Nom du produit Visiophone 1 appartement
Modèle ST-VP-400
Moniteur
Tension nominale [V~]/
Fréquence [Hz] Entrée: AC 110-240V, 60-50Hz
Sortie: DC 15V, 1200mA
Achage 7’’ TFT-LCD
Sonneries 16 mélodies polyphoniques
Distance de
fonctionnement [m] 50
Température de
fonctionnement [°C] -5 ~ +40
Humidité de
fonctionnement [%] 10 ~ 90
Dimensions [mm] 200x140x23
Station extérieure
Tension nominale [V~] DC 15V 1200mA
Camera CMOS 540 TVL
Diodes LED de vision
nocturne
6
L'angle de rotation de la
camera [°]
120
Température de
fonctionnement [°C]
-20 ~ +50
Humidité de
fonctionnement [%]
< 90
Dimensions [mm] 100x150x30
An de garantir le fonctionnement able et durable de
l‘appareil, il est nécessaire d‘utiliser et d‘entretenir ce
dernier conformément aux consignes gurant dans le
présent manuel. Les caractéristiques et les spécications
contenues dans ce document sont à jour. Le fabricant se
réserve le droit de procéder à des modications à des ns
d’amélioration du produit.
SYMBOLES
1. DESCRIPTION GÉNÉRALE
L‘objectif du présent manuel est de favoriser une utilisation
sécuritaire et able de l‘appareil. Le produit a été conçu et
fabriqué en respectant étroitement les directives techniques
applicables et en utilisant les technologies et composants les
plus modernes. Il est conforme aux normes de qualité les plus
élevées.
LISEZ ATTENTIVEMENT LE PRÉSENT MANUEL ET
ASSUREZ-VOUS DE BIEN LE COMPRENDRE AVANT
LA PREMIÈRE UTILISATION.
Le produit est conforme aux normes de sécurité
en vigueur.
Respectez les consignes du manuel.
Collecte séparée.
ATTENTION ! , AVERTISSEMENT ! et REMARQUE
attirent l'attention sur des circonstances
spéciques (symboles d'avertissement généraux).
ATTENTION ! Mise en garde liée à la tension
électrique !
Pour l’utilisation intérieure uniquement.
(Seulement pour les composants internes du kit)
ATTENTION ! Bien que l‘appareil ait été conçu en
accordant une attention spéciale à la sécurité et qu‘il
comporte des dispositifs de protection, ainsi que des
caractéristiques de sécurité supplémentaires, il n’est
pas possible d’exclure entièrement tout risque de
blessure lors de son utilisation. Nous recommandons
de faire preuve de prudence et de bon sens lorsque
vous utilisez l’appareil.
La version originale de ce manuel a été rédigée en
allemand. Toutes les autres versions sont des traductions
de l‘allemand.
2. CONSIGNES DE SÉCURITÉ
REMARQUE ! Les illustrations contenues dans le
présent manuel sont fournies à titre explicatif. Votre
appareil peut ne pas être identique.
ATTENTION ! Veuillez lire attentivement toutes
les consignes de sécurité et toutes les instructions.
Le non-respect des avertissements et des consignes
de sécurité peut entraîner des chocs électriques, un
incendie, des blessures graves ou la mort.
Les notions d‘« appareil », de « machine » et de « produit »
gurant dans les descriptions et les consignes du manuel se
rapportent à/au VISIOPHONE COLLECTIF 2 APPARTEMENTS.
a) Il est interdit de connecter des éléments d‘interphone
à des installations autres que celles indiquées par le
fabricant.
b) N‘insérez pas d‘objets métalliques dans les ouvertures
et les fentes de l‘interphone, car cela pourrait
provoquer un choc électrique ou un incendie.
c) En cas d’incertitude quant au fonctionnement correct
de l’appareil, contactez le service client du fabricant.
d) Seul le service du fabricant peut eectuer des
réparations. Ne tentez aucune réparation par vous-
même !
e) En cas de feu ou d’incendie, utilisez uniquement des
extincteurs à poudre ou au dioxyde de carbone (CO2)
pour étouer les ammes sur l’appareil.
f) Conservez le manuel d’utilisation an de pouvoir
le consulter ultérieurement. En cas de cession de
l’appareil à un tiers, l’appareil doit impérativement
être accompagné du manuel d’utilisation.
g) Tenez les éléments d’emballage et les pièces de
xation de petit format hors de portée des enfants.
h) Lors de l’utilisation combinée de cet appareil avec
d’autres outils, respectez également les consignes se
rapportant à ces outils.
i) Cet appareil n‘est pas un jouet. Les enfants doivent
demeurer sous la supervision d’un adulte an qu’ils
ne jouent pas avec l’appareil.
j) Nettoyez régulièrement l‘appareil pour en prévenir
l’encrassement.
k) Il est défendu de modier l’appareil pour en changer
les paramètres ou la construction.
l) Les éléments internes de l‘interphone ne doivent
pas être installés dans des pièces très humides, par
exemple des salles de bains, ou à proximité de sources
de chaleur, par exemple des tuyaux, des radiateurs.
CZ FR
MANUEL D‘UTILISATION

24 25
03.08.2020
Attention : Lors du choix de l‘emplacement de montage
des moniteurs internes, reportez-vous aux directives des
points 2 et 3.4.
3.2.3. SCHÈME ÉLECTRIQUE
Station extérieure Moniteur
1. Microphone
2. IR LED
3. Camera
4. Haut-parleur
5. Bouton d‘appel
6. Connecteur
7. Réglage du volume
8. Pare-pluie
3.2. PRÉPARATION À L‘UTILISATION
MONTAGE DE L’APPAREIL
3.2.1. MONTAGE DE LA STATION EXTÉRIEURE
1) Installez un pare-pluie sur le mur conformément aux
dimensions du dessin.
5) Vissez la boîte d‘installation au pare-pluie, puis xez
la partie avant de la station extérieure et serrez la vis
inférieure.
3.2.2. MONTAGE DU MONITEUR INTÉRIEUR
Fixez le support du moniteur au mur avec des vis.
Connectez les câbles conformément au schéma de câblage
(point 3.2.3.).
Après avoir connecté les câbles, placez le moniteur sur le
support, branchez le chargeur, puis connectez-le à la prise.
Câbles:
1. Audio
2. De mise à la terre
3. Vidéo
4. D‘alimentation
Description :
1. Les connexions 1,2,3,4 sur la station extérieure
doivent être connectés aux connexions 011, 012,
013, 014 sur le moniteur intérieur.
2. La connexion + - sur le moniteur interne doit se
connecter au chargeur.
3. Les connexions 5,6 de la station extérieure doivent
être connectées à une serrure électrique.
Type de câble : 4 câbles de connexion (à 4 conducteurs
RVV). La distance maximale de fonctionnement : 50m.
1
2 3 4
2) Desserrez la vis en bas de la station extérieure à
l‘aide de la clé fournie.
3) Séparez la station extérieure de la boîte d‘installation.
4) Connectez les câbles conformément au schéma de
câblage (pkt. 3.2.3.). et réglez le volume.
5
Nom Fig Quantité
Moniteur 1
Support
de
moniteur
1
Station
exté-
rieure
1
Pare-
pluie
1
Chargeur 1
Goujon 7
Vis 7
Clé 1
Borne
pour
câbles à
4 ls
4
CONSTRUCTION DU MONITEUR
1
2
3
4
5
6
10
9
8
7
11
12
13
14
1. Microphone
2. Voyant de mode muet
3. Voyant d‘appel vocal
4. Voyant d‘appel vocal
5. Écran
6. Icône d‘aperçu de la camera 2
7. Icône d‘aperçu de la camera 1
8. Icône de verrouillage de l‘ouverture de la porte
9. Icône de début / n de conversation
10. Communication internę
11. ▲
12. ▼
13. Bouton menu
14. Bouton retour
15. Jonction de la station extérieure
16. Connexion moniteur supplémentaire
17. Connexion d‘alimentation
8
1
2
3
4
5
6
7
3. CONDITIONS D’UTILISATION
L‘appareil est utilisé pour la communication vocale entre
la station extérieure et le moniteur intérieur. Il permet
également d‘avoir l‘aperçu de l‘image de la caméra et
d‘ouvrir le verrou électrique à l‘aide du moniteur interne.
L’utilisateur porte l’entière responsabilité pour
l’ensemble des dommages attribuables à un usage
inapproprié.
3.1. DESCRIPTION DE L‘APPAREIL
ÉLÉMENTS D’ENSEMBLE
CONSTRUCTION DE LA STATION EXTÉRIEURE
FRFR

26 27
03.08.2020
Pour régler le contraste, appuyez à nouveau sur le bouton
Menu. L‘écran achera „Color“. Une nouvelle pression sur
le bouton Menu fera passer les paramètres au volume.
L‘écran achera „Volume“. Ensuite, vous devez également
eectuer les réglages à l‘aide des boutons .
3.4. NETTOYAGE ET ENTRETIEN
a) Il est interdit d’asperger l‘appareil d‘eau ou de
l‘immerger dans l‘eau. (également une station
extérieure)
b) Contrôlez régulièrement l‘appareil pour vous assurer
qu‘il fonctionne correctement et ne présente aucun
dommage.
c) Utilisez un chion doux lors du nettoyage.
d) N‘utilisez pas de liquide vaisselle, de nettoyant pour
vitres, de diluant à peinture ou de liquides corrosifs
pour le nettoyage.
e) La station intérieure ne doit pas être installée dans
un endroit où l‘humidité et la température sont
élevées (par exemple près d‘une cheminée).
f) Évitez de frapper ou de taper sur le combiné.
g) Si la station intérieure n‘est pas utilisée pendant une
longue période (par exemple lorsque les utilisateurs
partent), débranchez-la de la prise.
MISE AU REBUT DES APPAREILS USAGÉS
À la n de sa vie, ce produit ne doit pas être jeté dans les
ordures ménagères ; il doit impérativement être remis
dans un point de collecte et de recyclage pour appareils
électroniques et électroménagers. Un symbole à cet
eet gure sur le produit, l‘emballage ou dans le manuel
d‘utilisation. Les matériaux utilisés lors de la fabrication
de l‘appareil sont recyclables conformément à leur
désignation. En recyclant ces matériaux, en les réutilisant ou
en utilisant les appareils usagés d’une autre manière, vous
contribuez grandement à protéger notre environnement.
Pour obtenir de plus amples informations sur les points de
collecte appropriés, adressez-vous à vos autorités locales.
Pour désactiver le moniteur, appuyez sur l‘icône illustrée
dans la gure ci-dessous pendant 4 secondes. La LED
indiquant le mode muet s‘allume sur le dessus du moniteur.
Une fois la connexion établie, le moniteur ne sonnera pas,
seule l‘image sera visible.
3.3.2. ÉTABLIR UNE CONNEXION
Appuyez sur le premier bouton de la station extérieure
pour vous connecter au moniteur. Le moniteur émettra
alors un son conformément aux paramètres et l‘écran
achera l‘image enregistrée par la caméra de la station
extérieure.
Pour démarrer une conversation avec une personne à
l‘extérieur, appuyez sur l‘icône représentée sur la gure.
Dans le même temps, le voyant de connexion vocale en
haut du moniteur s‘allumera.
Pour démarrer une conversation avec une personne à
l‘extérieur, appuyez sur l‘icône représentée sur la gure.
Dans le même temps, le voyant de connexion vocale en
haut du moniteur s‘allumera.
Attention : Pendant la conversation, vous pouvez régler le
volume, la luminosité et le contraste de l‘écran.
3.3.3. OUVERTURE DE LA PORTE
Pour ouvrir la porte, appuyez sur l‘icône illustrée sur la
gure.
3.3.4. APERÇU DE LA CAMÉRA
Pour obtenir un aperçu de la caméra 1 ou 2, appuyez sur
l‘icône d‘aperçu de la caméra avec le numéro approprié.
Le temps d‘achage est d‘environ 20 secondes, après ce
temps l‘écran devient vierge.
Lors de l‘achage de l‘aperçu de l‘image de la caméra, il
est possible de déverrouiller la porte, de recevoir un appel
vocal et de régler le contraste et la luminosité de l‘écran.
Attention : Le kit comprend une caméra. Si la deuxième
camera n‘est pas connecté, un écran bleu apparaît après
avoir appuyé sur l‘icône d‘aperçu de la camera 2.
3.3.5. RÉGLAGE DU VOLUME DE LA CONVERSATION
AINSI QUE DE LA LUMINOSITÉ ET DU CONTRASTE DE
L‘ÉCRAN
Pour dénir les paramètres, pendant la conversation ou
la vision d‘aperçu de l‘image de la caméra, appuyez sur
le bouton Menu. L‘écran achera „Brightness“. Réglez la
luminosité à l‘aide des boutons .
Pour accepter les paramètres, appuyez sur l‘icône de
début/n de conversation.
3.3. UTILISATION DE L‘APPAREIL
3.3.1. SÉLECTION DE SONNERIE
Pour sélectionner la mélodie de la sonnerie, appuyez
sur l‘icône d‘aperçu de la camera 1 pendant 4 secondes.
Appuyez ensuite sur l‘icône d‘ouverture de porte pour
régler le volume.
FRFR

28 29
03.08.2020
DATI TECNICI
Parametri - Descrizione Parametri - Valore
Nome del prodotto Videocitofono per casa
unifamiliare
Modello ST-VP-400
Monitor
Tensione nominale [V~]/
Frequenza [Hz]
Ingresso: AC 110-240V,
60-50Hz
Uscita: DC 15V, 1200mA
Display 7’’ TFT-LCD
Suonerie 16 suonerie polifoniche
Distanza di lavoro [m] 50
Temperatura di lavoro [°C] -5 ~ +40
Umidità di lavoro [%] 10 ~ 90
Dimensioni [mm] 200x140x23
Unità esterna
Tensione nominale [V~] DC 15V 1200mA
Fotocamera CMOS 540 TVL
LED per la visione
notturna
6
Angolo di visione della
fotocamera [°]
120
Temperatura di lavoro [°C] -20 ~ +50
Umidità di lavoro [%] < 90
Dimensioni [mm] 100x150x30
3.1. DESCRIZIONE DEL DISPOSITIVO
ELEMENTI DEL KIT
Denomi-
nazione
Fig Quanti
Monitor 1
Supporto
per
monitor
1
Unità
esterna
1
Rivesti-
mento
antipiog-
gia
1
Caricabat-
terie
1
Tassello 7
Vite 7
Chiave 1
Morsetto
per
cavi a 4
conduttori
4
ELEMENTI DEL MONITOR
1
2
3
4
5
6
10
9
8
7
11
12
13
14
1. Microfono
2. Indicatore di modalità di silenziamento
3. Indicatore di chiamata vocale
4. Indicatore di potenza
5. Schermo
6. Icona di anteprima della fotocamera 2
7. Icona di anteprima della fotocamera 1
8. Icona di apertura della serratura della porta
9. Icona di avvio/arresto della chiamata
10. Comunicazione interna
11. ▲
12. ▼
13. Pulsante menu
14. Pulsante di ritorno
15. Collegamento dell‘unità esterna
16. Collegamento del monitor supplementare
17. Collegamento di alimentazione
ELEMENTI DELL’UNITÀ ESTERNA
8
1
2
3
4
5
6
7
Per un funzionamento duraturo e adabile del dispositivo
assicurarsi di maneggiarlo e curarne la manutenzione
secondo le disposizioni presentate in questo manuale.
I dati e le speciche tecniche indicati in questo manuale
sono attuali. Il fornitore si riserva il diritto di apportare
delle migliorie nel contesto del miglioramento dei propri
prodotti.
SPIEGAZIONE DEI SIMBOLI
1. DESCRIZIONE GENERALE
Queste istruzioni sono intese come ausilio per un uso sicuro
e adabile. Il prodotto è stato rigorosamente progettato
e realizzato secondo le direttive tecniche e l‘utilizzo delle
tecnologie e componenti più moderne e seguendo gli
standard di qualità più elevati.
PRIMA DELLA MESSA IN FUNZIONE È NECESSARIO
AVER LETTO E COMPRESO LE ISTRUZIONI D‘USO
Il prodotto soddisfa le attuali norme di
sicurezza.
Leggere attentamente le istruzioni.
Prodotto riciclabile.
ATTENZIONE o AVVERTENZA! o NOTA!
per richiamare l’attenzione su determinate
circostanze (indicazioni generali di avvertenza).
ATTENZIONE! Pericolo di tensione elettrica!
Usare solo in ambienti chiusi. (Solo per
componenti interne del set)
ATTENZIONE! Anche se l‘apparecchiatura è
stata progettata per essere sicura, sono presenti
degli ulteriori meccanismi di sicurezza. Malgrado
l‘applicazione di queste misure supplementari di
sicurezza sussiste comunque il rischio di ferirsi. Si
raccomanda inoltre di usare cautela e buon senso..
Il manuale originale è stato scritto in tedesco. Le versioni in
altre lingue sono traduzioni dalla lingua tedesca.
2. SICUREZZA NELL‘IMPIEGO
AVVERTENZA! Le immagini contenute in questo
manuale sono puramente indicative e potrebbero
dierire dal prodotto.
ATTENZIONE! Leggere le istruzioni d‘uso e di
sicurezza. Non prestare attenzione alle avvertenze e
alle istruzioni può condurre a shock elettrici, incendi,
gravi lesioni o addirittura al decesso.
3. CONDIZIONI D‘USO
Il dispositivo viene utilizzato per la comunicazione vocale
tra la unità esterna e il monitor interno. Permette inoltre
di visualizzare l‘immagine della telecamera e di aprire la
serratura elettrica tramite il monitor interno.
L‘operatore è responsabile di tutti i danni derivanti da
un uso improprio.
Il termine „apparecchio“ o „prodotto“ nelle avvertenze
e descrizioni contenute nel manuale si riferisce alla/al
VIDEOCITOFONO PER CASA UNIFAMILIARE.
a) È vietato collegare elementi del citofono ad
installazioni diverse da quelle indicate dal produttore.
b) Non inserire oggetti metallici nelle aperture e nelle
fessure del citofono, poiché ciò potrebbe provocare
scosse elettriche o incendi
c) Se non si è sicuri del corretto funzionamento del
dispositivo, rivolgersi al servizio assistenza del
fornitore.
d) Le riparazioni devono essere eseguite esclusivamente
dal servizio assistenza del produttore. Non eseguire le
riparazioni da soli!
e) In caso di incendio, utilizzare solo estintori a polvere o
ad anidride carbonica (CO2).
f) Conservare le istruzioni d‘uso per uso futuro. Nel caso
in cui il dispositivo venisse adato a terzi, consegnare
anche queste istruzioni.
g) Tenere gli elementi di imballaggio e le piccole parti di
assemblaggio fuori dalla portata dei bambini.
h) Durante l’impiego del dispositivo in contemporanea
con altri dispositivi, è consigliabile rispettare le altre
istruzioni d’uso.
i) Questo dispositivo non è un giocattolo. I bambini
devono essere sorvegliati anché non giochino con
il prodotto.
j) Pulire regolarmente l‘apparecchio in modo da evitare
l‘accumulo di sporcizia.
k) È vietato intervenire sulla costruzione del dispositivo
per modicare i suoi parametri o la sua costruzione.
l) Gli elementi interni del citofono non devono essere
installati in ambienti con elevata umidità, ad es. bagni
o vicino a fonti di calore, ad es. tubi, radiatori.
IT
ISTRUZIONI PER L’USO IT

30 31
03.08.2020
Per impostare il contrasto, premere di nuovo il tasto Menu.
Lo schermo mostrerà la scritta „Color“. Premendo di nuovo
il tasto Menu, si passa alle impostazioni di volume. Lo
schermo mostrerà la scritta „Volume“. Quindi eettuare le
impostazioni con i tasti .
3.4. PULIZIA E MANUTENZIONE
a) È vietato spruzzare il dispositivo con un getto
d‘acqua o immergere il dispositivo in acqua. (si
riferisce anche all’unità esterna)
b) Eettuare controlli regolari del dispositivo per
mantenerlo eciente e privo di danni.
c) Per la pulizia utilizzare un panno morbido.
d) Per la pulizia non utilizzare detersivi per piatti,
detersivi per vetri, diluenti per vernici o liquidi
caustici.
Per silenziare il monitor, premere l‘icona indicata nella
gura seguente per 4 secondi. Quindi si accenderà il LED
sulla parte superiore del monitor per indicare la modalità di
silenziamento. Quando la connessione è stabilita, il monitor
non squilla, ma sarà visibile solo l‘immagine.
3.3.2. CONNESSIONE
Premere il primo pulsante dell‘unità esterna al ne di
collegarsi al monitor. Il monitor emetterà quindi un segnale
acustico in base alle impostazioni e verrà visualizzata
l‘immagine registrata dalla telecamera dell‘unità esterna.
Per poter parlare con una persona che si trova all‘esterno,
bisogna premere l‘icona indicata nella gura. Allo stesso
tempo, l‘indicatore della chiamata vocale si illumina nella
parte superiore del monitor.
Per terminare la chiamata, premere nuovamente l‘icona .
Nota: È possibile regolare il volume, la luminosità e il
contrasto dello schermo durante la chiamata.
3.3.3. APERTURA DELLA PORTA
Al ne di aprire la porta bisogna premere l’icona indicata
nella gura.
3.3.4. ANTEPRIMA DELLA TELECAMERA
Per ottenere l‘anteprima dalla telecamera 1 o 2, premere
l‘icona dell‘anteprima della telecamera con il numero
corrispondente. Il tempo di visualizzazione è di circa 20
minuti, successivamente lo schermo si disattiva.
Durante la visualizzazione anteprima della telecamera,
è possibile sbloccare la porta, rispondere alla chiamata
vocale e impostare il contrasto e la luminosità dello
schermo.
Nota: Il kit contiene una sola telecamera. Se la seconda
telecamera non è collegata, alla pressione dell‘icona di
anteprima della telecamera 2 apparirà uno schermo blu.
3.3.5. IMPOSTAZIONE DEL VOLUME DI CHIAMATA
E DELLA LUMINOSITÀ E DEL CONTRASTO DELLO
SCHERMO
Per eettuare le impostazioni, premere il tasto Menu
durante la chiamata o la visualizzazione dell‘immagine della
telecamera. Lo schermo mostrerà la scritta „Brightness“.
Regolare la luminosità con i tasti .
Nota: Per la scelta della posizione dei monitor per interni,
seguire le istruzioni di cui ai punti 2 e 3.4.
3.2.3. SCHEMA ELETTRICO
Unità esterna Monitor
1. Microfono
2. IR LED
3. Telecamera
4. Altoparlante
5. Pulsante di collegamento
6. Connettore
7. Controllo di volume
8. Rivestimento antipioggia
3.2. PREPARAZIONE AL FUNZIONAMENTO
MONTAGGIO DEL DISPOSITIVO
3.2.1. MONTAGGIO DELL’UNITÀ ESTERNA
1) Montare il rivestimento antipioggia sulla parete in
base alle dimensioni indicate nella gura.
5) Avvitare la scatola di montaggio al rivestimento
antipioggia, quindi ssare la parte anteriore
dell‘unità esterna e avvitare la vite inferiore.
3.2.2. MONTAGGIO DEL MONITOR INTERNO
Fissare il supporto del monitor alla parete mediante viti.
Collegare il cablaggio conformemente allo schema (punto
3.2.3.).
Dopo aver collegato i cavi, posizionare il monitor sulla
staa, inserire l‘alimentatore e poi collegarlo ad una presa
di corrente.
Fili
1. Audio
2. Messa a terra
3. Video
4. Alimentazione elettrica
Descrizione:
1. I terminali 1, 2,3,4 sull‘unità esterna devono essere
collegati ai terminali 012, 013, 014 sul monitor
interno.
2. Il terminale + - sul monitor interno deve essere
collegato al caricabatterie.
3. Il terminale 5.6 sull‘unità esterna deve essere
collegato alla serratura elettrica.
Tipo di cavo: 4 cavi di collegamento (RVV a 4 conduttori).
Distanza massima di lavoro: 50m.
3.3. LAVORARE CON IL DISPOSITIVO
3.3.1. SELEZIONE DELLA SUONERIA
Per selezionare la suoneria del campanello, premere l‘icona
dell‘immagine della fotocamera 1 per 4 secondi. Quindi
impostare il volume premendo l‘icona dell’apertura della
porta.
Per accettare le impostazioni, premere l‘icona di inizio/ne
della chiamata.
1
2 3 4
2) Svitare la vite in basso dell‘unità esterna utilizzando
la chiave in dotazione.
3) Separare l‘unità esterna dalla scatola di montaggio.
4) Collegare il cavo secondo lo schema elettrico
(paragrafo 3.2.3.) e regolare il volume.
5
IT IT

32 33
03.08.2020
e) L‘unità interna non deve essere installata in un luogo
caratterizzato da un‘elevata umidità e temperatura
(ad es. vicino ad un caminetto).
f) Non sbattere né colpire la cornetta.
g) Se l‘unità interna non viene utilizzata per un periodo
di tempo prolungato (ad es. durante l‘assenza degli
utenti), occorre scollegarla dalla presa di corrente.
SMALTIMENTO DELLE ATTREZZATURE USATE
Questo prodotto, se non più funzionante, non deve
essere smaltito insieme ai normali riuti, ma deve essere
consegnato ad un’organizzazione competente per lo
smaltimento dei dispositivi elettrici e elettronici. Maggiori
informazioni sono reperibili sull‘etichetta sul prodotto, sul
manuale di istruzioni o sull‘imballaggio. I materiali utilizzati
nel dispositivo possono essere riciclati secondo indicazioni.
Riutilizzando i materiali o i dispositivi, si contribuisce
a tutelare l‘ambiente circostante. Le informazioni sui
rispettivi punti di smaltimento sono reperibili presso le
autorità locali.
DATOS TÉCNICOS
Parámetro - Descripción Parámetro - Valor
Nombre del producto Videoportero para 1 vivienda
Modelo ST-VP-400
Monitor
Voltaje [V ~]/
Frecuencia [Hz]
Entrada: AC 110-240V,
60-50Hz
Salida: DC 15V, 1200mA
Pantalla 7’’ TFT-LCD
Timbres 16 melodías polifónicas
Distancia de trabajo [m] 50
Temperatura de trabajo
[°C] -5 ~ +40
Humedad de trabajo [%] 10 ~ 90
Dimensiones [mm] 200x140x23
Puesto exterior
Voltaje [V ~] DC 15V 1200mA
Cámara CMOS 540 TVL
Diodos LED de visión
nocturna
6
Ángulo de rotación de la
cámara [°]
120
Temperatura de trabajo
[°C]
-20 ~ +50
Humedad de trabajo [%] < 90
Dimensiones [mm] 100x150x30
Para garantizar un funcionamiento duradero y able del
aparato, el manejo y mantenimiento deben llevarse a
cabo de acuerdo con las instrucciones de este manual. Los
datos técnicos y las especicaciones de este manual están
actualizados. El fabricante se reserva el derecho de realizar
modicaciones para mejorar la calidad.
EXPLICACIÓN DE LOS SÍMBOLOS
1. DESCRIPCIÓN GENERAL
Este manual ha sido elaborado para favorecer un empleo
seguro y able. El producto ha sido estrictamente diseñado
y fabricado conforme a las especicaciones técnicas y para
ello se han utilizado las últimas tecnologías y componentes,
manteniendo los más altos estándares de calidad.
ANTES DE LA PUESTA EN FUNCIONAMIENTO,
LEA LAS INSTRUCCIONES MINUCIOSAMENTE Y
ASEGÚRESE DE COMPRENDERLAS.
El producto cumple con las normas de
seguridad vigentes.
Respetar las instrucciones de uso.
Producto reciclable.
¡ATENCIÓN!, ¡ADVERTENCIA! o ¡NOTA! para
llamar la atención sobre ciertas circunstancias
(señal general de advertencia).
¡ATENCIÓN! ¡Advertencia de tensión eléctrica!
Uso exclusivo en áreas cerradas. (Solo para
componentes internos del set)
¡ATENCIÓN! Aunque en la fabricación de este
aparato se ha prestado gran importancia a la
seguridad, dispone de ciertos mecanismos de
protección extras. A pesar del uso de elementos de
seguridad adicionales, existe el riesgo de lesiones
durante el funcionamiento, por lo que se recomienda
proceder con precaución y sentido común.
El texto en alemán corresponde a la versión original. Los
textos en otras lenguas son traducciones del original en
alemán.
2. SEGURIDAD
¡ADVERTENCIA! En este manual se incluyen fotos
ilustrativas que podrían no coincidir exactamente con
la apariencia real del dispositivo.
¡ATENCIÓN! Lea todas las instrucciones e
indicaciones de seguridad. La inobservancia de
las advertencias e instrucciones al respecto puede
provocar descargas eléctricas, incendios, lesiones
graves e incluso la muerte.
3. INSTRUCCIONES DE USO
El aparato permite la comunicación por voz entre la unidad
exterior y el monitor interior. También permite ver imagen
a través de la cámara y abrir la cerradura eléctrica por
medio del monitor interior.
El usuario es responsable de los daños derivados de un
uso inadecuado del aparato.
Conceptos como „aparato“ o „producto“ en las advertencias
y descripciones de este manual se reeren a VIDEOPORTERO
PARA 1 VIVIENDA.
a) No conecte elementos del interfono a instalaciones
que no sean las indicadas por el fabricante.
b) No introduzca objetos metálicos en las aberturas y
ranuras de los elementos del interfono, ya que podría
provocar descargas eléctricas o incendios.
c) Si no está seguro de que la unidad funcione
correctamente, póngase en contacto con el servicio
técnico del fabricante.
d) Las reparaciones solo pueden ser realizadas por
el servicio técnico del fabricante. ¡No realice
reparaciones por su cuenta!
e) En caso de incendio, utilice únicamente extintores
de polvo o dióxido de carbono (CO2) para apagar el
aparato.
f) Conserve el manual de instrucciones para futuras
consultas. Este manual debe ser entregado a toda
persona que vaya a hacer uso del dispositivo.
g) Los elementos de embalaje y pequeñas piezas de
montaje deben mantenerse alejados del alcance de
los niños.
h) Al utilizar este equipo junto con otros, también deben
observarse otras instrucciones de uso.
i) Este aparato no es un juguete. Debe controlar que los
niños no jueguen con él.
j) Limpie regularmente el dispositivo para evitar que la
suciedad se incruste permanentemente.
k) Se prohíbe realizar cambios en la construcción del
dispositivo para modicar sus parámetros o diseño.
l) Los elementos internos del interfono no deben
instalarse en salas con mucha humedad, por ejemplo,
baños; o cerca de fuentes de calor, por ejemplo,
tuberías, radiadores.
IT ES
MANUAL DE INSTRUCCIONES

34 35
03.08.2020
Atención: Al elegir el lugar de instalación de los monitores
interiores, siga las indicaciones de los puntos 2 y 3.4.
3.2.3. ESQUEMA ELÉCTRICO
Puesto exterior Monitor
1. Micrófono
2. LED IR
3. Cámara
4. Altavoz
5. Botón de conexión
6. Conector
7. Regulador de volumen
8. Protección antilluvia
3.2. PREPARACIÓN PARA LA PUESTA EN MARCHA
MONTAJE DE LA MÁQUINA
3.2.1. INSTALACIÓN DE LA UNIDAD EXTERIOR
1) Instale la protección antilluvia en la pared de acuerdo
con las dimensiones indicadas en el dibujo.
5) Fije la caja de instalación a la protección antilluvia,
ajuste la parte delantera de la unidad exterior y
apriete el tornillo inferior
3.2.2. INSTALACIÓN DEL MONITOR INTERIOR
Ajuste el mango del monitor a la pared mediante tornillos.
Conecte el cableado según el esquema (punto 3.2.3.)
Después de instalar los cables, coloque el monitor en el
mango, conecte la fuente de alimentación y empálmela a
la entrada.
Cables
1. De audio
2. De puesta a tierra
3. De vídeo
4. De alimentación
Descripción:
1. Las conexiones 1, 2, 3 y 4 de la unidad exterior deben
estar empalmadas a las conexiones 011, 012, 013 y
014 en los monitores interiores.
2. Las conexiones + - en los monitores interiores deben
estar empalmadas al cargador.
3. Las conexiones 5 y 6 de la unidad exterior deben
estar empalmadas a la cerradura eléctrica.
Tipo de cable: 4 cables de conexión (de 4 hilos RVV).
Distancia de trabajo máxima: 50 m.
1
2 3 4
2) Para elegir la melodía del timbre, pulse el icono de
vista de cámara durante 4 segundos hasta que oiga
un sonido característico.
3) Si lo vuelve a pulsar, podrá cambiar la melodía.
4) Para aceptar la selección, pulse el icono de apertura
de puerta.
5
8
1
2
3
4
5
6
7
Nombre Fig Cantidad
Monitor 1
Mango
en el
monitor
1
Puesto
exterior
1
Pro-
tección
antilluvia
1
Cargador 1
Perno de
expan-
sión
7
Tornillo 7
Llave 1
Terminal
para
cables de
4 hilos
4
ESTRUCTURA DEL MONITOR
1
2
3
4
5
6
10
9
8
7
11
12
13
14
1. Micrófono
2. Indicador del modo de silencio
3. Indicador de establecimiento de la conexión por voz
4. Indicador de potencia
5. Pantalla
6. Icono de vista de cámara 2
7. Icono de vista de cámara 1
8. Icono de desbloqueo de la puerta
9. Icono de inicio / nalización de la conversación
10. Comunicación interna
11. ▲
12. ▼
13. Botón de menú
14. Botón de regreso
15. Conexión de la unidad exterior
16. Conexión del monitor adicional
17. Conexión de alimentación
ESTRUCTURA DE LA UNIDAD EXTERIOR
3.1. DESCRIPCIÓN DEL APARATO
ELEMENTOS DEL KIT
ESES

36 37
03.08.2020
Para ajustar el contraste, vuelva a pulsar el botón Menú. En
la pantalla aparecerá la palabra „Color“. Si vuelve a pulsar
el botón Menú, pasará al ajuste de volumen. En la pantalla
aparecerá la palabra „Volume“. Entonces, también debe
realizar ajustes mediante los botones .
3.4. LIMPIEZA Y MANTENIMIENTO
a) Prohibido rociar agua sobre el dispositivo o
sumergirlo en agua. (también aplica a la unidad
exterior)
b) En lo que respecta a la eciencia técnica y posibles
daños, el dispositivo debe ser revisado regularmente.
c) Por favor, utilice un paño suave para la limpieza.
(esto es especialmente importante a la hora de
limpiar la cámara o la pantalla del monitor)
d) No limpie con lavaplatos, limpiacristales, disolventes
de esmaltes ni otros líquidos corrosivos.
e) Preste atención a la iluminación del lugar de
instalación de los monitores, ya que una luz
demasiado potente puede impedir que se vean las
imágenes.
f) No toque la pantalla del monitor con las manos
mojadas.
g) Evite dar golpes a la pantalla del monitor y no lance,
agite o golpee el monitor.
ELIMINACIÓN DE DISPOSITIVOS USADOS
Tras su vida útil, este producto no debe tirarse al contenedor
de basura doméstico, sino que ha de entregarse en el
punto limpio correspondiente para recolección y reciclaje
de aparatos eléctricos. Al respecto informa el símbolo
situado sobre el producto, las instrucciones de uso o el
embalaje. Los materiales utilizados en este aparato son
reciclables, conforme a su designación. Con la reutilización,
aprovechamiento de materiales u otras formas de uso de
los aparatos utilizados, contribuirás a proteger el medio
ambiente. Para obtener información sobre los puntos de
recogida y reciclaje contacte con las autoridades locales
competentes.
Para silenciar el monitor, pulse el icono indicado en
el dibujo siguiente durante 4 segundos. Entonces, se
iluminará el diodo indicador del modo silencio en la parte
superior del monitor. Cuando se establezca una conexión,
el monitor no sonará y solo se verá la imagen.
3.3.2. ESTABLECIMIENTO DE CONEXIÓN
Pulse el primer botón de la unidad exterior para conectarse
con el monitor. Entonces, el monitor emitirá un sonido
de acuerdo con los ajustes, y en la pantalla se mostrará
la imagen registrada por la cámara de la unidad exterior.
Para hablar con la persona que se encuentra en el exterior,
pulse el icono indicado en el dibujo. Al mismo tiempo, el
indicador de establecimiento de la conexión por voz se
iluminará en la parte superior del monitor. Para nalizar la
conversación, vuelva a pulsar el icono indicado en el dibujo.
Atención: Durante la conversación, existe la posibilidad de
ajustar el volumen, la claridad y el contraste de la pantalla.
3.3.3. APERTURA DE PUERTA
Para abrir la puerta, pulse el icono indicado en el dibujo.
3.3.4. VISTA DE LA CÁMARA
Para ver las imágenes registradas por la cámara 1 o
2, pulse el icono de vista de la cámara con el número
correspondiente. El tiempo de visión dura aprox. 20 s, tras
lo cual la pantalla se apaga.
Mientras se vean las imágenes de la cámara, se puede
desbloquear la puerta, iniciar la conexión por voz y ajustar
el contraste y la claridad de la pantalla.
Atención: El kit contiene una cámara. Si no conecta la
segunda cámara, después de pulsar el icono de vista de la
cámara 2 aparecerá una pantalla azul.
3.3.5. AJUSTE DEL VOLUMEN DE LA CONVERSACIÓN Y
LA CLARIDAD Y EL CONTRASTE DE LA PANTALLA
Para realizar ajustes durante la conversación o ver la
imagen de la cámara, pulse el botón Menú. En la pantalla
aparecerá la palabra „Brightness“. Regule la claridad por
medio de los botones .
Para aceptar los ajustes, pulse el icono de inicio/nalización
de la conversación.
3.3. MANEJO DEL APARATO
3.3.1. SELECCIÓN DE TIMBRE
Para seleccionar la melodía del timbre, pulse el icono de
vista de cámara 1 durante 4 segundos. Después, ajuste el
volumen pulsando el icono de apertura de puerta.
ESES

38 39
03.08.2020
NOTES/NOTIZENNAMEPLATE TRANSLATIONS
Importer: expondo Polska sp. z o.o. sp. k. ul.
Nowy Kisielin-Innowacyjna 7, 66-002 Zielona Góra | Poland, EU
expondo.de
Product Name
Model
Power supply
Production Year
Serial No.
1-Family HouseVideo Doorphone
ST-VP-400
15 V 1,2A
1 2 3 4 5 6
DE Produktname Modell Spannung/
Frequenz
Produktionsjahr Ordnungsnummer Importeur
EN Product Name Model Voltage/
Frequency
Production Year Serial No. Importer
PL Nazwa Produktu Model Napięcie/
Częstotliwość
Rok produkcji Numer serii Importer
CZ
Název výrobku Model Jmenovité
napájecí napětí/
Frekvence
Rok výroby Sériové číslo Dovozce
FR Nom du produit Modèle Tension/
Fréquence
Année de
production
Numéro de série Importateur
IT Nome del
prodotto
Modello Tensione/
Frequenza
Anno di
produzione
Numero di serie Importatore
ES Nombre del
producto
Modelo Voltaje/
Frecuencia
Año de
producción
Número de serie Importador
1
2
3
4
5
6
Table of contents
Languages:
Other STAMONY Intercom System manuals
