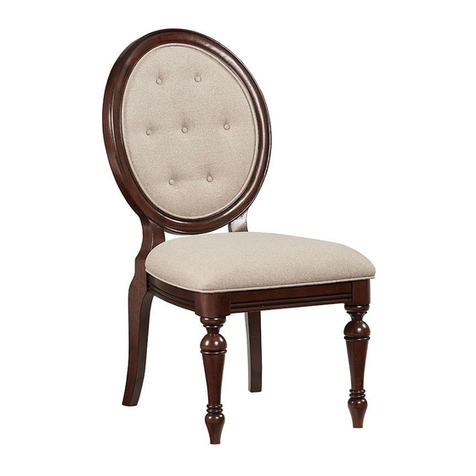
Standard Furniture 93850 OLIVIA BR User manual

ASSEMBLY INSTRUCTIONS
PARTS LIST
No. Description Sketch Q'ty
1
2Bun foot
1 pc
4 pcs
Page: 1/2
Made in Vietnam
Cleaning instructions: Clean using soft cloth
Read instruction carefully prior to assembly.
Thank you for purchasing this quality product. Check carefully for small parts which may
come loose during shipment.
Remove all components from pack and place top down on soft surface such as carpet or
cloth to prevent scratching the finish. Identify and count all parts as specified below.
It is recommended to use two or more persons during the assembly process.
ASSEMBLY INSTRUCTIONS
GROUP NO.: 93850 OLIVIA BR
ITEM NO.: 93857 NIGHTSTAND
Nightstand

Page: 2/2
Made in Vietnam
Cleaning instructions: Clean using soft cloth
***Caution: Please read all instructions carefully before starting the assembly process. These parts are
cumbersome and heavy. Therefore, two people are recommended in order to prevent personal injury
and insure the parts are not damaged during the assembly.
Attach Bun foot (2) to Nightstand (1).
ASSEMBLY INSTRUCTIONSASSEMBLY INSTRUCTIONS
GROUP NO.: 93850 OLIVIA BR
ITEM NO.: 93857 NIGHTSTAND

PARTS LIST
No. Description Sketch Q'ty
1
2Bun foot
1 pc
4 pcs
Page: 1/2
Made in Vietnam
Cleaning instructions: Clean using soft cloth
Read instruction carefully prior to assembly.
Thank you for purchasing this quality product. Check carefully for small parts which may
come loose during shipment.
Remove all components from pack and place top down on soft surface such as carpet or
cloth to prevent scratching the finish. Identify and count all parts as specified below.
It is recommended to use two or more persons during the assembly process.
Chest
ASSEMBLY INSTRUCTIONSASSEMBLY INSTRUCTIONS
GROUP NO.: 93850 OLIVIA BR
ITEM NO.: 93855 CHEST, DRAWER

Page: 2/2
Made in Vietnam
Cleaning instructions: Clean using soft cloth
***Caution: Please read all instructions carefully before starting the assembly process. These parts are
cumbersome and heavy. Therefore, two people are recommended in order to prevent personal injury
and insure the parts are not damaged during the assembly.
ASSEMBLY INSTRUCTIONSASSEMBLY INSTRUCTIONS
GROUP NO.: 93850 OLIVIA BR
ITEM NO.: 93855 CHEST, DRAWER
Step 1: Attach Bun foot (2) to Chest (1).
Top
Step 2: The tipping restraint must be attached at back of Chest, above and on the right or left.
STEP 1
STEP 2

PARTS LIST
No. Sketch Q'ty
1
2Bun foot
1 pc
4 pcs
Page: 1/3
Made in Vietnam
Cleaning instructions: Clean using soft cloth
Read instruction carefully prior to assembly.
Thank you for purchasing this quality product. Check carefully for small parts which may
come loose during shipment.
Remove all components from pack and place top down on soft surface such as carpet or
cloth to prevent scratching the finish. Identify and count all parts as specified below.
It is recommended to use two or more persons during the assembly process.
Dresser
41 pc
Mirror
Mirror Support
52 pcs
31 pc
Support Leg
HARDWARE LIST
1/4" *38mm Allen Bolt
1/4" Allen Key
ASSEMBLY INSTRUCTIONS
GROUP NO.: 93850 OLIVIA BR
ITEM NO.: 93859 DRESSER
93858 MIRROR
Description

STEP 1:
Page: 2/3
Made in Vietnam
Cleaning instructions: Clean using soft cloth
***Caution: Please read all instructions carefully before starting the assembly process. These parts are
cumbersome and heavy. Therefore, two people are recommended in order to prevent personal injury
and insure the parts are not damaged during the assembly.
STEP 1:
STEP 2:
Step 1: Attach Bun foot (2) and Support leg (3) to Dresser (1).
ASSEMBLY INSTRUCTIONS
GROUP NO.: 93850 OLIVIA BR
ITEM NO.: 93859 DRESSER
93858 MIRROR
Step 2: Attach Mirror support (5) to back of Dresser (1) and Mirror (4) by using Flat Washer (D),
Spring Washer (C), Allen Bolt (B) and Allen Key (A). Align holes in Mirror support with pre-drilled
dresser and Mirror must be center.

Page: 3/3
Made in Vietnam
Cleaning instructions: Clean using soft cloth
***Caution: Please read all instructions carefully before starting the assembly process. These parts are
cumbersome and heavy. Therefore, two people are recommended in order to prevent personal injury
and insure the parts are not damaged during the assembly.
ASSEMBLY INSTRUCTIONS
GROUP NO.: 93850 OLIVIA BR
ITEM NO.: 93859 DRESSER
93858 MIRROR
Step 3: The tipping restraint must be attached at back of Dresser, above and on the right or left.

Page: /3
PARTS LIST
No. Description Sketch Q'ty
1
2
3
4
5
1 PC
6
1 PC
HARDWARE LIST
Made in Vietnam
Cleaning instructions: Clean using soft cloth
Read instruction carefully prior to assembly.
Thank you for purchasing this quality product. Check carefully for small parts which may
come loose during shipment.
Remove all components from pack and place top down on soft surface such as carpet or
cloth to prevent scratching the finish. Identify and count all parts as specified below.
It is recommended to use two or more persons during the assembly process.
ASSEMBLY INSTRUCTIONS
ITEM NO.: 93861 HEADBOARD, 4/6 UPH POSTER W/CRY
93852 RAILS, 3/3 - 4/6 POSTER BED
93863 FOOTBOARD, 4/6 POSTER W/SLATS
GROUP NO. : 93850 OLIVIA BR
2 PCS
4 PCS
7
8
9
1 PC
4 PCS
2 PCS
4 PCS
8 PCS
Center Support
Leg
Slat
Side Rail
Footboard
Crystal & Turning
UPH Headboard
Panel
Bun foot
Post (L & R)
Cross bar
1/4" Allen Key

***Caution: Please read all instructions carefully before starting the assembly process. These parts are
cumbersome and heavy. Therefore, two people are recommended in order to prevent personal injury
and insure the parts are not damaged during the assembly.
STEP 2:STEP 1:
Page: 2/3
STEP 4:STEP 3:
Step 1: Attach Cross bar (3) to Post (L&R) by using Flat
Washer (D), Spring Washer (C), Allen Bolt (B) and Allen Key
(A). Then attach Post (2) to H/B (1) by using Flat Washer (G),
Spring Washer (F), Allen Bolt (E) and Allen Key (A)
Made in Vietnam
Cleaning instructions: Clean using soft cloth
Step 4: Attach Crystal & Turning (4) to H/B (1) and F/B (5).
ASSEMBLY INSTRUCTIONS
ITEM NO.: 93861 HEADBOARD, 4/6 UPH POSTER W/CRY
93852 RAILS, 3/3 - 4/6 POSTER BED
93863 FOOTBOARD, 4/6 POSTER W/SLATS
GROUP NO. : 93850 OLIVIA BR
Step 2: Attach Bun foot (6) to Footboard (5)
Step 3: Attach Side rail (7) to H/B (1) and F/B (5) by using
Thread bolt (H), Curve Washer (J), Hex nut (I) and Open
Wrench (K).

***Caution: Please read all instructions carefully before starting the assembly process. These parts are
cumbersome and heavy. Therefore, two people are recommended in order to prevent personal injury
and insure the parts are not damaged during the assembly.
STEP 5:
Page: 3/3
STEP 6:
Step 5: Center Support Leg (9) to Slat (8).
Made in Vietnam
Cleaning instructions: Clean using soft cloth
9
Step 6: Attach Slat (8) to Side rail (7) by using Screw (H) and Screw - driver (not included).
9
ASSEMBLY INSTRUCTIONS
ITEM NO.: 93861 HEADBOARD, 4/6 UPH POSTER W/CRY
93852 RAILS, 3/3 - 4/6 POSTER BED
93863 FOOTBOARD, 4/6 POSTER W/SLATS
GROUP NO. : 93850 OLIVIA BR

Page: /3
PARTS LIST
No. Description Sketch Q'ty
1
2
3
4
5
1 PC
6
1 PC
HARDWARE LIST
Made in Vietnam
Cleaning instructions: Clean using soft cloth
Read instruction carefully prior to assembly.
Thank you for purchasing this quality product. Check carefully for small parts which may
come loose during shipment.
Remove all components from pack and place top down on soft surface such as carpet or
cloth to prevent scratching the finish. Identify and count all parts as specified below.
It is recommended to use two or more persons during the assembly process.
ASSEMBLY INSTRUCTIONS
ITEM NO.: 93851 HEADBOARD, 3/3 UPH POSTER W/CRY
93852 RAILS, 3/3 - 4/6 POSTER BED
93853 FOOTBOARD, 3/3 POSTER W/SLATS
GROUP NO. : 93850 OLIVIA BR
2 PCS
4 PCS
7
8
9
1 PC
4 PCS
2 PCS
4 PCS
8 PCS
Center Support
Leg
Slat
Side Rail
Footboard
Crystal & Turning
UPH Headboard
Panel
Bun foot
Post (L & R)
Cross bar
1/4" Allen Key

***Caution: Please read all instructions carefully before starting the assembly process. These parts are
cumbersome and heavy. Therefore, two people are recommended in order to prevent personal injury
and insure the parts are not damaged during the assembly.
STEP 2:STEP 1:
Page: 2/3
STEP 4:STEP 3:
Step 1: Attach Cross bar (3) to Post (L&R) by using Flat
Washer (D), Spring Washer (C), Allen Bolt (B) and Allen Key
(A). Then attach Post (2) to H/B (1) by using Flat Washer (G),
Spring Washer (F), Allen Bolt (E) and Allen Key (A)
Made in Vietnam
Cleaning instructions: Clean using soft cloth
Step 4: Attach Crystal & Turning (4) to H/B (1) and F/B (5).
ASSEMBLY INSTRUCTIONS
ITEM NO.: 93852 RAILS, 3/3 - 4/6 POSTER BED
GROUP NO. : 93850 OLIVIA BR
Step 2: Attach Bun foot (6) to Footboard (5)
Step 3: Attach Side rail (7) to H/B (1) and F/B (5) by using
Thread bolt (H), Curve Washer (J), Hex nut (I) and Open
Wrench (K).
93851 HEADBOARD, 3/3 UPH POSTER W/CRY
93853 FOOTBOARD, 3/3 POSTER W/SLATS

***Caution: Please read all instructions carefully before starting the assembly process. These parts are
cumbersome and heavy. Therefore, two people are recommended in order to prevent personal injury
and insure the parts are not damaged during the assembly.
STEP 5:
Page: 3/3
STEP 6:
Step 5: Center Support Leg (9) to Slat (8).
Made in Vietnam
Cleaning instructions: Clean using soft cloth
9
Step 6: Attach Slat (8) to Side rail (7) by using Screw (H) and Screw - driver (not included).
9
ASSEMBLY INSTRUCTIONS
ITEM NO.: 93852 RAILS, 3/3 - 4/6 POSTER BED
GROUP NO. : 93850 OLIVIA BR
93851 HEADBOARD, 3/3 UPH POSTER W/CRY
93853 FOOTBOARD, 3/3 POSTER W/SLATS

STANDARD
INSTRUCTIONS DE MONTAGE
GROUPE NUMÉRO : 93850 - OLIVIA BR
ARTICLE NUMÉRO : 93857 -TABLE DE CHEVET
Veuillez lire attentivement ces instructions avant le montage.
Merci d'avoir acheté ce produit de qualité. Veuillez vérifier soigneusement les petites pièces
qui auraient pu se déplacer lors du transport
Enlevez toutes les pièces de l'emballage et placez-les sur une surface qui n'égratignera pas le
fini, comme un tapis ou du tissu. Identifiez et comptez toutes les pièces énumérées ci-dessous.
Nous recommandons d'avoir deux personnes ou plus lors du montage.
LISTE DES PIÈCES
N°
Description
Schéma
Qté
1
Table de chevet
1 pièce
2
Pied arrondi
4 pièces
Instruction de nettoyage : Utiliser un chiffon
doux. Fabriqué au Vietnam Page : 1/2

ÉTAPE 1
Ouvrir le tiroir
inférieur.
Prendre
la boîte avec les
pieds arrondis.
ÉTAPE 2
ÉTAPE 3
Haut
STANDARD
INSTRUCTIONS DE MONTAGE
GROUPE NUMÉRO : 93850 - OLIVIA BR
ARTICLE NUMÉRO : 93857 - TABLE DE CHEVET
***Attention : Veuillez lire attentivement toutes les instructions avant le montage. Ces
pièces sont encombrantes et lourdes. Nous recommandons donc d'avoir 2 personnes ou plus
lors du montage pour prévenir les blessures corporelles et pour ne pas endommager les
pièces lors du montage.
ÉTAPE 2: Attacher le pied arrondi (2) à la table de
chevet (1).
ÉTAPE 3 : Attacher le crochet anti basculement à l'arrière de la table de chevet, au-dessus et à droite ou à
gauche.
Instructions de nettoyage : Utiliser un chiffon doux.
Fabriqué au Vietnam Page : 2/2

STANDARD
INSTRUCTIONS DE MONTAGE
GROUPE NUMÉRO : 93850 - OLIVIA BR
ARTICLE NUMÉRO : 93855 - COFFRE, TIROIR
Veuillez lire attentivement toutes les instructions avant le montage.
Merci d'avoir acheté ce produit de qualité. Veuillez vérifier soigneusement les petites pièces
qui auraient pu se déplacer lors du transport
Enlevez toutes les pièces de l'emballage et placez-les sur une surface qui n'égratignera pas le
fini, comme un tapis ou du tissu. Identifiez et comptez toutes les pièces énumérées ci-dessous.
Nous recommandons d'avoir deux personnes ou plus lors du montage.
LISTE DES PIÈCES
N°
Description
Schéma
Qté
1
Coffre, tiroir
1 pièce
2
Pied arrondi
4 pièces
Instructions de nettoyage : Utiliser un chiffon
doux. Fabriqué au Vietnam Page : 1/2

ÉTAPE 1
Ouvrir le tiroir
inférieur.
Prendre
la boîte avec les
pieds arrondis.
ÉTAPE 2
STANDARD
INSTRUCTIONS DE MONTAGE
GROUPE NUMÉRO : 93850 - OLIVIA BR
ARTICLE NUMÉRO : 93855 - COFFRE, TIROIR
***Attention : Veuillez lire attentivement toutes les instructions avant le montage. Ces
pièces sont encombrantes et lourdes. Nous recommandons donc d'avoir de 2 personnes ou
plus lors du montage pour prévenir les blessures corporelles et pour ne pas endommager les
pièces lors du montage.
Étape 2: Attacher les pieds arrondis (2) au coffre (1).
Étape 3 : Attacher le crochet anti basculement à l'arrière du coffre, au-dessus et à droite ou à gauche.
Instructions de nettoyage : Utiliser un chiffon doux.
Fabriqué au Vietnam Page : 2/2
ÉTAPE 3

LISTE DU MATERIEL
N°
Schéma
Description
Qté
A
Clé hexagonale ¼ po
1 pièce
B
Boulon hexagonal ¼ po
*38mm
8 pièces
C
Rondelle frein ¼ po
8 pièces
D
Rondelle plate ¼ po
8 pièces
LISTE DES PIÈCES
N°
Description
Schéma
Qté
1
Commode
1 pièce
2
Pied arrondi
4 pièces
3
Pied de soutien
1 pièce
4
Miroir
1 pièce
5
Support du miroir
2 pièces
STANDARD
INSTRUCTIONS DE MONTAGE
GROUPE NUMÉRO : 93850 - OLIVIA BR
ARTICLE NUMÉRO : 93859 - COMMODE
93858 - MIROIR
Veuillez lire attentivement toutes les instructions avant le montage.
Merci d'avoir acheté ce produit de qualité. Veuillez vérifier soigneusement les petites pièces
qui auraient pu se déplacer lors du transport
Enlevez toutes les pièces de l'emballage et placez-les sur une surface qui n'égratignera pas le
fini, comme un tapis ou du tissu. Identifiez et comptez toutes les pièces énumérées ci-dessous.
Nous recommandons d'avoir deux personnes ou plus lors du montage.
Instructions de nettoyage : Utiliser un chiffon
doux. Fabriqué au Vietnam Page : 1/3

ÉTAPE 1
Ouvrir le tiroir inférieur.
Prendre la boîte avec
les pieds arrondis.
ÉTAPE 2
STANDARD
INSTRUCTIONS DE MONTAGE
GROUPE NUMÉRO : 93850 - OLIVIA BR
ARTICLE NUMÉRO : 93859 - COMMODE
93858 - MIROIR
***Attention : Veuillez lire attentivement toutes les instructions avant le montage. Ces
pièces sont encombrantes et lourdes. Nous recommandons donc d'avoir de 2 personnes ou
plus lors du montage pour prévenir les blessures corporelles et pour ne pas endommager les
pièces lors du montage.
Étape 2 : Attacher les pieds arrondis (2) et le pied de soutien (3) à la commode (1).
Instructions de nettoyage : Utiliser un chiffon
doux. Fabriqué au Vietnam Page : 2/3

ÉTAPE 3
B C D
A
STANDARD
INSTRUCTIONS DE MONTAGE
GROUPE NUMÉRO : 93850 - OLIVIA BR
ARTICLE NUMÉRO : 93859 - COMMODE
93858 - MIROIR
***Attention : Veuillez lire attentivement toutes les instructions avant le montage. Ces
pièces sont encombrantes et lourdes. Nous recommandons donc d'avoir de 2 personnes ou
plus lors du montage pour prévenir les blessures corporelles et pour ne pas endommager les
pièces lors du montage.
Étape 3 : Attacher le support du miroir (5) à l'arrière de la commode (1) et du miroir (4) en utilisant
la rondelle plate (D), la rondelle frein (C), le boulon hexagonal (B) et la clé hexagonale (A).
Alignez les trous au support du miroir avec ceux qui sont pré-percés sur la commode et sur le
miroir.
Étape 4 : Attacher le crochet anti basculement à l'arrière de la commode, au-dessus et à droite ou à
gauche.
Instructions de nettoyage : Utiliser un chiffon doux.
Fabriqué au Vietnam Page : 3/3
ÉTAPE 4
This manual suits for next models
1
Table of contents
Languages:
Other Standard Furniture Indoor Furnishing manuals
Popular Indoor Furnishing manuals by other brands

Furniture of America
Furniture of America YNJ-2174C41 Assembly instructions

Broyhill
Broyhill GBO21-602-1 Assembly instructions

Habitat
Habitat Marel 817588 quick start guide

Argos
Argos PENTON 462/7757 Assembly instructions

Pessotto
Pessotto Aladino Elektra Assembly instructions

Sauder
Sauder Hammond 431249 manual