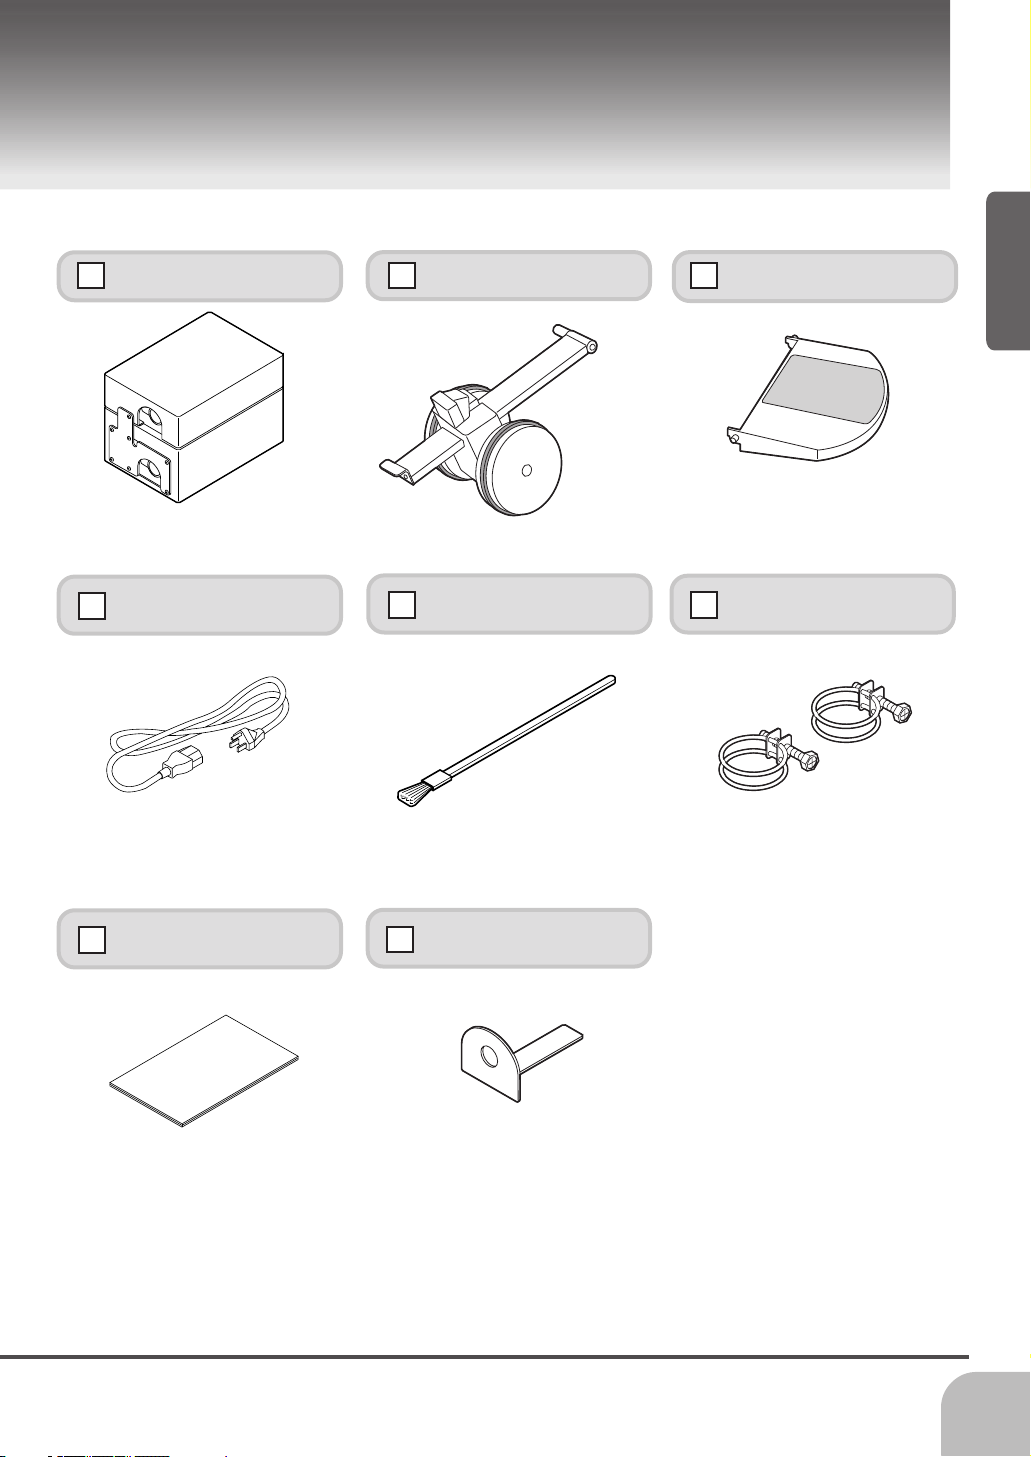
2
Folding Procedures
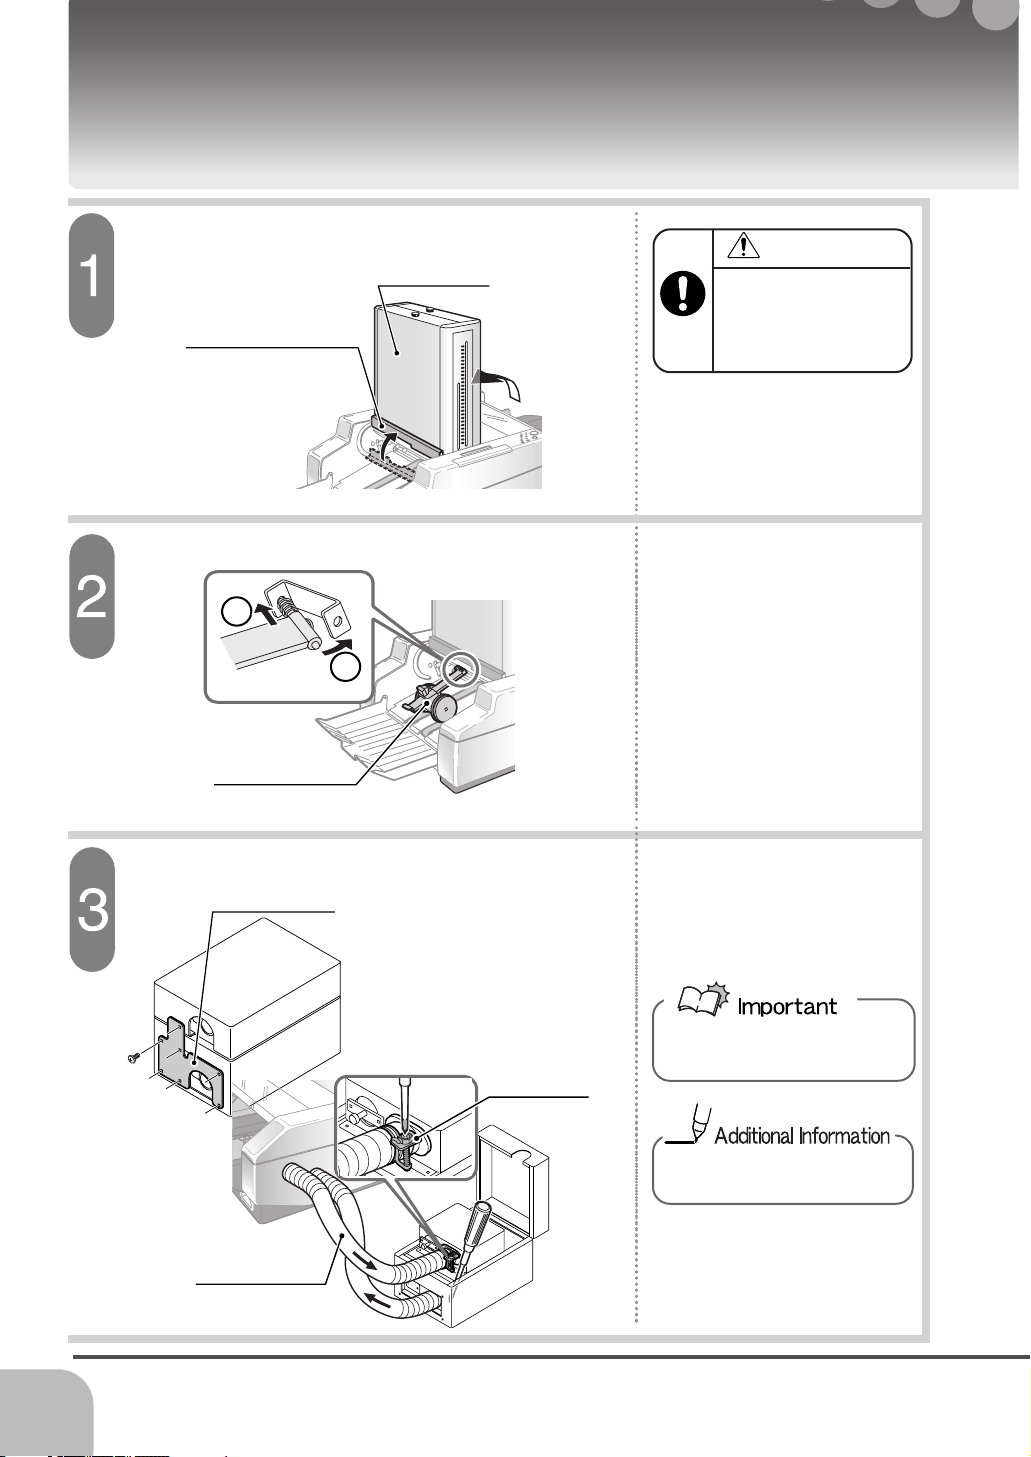
1
2
3
4
5
6
7
1514
ABC
PowerSwitch
Fold Pattern Selecting Button.
Sheets set as the left illustration are folded
as the illustration to the below.
When performing the short folding, set the
sheet oppositely as the illustration to the
lower left part shows.
When performing the opposite direction folding,
pile the sheet up sisde down.
Sheet can be piled mazimum 50 mm.
Tighten the sheet guide locking knobs after fitting the guides.
There are 6 folding patterns shown below.
Sheet Size Selecting Button
Sheet Guide Locking Knob
End Stopper
Delivery Roller
Test Button
Start/Stop Button
Sheet Guide
Short Fold
Single Fold
Letter Fold
Parallel Fold
Accordion Fold
Short Fold
Gate Fold
Single Fold
Letter Fold
Parallel Fold
Accordion Fold
Short Fold
Gate Fold
ABC
ABC
ABC
ABC
ABC
Check the folded sheet. If there is a
folding skew, refer to [Troubleshooting]
and perform the adjustment.
¥When folding the specific number of sheets,
refer to [Set the Number of Fold (Pre-set Function)].
¥To quit folding, press the start/stop button again.
Refer to page 22.
Refer to page 16.
ABC
ABC
Start / Stop
Test Feed
Sheet Size
Folding Pattern
81/2"X 11"
81/2"X 14"
51/2"X 81/2"
11"X 17"
Start / Stop
Test Feed
Sheet Size
Folding Pattern
8
1/2
"
X
11"
8
1/2
"
X
14"
5
1/2
"
X
8
1/2
"
11"
X
17"
Start / Stop
Test Feed
Sheet Size
Folding Pattern
8
1/2
"
X
11"
8
1/2
"
X
14"
5
1/2
"
X
8
1/2
"
11"
X
17"
Folding Standard Size Sheet Folding Standard Size Sheet
Let’s fold the standard size (11"x17", 9"x11", 8.5"x11", 5,5"x8.5") sheet.
Turn on the power switch. Set the end stopper.
Set the delivery Roller.
Press the test button.
Press the start/stop button and start folding.
Select the fold pattern and sheet size.
Loosen the sheet guide locking knobs
and place the sheets on the center.
Then fit the sheet guides to the sheet.
View of This Operation Manual
This mark indicates the title or
page to refer.
Indicates the trick of the operation.
This number indicates the
operating order.
Chapter Title
Topic Title
Explanation
Indicates the summary for
operation described in
this page.
This section explains how to read this operation manual, and how to search the necessary topic.
Indicates the items that you have to be careful during operation.
Indicates the useful informations.