manuals.online logo
Brands
  1. Home
  2. •
  3. Brands
  4. •
  5. Stanley
  6. •
  7. Air Compressor
  8. •
  9. Stanley AC6359 User manual

Stanley AC6359 User manual

02701 01/11
For service, spare parts or product information,
please contact Smart Marketing Group Pty. Ltd.
AUST. 1300 660 457 N.Z. 0800 474 876
MODEL NO. AC6359
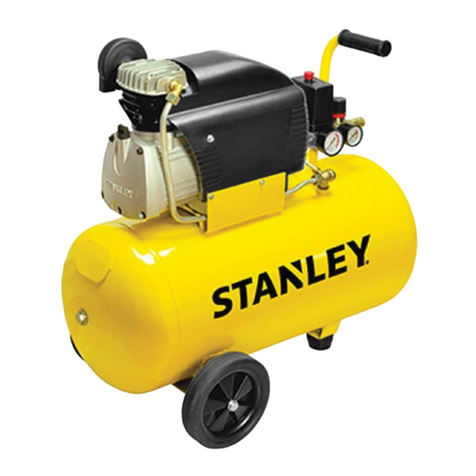
2.5HP 50LT Belt Drive Compressor
2
SUGGESTED APPLICATIONS
You may use most light duty air tools with this compressor. Some
examples of light duty tools are:
CLEANING
s %NGINECLEANINGGUN
s 3ANDBLASTERKIT
s !IRBLOWGUN
s !BRASIONKIT
TOOLS
s !IRHAMMER
s !IRDRILL
s )MPACTWRENCH
s 2ATCHETWRENCH
s 3ANDER
s $IE'RINDER
FASTENING
s &RAMINGGUN
s #BRADDER
s 4NAILER
PAINTING
s 'RAVITYFEEDSPRAYGUN
s ,OWPRESSURESPRAYGUN
s 4OUCHUPSPRAYGUN
Section Page
Contents 2
3UGGESTED!PPLICATIONS 2
)NTRODUCTION 3
Warranty 
'ENERAL3AFETY)NSTRUCTIONS 
%LECTRICAL)NFORMATION 8
3PECIlC3AFETY)NSTRUCTIONS 8
Components and Controls 9
/PERATING)NSTRUCTIONS 
Maintenance 
4ROUBLE3HOOTING 18
Parts Diagram 19
4ECHNICAL)NFORMATION 20
#ONTACT)NFORMATION 20
CONTENTS
3
INTRODUCTION
Dear Customer,
Thank you for purchasing this compressor which has passed through
OUREXTENSIVEQUALITYASSURANCEPROCESSES%VERYCAREHASBEENTAKEN
to ensure that it reaches you in perfect condition. However, in the
UNLIKELYEVENTTHATYOUSHOULDEXPERIENCEAPROBLEMORIFYOUREQUIRE
any assistance please do not hesitate to contact us;
If you have a problem, call customer service do not
return this compressor to the place of purchase.
CUSTOMER SERVICE
Australia: 1300 660 457
New Zealand: 0800 474 876
Operating times: Monday – Friday
8.30am - 5.30 pm
!USTRALIAN%ASTERN3TANDARD4IME!%34
EXPRESS WARRANTY STATEMENT
COMPRESSOR GROUP - TRADE
You are not required to do anything to register your compressor
purchase. Please attach the purchase receipt to this manual and
ENSUREBOTHAREKEPTSAFE7EHOPEYOUENJOYYOURNEWCOMPRESSOR
ANDIFYOUHAVEANYPROBLEMSCALLCUSTOMERSERVICEONTHEABOVEPHONE
NUMBERS$ONOTRETURNTOPLACEOFPURCHASE
3MART-ARKETING'ROUP0TY,TD3-'WARRANTSTHATTHISCOMPRESSOR
WILLBEFREEFROMMANUFACTURINGFAULTSORDEFECTSFORMONTHSFROM
the date of purchase, providing original purchase receipt is kept and
SHOWNWHENNEEDEDANDISSUBJECTTOTHETERMSANDCONDITIONSBELOW
What is covered.
s-ANUFACTURINGFAULTORDEFECT
How to claim under this warranty.
s#ALLCUSTOMERSERVICEPHONENUMBERATTHETOP
s%NSUREYOUHAVETHEFOLLOWING/RIGINALPURCHASERECEIPT-ODELOF
COMPRESSOR3ERIALNUMBEROFCOMPRESSOR
s$ISCUSSTHEISSUE
s#USTOMERSERVICEWILLADVISEWHICHAUTHORISEDSERVICEAGENTTOTAKE
the compressor to provided the issue is a warranty one.
s4AKECOMPRESSORTOAUTHORISEDSERVICEAGENTFORREPAIR
What is not covered.
s$AMAGEORDETERIORATIONDUETOTRANSPORT
s$AMAGECAUSEDBYNEGLIGENCEMISUSEABUSEORACCIDENTOR
incorrect voltage and wattage.
s!NYCORROSIONORRUSTING
s$AMAGECAUSEDBYINCORRECTSETUPANDSTARTUP
s2EPLACEMENTPARTSDUETOGENERALWEARANDTEAR
s#OMPRESSORSWITHSERIALNUMBERDEFACEMENTMODIlCATIONOR
removal.
s#OMPRESSORSWHICHHAVEBEENSERVICEDBYOTHERTHANANAUTHORISED
SMG service agent.
s#OMPRESSORSWITHNOORIGINALPURCHASERECEIPT
s#OMPRESSORSWHICHHAVEBEENONSOLDNOTORIGINALPURCHASER
s$AMAGEDUETONONSERVICINGOFCOMPRESSORASISREQUIREDBYTHIS
manual.
s"LOCKAGESDAMAGECAUSEDBYDUSTDIRTSPIDERSWEBSORINSECTS
s$AMAGECAUSEDBYTHEINCORRECTlTTING
of accessories.
s$AMAGECAUSEDBYOVERLOADINGOVERWORKINGTHECOMPRESSOR
s$AMAGETOATTACHEDEQUIPMENTORTHIRDPARTYACCESSORIES
s$AMAGECAUSEDBYATTACHEDEQUIPMENTORTHIRDPARTYACCESSORIES
s,OANUNITWHILSTWARRANTYSERVICINGISCARRIEDOUT
s,OSSOFINCOMEDUETOWARRANTYSERVICING

!SSOONASYOUHAVEPURCHASEDTHEAIRCOMPRESSORWERECOMMEND
that you check to make sure it is intact and that you read the operating
INSTRUCTIONSCAREFULLYBEFOREUSINGIT4HEPURCHASERECEIPTFORTHIS
PRODUCTISTOBERETAINEDANDMUSTBEPRESENTEDIFMAKINGACLAIM
UNDERTHETERMSOFTHE3MART-ARKETING'ROUP3-'WARRANTY"ANK
ACCOUNTSTATEMENTSARENOTACCEPTABLEFORPROOFOFPURCHASE
4HEWARRANTYWILLUNDERNOCIRCUMSTANCESEXTENDTOREIMBURSEMENT
or payment of damages, whether direct, indirect or consequential
or loss of income. The warranty is void if there is evidence the air
COMPRESSORSHASBEENMODIlEDORTAMPEREDWITHINANYWAYORUSED
with unauthorised accessories without our consent.
3-'DECLINESANYRESPONSIBILITYORLIABILITYWHATSOEVERARISING
FROMMISUSEORABUSENEGLIGENTHANDLINGOFTHEAIRCOMPRESSORSOR
IFTHEPRODUCTHASNOTBEENINSTALLEDORFAILURETOCOMPLYWITHTHE
relevant safety, operating, setting and maintenance instructions
SEEFURTHERINTHISMANUAL
!NYITEMSENTFREIGHTCOLLECTFORREPAIRWILLBEREFUSED7ARRANTY
repairs are free of charge, provided the appliance is delivered
to our service department or authorised service agent. The air
COMPRESSORWILLNEEDTOBERETURNEDADEQUATELYPROTECTEDINA
BOX4RANSITDAMAGEISRESPONSIBILITYOFTHEOWNER!SSISTANCE
UNDERTHEWARRANTYWILLONLYBEMADEAVAILABLEIFTHEREQUESTIS
MADETOOURCUSTOMERSERVICETEAMONTHECONTACTNUMBERSLISTED
BELOWANDPROOFOFPURCHASEISPROVIDED
This is a repair only warranty you will need to take the air compressor
to the authorised service agent after contacting our customer service
centre.
$AMAGECAUSEDBYTHIRDPARTYACCESSORIESISNOTCOVEREDUNDERTHIS
warranty.
Damage caused to attached equipment or third party accessories
WILLNOTBECOVEREDUNDERTHISWARRANTY
2USTANDCORROSIONARENOTCOVEREDUNDERTHISWARRANTY#OSTOFALOAN
compressor is not covered under the warranty. Loss of income is not
covered under the warranty.
)FAWARRANTYFAULTISFOUNDTHEFREIGHTCOSTWILLBECREDITEDTO
THEOWNER"LOCKAGESCAUSEDBYSPIDERWEBSINSECTSDIRTOR
ACCUMULATEDDUSTISNOTCOVEREDBYWARRANTY3-'RESERVESTHE
right to replace or repair the appliance within the warranty period.
0ARTSFOUNDTOBEDEFECTIVEDUETOAMANUFACTURINGDEFAULTWILLBE
replaced free of charge.
)NTHEEVENTOF3-'CHOOSINGTOREPLACETHEAPPLIANCETHEWARRANTY
WILLEXPIREATTHEORIGINALDATEOFPURCHASE)FNOWARRANTYFAULTIS
FOUNDTHEOWNERWILLBEADVISEDANDTHEPRODUCTWILLBERETURNEDAND
ANYCOSTSASSOCIATEDWITHTHESERVICEWILLBECHARGEDTOTHEOWNER
)N!USTRALIATHIS3-'WARRANTYISINADDITIONTOTHECONDITIONSAND
GUARANTEESWHICHAREMANDATORYASIMPLIEDBYTHE4RADE0RACTICES!CT
AND3TATEAND4ERRITORYLEGISLATION
)N.EW:EALANDTHIS3-'WARRANTYISINADDITIONTOTHECONDITIONS
ANDGUARANTEESWHICHAREMANDATORYASIMPLIEDBYTHE.EW:EALAND
#ONSUMER'UARANTEE!CT
For service, spare parts or product information please contact customer
service:
!USTRALIA
.EW:EALAND
COMPLETE WARRANTY STATEMENT – COMPRESSOR GROUP
5
LUBRICATION OF COMPRESSOR
9OURCOMPRESSORISOILlLLED$ONOTTIPTOUNPACKORASSEMBLE#HECK
the oil level to ensure the level is to the top of the red dot on the sight
glass; refer to page 10 for complete details and diagram. Failure to
DOTHISMAYRESULTINDAMAGETOTHEAIRCOMPRESSORANDORINJURYTO
the user.
ASSEMBLY
4HISCOMPRESSOR-534BEFULLYASSEMBLEDBYYOUPRIORTOUSE&AILURE
TODOSOWILLRESULTINTHEWARRANTYBEING6/)$&AILURETOFULLY
ASSEMBLETHISCOMPRESSORMAYALSORESULTINPERSONALINJURY
SAFETY
.OTE4HISCOMPRESSORHASAMAXIMUMOPERATINGPRESSUREOF
BAR!LWAYSREGULATETHEOUTLETAIRPRESSURETOMATCHYOURAIRTOOLS
operating pressure noted in you air tools instructions.
"EFOREATTEMPTINGTOOPERATETHISAIRCOMPRESSORTHEFOLLOWINGBASIC
SAFETYPRECAUTIONSSHOULDBETAKENTOREDUCETHERISKOFlREELECTRIC
SHOCKANDPERSONALINJURY)TISIMPORTANTTOREADTHEINSTRUCTION
manual and to understand applications, limitations and potential
hazards associated with the air compressor. This air compressor is not
INTENDEDFORUSEBYPERSONSINCLUDINGCHILDRENWITHREDUCEDPHYSICAL
SENSORYORMENTALCAPABILITIESORLACKOFEXPERIENCEANDKNOWLEDGE
UNLESSTHEYHAVEBEENGIVENSUPERVISIONORINSTRUCTIONCONCERNINGTHE
USEOFTHEAPPLIANCEBYAPERSONRESPONSIBLEFORTHEIRSAFETY
BEWARE OF CHILDREN AND PETS
#HILDRENANDPETSSHOULDBEKEPTOUTOFTHEWORKAREA#HILDREN
SHOULDNOTBEALLOWEDTOTOUCHOROPERATETHEAIRCOMPRESSOR
tools or extension cords. This air compressor is not designed for
USEBYYOUNGCHILDRENORINFIRMPERSONSWITHOUTSUPERVISION4HE
AIRCOMPRESSORANDTOOLSSHOULDBEKEPTOUTOFREACHOFCHILDREN
PREFERABLYSTOREDORLOCKEDINASECURECABINETORROOMWHENNOT
in use.
WORK AREA
7ORKAREASANDBENCHESSHOULDBEKEPTTIDY#LUTTEREDBENCHESAND
WORKAREASCANCAUSEACCIDENTS&LOORSSHOULDBEKEPTCLEANANDFREE
FROMRUBBISH3PECIALCARESHOULDBETAKENWHENTHEmOORISSLIPPERY
DUETOSAWDUSTORWAX!LWAYSLEAVESUFlCIENTDISTANCEATLEAST
METRESBETWEENTHEAIRCOMPRESSORANDTHEWORKAREAESPECIALLY
when using tools designed for sanding or spraying liquids.
WORK ENVIRONMENT
Do not expose your air compressor to rain or use in damp or wet
CONDITIONS+EEPTHEWORKAREAWELLLIT!LWAYSENSUREYOUR
COMPRESSORISLEVELANDSTABLE5SINGYOURCOMPRESSORONUNEVENOR
UNSTABLEGROUNDMAYCAUSEALACKOFLUBRICATIONANDTHEPUMPTOSEIZE
THISDAMAGEWILLNOTBECOVEREDUNDERWARRANTY
GUARD AGAINST ELECTRIC SHOCK
!VOIDBODYCONTACTWITHEARTHEDORGROUNDEDSURFACESEGPIPESAND
REFRIGERATORS
DO NOT FORCE AIR COMPRESSORS
4HEAIRCOMPRESSORWILLDOABETTERSAFERJOBANDGIVEYOUMUCHBETTER
service if it’s used at the duty cycle for which it was designed. The
DUTYCYCLEWILLONLYTAKEEFFECTAFTERTHEINITIALSTTANKlLLFORTHEDAY
This air compressors duty cycle is 75%. Duty cycle is the proportion of
time during which the air compressor is operating compared with not
OPERATING&OREXAMPLEADUTYCYCLECOULDMEANAFTERSECONDS
OFOPERATIONMOTORPUMPINGTHEAIRCOMPRESSORMUSTBELEFTFOR
seconds resting, motor not pumping. When the motor is pumping the
ATTACHEDAIRTOOLCANNOTBEUSED/NLYUSETHEATTACHEDAIRTOOLWHILE
the compressor is not pumping. Stop using the attached tool as soon
as the air compressor starts pumping.
USE THE RIGHT TOOL
3ELECTTHERIGHTTOOLFORTHEJOB$ONOTUSEATOOLFORAJOBFORWHICH
it was not designed. Do not force a small air compressor to do the
JOBOFAHEAVYnDUTYAIRCOMPRESSOR$ONOTUSETHEAIRCOMPRESSORFOR
purposes not intended.
6
DO NOT ABUSE THE POWER CORD
.EVERYANKORPULLONTHEPOWERCORDTODISCONNECTITFROMTHEMAINS
SUPPLYSOCKET.EVERCARRYORPULLYOURAIRCOMPRESSORBYITSPOWER
cord. Keep the power cord away from heat, oil, solvents and sharp
EDGES2EGULARLYCHECKTHEPLUGANDCORDANDIFDAMAGEDHAVEIT
REPLACEDBYANAUTHORISEDSERVICEFACILITY
EXTENSION CORDS AND REELS
4HISAIRCOMPRESSOR-534BEPLUGGEDDIRECTLYINTOA6!#WALL
socket.
4HISAIRCOMPRESSORIS./4DESIGNEDTOBERUNOFFANEXTENSION
CORDLEAD)FYOUNEEDEXTRADISTANCEDO./4USEANEXTENSION
CORD53%!,/.'%2!)2(/3%
The use of extension cords may cause power voltage loss and will
RESULTINDAMAGETOTHEMOTOR4HISWILL./4BECOVEREDUNDER
warranty.
SECURE THE WORK PIECE
7HENEVERPOSSIBLESECURETHEWORKPIECEUSINGCLAMPSORAVICE)TISSAFER
THANUSINGYOURHANDSORFEETANDLEAVESBOTHHANDSFREETOCONTROLTHETOOL
HOT COMPONENTS
"EWAREMANYOFTHECOMPONENTSWILLGETHOTDURINGUSE.EVERTOUCH
ANYOFTHEMETALPIPESPUMPORMOTORASTHESEMAYBURN
MAINTAIN YOUR AIR COMPRESSOR WITH
CARE
&OLLOWTHEINSTRUCTIONSFORLUBRICATINGANDCHANGINGACCESSORIES
Check the air compressor power cord periodically and if damaged have
ITREPLACEDBYANAUTHORISEDSERVICEFACILITY+EEPHANDLESCLEANDRY
ANDFREEFROMOILANDGREASE%NSURETHATVENTILATIONSLOTSAREKEPT
clean and free from dust at all times. Blocked ventilation slots or air
filter can cause overheating and damage to the motor and this will not
BECOVEREDUNDERWARRANTY
DISCONNECT AIR COMPRESSOR
%NSURETHATTHEAIRCOMPRESSORISDISCONNECTEDFROMTHEMAINSSUPPLY
WHENNOTINUSEBEFORESERVICINGLUBRICATINGMAKINGADJUSTMENTSOR
when changing any accessories.
REMOVE ADJUSTING KEYS
AND WRENCHES
&ORMTHEHABITOFALWAYSCHECKINGTOSEETHATANYADJUSTINGKEYSOR
WRENCHESHAVEBEENREMOVEDFROMTHEAIRCOMPRESSORORATTACHEDAIR
TOOLSBEFOREOPERATING
AVOID UNINTENTIONAL STARTING
%NSURETHATTHESWITCHISINTHE@/&&POSITIONBEFOREPLUGGINGTHE
air compressor into the mains supply.
PROTECT FURNISHINGS
)FUSINGTHEAIRCOMPRESSORINSIDEYOURHOUSEPROTECTFURNISHINGS
ANDFLOORSWITHASUITABLEDUSTSHEET
FIRE PRECAUTIONS
When using the air compressor inside your house or workshop
GENERALlREPRECAUTIONSSHOULDBEOBSERVED!SAPRECAUTIONITIS
RECOMMENDEDTHATANEXPERTISCONSULTEDONOBTAININGANDUSINGA
SUITABLElREEXTINGUISHER
CLEANING YOUR AIR COMPRESSOR
!LWAYSDISCONNECTYOURAIRCOMPRESSORFROMTHEMAINSPOWER
SUPPLYBEFOREYOUCOMMENCECLEANING!LWAYSENSURETHATYOURAIR
COMPRESSORHASCOOLEDABOUTONEHOURBEFORECLEANINGANDSTORING
7HENCLEANINGYOURAIRCOMPRESSORUSEONLYADAMPSOFTCLOTH.%6%2
use liquid or solvents of any type.
7
WARNING
$ONOTATTEMPTTOMODIFYTHEAIRCOMPRESSORINANYWAYTHISWILL6/)$YOURWARRANTY
The use of any attachment or accessory other than those recommended in this instruction manual could result in damage to the air
COMPRESSORANDCOULDCAUSEINJURIESTOTHEOPERATOR
4HISELECTRICAIRCOMPRESSORCOMPLIESWITH!USTRALIAN.EW:EALANDAND)NTERNATIONALSTANDARDSANDSAFETYREQUIREMENTS2EPAIRSSHOULD
ONLYBECARRIEDOUTBYQUALIlEDPERSONSUSINGORIGINALSPAREPARTS&AILURETODOSOMAYRESULTINCONSIDERABLEDANGERTOTHEOPERATOR
CHECK DAMAGED PARTS
"EFOREUSINGTHEAIRCOMPRESSORITSHOULDBECAREFULLYCHECKEDTO
determine that it will operate properly and perform its intended
function.
Check for the correct alignment of moving parts ensuring that they do
NOTBIND#HECKFORBROKENORMISSINGPARTSANDHAVETHEMREPLACED
or repaired at an authorised service facility. Check any other condition
THATMAYAFFECTTHEOPERATIONOFTHEAIRCOMPRESSOR!GUARDORANY
OTHERPARTOFTHEAIRCOMPRESSORTHATISDAMAGEDSHOULDBEPROPERLY
REPAIREDORREPLACEDBYANAUTHORISEDSERVICEFACILITYUNLESSOTHERWISE
indicated in this instruction manual.
!NYSWITCHBUTTONTHATDOESNOTOPERATECORRECTLYMUSTBEREPLACEDBY
an authorised service facility.
$/./4USETHEAIRCOMPRESSORIFTHE@/./&&BUTTONDOESNOT
TURNTHEAIRCOMPRESSOR@/.AND@/&&
PERSONAL SAFETY
Clothing
$ONOTWEARLOOSECLOTHINGJEWELLERYORANYTHINGTHATCOULDGETCAUGHT
in moving machinery.
Hair
,ONGHAIRSHOULDBETIEDBACKORCONTAINEDINAPROTECTIVECOVERING
Eye Protection
4HEUSEOFSAFETYGOGGLESISHIGHLYRECOMMENDEDNORMALGLASSES
ARENOTSUFlCIENTFOREYEPROTECTIONWHENUSINGANAIRCOMPRESSOR
Prescription glasses do not have safety lenses.
Footwear
7HERETHEREISTHERISKOFHEAVYOBJECTSORIFTHEREISARISKOFSLIPPING
ONWETORSLIPPERYmOORSSUITABLENONnSLIPSAFETYFOOTWEARSHOULDBE
worn. Protect your feet from dropping accidents.
Ear Protection
The use of ear protection is highly recommended when using air
compressors. The continual noise may damage your ears.
Respiratory Protection
When operating any machinery that creates dust or when spray
PAINTINGANAPPROVEDDUSTlLTERMASKMUSTBEWORN7HEN
MACHININGCONCRETEMANMADElBRESESPECIALLY-$&-EDIUM
$ENSITY&IBREBOARDTHERESINUSEDINTHESEMATERIALSCANBE
hazardous to your health. Use an approved face mask with
REPLACEABLElLTER
Do Not Over Reach
$ONOTOVERREACH+EEPAPROPERFOOTINGANDMAINTAINYOURBALANCEAT
ALLTIMES!VOIDUSINGABNORMALSTANCESANDAWKWARDBODYPOSITIONS
Stay Alert
Watch what you are doing, use common sense, and never operate an
air compressor when you are tired, drinking alcohol, taking drugs or if
taking medication that causes drowsiness.
8
SPECIFIC SAFETY INSTRUCTIONS
Warning! Do not use the air compressor in areas where there is a risk
OFEXPLOSIONORlREFROMCOMBUSTIBLEMATERIALS4HESPARKSGENERATED
FROMCERTAINTOOLSATTACHEDTOAIRCOMPRESSORCANIGNITECOMBUSTIBLE
MATERIALSASWELLASmAMMABLELIQUIDSPAINTVARNISHPETROL
mAMMABLEGASESANDDUSTOFANEXPLOSIVENATURE!SAPRECAUTIONITIS
RECOMMENDEDTHATYOUCONSULTANEXPERTONASUITABLElREEXTINGUISHER
and its use.
• Do not attempt to modify the air compressor, guards or the
supplied accessories in any way.
• Air compressors are designed for intermittent operation.
Ideally a 75% duty cycle (Meaning 45 seconds ON motor pumping
and 15 seconds OFF, motor not pumping). When the motor is
pumping the attached air tool can not be used. Only use the
attached air tool while the compressor is not pumping.
• Stop using the attached tool as soon as the air compressor starts
pumping.
• Always check the oil level before use. The oil level should be
above the red dot on the sight glass.
• Fully assemble compressor before use.
• Always ensure your compressor is level and stable. Using your
compressor on uneven or unstable ground may cause a lack
of lubrication and the pump to seize, this damage will not be
covered under warranty.
• Never run this compressor without the wheels and/or rubber
stoppers being correctly fitted.
• Never use an extension cord with this compressor always use a
longer air hose.
• Never connect to a generator which does not produce sufficient
power, at least 5500W and has pure sine wave power output.
• This compressor has a maximum operating pressure of 10 bar.
Always regulate the outlet pressure to match your air tools
operating pressure noted in your air tools instructions.
s!IRCOMPRESSORSARENOTDESIGNEDFORCONTINUOUSRUNNING
s!VOIDTOUCHINGTHEPUMPAREAASITCANBECOMEVERYHOTANDMAY
BURN
s%NSURETHATTHEAIRCOMPRESSORISDISCONNECTEDFROMTHEMAINS
SUPPLYWHENNOTINUSEBEFORESERVICINGLUBRICATINGMAKING
changes and when changing attachments such as air hoses / tools.
s!LWAYSUSETHECORRECTTYPEOFTOOLFORTHEOPERATIONTOBECARRIED
out.
s.EVERUSETHEAIRCOMPRESSORIFANYPARTOFTHEUNITISDAMAGED
!LWAYSHAVETHEAIRCOMPRESSORSERVICEDBYANAUTHORISEDSERVICE
agent.
s!LWAYSWEARSAFETYEYEEARANDRESPIRATORYPROTECTIONWHEN
operating the air compressor.
s!LLOWTHETANKTOCOMPLETELYlLLBEFOREUSINGTHEAIRCOMPRESSOR
s)FTHEAIRCOMPRESSORMAKESANUNFAMILIARSOUNDORVIBRATES
EXCESSIVELYSWITCHTHEAIRCOMPRESSOR@/&&IMMEDIATELYAND
DISCONNECTFROMTHEMAINSPOWERSUPPLY)NVESTIGATETHEPOSSIBLE
cause or consult your authorised service facility.
s!LWAYSMOVETHEAIRCOMPRESSORUSINGTHEHANDLEANDWHEELS
s!LWAYSUSETHEAIRCOMPRESSORONSTABLEGROUND
s4HISAIRCOMPRESSORISDESIGNEDTOCOMPRESSNORMALAIR.EVERUSE
to compress any other types of gases.
s.EVERDIRECTTHEJETOFAIROROTHERLIQUIDSGASESTOWARDSYOURBODY
other persons or animals.
s.EVERDIRECTTHEJETOFAIROROTHERLIQUIDSGASESTOWARDSTHISAIR
compressor.
s4HISAIRCOMPRESSORISNOTSUITABLEFORPHARMACEUTICALFOODOR
sanitary purposes.
s4HISAIRCOMPRESSORISNOTTOBEUSEDTOFORlLLINGSCUBAOROXYGENAIR
BOTTLESORTANKS
s!LWAYSFOLLOWTHEINSTRUCTIONSRELATINGTOTHETOOLSATTACHEDTOTHIS
air compressor.
ELECTRICAL DATA
IMPORTANT
4HISAIRCOMPRESSORISlTTEDWITHASEALEDELECTRICALCONNECTIONPLUGTHATISCOMPATIBLEWITHTHEMAINSPOWERSUPPLYFOR!USTRALIA.EW
:EALANDANDMEETSTHEREQUIREMENTSOF!USTRALIAN3TANDARDS4HISAIRCOMPRESSORMUSTBECONNECTEDTOASUPPLYVOLTAGETHATISEQUALTO
THATSTATEDONTHERATINGLABEL)FTHEMAINSPOWERCONNECTIONPLUGORPOWERCORDBECOMESDAMAGEDITMUSTBEREPLACEDWITHACOMPLETE
ASSEMBLYTHATISIDENTICALTOTHEORIGINALANDTHISMUSTBEREPLACEDBYANAUTHORISEDSERVICECENTRE!LWAYSFOLLOWTHE!USTRALIAN.EW
:EALANDREQUIREMENTSFORCONNECTIONTOTHEMAINSSUPPLY)FINDOUBTALWAYSCONSULTAQUALIlEDELECTRICIAN
9
COMPONENTS AND CONTROLS
Pic. 1
1. Handle
 -OTORRESETBUTTON
3. Belt guard
 0RESSURESWITCH
 /N/FFBUTTON2EDBUTTON
 !IRlLTER
7. Pump
8. Sight glass
 /ILDRAINBOLT
10. Motor/Pump Deck
11. Tank
12. Wheel
 4ANKPRESSUREGAUGE3MALL
 2EGULATOR
 /UTLETPRESSUREGAUGE,ARGE
 !IROUTLETSOCKET.ITTOSTYLE
 4WINRUBBERSTOPPERS
18. Motor cover
19. Motor
20. Safety valve
PIC. 1
6
5
3
2
1
7
8
9
10
11
12 13 
6
17
19
18
20

5

15
16
10
OPERATING INSTRUCTIONS
Unpacking
#AREFULLYUNPACKYOURAIRCOMPRESSOR4HISAIRCOMPRESSORISBULKYAND
HEAVYTWOPERSONLIFTREQUIRED$ISPOSEOFALLPACKINGMATERIALINAN
ENVIRONMENTALLYRESPONSIBLEMANNER
Assembly
9OURAIRCOMPRESSORREQUIRESMINORASSEMBLYBEFOREINITIALOPERATION
#HECKTHATYOUHAVEALLREQUIREDCOMPONENTSREQUIREDFORASSEMBLYAND
initial use.
9OURCOMPRESSORISlLLEDWITHOILDONOTTIPTOASSEMBLE
Oil breather
4HISCOMPRESSORALREADYHASTHEOILBREATHERlTTED)TISCLOSESTTOTHE
pressure switch, this is also the oil fill.
Lubrication
Warning:9OURAIRCOMPRESSOR)3&),,%$WITH/),
To check the oil level:
 !LWAYSCHECKTHEOILLEVELWHENTHEAIRCOMPRESSORISONmATAND
level ground.
,OOKATTHESIGHTGLASSANDENSURETHEOILISABOVETHEREDDOTONTHE
SIGHTGLASSASPERTHEh/),,%6%,'!5'%vLABELSEE0ICAND0IC
To add oil, if required, additional oil not included:
 2EMOVEOILBREATHER
 !DDOIL3!%TOATLEASTTHETOPOFTHEREDDOT
SEE0IC
 /ILLEVELWILLTAKEABOUTMINUTETODRAINDOWN
and settle.
 #HECKOILLEVELINSIGHTGLASSSEE0IC
2ECHECKANDTOPUPIFREQUIREDUNTILLEVELISCORRECT
 2EPLACEOILBREATHER
WARNING
Do not attempt to operate this compressor until it is
FULLYASSEMBLED
$AMAGECAUSEDDUETOINCOMPLETEASSEMBLYWILLNOTBECOVERED
under warranty.
%NSURETHEAIRCOMPRESSORISDISCONNECTEDFROMTHEPOWER
SUPPLYBEFORECARRYINGOUTANYASSEMBLYMAINTENANCEOR
ADJUSTMENTSONTHEMACHINE
.EVERUNDERlLLOROVERlLLWITHOIL
PIC. 2
/ILBREATHER
PIC. 3
/ILLEVELSHOULDBE
to the top of the
red dot on the sight
glass
ASPERTHELABEL
/ILBREATHER
Oil sight glass
PIC. 4
11
PIC. 5
PIC. 6
PIC. 7
RUBBER STOPPER
4OATTACHTHERUBBERSTOPPERSTOTHEBRACKETLOCATEDONTHEBOTTOMOF
the tank;
1. Undo and remove the nut and star washer.
0USHTHROUGHTHEBRACKETANDREPLACETHESTARWASHERANDNUT
3. Tighten the nut, Pic. 5.
WHEELS
1. Undo and remove the nut and star washer.
0USHBOLTTHROUGHWHEELBRACKETANDREPLACETHESTARWASHER
3. Tighten the nut, Pic. 6.
Use 3 hex head screws to
ATTACHHANDLESONTHIS
side and 1 on other side.
HANDLE
1. Position handle under and inside the Motor/Pump
deck at the motor end.
2. Line up holes.
3. Secure with the three hex head screws, Pic. 7.
12
PIC. 8
AIR FILTER
!IRlLTERISFACTORYlTTED
To replace filter:
1. Carefully unscrew the screws inside the air filter.
 2EMOVEAIRlLTER
 2EPLACEWITHNEWAIRlLTER
 2EPLACEANDTIGHTENTHESCREWSTOSECURETHE
air filter . Do not over tighten the screws.
NOTE:$ONOT/6%24)'(4%.ASTHISMAYDAMAGETHEAIRlLTEROR
CYLINDERHEADWHICHWILL./4BECOVEREDUNDERWARRANTY
STARTING AND STOPPING
YOUR AIR COMPRESSOR
Pic. 9
./4%!LWAYSENSURETHATYOUPLUGYOURAIRCOMPRESSORINTOA
STANDARD6!#POWERPOINT.EVERUSEANEXTENSIONCORDASTHIS
can lead to a voltage drop which may cause power loss and over
heating. Use a longer air hose if you need to get closer to your work
area.
!LWAYSSTARTANDSTOPTHECOMPRESSORUSINGTHE
/./&&BUTTONONTHE0RESSURE3WITCH0IC)TEMANDAS
WELLAS0IC$AMAGECAUSEDBYNOTUSINGTHISSWITCHWILLNOT
BECOVEREDBYWARRANTY
4OTURNYOURAIRCOMPRESSOR/.
,IFTUPTHERED/./&&BUTTONONTOPOFTHE
pressure switch
To turn your air compressor OFF;
0USHDOWNTHERED/./&&BUTTONONTOPOFTHEPRESSURESWITCH
PIC. 9
0USHBUTTON
down for off
,IFTBUTTON
down for on
13
RUNNING IN YOUR NEW
AIR COMPRESSOR
Before running in ensure that the following has been
completed:
1. Oil level is correct, see page 10.
 4HEAIRCOMPRESSORHASBEENFULLYASSEMBLEDSEEPAGESn
Your new air compressor requires running in:
1. Plug the power cord into a standard
6!#POWERPOINT
2. Open the tank drain tap.
3. Start the air compressor using the
/./&&BUTTON
 2UNTHEAIRCOMPRESSORFORAPPROXIMATELY
1 minute.
4HISENSURESTHATTHEAIRCOMPRESSORISFULLYLUBRICATEDUNDERNOLOAD
!FTERTHEMINUTESTOPTHEAIRCOMPRESSORUSINGTHE
/./&&BUTTON!LLOWTOCOOLAPPROXIMATELYMINUTES2ECHECKTHE
OILLEVELANDTOPUPIFNEEDEDADDITIONALOIL3!%NOTINCLUDED
Before starting your air compressor again ensure that the
tank drain tap is closed.
USING THE AIR COMPRESSOR
Before starting, run through this simple list:
 /ILLEVELn#/22%#4TOPOFREDDOT
0LEASEREFERTODIAGRAM0ICPAGE
 $RAINTAPnOPENANDDRAINTANK
 $RAINTAPnCLOSEFULLY
 #HECKPOWERLEADFORANYDAMAGE)FDAMAGEDHAVEREPLACEDBY
an authorised service centre.
 0LUGAIRCOMPRESSORINTOASTANDARD6!MP
!#POWERPOINTANDTURN/.
 ,IFTTHEAIRCOMPRESSORBUTTONTOTURN/.
see page 12, Pic. 9.
 !LLOWTHEAIRCOMPRESSORTOlLLTHEAIRTANK
8. Turn the power point OFF and disconnect the power lead from the
power point.
9. Connect your air hose and air tools.
 2ECONNECTTOTHEPOWERLEADTOTHEPOWERPOINTANDTURN/.
 4URNYOURAIRCOMPRESSOR/.
12. Set the outlet air pressure to match your air tools requirement.
 /NCETURNEDANDYOUBEGINUSINGTHECONNECTEDAIRTOOLSTHE
air compressor will start and stop without warning. This is
CONTROLLEDBYTHEPRESSURESWITCH4HESEPRESSURESETTINGSARE
FACTORYSETANDSHOULDNOTBECHANGED
0UMPINGSTARTSATMINIMUM03)ANDSTOPSATMAXIMUM03)
/NCETHEINITIALPUMPUPSTAGEHASlNISHEDYOUCANADJUSTTHEOUTLET
air pressure to the tools recommended working pressure and open
the air tap fully.

PIC. 10
4HECONlGURATIONOFTOOLSANDACCESSORIESCANBEVARIEDTOSUITYOUR
PARTICULARREQUIREMENTS!BASICRECOMMENDEDSETUPISSHOWNIN
Pic.10
When you have finished using your air compressor follow these
simple steps:
1. Turn your air compressor OFF, using the
/./&&BUTTON
2. Turn the power point OFF and disconnect the
power lead.
3. Disconnect your air tools and air hose.
 #LEANYOURAIRHOSEANDAIRTOOLS
5. Store your air hose and air tools in a secure well ventilated
CABINET
6. Slowly open the tank drain tap, see page 16.
This allows excess air and moisture, water,
to vent.
7. Leave the tank drain tap open. This allows any moisture to drain
while the air compressor
is stored.
15
ADJUSTING THE PRESSURE
4OADJUSTTHEOUTLETAIRPRESSUREUSETHEORANGECOLOUREDREGULATOR
KNOBANDCHECKTHEPRESSUREONTHEOUTLETPRESSUREGAUGE0IC
)FTHEPRESSURENEEDSTOBELOWERTURNANTICLOCKWISE
)FTHEPRESSURENEEDSTOBEHIGHERTURNCLOCKWISE
Use the gauge to ensure you set the correct working pressure.
.OTE4HISCOMPRESSORHASAMAXIMUMPRESSUREOFBAR!LWAYS
regulate the air pressure to match your air tool. Different air tools
REQUIREDIFFERENTOPERATINGPRESSURES!LWAYSCHECKWITHTHETOOL
manufacturer if unsure.
SAFETY VALVE
Pic. 12
./4%7HENCHECKINGTHESAFETYVALVE!,7!93WEARSAFETYGLASSES
To check the operation of the safety valve the air tank will need to
BEFULL'ENTLYPULLTHERINGOUTWARDS4HISSHOULDRELEASEAIRUNDER
PRESSURE2ELEASETHERINGANDTHISSHOULDSTOPTHEAIROUTmOW
immediately.
)FTHESAFETYVALVEDOES./4WORKINTHISMANNER34/0THEAIR
compressor immediately and have the air compressor
CHECKEDSERVICEDBYANAUTHORISEDSERVICECENTRE
PIC. 11
PIC. 12
Tank
pressure
gauge
Safety valve.
Pull up to check
operation.
2EGULATOR
/N/FFBUTTON
.ITTOSTYLE
outlet socket
Outlet
pressure
gauge
Pressure
switch
PIC. 13
AIR FITTING
Pic. 13
4HISAIRCOMPRESSORISlTTEDWITHA@.ITTOSTYLE@AIRlTTING
To use:
1. Slide the outer collar down.
 0USHINTHEMALElTTINGNOTINCLUDED
 2ELEASETHECOLLAR
 &ULLYANDCOMPLETELYPUSHTHEMALElTTINGNOTINCLUDEDINTOTHE
female until it clicks.
.OTE4HISCOMPRESSORHASAMAXIMUMPRESSUREOFBAR!LWAYS
regulate the air pressure to match your air tool. Different air tools
REQUIREDIFFERENTOPERATINGPRESSURES!LWAYSCHECKWITHTHETOOL
manufacturer if unsure.
 3LIDEOUTERCOLLARBACK
0USHMALElTTINGINNOT
SUPPLIED
Push male fitting until outer
collar locates forward and
clicks.
16
PIC. 14
DRAIN TAP
Pic. 14
!FTERUSEOPENTHEDRAINTAPTODRAINEXCESSAIRANDANYMOISTURE4HE
excess air will also help purge the moisture. Leave the drain tap open
when air compressor is not in use, so any moisture can continue to
drain
To open the drain tap pull the lever down to vertical.
To seal the drain tap push the lever up to horizontal.
./4%2EMEMBERTOSEALTHEDRAINTAPBEFORESTARTINGTHECOMPRESSOR
BELT TENSION
Pic. 15
#ORRECTBELTTENSIONISPARAMOUNTTOASAFEANDRELIABLEAIRCOMPRESSOR
4OOTIGHTABELTCANCAUSEDAMAGETOBEARINGSANDPREMATUREMOTOR
FAILURE4HESEFAILURESWILLNOTBECOVEREDBYWARRANTY4OOLOOSE
ABELTCANCAUSEPOORPERFORMANCEANDEXCESSHEATDUETOSLIPPAGE
which can also lead to premature component failure. This will not
BECOVEREDBYWARRANTY4OCHECKTHEBELTTENSIONGENTLYPUSHDOWN
MIDWAYBETWEENTHETWOPULLEYSTHEBELTSHOULDONLYMOVEBETWEEN
MMnMM0IC)FTHEBELTMOVESMORETHATTHISAMOUNTTHEN
YOUWILLNEEDTOTIGHTENTHEBELT
4OADJUSTTHEBELTTENSIONFOLLOWTHESESIMPLESTEPS
 ,OOSENTHEMOTORBOLTS0IC
 3LIDETHEMOTORFORWARDORBACKWARDTOCORRECTPOSITION
 4IGHTENTHEMOTORBOLTS
 #HECKBELTTENSIONANDREPEATIFNEEDED
 )FUNCERTAINABOUTATTEMPTINGTHEABOVESTEPSPLEASE
consult an authorised service agent.
Drain Tap Sealed
/2
4OCLOSEANDSEALPUSHLEVERUP2IGHTORLEFT
To open and drain pull lever down
Drain tap opened unsealed
PIC. 15
MOTOR BOLTS
MM
17
BELT STRAIGHTNESS
Pic. 16
"ELTSTRAIGHTNESSISPARAMOUNTTOASAFEANDRELIABLEAIRCOMPRESSOR
4HEBELTSHOULDALWAYSRUNINASTRAIGHTLINEBETWEENTHETWO
PULLEYS)FTHEBELTISONANANGLETHISCOULDCAUSEEXCESSIVESTRAINAND
WEARONCOMPONENTS4HISWILLNOTBECOVEREDBYWARRANTY4HEBELT
SHOULDRUNPARALLELTOTHETWOPULLEYS)FNOTADJUST
4OADJUSTTHEBELTSTRAIGHTNESSFOLLOWTHESESIMPLESTEPS
 ,OOSENTHEPUMPBOLTS0IC
2. Slide the pump to the appropriate position.
 4IGHTENTHEPUMPBOLTS
 #HECKBELTSTRAIGHTNESSANDREPEATIFNEEDED
 #HECKBELTTENSIONANDCORRECTIFNECESSARY
PIC. 16
PUMP BOLTS
BELT REPLACEMENT
Pic. 17
4HEBELTWILLNEEDREPLACINGIFITHASBEENDAMAGEDWORNORITHAS
reached 250 hours of use.
4OREPLACETHEBELTFOLLOWTHESESTEPS
 5NDOANDREMOVETHEBELTGUARDSCREWSSEE0IC
 5NCLASPANDREMOVETHEFRONTOFTHEBELTGUARD
 ,OOSENTHEMOTORBOLTS0ICPAGE
 2EMOVETHEBELT
 #LEANBOTHPULLEYSWITHADRYSOFTCLOTH
 $/./453%ANYLUBRICANTSORSOLVENTSASTHISCAN
 DAMAGETHENEWBELTBYCAUSINGSLIPPAGE
 &ITNEWBELT
 3ETCORRECTBELTTENSIONSEEPAGE
 #HECKTHEBELTSTRAIGHTNESSANDTENSIONADJUST
if required, see page 16.
 2EPLACETHEFRONTOFTHEBELTGUARDBYCLICKINGIT
into place.
10. To secure fully replace then tighten the
 BELTGUARDSCREWS
4HEREPLACEMENTBELTISSIMILARTO"OSCH3TYLE!
PIC. 17
BELT GUARD SCREWS AND CLIPS
Loosen and remove these
screws.
/NCESCREWSHAVEBEENREMOVEDPUSHAND
unclasp these 8 clips
18
If your compressor does not start
s#HECKTHATYOUHAVEPLUGGEDTHEPOWERLEADINTOASTANDARD
6!MPPOWERPOINTANDTURNEDTHEBUTTON/.
s#HECKTHATYOUHAVETURNEDTHEAIRCOMPRESSOR
/./&&BUTTON/.
s4HEAIRTANKMAYBEFULL5SEYOURAIRTOOLANDTHEAIR
compressor should start when the pressure decreases to
03)
If your compressor does not build
up pressure
s #HECKTHATTHETANKDRAINTAPISSEALED
If your compressor smells like burnt oil
s #HECKTHEOILLEVELASITMAYBELOW
)FTHESETIPSDONOTWORKPLEASEHAVEYOURUNITCHECKEDBYAN
authorised service centre.
Call Smart Marketing Group for your closest centre,
Aust. 1300 660 457 N.Z. 0800 474 876.
TROUBLE SHOOTING
PIC. 18
MAINTENANCE
Daily
Before use
 3EALTHETANKDRAINTAPSEE0IC
 #HECKTHEOILLEVELSEEPAGE0IC
 #HECKSAFETYVALVEOPERATIONSEEPAGE0IC
 #HECKTHEBELTTENSION0IC0AGE-OVEMENTSHOULD
BEMM!DJUSTIFREQUIRED0AGE
 #HECKFORBELTSTRAIGHTNESS!DJUSTIFREQUIRED0AGE
After use
 /PENTHETANKDRAINTAPSEE0IC
2. Wipe down the air compressor.
3. Store safely and securely.
Every 50 Hours
 2EPLACETHEAIRlLTERREFERPAGE
2. Drain oil completely and replace with fresh oil
To drain:
A ,OOSENANDREMOVETHEDRAINBOLT0ICANDDRAINOILINTOA
FUNNELBOTTLEANDDISPOSEOFINANAPPROPRIATEMANNER
B /NCEDRAINEDREPLACEANDTIGHTENTHEDRAINBOLT
c. Wipe up any oil spills.
d. Fill up to the top red dot on the sight glass with fresh clean
OIL2EFERPAGEFORh4O!DD/ILIF2EQUIREDvDETAILS
2EFERTODIAGRAM0ICPAGE
./4%5SEOILTYPE3!%
 #HECKANDREPLACETHEBELTIFNECESSARY
2EMOVEOILDRAIN
BOLTANDDRAINUSED
oil into funnel.
2EPLACEAND
tighten oil drain
BOLT
19
21
32
42
59
67
58
66
65
64
62
50
94
47
43
70
68
69
PARTS DIAGRAM
Part Description Qty 3-'0ART.O
21 !IR&ILTER 1!#!&
Cylinder Head 2 !##(
Drain Tap 1 !#$4
%XHAUST%LBOW 1!#%%
 %XHAUST4UBE 1!#%4
32 Oil Breather 1 !#/"
 Oil Level Sight Glass 1 !#/,3'
/NE7AY6ALVE 1!#/76
58 .ITTOSTYLElTTING 2!#.3&
50 Output Pressure Gauge 1 !#/0'
Cast outlet tree 1 !##/54
 Pressure Switch 1 !#03
Part Description Qty 3-'0ART.O
 2UBBER3TOPPERWITH"OLT.UT 2!#23
 3AFETY0RESSURE6ALVE 1!#306
59 Tank Handle 1 !#4(
62 Tank Pressure Gauge 1 !#40'
5NLOADING4UBENYLON 1!#54
69 Wheel 2 !#7(
68,70 7HEEL"OLT.UT 2!#7("
Belt 1 !#"
Belt Guard 1 !#"'
67 Tank Bung 2 !#4"
Image may not match exactly. For reference only.
For any queries or assistance call
Customer Service
AUST. 1300 660 457
NZ 0800 474 876
Hours of operation:
-ONDAYTO&RIDAYAMPM!%34
Do not return to place of purchase.
+EEPYOURPURCHASERECEIPTTHISWILLBEREQUIREDTO
MAKEANYCLAIMSUNDERTHEMONTHWARRANTY
TECHNICAL INFORMATION
Specifications
!IR#OMPRESSOR !#
6OLTAGE 6!#^(Z
Motor %LECTRIC(P
Wattage 2200W
.O,OAD3PEED 20-
&REE!IR$ELIVERY&!$ 190 L per minute*
Tank Size 50 L
*

Other manuals for AC6359

1

Other Stanley Air Compressor manuals

Stanley AirPro 120 HRC120DS User manual

Stanley

Stanley AirPro 120 HRC120DS User manual

Stanley AC6511 User manual

Stanley

Stanley AC6511 User manual

Stanley N128677 User manual

Stanley

Stanley N128677 User manual

Stanley AIRPRO 120 CDC120SCA User manual

Stanley

Stanley AIRPRO 120 CDC120SCA User manual

Stanley DN 200-10-5 User manual

Stanley

Stanley DN 200-10-5 User manual

Stanley BA 550/11/200 User manual

Stanley

Stanley BA 550/11/200 User manual

Stanley DN 200/8/6 User manual

Stanley

Stanley DN 200/8/6 User manual

Stanley FATMAX FMXCMD152WE User manual

Stanley

Stanley FATMAX FMXCMD152WE User manual

Stanley FatMax FMFP12829 User manual

Stanley

Stanley FatMax FMFP12829 User manual

Stanley FATMAX FMFP70979 User manual

Stanley

Stanley FATMAX FMFP70979 User manual

Stanley AIRPRO 120 User manual

Stanley

Stanley AIRPRO 120 User manual

Stanley D 210/8/24S User manual

Stanley

Stanley D 210/8/24S User manual

Stanley AC6168 User manual

Stanley

Stanley AC6168 User manual

Stanley HY 227/10/5 User manual

Stanley

Stanley HY 227/10/5 User manual

Stanley Fatmax TAB 200/10/24V User manual

Stanley

Stanley Fatmax TAB 200/10/24V User manual

Stanley SXCMD15WE User manual

Stanley

Stanley SXCMD15WE User manual

Stanley 8216035SCR011 User manual

Stanley

Stanley 8216035SCR011 User manual

Stanley D 200/8/6 User manual

Stanley

Stanley D 200/8/6 User manual

Stanley D 200/10/24V User manual

Stanley

Stanley D 200/10/24V User manual

Stanley SXAC2550222 User manual

Stanley

Stanley SXAC2550222 User manual

Stanley Fatmax FMXCMS2020TE User manual

Stanley

Stanley Fatmax FMXCMS2020TE User manual

Stanley SXAC1521121 User manual

Stanley

Stanley SXAC1521121 User manual

Stanley DN55/8/5 User manual

Stanley

Stanley DN55/8/5 User manual

Stanley STFP00020 User manual

Stanley

Stanley STFP00020 User manual

Popular Air Compressor manuals by other brands

sunjoe iONAIR-CT Operator's manual

sunjoe

sunjoe iONAIR-CT Operator's manual

Power Fist 8825549 user manual

Power Fist

Power Fist 8825549 user manual

ALLPOWER 1/3HP 3 Gallon owner's manual

ALLPOWER

ALLPOWER 1/3HP 3 Gallon owner's manual

Airmax AMC062-1 instruction manual

Airmax

Airmax AMC062-1 instruction manual

EUROPRO 30+ user manual

EUROPRO

EUROPRO 30+ user manual

Airmax SW20 owner's manual

Airmax

Airmax SW20 owner's manual

Central Pneumatic 60637 Owner's manual & safety instructions

Central Pneumatic

Central Pneumatic 60637 Owner's manual & safety instructions

pilotair K17D Instructions and parts list

pilotair

pilotair K17D Instructions and parts list

pilotair K25PR Instructions and parts list

pilotair

pilotair K25PR Instructions and parts list

Firestone AIRIDE 2639 installation instructions

Firestone

Firestone AIRIDE 2639 installation instructions

pilotair K25 Instructions and parts list

pilotair

pilotair K25 Instructions and parts list

Central Pneumatic 67698 owner's manual

Central Pneumatic

Central Pneumatic 67698 owner's manual

IMG STAGE LINE MCL-204 instruction manual

IMG STAGE LINE

IMG STAGE LINE MCL-204 instruction manual

MasterFlow MF-1089 owner's manual

MasterFlow

MasterFlow MF-1089 owner's manual

Black Ridge BR1000 instruction manual

Black Ridge

Black Ridge BR1000 instruction manual

ALLPOWER APC4408 Operator's manual

ALLPOWER

ALLPOWER APC4408 Operator's manual

easymaxx 07703 manual

easymaxx

easymaxx 07703 manual

ALLPOWER APC4035 owner's manual

ALLPOWER

ALLPOWER APC4035 owner's manual

manuals.online logo
manuals.online logoBrands
  • About & Mission
  • Contact us
  • Privacy Policy
  • Terms and Conditions

Copyright 2025 Manuals.Online. All Rights Reserved.