manuals.online logo
Brands
  1. Home
  2. •
  3. Brands
  4. •
  5. Stanley
  6. •
  7. Laser Level
  8. •
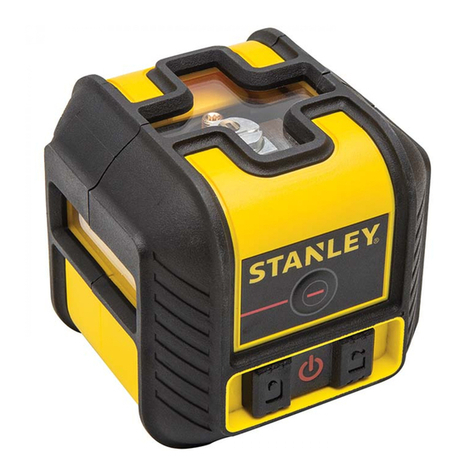
  9. Stanley STHT77504-1 User manual

Stanley STHT77504-1 User manual

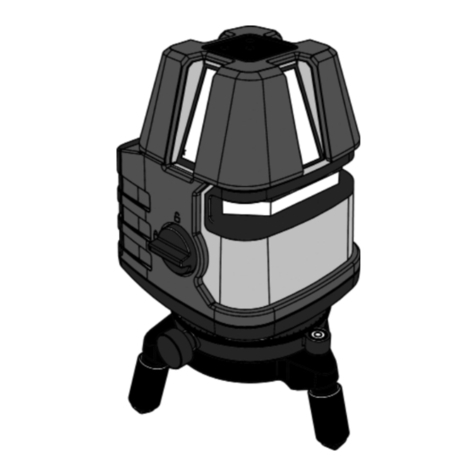
STHT77504-1 & STHT77594-1
Self-Leveling 360º Cross-line Laser
Please read these instructions before operating the product.
www.2helpU.com
DOC100270398
GB
NL
GR
I
FIN
HU
BG
LV
D
DK
CZ
ES
NO
SK
RO
LT
F
SE
RU
PT
PL
SI
EE
TR
HR
A123
4
x1
x2
x3
2
Figures
C
B
1/4-20
1
2
3
3
4
Figures
D
1
2
3
1
2
3
5
E
1
2
F
6
Figures
G
7
8
GB Contents
• Laser Information
• User Safety
• Battery Safety
• Installing AA Batteries
• Turning the Laser On
• Checking Laser Accuracy
• Using the Laser
• Maintenance
• Troubleshooting
• Service and Repairs
Laser Information
The STHT77504-1 and STHT77594-1 lasers are Class
2 laser products. The lasers are self-leveling laser
tools that can be used for horizontal (level) and vertical
(plumb) alignment projects.
User Safety
Safety Guidelines
DANGER: Indicates an imminently
hazardous situation which, if not avoided,
will result in death or serious injury.
WARNING: Indicates a potentially
hazardous situation which, if not avoided,
could result in death or serious injury.
CAUTION: Indicates a potentially hazardous
situation which, if not avoided, may result in
minor or moderate injury.
NOTICE: Indicates a practice not related to
personal injury which, if not avoided, may result in
property damage.
If you have any questions or comments about this
or any STANLEY® tool, go to
http://www.STANLEY.com.
WARNING:
Read and understand all instructions.
Failure to follow the warnings and
instructions in this manual may result in
serious personal injury.
SAVE THESE INSTRUCTIONS
WARNING:
Laser Radiation Exposure. Do not
disassemble or modify the laser level.
There are no user serviceable parts
inside. Serious eye injury could result.
WARNING:
Hazardous Radiation. Use of controls or
adjustments, or performance of procedures,
in hazardous radiation exposure.
Symbol Meaning
V Volts
mW
Laser Warning
nm Wavelength in nanometers
2 Class 2 Laser
Warning Labels
For your convenience and safety, the following
labels are on your laser.
WARNING: To reduce the risk of
injury, user must read instruction
manual.
WARNING: LASER RADIATION. DO
NOT STARE INTO BEAM. Class 2
Laser Product.
9
GB
• Do not operate the laser in explosive
atmospheres, such as in the presence of
This tool may
create sparks which may ignite the dust or fumes.
• Store an idle laser out of reach of children and
other untrained persons. Lasers are dangerous in
the hands of untrained users.
•
repair personnel. Service or maintenance
injury. To locate your nearest Stanley service center
go to http://www.2helpU.com.
• Do not use optical tools such as a telescope or
transit to view the laser beam. Serious eye injury
could result.
• Do not place the laser in a position which may
cause anyone to intentionally or unintentionally
stare into the laser beam. Serious eye injury
could result.
•
anyone’s eyes. Serious eye injury could result.
• Turn the laser off when it is not in use. Leaving
the laser on increases the risk of staring into the
laser beam.
• Do not modify the laser in any way. Modifying
the tool may result in hazardous laser radiation
exposure.
• Do not operate the laser around children or
allow children to operate the laser. Serious eye
injury may result.
• If labels
are removed, the user or others may inadvertently
expose themselves to radiation.
• Position the laser securely on a level surface. If
the laser falls, damage to the laser or serious injury
could result.
Personal Safety
• Stay alert, watch what you are doing, and use
common sense when operating the laser. Do not
use the laser when you are tired or under the
of inattention while operating the laser may result in
serious personal injury.
• Use personal protective equipment. Always wear
eye protection. Depending on the work conditions,
wearing protective equipment such as a dust
mask, non-skid safety shoes, hard hat, and hearing
protection will reduce personal injury.
Tool Use and Care
• Do not use the laser if the Power/Transport Lock
switch does not turn the laser on or off. Any tool that
cannot be controlled with the switch is dangerous
and must be repaired.
• Follow instructions in the Maintenance section of
this manual. Use of unauthorized parts or failure to
follow Maintenance instructions may create a risk
of electric shock or injury.
Battery Safety
WARNING:
Batteries can explode, or leak, and can
To reduce this risk:
• Carefully follow all instructions and warnings on the
battery label and package.
• Always insert batteries correctly with regard to
polarity
(+ and –), as marked on the battery and the
equipment.
• Do not short battery terminals.
• Do not charge disposable batteries.
• Do not mix old and new batteries. Replace all
batteries at the same time with new batteries of the
same brand and type.
• Remove dead batteries immediately and dispose of
per local codes.
•
• Keep batteries out of reach of children.
• Remove batteries when the device is not in use.

10
GB Installing AA Batteries
STHT77594-1 laser.
1.
2. On the bottom of the laser, lift up the latch to open
B 1).
3.
batteries, making sure to position the - and + ends of
B 2).
4.
B 3).
When
A 2.
Turning the Laser On
1. ,
º position).
2.
beam. Either:
•
left
the beams in manual mode A 1).
• Move the to the
right
beams in self-leveling mode A 3).
3. A 4
horizontal and vertical beams.
4. Check the laser beams.
• If the laser is tilted so much that it cannot
self-level
(> 4°), or the laser is not level in manual mode,
• the laser is not level
(or plumb) and should NOT BE USED for
repositioning the laser on a level surface.
5.
a project.
• This is the first time you are using the laser
temperatures).
• The laser has not been checked for accuracy
in a while.
• dropped.
Checking Laser Accuracy
prior
(in case the laser
any of the accuracy checks listed in this manual,
• closest
to the operating distance
the laser.
•
that is level in both directions.
• Mark the center of the laser beam.
Horizontal Beam - Scan Direction
Checking the horizontal scan calibration of the
9m) apart. It
is important to conduct a calibration check using
a distance no shorter than the distance of the
1.
D 1).
2. Move the
right A 3) to turn the laser ON in self-
.
3. (9m) apart along the laser beam,
mark a and b.
4. Turn the laser 180º.
11
GB
5.
a D 2).
6. b, mark c along the
laser beam D 3).
7. b and
c.
8.
b and c for the
a and b in
an authorized service center.
Distance Between
a and b
Allowable Distance
Between b and c
30 (9m)
40 (12m)
50 (15m)
Horizontal Beam - Pitch Direction
Checking the horizontal pitch calibration of the
(9m) long.
It is important to conduct a calibration check using
a distance no shorter than the distance of the
1.
E 1).
2. Move the
right A 3) to turn the laser ON in self-
3. (9m) apart along the laser beam,
mark a and
b.
4.
E 2).
5.
6.
b.
7. a, mark c along the
laser beam E 3).
8. a and c.
9.
a and c for the
a and b in
an authorized service center.
Distance Between
a and b
Allowable Distance
Between a and c
30 (9m)
40 (12m)
50 (15m)
Vertical Beam - Plumb
Checking the vertical (plumb) calibration of the
a substantial amount of vertical height available,
positioning the laser and another person near a ceiling
to mark the position of the beam. It is important to
conduct a calibration check using a distance no
1.
F 1).
2. Move the
right A 3) to turn the laser ON in self-
3. .
4.
5.
locations a, b, and c b
a and c.
6. Where the top of the laser beam appears at the
top of the door jamb, mark e.
7. Move the laser to the opposite side of the door
F 2).
8. a, b,
and c.
9. Where the top of the laser beam appears at the
top of the door jamb, mark f.
10. e and f.
12
GB 11.
e and f for the
corresponding Height D
the laser must be serviced at an authorized
service center.
Height D
Allowable Distance
Between e and f
6.56 (2.0m)
8.20 (2.5m)
9.84 (3.0m)
Using the Laser
Operating Tips
•
the laser.
•
• If the laser is ever dropped, check to make sure it
is still calibrated.
•
laser is self-leveling. Each laser is calibrated at
as long as it is positioned
•
Turning the Laser Off
A 2
Using the Laser with the Bracket
G
or pole.
1.
•
C), position the
G 1).
• G 2
bracket arm.
2. If needed, change the height or position of the laser
on the bracket.
• G 3) counter-
•
G 4). To change the bracket
from 90° to 180°, slide the bracket arm to the
top of the bracket and then flip the arm to the
G 5).
• G 3)
3. G 6) to hold the
laser in place on a stud, ceiling grid, or pole.
•
at the correct angle for attaching to the object.
G 7).
•
ceiling grid, or pole.
• G 8
until the clamp is tight around the object and the
bracket is held in place.
13
GB
Using the Laser with Other
Accessories
WARNING:
Since accessories other than those offered
by STANLEY have not been tested with this
laser, use of such accessories with this laser
could be hazardous.
Only use STANLEY® accessories that are
recommended for use with this model. Accessories
that may be suitable for one laser may create a risk of
injury when used with another laser.
C)
to accommodate current or future ®
accessories.
Other
http://
www.STANLEY.com.
Maintenance
•
•
•
•
• Calibration checks and other maintenance repairs
service centers.
Troubleshooting
The Laser Does Not Turn On
•
•
compartment.
•
or corrosion.
•
•
• When using rechargeable batteries, make sure the
•
•
operating temperature.
The Laser Beams Flash
When in self-leveling mode, the lasers are designed
to self-level up to an average of 4° in all directions. If
the laser is tilted so much that the internal mechanism
manual mode
level surface.
Laser Beams Will Not Stop Moving
The laser is a precision instrument. Therefore, if it is
not positioned on a stable (and motionless) surface,
14
GB Service and Repairs
Note: Disassembling the laser level will void all
warranties on the product.
authorized service centers. Service or maintenance
service
center, go to http://www.STANLEY.com.
Two Year Warranty
purchase to:
Stanley UK Sales Limited
Brackmills, Northampton NN4 7BW
or repair or alteration of this product not authorised
this product.
consumer purchasers of this product.
NOTE:
The customer is responsible for the correct use and
care of the instrument. Moreover, the customer is
calibration of the instrument.
15
GB
STHT77504-1 STHT77594-1
Light Source Laser diodes
Laser Wavelength 630 – 680 nm visible 510 – 530 nm visible
Operating Temperature
Storage Temperature
D
16
Inhalt
• Informationen zum Laser
• Benutzersicherheit
• Sicherer Umgang mit Akkus
• Einlegen von AA-Batterien
• Einschalten des Lasers
• Prüfen der Lasergenauigkeit
• Verwendung des Lasers
• Wartung
• Fehlerbehebung
• Service und Reparaturen
Informationen zum Laser
Die Laser STHT77504-1 und STHT77594-1
Benutzersicherheit
Sicherheitsrichtlinien
GEFAHR: Weist auf eine unmittelbar
drohende gefährliche Situation hin, die,
sofern nicht vermieden, zu tödlichen oder
schweren Verletzungen führt.
WARNUNG: Weist auf eine möglicherweise
gefährliche Situation hin, die, sofern nicht
vermieden, zu tödlichen oder schweren
Verletzungen führen kann.
VORSICHT: Weist auf eine möglicherweise
gefährliche Situation hin, die, sofern nicht
vermieden, zu leichten oder mittelschweren
Verletzungen führen kann.
HINWEIS: Weist auf ein Verhalten hin, das nichts
mit Verletzungen zu tun hat, aber, wenn es nicht
vermieden wird, zu Sachschäden führen kann.
Bei Fragen oder Anmerkungen zu diesem oder
anderen STANLEY®-Werkzeugen besuchen Sie
bitte http://www.STANLEY.com.
WARNUNG:
Lesen und verstehen Sie alle
Das Nichtbeachten von
Warnhinweisen und Anweisungen in dieser
Anleitung kann schweren Verletzungen führen.
BEWAHREN SIE DIESE ANWEISUNGEN AUF
WARNUNG:
sich keine zu wartenden Teile. Es können
WARNUNG:
Die Verwendung von
Steuerelementen oder Anpassungen sowie
die Durchführung von Verfahren, die nicht den
hierin beschriebenen entsprechen, kann zu
gefährlicher Strahlenbelastung führen.
Das Etikett auf Ihrem Laser kann die folgenden
Symbol Bedeutung
V Volt
mW
Laser-Warnung
nm
2
Warnetiketten
Für mehr Komfort und Sicherheit sind auf Ihrem
Laser folgende Etiketten angebracht.
WARNUNG: Zur Reduzierung der
Verletzungsgefahr muss jeder
Benutzer die Betriebsanleitung lesen.
WARNUNG: LASERSTRAHLUNG.
BLICKEN SIE NICHT IN DEN
STRAHL. Laserprodukt der Klasse 2.

Other manuals for STHT77504-1

1

This manual suits for next models

1

Other Stanley Laser Level manuals

Stanley TLM30 User manual

Stanley

Stanley TLM30 User manual

Stanley FatMax AL32 User manual

Stanley

Stanley FatMax AL32 User manual

Stanley STHT77148 User manual

Stanley

Stanley STHT77148 User manual

Stanley SLL360 User manual

Stanley

Stanley SLL360 User manual

Stanley STHT77504-1 User manual

Stanley

Stanley STHT77504-1 User manual

Stanley STHT77149 User manual

Stanley

Stanley STHT77149 User manual

Stanley STHT77502-1 User manual

Stanley

Stanley STHT77502-1 User manual

Stanley SCL-D User manual

Stanley

Stanley SCL-D User manual

Stanley STHT77611 User manual

Stanley

Stanley STHT77611 User manual

Stanley FatMax FMHT77598 User manual

Stanley

Stanley FatMax FMHT77598 User manual

Stanley SML User manual

Stanley

Stanley SML User manual

Stanley STHT77503-1 User manual

Stanley

Stanley STHT77503-1 User manual

Stanley FatMax FMHT1-77413 User manual

Stanley

Stanley FatMax FMHT1-77413 User manual

Stanley IntelliLaser Pro User manual

Stanley

Stanley IntelliLaser Pro User manual

Stanley STHT77512-1 User manual

Stanley

Stanley STHT77512-1 User manual

Stanley Fatmax Series User manual

Stanley

Stanley Fatmax Series User manual

Stanley SP1X User manual

Stanley

Stanley SP1X User manual

Stanley FatMaxSP5 User manual

Stanley

Stanley FatMaxSP5 User manual

Stanley FatMax PB2 User manual

Stanley

Stanley FatMax PB2 User manual

Stanley IntelliLaser Pro User manual

Stanley

Stanley IntelliLaser Pro User manual

Stanley FCL-G User manual

Stanley

Stanley FCL-G User manual

Stanley RL HW User manual

Stanley

Stanley RL HW User manual

Stanley STHT77502-1 User manual

Stanley

Stanley STHT77502-1 User manual

Stanley Fatmax FMHT1-77415 User manual

Stanley

Stanley Fatmax FMHT1-77415 User manual

Popular Laser Level manuals by other brands

NWI NRL800X manual

NWI

NWI NRL800X manual

Kapro Prolaser 883 GREEN user manual

Kapro

Kapro Prolaser 883 GREEN user manual

ADA INSTRUMENTS TOPLiner 3x360 operating instructions

ADA INSTRUMENTS

ADA INSTRUMENTS TOPLiner 3x360 operating instructions

Silverline 427637 quick start guide

Silverline

Silverline 427637 quick start guide

Bosch Professional GCL 2-50 Original instructions

Bosch

Bosch Professional GCL 2-50 Original instructions

Powerfix Profi PLW 3 A1 operating instructions

Powerfix Profi

Powerfix Profi PLW 3 A1 operating instructions

BELLOTA NIV20R user manual

BELLOTA

BELLOTA NIV20R user manual

Bauer 20204L-B Owner's manual & safety instructions

Bauer

Bauer 20204L-B Owner's manual & safety instructions

SMART MAX GEOSYSTEMS DE Series Repair manual

SMART MAX GEOSYSTEMS

SMART MAX GEOSYSTEMS DE Series Repair manual

Ryobi AirGrip ELL1001 user manual

Ryobi

Ryobi AirGrip ELL1001 user manual

Topcon LAZER ZONE PZL-1 instruction manual

Topcon

Topcon LAZER ZONE PZL-1 instruction manual

Leica 3D Disto user manual

Leica

Leica 3D Disto user manual

LaserLiner MasterCross-Laser 2 manual

LaserLiner

LaserLiner MasterCross-Laser 2 manual

Black & Decker Bullseye BDL100S instruction manual

Black & Decker

Black & Decker Bullseye BDL100S instruction manual

Johnson Level & Tool 40-6560 instruction manual

Johnson Level & Tool

Johnson Level & Tool 40-6560 instruction manual

PLS PLS-24 Series user manual

PLS

PLS PLS-24 Series user manual

Leica Rod Eye Basic user manual

Leica

Leica Rod Eye Basic user manual

Bosch PLR 25 manual

Bosch

Bosch PLR 25 manual

manuals.online logo
manuals.online logoBrands
  • About & Mission
  • Contact us
  • Privacy Policy
  • Terms and Conditions

Copyright 2025 Manuals.Online. All Rights Reserved.