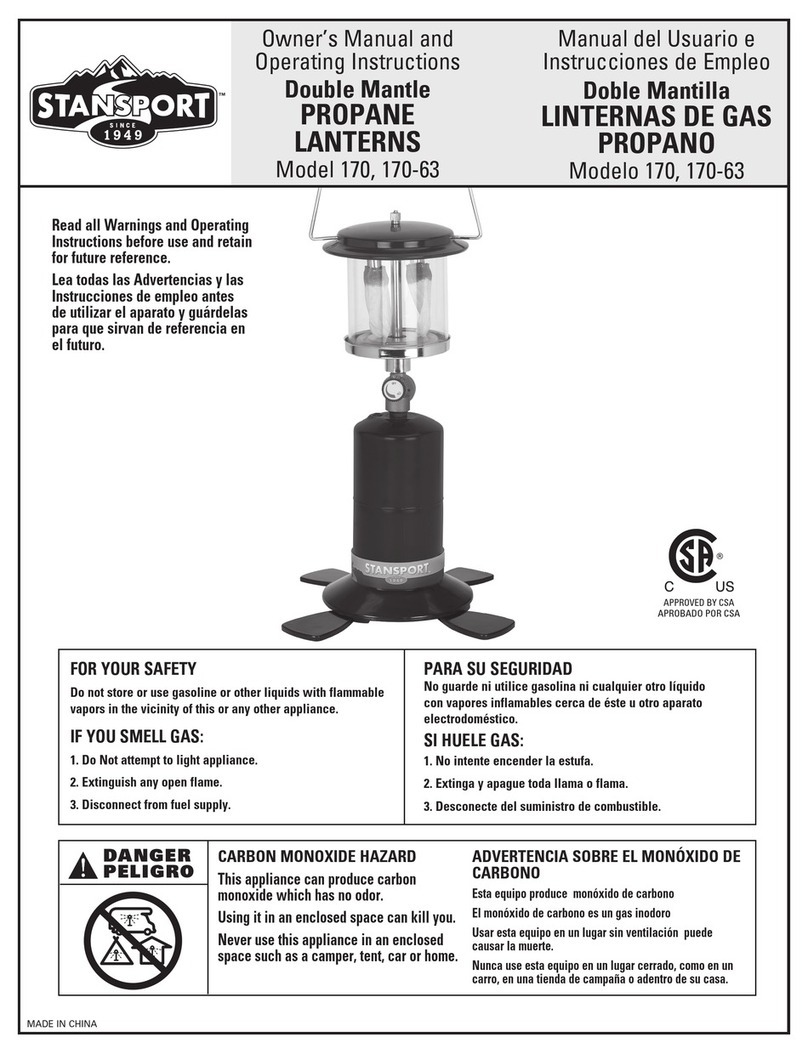
Stansport 172 User manual

Read all Warnings and Operating Instructions
before use and retain for future reference
CARBON MONOXIDE HAZARD
This appliance can produce carbon monoxide
which has no odor.
Using it in an enclosed space can kill you.
Never use this appliance in an enclosed space
such as a camper, tent, car or home.
FOR YOUR SAFETY
IF YOU SMELL GAS:
1. Do Not attempt to light appliance.
2. Extinguish any open flame.
3. Disconnect from fuel supply.
FOR YOUR SAFETY
Do not store or use gasoline or
other liquids with flammable vapors in the
vicinity of this or any other appliance.
MADE IN CHINA
STANSPORT, INC. LOS ANGELES, CA 90023 -
For questions call customer service: Toll Free
(800) 421-6131
Limited Warranty
Stansport™warrantsthatfortheperiodofoneyearthisproduct,willbefreefromdefectsinmaterialandworkmanship.Stansport™,atitsoption,willrepairorreplacethisproduct
oranycomponentoftheproductfoundtobedefectiveduringthewarrantyperiod.Replacementwillbemadewithaneworremanufacturedproductofcomponent.Iftheproductisno
longeravailable,replacementwillbemadewithasimilarproductofequalorgreatervalue.Thisisyourexclusivewarranty.
Thiswarrantyisvalidfortheoriginalretailpurchaserfromthedateofinitialretailpurchaseandisnottransferable.Keeptheoriginalsalesreceipt.Proofofpurchaseisrequiredto
obtainwarrantyperformance.Stansport™dealers,servicecenters,orretailstoressellingStansport™productsdonothavetherighttoalter,modifyorinanywaychangethetermsand
conditionsofthiswarranty.
Thiswarrantydoesnotcovernormalwearofpartsordamageresultingfromanyofthefollowing:negligentuseormisuseoftheproduct,usecontrarytotheoperatinginstructions,
disassembly,repairoralterationbyanyoneotherthanStansport™oranauthorizedservicecenter.Further,thewarrantydoesnotcoveractsofGod,suchasfire,flood,hurricanesand
tornados.
Stansport™shallnotbeliableforanyincidentorconsequentialdamagescausedbythebreachofanyexpressorimpliedwarrantyorconditions.Excepttotheextentprohibitedby
applicablelaw,anyimpliedwarrantyofmerchantabilityorfitnessforaparticularpurposeislimitedindurationtothedurationoftheabovewarrantyorconditions.Somestates,provinces
orjurisdictionsdonotallowtheexclusionorlimitationofincidentalorconsequentialdamagesorlimitationsonhowlonganimpliedwarrantylasts,sotheabovelimitationsorexclusion
maynotapplytoyou.Thiswarrantygivesyouspecificlegalrights,andyoumayalsohaveotherrightsthatvaryfromstatetostateorprovincetoprovince.
Howtoobtainwarrantyservice:donotreturnthisproducttothestore.Call1-800-421-6131tollfreeorwriteusatStansport™,2801E.12thStreet,LosAngeles,CA90023.Be
preparedtogiveyourname,address,modelnumber,descriptionoftheproblem,phonenumber,andproofofretailpurchase(salesslip).
PLEASE READ CAREFULLY TO ENSURE YOUR SAFETY:
FOR OUTDOOR USE ONLY
1) Read and follow all instructions.
2) When used in an enclosed area, allow for ample ventilation.
3) Do not expose the propane cylinder to excessive heat.
4) Always inspect the lantern, propane cylinder and connectors for damage, debris or dirt before attaching the cylinder to the stove.
5) Always attach/detach the propane cylinder away from any open flame or pilot light and only after the lantern has cooled.
6) Always inspect the burner holes for obstructions prior to operation. Do not operate if any blockage is found.
7) Do not use or operate if either the lantern or propane cylinder is found to be damaged.
8) Always disconnect the propane cylinder when not in use and/or transporting. Store in and upright position and in a cool, well ventilated area.
9) Be sure to tightly secure all connections to the propane cylinder prior to usage.
10) Absolutely never operate the lantern near any flammable liquids or vapors and keep all flammable or combustible materials beyond the
clearance zone as indicated on the back panel.
11) Discontinue operation and close valve if:
• Ambient temperature drops below-10ºF.
• There is no fuel remaining in the propane cylinder.
• Lighting cannot be performed quickly and easily.
• Combustion becomes unstable or there are repeated flame-outs.
12) Absolutely do not use as a space heater, or in a tent.
13) Keep out of the reach of children.
CONNECTING THE FUEL CYLINDER:
1) Use only 16.4 oz propane cylinders as approved by the United States Department of Transportation.
2) Make sure the valve knob is turned off (twist in a clockwise direction).
3) Make sure the rubber seal is clean, undamaged, and in its proper centered position. The rubber seal is part of the valve adapter assembly and
the cylinder connection is to be made to the underside of the valve adapter assembly.
4) Screw the propane gas cylinder onto the lantern valve adapter. Hand tighten only.
5) Apply soapy water to the connection to check for leakage. (Leaking gas will form bubbles).
WARNING
• FOR OUTDOOR USE ONLY.
• Supply plenty of fresh air when using the lantern. Do not obstruct the flow of combustion air or ventilation air.
• Do not use as a space heater.
• Lanterns produce heat. Keep lantern away from burnable materials. Do not place the lantern any closer than 24” to combustibles.
• Use a flat, level support surface where the stove is safe from accidental tipping.
• Use only 14.7 or 16.4 oz. propane cylinders marked per USDOT-39 or TC CAN/CSA B339 standards.
• Use only with propane fuel.
• Use only the 16 psi regulator included with your lantern. Do not attempt to alter.
CAUTION
PROPANE FUEL IS HIGHLY FLAMMABLE AND UNDER PRESSURE.
Do not store in temperatures over 120˚F.
Never use a flame to check for leaks. Use soapy water.
Keep out of the reach of children at all times.
Owner’s Manual and Operating Instructions
for Double Mantle Propane Lanterns
Model 172
APPROVED BY CSA

Propane gas is highly flammable and under pressure in the cylinder. Do Not store or use gasoline or other flammable
liquids or vapors in the vicinity of this stove. If you detect the odor of gas, immediately evacuate the enclosed area and
contact the appropriate authorities/professionals.
SET UP/ OPERATING/ STORAGE INSTRUCTIONS
PREPARING THE LANTERN
1. Remove the bail handle.
2. Carefully attach a silk mantle to each burner in the groove on the burner assembly.
3. Prime the mantles by holding a lighted match near the bottom of each mantle. This will reduce the mantle in size
and causes it to turn a gray / white in color.
4. Do not touch the mantle after it has been primed, as it will easily break apart.
5. Carefully place the glass globe over the burner assembly and into the globe frame.
6. Insert the bail handle through the holes in the hood.
7. Place the hood with the bail connected, onto the threaded post and secure with the knurled knob.
Do not over-tighten knob.
8. Be sure the valve is in the off position.
9. Attach lantern to a 16.4 oz disposable propane cylinder (not included).
10. Place the disposable cylinder into the plastic lantern base with feet extended.
OPERATING THE LANTERN
1. Attach two new mantles to the fuel outlet posts by squeezing the wire and releasing.
2. Place a lighted match at the lower edge of the mantle and slowly open the gas valve approximately half way.
3. Once the mantle is lit, adjust the gas valve to the desired output.
4. Please note it may take a few moments for the mantle to heat evenly and glow uniformly. This is normal.
5. Please Note: The glass globe and metal bail can become very hot during operation. While it is not recommended
to move the lantern during use, if it becomes necessary to relocate the lantern during operation please use a
glove to prevent possible burns from handling the hot metal bail.
6. After use allow 15 minutes for the lantern to cool before attempting to remove the LP cylinder and storage.
7. To remove the LP cylinder, firmly grasp the lantern and carefully rotate the cylinder in a counter-clockwise
direction. Remove the cylinder and store separately.
CLEANING YOUR LANTERN
1. Allow the lantern to cool completely.
2. Carefully remove the propane cylinder by grasping the lantern and rotating the cylinder in a clockwise direction.
3. Unscrew the lantern top nut.
4. Carefully pull outward on the metal bail and remove from the lantern frame.
5. Lift the metal lantern top off the center lantern frame post.
6. Remove the glass globe and clean with a soft cloth.
7. Remove the used silk mantles and replace with new ones.
8. Replace the glass globe and lantern top. Be sure to align the holes in the lantern top with holes on the inner
lantern frame.
9. Replace the metal bail handle into the lantern top holes.
10. Reinstall and tighten the lantern top nut. Hand tighten only.
STORING YOUR LANTERN
1. Turn off the lantern and allow it to cool for 15 minutes.
2. Remove the disposable propane cylinder.
3. Do Not store with the propane cylinder attached.
4. Place lantern into the Lantern Case for protective storage.
5. It is a good idea to store additional silk mantles in the protective carry case.
MAINTENANCE SCHEDULE & REPLACEMENT PARTS
1. Clean your lantern after each use and before storage.
2. Replacement glass globes and mantles can be purchased at your local camping dealer.
3. No other parts on the lantern are serviceable in the field. If your lantern requires additional service,
please contact our customer service dept at: 800-421-6131
CAUTION WARNING
BURN HAZARD
• Never leave lantern unattended when hot
or in use.
• Keep out of reach of children.
DANGER
EXPLOSION - FIRE HAZARD
• Never store propane near high heat, open
flames, pilot lights, direct sunlight, other
ignition sources or where temperatures
exceed 120 degrees F (49˚C).
• The cylinder must be disconnected when
the lantern is in storage.
SERVICE SAFETY
• Keep all connections and fittings clean.
Inspect propane cylinder and lantern propane
connections for damage before attaching.
• During set up, check all connections and
fittings for leaks using soapy water. Bubbles
indicate a leak. Never use a flame.
WARNING:
Double mantle lantern shown for illustration purposes
OPEN
CLOSED
Other Stansport Lantern manuals
Popular Lantern manuals by other brands
Regent Lighting Solutions
Regent Lighting Solutions Lumina installation instructions
Olimpia electronics
Olimpia electronics POWER LIGHT Series manual
Teknoware
Teknoware VOT100 General information
Cosi
Cosi Cosiscoop Original User instruction of use
Kanlux
Kanlux BENO LED SE Series manual

Wetelux
Wetelux 89 27 89 instruction manual

eaglelighting
eaglelighting INDIGO COMBO T5 installation instructions

Yeelight
Yeelight D2 user manual
HOLOPHANE
HOLOPHANE PRISMASPACE installation instructions

Kichler Lighting
Kichler Lighting Montego 49679WHRLED manual

Life
Life Tribal user manual
Home Decorators Collection
Home Decorators Collection Y37029ALED-292 Use and care guide
