Stanwax Laser ILDA Gem Pocket User manual
ILDA Gem Pocket
Power up
To power up the ILDA Gem Pocket simply press the power button momentarily. As the unit starts, the scanner output and
colour signals will be enabled. Note if the pots are all set to zero there will be no visible output but you should be able to
hear the scanners running.
The ILDA Gem Pocket will also apply a +5V signal to the ILDA shutter connection to ensure that if a shutter is in use it will
be opened when the Ilda Gem Pocket is powered on.
When the power button is depressed, if the unit fails to start it normally indicates a low battery. (see power management
section below)
Normal mode
Normal mode can be used to test the modulation of the laser modules, match several projectors to the same output size or to output a
safe low power beam while aligning or adjusting a projector, all without the use of a computer and laser controller.
Please note any button press will cause the scanner and modulation outputs to cease.
Following start-up the scanner and colour output will be enabled and the quadrature test pattern will output to the scanners.
The colour outputs are always set to variable levels on power up or whenever normal mode is entered. Note if the pots are
all at zero the output will not be visible. Adjust the pots to the desired level and the square test pattern will be visible. The
test pattern will output at aprox. 50% scanner output scale set on the scanner amplifier, therefore the output scale of
multiple projectors can be matched. Pressing one of the coloured buttons will remove the voltage on the matching colour
line turning the corresponding laser output off. A second push will turn the corresponding colour channel to full power and a
third push of the same button again will return variable level output for level adjustment by the pot. This cycle is repeatable
on each of the three channels.
From the factory the ILDA Gem Pocket will output to the scanners at a rate of18kpps, the scan rate can be changed at any
time by the user (see extended operation modes below).
Note: Laser modules with low impedance on the modulation inputs may result in the output being loaded and therefore not
be able to maintain full 5V output on the ILDA Gem Pocket colour lines.
ILDA Gem Pocket
Laser projector tool Instructions
V1.04 January 2014
The ILDA Gem Pocket is an easy to use battery powered pocket sized version
of the popular laser projector test tool the ILDA Gem from Stanwax
Laser. Using
the latest digital technology the ILDA Gem Pocket will provide a long life while
running from a single 9V alkaline or lithium battery and is housed in a rugged
ABS housing with silicone rubber protective boot available as an optional extra.
The ILDA Gem Pocket has on board quadrature pattern generator that will
output a quadrature (square) test pattern to your scanners at one of four user
selectable scan rates.
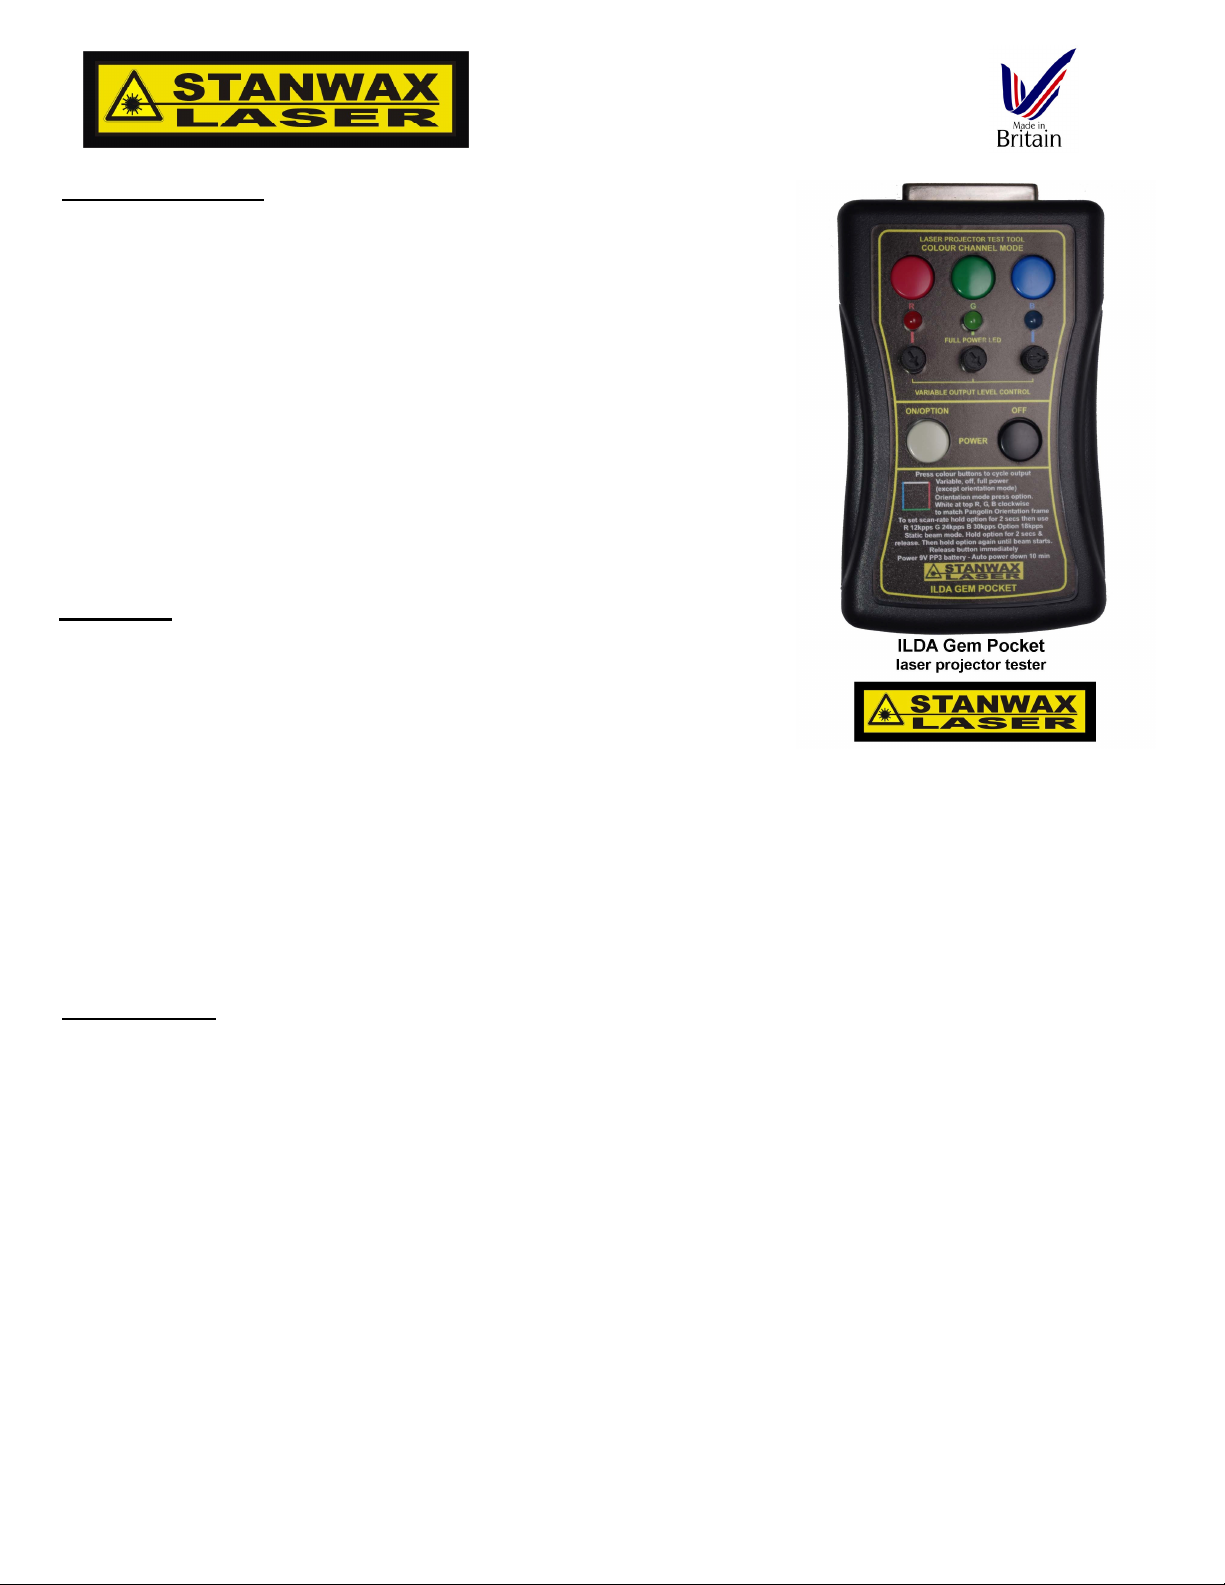
The simple controls consist of three pots and five push buttons plus three
indicator LEDs. (see image right)
The pots allow the colour levels to be constantly variable between 0 and 100%,
and buttons are provided to switch the outputs to full power. Red green and
blue LEDs are provided to indicate full power output. Other output options are
orientation mode and static beam mode. In addition to this there are four user
selectable scan rate settings
.
Operation
The ILDA Gem Pocket is a simple tool to use but we would advise that you
should familiarise yourself with its controls and modes by reading this manual in
full before use.
Connect the 25 way sub-d female connector of the ILDA Gem Pocket to the
laser projector using a 25 way ILDA standard lead, or the optional ribbon cable
if purchased
.

individual colour bars will respond to either variable level output or full power output by use of the RGB buttons in the same
colour bars will act in the same way as in normal mode however in orientation mode the channel off function is not available.
Note. When any of the output modes is entered the colour lines are always set to variable output.
Selecting extended options
Additional options allows the ILDA Gem Pocket to provide more useful functions.
Pressing and holding the power/option button for a few seconds will provide some more options. Entering of extended
option mode is indicated by the scanner and colour output ceasing, showing that the ILDA Gem Pocket is waiting for the
next button press to change the mode.
Static beam mode
Static beam mode can be used for power measurement at the laser aperture and to check & adjust the centring of the scanners.
When in extended option mode it is possible to enable laser output but without enabling the scanner output to produce a
single static beam. As this mode can be dangerous, to ensure it cannot be set accidentally you must follow the procedure
below carefully. This mode is used for power measurement and should be used with care, and for safety reasons before
entering this mode it is recommended to use a beam block in front of the laser under test, that can withstand the full power
of the laser without over heating or failing. A black anodised heat sink is ideal for this as long as it is of suitable size for you
laser power.
To enter static beam mode the power/option button must be held down for a few seconds to enter extended options mode.
Upon releasing, the power/option button must be pressed and held down a second time for aprox 5 seconds.
As soon as the output begins the button must be released. If the power/option button remains held then the ILDA Gem
Pocket will revert to normal operation with the scanner output enabled.
In static beam mode pressing the coloured buttons, will, as in normal mode, cycle the colour output between variable, off
and full power. Note if the pots are turned fully anti clockwise when entering static beam mode there may appear to be no
laser output, therefore it is recommended that at least one pot be turned up to aprox. 10-20% before entering this mode.
Pressing the power/option button will exit static beam mode and return the ILDA Gem Pocket to normal mode with scanner
output enabled and the colour outputs set to variable levels.
Changing the scanner output rate
Changing the scan rate can be useful to test projectors with differing specification of scanners. The test output will also indicate scanner
over shoot and undershoot if incorrectly tuned.
In extended options mode, indicated by the scanner and colour outputs being disabled, it is possible to change the scan rate
of the output. To do this press one of the buttons briefly (choose the button that matches the rate you require as listed
below) This sets the scan rate and the unit will store the setting in NVRAM before restarting using the new setting, so no
further action is required. The scan rate can be changed as often as you need. Once in extended options mode, should you
decide that you don’t wish to change the scan rate simply press the power off button and the change will be cancelled. Upon
the next power up the previous scan rate will re-load.
Red button will set the output to 12kpps Blue button will set the output to 30kpps
Green button will set the output to 24kpps Power/option button will set the output to the factory default of 18kpps
Orientation
mode
Orientation mode is used to test the output orientation of the laser projector and so is
useful to allow a number of projectors to be set to a particular orientation.
A brief press of power/option button will toggle the output into orientation mode. In
this mode the test pattern will be split into coloured bars. The position of the bars
in the output will always be constant so the pattern can be used to test the output
orientation of the laser projector.
When viewed from behind the laser projector towards a screen the output will
match the Pangolin orientation test frame when the output displays the white bar
at the top and the red bar at the right with green and blue following clockwise (see
image right). Pressing the power/option button once more will return the ILDA
Gem Pocket to normal mode.
In orientation mode the white bar will always appear at full power but the RGB

Power management
Long battery life is important, so as well as being economical on battery power and having an auto power feature, power management
features ensure 5V output can be maintained on the colour lines. The ILDA Gem Pocket has sophisticated power management to provide
good performance in all of these aspects.
A brief press of the off button will close the ILDA Gem Pocket down (note power will turn off as the button is released).
The ILDA Gem Pocket uses low power circuitry to maintain long battery life and includes an auto power down feature which
will automatically turn off the unit to conserve battery power after operating for approximately 10 mins. without any button
being pressed.
To ensure that the output of the colour lines are maintained at a full 5v a battery monitoring circuit will prevent the ILDA Gem
Pocket from starting if the battery voltage is too low to achieve 5v output. Therefore upon pressing the power button to turn
the unit on, if there is no output then it is recommended to replace the battery.
Any 9v PP3 battery will work but for long life an alkaline or lithium battery is advised. Rechargable Ni-Cd or Ni-Mh types can
be used but bear in mind they do not retain power well when stored, so you may come to use your ILDA Gem Pocket to find
the battery depleted and therefore unable to start.
Changing the battery
Remove the protective rubber boot (if fitted) and slide off the battery cover at the lower end of the unit on the underside
opposite the DB25 connector. Remove the old battery and replace with a PP3 alkaline or Lithium type. Ensure the battery
clip is attached firmly and stow the battery in the compartment before replacing the cover and protective rubber boot.
Specifications
Power source PP3 9V battery (supplied) Alkaline or Lithium recommended
Current drain 12mA max (all LEDS lit) 3mA nominal
Colour Outputs red green and blue channels at variable, off or 5 V level (user selectable)
Colour signal output voltage (full power output slected) 5.02V max 4.80V min (depending on battery condition)
Scanner output quadrature test pattern at 12, 18, 24 & 30kpps (+/-10%)
Orientation output white at the top with red green and blue in clockwise direction indicating projector configured as per
Pangolin orientation test frame.
Shutter and Colour outputs are short circuit protected.
Scanner output 5V peak to peak differential (50% of ILDA max scale signal)
Dimensions 117.5mm x 72.4mm x 25.4mm
Weight 220g with battery
While we agree the ILDA Gem Pocket is a very useful tool we regret that it cannot, at this time, dispense coffee.
©2013 Stanwax Laser
www.stanwaxlaser.co.uk
Table of contents


