manuals.online logo
Brands
  1. Home
  2. •
  3. Brands
  4. •
  5. Star Headlight & Lantern
  6. •
  7. Security System
  8. •
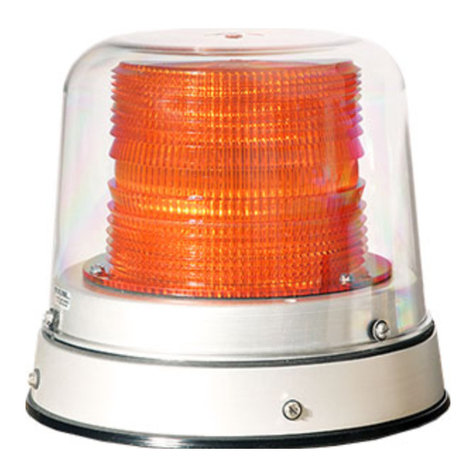
  9. Star Headlight & Lantern X-Fire 281R Series User manual

Star Headlight & Lantern X-Fire 281R Series User manual

PLIT581 REV. D 8/10/22
LED FIVE YEAR LIMITED WARRANTY
The manufacturer warrants this LED light against factory defects in material and workmanship for five years
after the date of purchase. The owner will be responsible for returning to the Service Center any defective
item(s with the transportation costs prepaid. The manufacturer will, without charge, repair or replace at its
option, products, or part(s , which its inspection determines to be defective. Repaired or replacement item(s
will be returned to the purchaser with transportation costs prepaid from the service point. A copy of the
purchaser's receipt must be returned with the defective item(s in order to qualify for the warranty coverage.
Exclusions from this warranty include, but are not limited to, domes, and/or the finish. This warranty shall not
apply to any light, which has been altered, such that in the manufacturer's judgment, the performance or
reliability has been affected, or if any damage has resulted from abnormal use or service.
There are no warranties expressed or implied (including any warranty of merchantability or fitness , which
extend this warranty period. The loss of use of the product, loss of time, inconvenience, commercial loss or
consequential damages, including costs of any labor, are not covered. The manufacturer reserves the right
to change the design of the product without assuming any obligation to modify any product previously
manufactured.
This warranty gives you specific legal rights. You might also have additional rights that may vary from state to
state. Some states do not allow limitations on how long an implied warranty lasts. Some states do not allow
the exclusion or limitation of incidental or consequential damages. Therefore, the above limitation(s or
exclusion(s may not apply to you.
281R 281RP 281RFP
281R Series LED Lights
Star eacons
featuring the
281RM
281R
Use appropriate hardware (user supplied) to mount the light
through the three holes located in the flange, routing the wires
through a pre-drilled center hole in your mounting surface.
Permanent Mounting (281R Series)
-2-
DIN Mounting (281RP and 281RFP Series)
These models are designed with a standard flexible
European D N (pipe/pole) mount. You must have the
mating mount installed on your vehicle to utilize this light.
To install, loosen the wing nut, slide the light onto the mount, and
tighten the wing nut.
Please note that the D N mount versions are 12-24VDC and do not
have the Pattern Programming, High/Low, or Synchronization
features mentioned on the following pages.
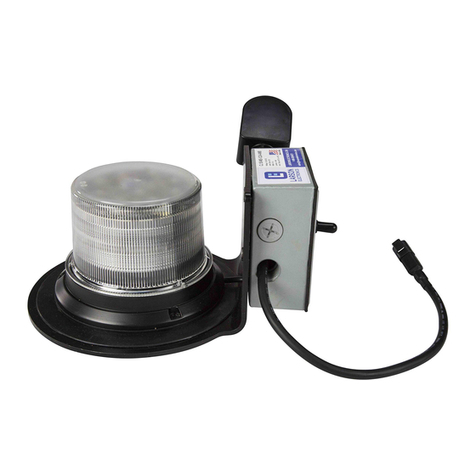
Magnet Mounting (281RM Series)
If you are mounting the light on the roof of your vehicle, take extreme care to ensure that the magnet
is firmly seated on your roof, and that the pull of the magnet is sufficient to secure the light in place.
As the composition of the metal in the roofs of different vehicles may vary, as well as the contour,
texture and/or condition, Star cannot guarantee the ability of the light to remain in place upon a
moving vehicle. It is the sole responsibility of the owner to ensure the warning light is secure.
WARNING!!!! Care should be taken when positioning any warning light on the roof,
dash, or instrument panel of the vehicle, so that the light and/or cord
does not interfere with the proper operation of any airbags! Failure to
heed this warning may result in serious or fatal injury.
• CAUTION: Please be sure to check that your cigarette plug outlet is properly fused.
Testing the light before this fuse is properly installed will void the warranty on
the light.
• This light has been factory tested and approved. f the light fails to work when the
plug is inserted into the cigarette plug socket, twist the plug a few times to remove
any ash or other deposits which might be preventing a good contact from being
made. f the problem persists, check for a fuse inside of the plug itself. f present,
remove the fuse from the circuit, check to see if it has blown, and clean the lighter
socket and contact surfaces. Reconnect the fuse and test the light again.
Please Note: The magnet mounted versions with cig plugs are 12-24VDC and do not have
the Pattern Programming, High/Low or Synchronization features
mentioned on the following pages.
Single olt Mounting (281R Series)
The 281RB series is designed to be mounted through a single
1/2” or 13mm hole and secured with the enclosed M12 nut.
-3-
Wiring Instructions (281R Series)
Pattern Programming
WHITE: (Synch - Connect with White wire from up to 5
other lights (see back page for details).
RED: (Power - Connect to your switch through a
fuse to 12-24VDC.
GREEN: (Pattern Select - Touch and release to Ground
to scroll through patterns.
LACK: (GROUND - Connect to the negative
side of the battery or a
Good Chassis Ground.
USER
SUPPLIED
SWITCH
USER SUPPLIED
5A FUSE
† - Approved patterns for SAE J845
Pattern Shortcuts: Hold Green wire to ground for indicated time.
Steady Burn: Not in pattern cycle. Only accessible through shortcut. Hold Green wire to
ground for 18 seconds (light will flash 5 times).
CAUTION: All of our DC powered warning lights are polarity sensitive. All wires
connected to the positive terminal of the battery should be fused at
the battery for their rated load. Testing the light before this fuse is
properly installed will void the warranty on the light.
(Excludes IN and Mag Mount Versions)
Change the flash pattern by touching and releasing the Green wire to BAT - (Neg)/Ground.
PURPLE: (High/Low Select (optional - Connect to Ground
for Low Power.
-4-
Synchronization of Multiple Lights
(Hardwire versions only)
SYNCHRONIZATION
You can synchronize up to six lights with compatibility.
O NOT CONNECT WHITE WIRES UNTIL PROGRAMMING HAS BEEN COMPLETE FOR
ALL LIGHTS!!
1. Power up the first unit and select a Phase 1 pattern.
2. Program the second light with the same Pattern Type.
Lights with the SAME phase flash together (simultaneous).
Lights with D FFERENT phases flash opposite one another (alternate).
3. After programming all lights, tie off the green wires and connect the white wires
together.
4. Test lights by applying power to all of them at the same time.
f you have any questions concerning this or any other product, please contact our
Customer Service Department at (585) 226-9787.
f a product must be returned for any reason, please contact our
Customer Service Department to obtain a Returned Materials Authorization
number (RMA #) before you ship the product back.
Please write the RMA # clearly on the package near the mailing label.

This manual suits for next models

5

Other Star Headlight & Lantern Security System manuals

Star Headlight & Lantern Star X FIRE 200A Series User manual

Star Headlight & Lantern

Star Headlight & Lantern Star X FIRE 200A Series User manual

Star Headlight & Lantern SS670 Quick guide

Star Headlight & Lantern

Star Headlight & Lantern SS670 Quick guide

Star Headlight & Lantern StarSignal SS741MG-11 User manual

Star Headlight & Lantern

Star Headlight & Lantern StarSignal SS741MG-11 User manual

Popular Security System manuals by other brands

Videofied VIA-Pro owner's manual

Videofied

Videofied VIA-Pro owner's manual

Lorex L15D424321B Specifications

Lorex

Lorex L15D424321B Specifications

Mango TriggerNG user guide

Mango

Mango TriggerNG user guide

visual engineering Guardian VIP user manual

visual engineering

visual engineering Guardian VIP user manual

CMR Electrical LD8-2 Installation and operation manual

CMR Electrical

CMR Electrical LD8-2 Installation and operation manual

Pyronix PCX 46 user manual

Pyronix

Pyronix PCX 46 user manual

FLIR DVT-KBD-G2 Quick installation guide

FLIR

FLIR DVT-KBD-G2 Quick installation guide

Kentix MultiSensor-LAN user manual

Kentix

Kentix MultiSensor-LAN user manual

MobileHelp Touch user guide

MobileHelp

MobileHelp Touch user guide

Sygonix 1594378 operating instructions

Sygonix

Sygonix 1594378 operating instructions

Optex VX-402 installation instructions

Optex

Optex VX-402 installation instructions

Nokia IP560 - Hard Disk Drive Based installation guide

Nokia

Nokia IP560 - Hard Disk Drive Based installation guide

Mobotix Mx-S-NAS2A-8 quick guide

Mobotix

Mobotix Mx-S-NAS2A-8 quick guide

Home Sentinel CA 1030 manual

Home Sentinel

Home Sentinel CA 1030 manual

Cooper Security i-On 40 Administrator's guide

Cooper Security

Cooper Security i-On 40 Administrator's guide

KATEK TeleAlarm RAC80 quick guide

KATEK

KATEK TeleAlarm RAC80 quick guide

E2S BExBG21D-P instruction manual

E2S

E2S BExBG21D-P instruction manual

iStaySafe iStaySafeAlert quick start guide

iStaySafe

iStaySafe iStaySafeAlert quick start guide

manuals.online logo
manuals.online logoBrands
  • About & Mission
  • Contact us
  • Privacy Policy
  • Terms and Conditions

Copyright 2025 Manuals.Online. All Rights Reserved.