starlight SJB-150R Installation manual


1
Star-Light SJB-150R.....................................................................................EN
Operation Manual
Slow Juicer
SJB-150R
The picture diagram only and could be similar as the product.
Don't connect to the power before you complete reading of this statement, and properly
retained for reference because the continuous improvement of products are subject to
change without notice.

2
Product characteristics
1. Non-grinding juicing method featured by slow squeezing is adopted for the product, so
the natural flavor and nutrient elements of fruits and vegetables are well retained. The
product has multiple functions, including making vegetable juice and fruit juice, etc.
2. The squeezing cup may be separated with the mainframe, and it is convenient for
cleaning.
3. Dual-switch design makes the product safer (make the squeezing cup installed onto the
mainframe; apply the front cover of squeezing body, and then turn on the switch to make
the product run).
Note: The product is applicable to family use, and it is inapplicable to commercial use,
otherwise its service life may be shortened. Don't use the unit if the rotating sieve damaged.
Safety notes
Please carefully read the instruction book before the product is used, and please use the
machine according to the instruction book. Be sure not to use the product for other
purposes.
1. Please do not make the machine share the same power supply with other high power
electric appliances, and the product shall be used with 30A leakage circuit breaker
installed.
2. To prevent electric leakage and other hazards, please use the machine according to the
instruction book.
3. It is forbidden to make the machine, power line and plug immersed into water or other
liquids.
4. Be careful to watch it during operation of the machine, so as to prevent accident.
5. If the parts or product structure is found to be damaged (particularly, the safety
protection device and power line are damaged) please do not use the machine. Do not
attempt to repair it by yourself, and it shall be repaired by professionals, so as to prevent
accident.
6. Do not let children or the disabled operate the machine under the condition that they
have not received any guidance or supervision.
7. Please do not make the product used on or beside high-temperature gas or electric
stove.
8. It is forbidden to use finger, spoon or chopstick to push fruits/vegetables into the feed
inlet of the machine.
9. Please do not touch or move any moving part during operation of the machine.
10. Please do not make metal sheet or other conducting material inserted into the juicer, so
as to prevent fire or short circuit.

3
11. Before the machine is cleaned,moved or if it is not used,please power off and pull out
the plug.
12. Be sure not to put the machine near inflammable goods.
13. 13.1f the supply cord is damaged,it must be replaced by the manufacturer its service
agent or similarly qualified persons.
14. Be sure to hold the plug with hands when the plug is pulled out, and it is forbidden to pull
the power line or touch the wire with wet hands.
15. Please be sure that the juicer is put on a firm plane before it is used.
16. Please keep it out of the reach of children and do not put the machine in a closed room.
17. Please be sure to pull out the power plug after the use.
18. Switch off the appliance and disconnect from supply before changing accessories or
approaching parts that move in use.
19. Always disconnect the appliance from the supply if it is left unattended and before
assembling, disassembling or cleaning.
20. This appliance shall not be used by children. Keep the appliance and its cord out of
reach of children.
21. Appliances can be used by persons with reduced physical,sensory or mental
capabilities or lack of experience and knowledge if they have been given supervision or
instruction concerning use of the appliance in a safe way and if they understand the
hazards involved.
22. Children shall not play with the appliance.
23. This appliance can be used by children aged from 8 years and above and persons with
reduced physical, sensory or mental capabilities or lack of experience and knowledge if
they have been given supervision or instruction concerning use of the appliance in a
safe way and understand the hazards involved. Children shall not play with the
appliance. Cleaning and user maintenance shall not be made by children without
supervision.

4
Schematic diagrams for parts
1 – Squeezing body cover
2 – Spiral propeller
3 – Squeezing barrel
4 – Washing rack
5 – Squeezing cup
6 – Pulp outlet
7 – Juice outlet
8 – Main body
9 – Switch
10 – Stopper
11 – Pulp receiving cup
12 – Juice receiving cup
13 – Pushing rod
14 – Cleaning brush

5
Assembly method
1. Make the squeezing cup installed onto the main body
① Make the squeezing cup inserted to the fixed point position of the main body.
2. Put the squeezing barrel into the washing rack.
3. Make the assembled squeezing barrel and washing rack installed into the squeezing cup
When installation, please make the marking point on the squeezing barrel align with
that on the squeezing cup

6
4. Make the spiral propeller installed into the squeezing barrel.
5. Install the squeezing body cover
① When it is installed downwards, the marking point on squeezing body cover shall
align with that on the squeezing cup.
②③Make“ ”at the back of the protruding part of squeezing body cover rotate towards
“ ”on squeezing cup in clockwise direction and lock.
6. See the figure. Make the two juice/pulp receiving cups put at the appropriate position:
one is used to receive juice, and another is used to receive pulp (the two cups have the
same overall dimension).

7
Assembly of squeezing rubber pad
After the squeezing rubber pad is pulled out for cleaning, make it inserted as per the
direction indicated in the figure.
Juicing
1. Turn on the switch (forward)
Forward: Make fruits and vegetables pushed downwards for squeezing.
Reverse: Fruits and vegetables return upwards
Notes:
Please don't use wet hand to operate switch
Before put into fruits and vegetable, don't let unit run free, otherwise it may damage the unit.
2. Make the clean fruits and vegetables (if the size of the fruits and vegetables is larger than
that of the feed inlet, please make them cut into the blocks with proper size) put into the
feed inlet, and make the pushed inwards by the pushing rod.

8
Note:
1) Please use fresh fruits and vegetables to make the juice. The stale fruits and
vegetables that have been stored in refrigerator for a long time shall be used after
being immersed in cold water for over 10min.
2) The kernel of fruits must be removed
3. If the machine stops suddenly during operation, press "stop button firstly, and then press
the "reverse" button to make the materials in the spiral propeller pushed upwards; and
then press "forward" button (repeat the process for about 3 times).
* During "reverse" of the machine, please use hands to press the cover slightly (prevent
loosening of the cover).
* If the machine still does not run after the aforesaid operation, please disassemble the
squeezing cup for cleaning, and then use the product again.
* The hard materials (such as carrot) must be juiced after being cut into strips; otherwise
clamping and even product damage may be caused.
4. After the squeezing process is completed, please press the stop switch, and pull out the
power plug

9
Warning:
Please do not store the squeezed juice for a long time.
The machine is inapplicable to crush grains (motor clamp and mechanical failure are liable
to be caused).
Disassembly method
1. Power off to stop the machine, and pull out the power plug.
2. Use hands to hold the squeezing body cover and rotate it in counter clockwise direction
(see the figure); and pull out the squeezing body cover when it is rotated to the
position indicated in the figure.
3. Hold the juice outlet on the squeezing cup and take it out (see the figure③).

10
4. Take out the spiral propeller + squeezing barrel + washing rack assembly in the
squeezing cup (see the figure ④).
5. Respectively disassemble the spiral propeller, squeezing barrel and washing rack.
Cleaning method
1. Wash the disassembled parts with flowing water; if the meshes are blocked up by dreg,
please use the cleaning brush for the cleaning.
Note: Please do not use iron wire brush, abrading or sharp cleaning tool for the cleaning.

11
2. Do not make the mainframe put into water for cleaning; and be sure to use wringed soft
cloth to clean it.
3. After cleaning, please dry the cleaned parts and store them in a clean and ventilating
place.
Notes:
1). Please wash the machine in time after use, otherwise the dreg will attach to the
container, which will affect the assembly and cleaning, and even result in
performance reduction.
2) The rubber pad at the bottom of the squeezing cup may be washed. Please refer to
the contents in page 5.
Notes for use
Please read the following contents before use
1. The materials shall be put into the machine slowly one by one, and new materials shall
be put into it after the previous materials have been squeezed.
2. The materials with large fiber content (such as celery) shall be put into the machine after
being cut into the blocks with appropriate size (10-20cm). (The materials with particularly
strong fiber shall be put into the machine slowly after being cut into the blocks of about
3cm).
3. When the carrot that have been stored at low temperature for over 1 year is used for
squeezing,it is better to make it squeezed together with the materials with large water
content (such as pear or orange), because that such carrot has small water content. The
juice amount will be larger if new materials are put into the machine after the previous
materials have been squeezed (the juice amount will vary with the water content of
materials).
4. The juice amount will be small if the materials are not fresh. When dry materials stored in
refrigerator are used for squeezing,the materials shall be squeezed after being
12
immersed in clear water for sufficient water absorption,so that the effect will be better.
5. Hard materials are not applicable to make juice (such as kudzu,sugarcane, etc.)
6. There will be certain friction noise when carrot (hard flesh) or apple (hard peel) is used
for squeezing,but this has no impact on the product.
7. Juice will be splash from the feed inlet when such materials as Cherry tomatoes and
grapes are used for squeezing.
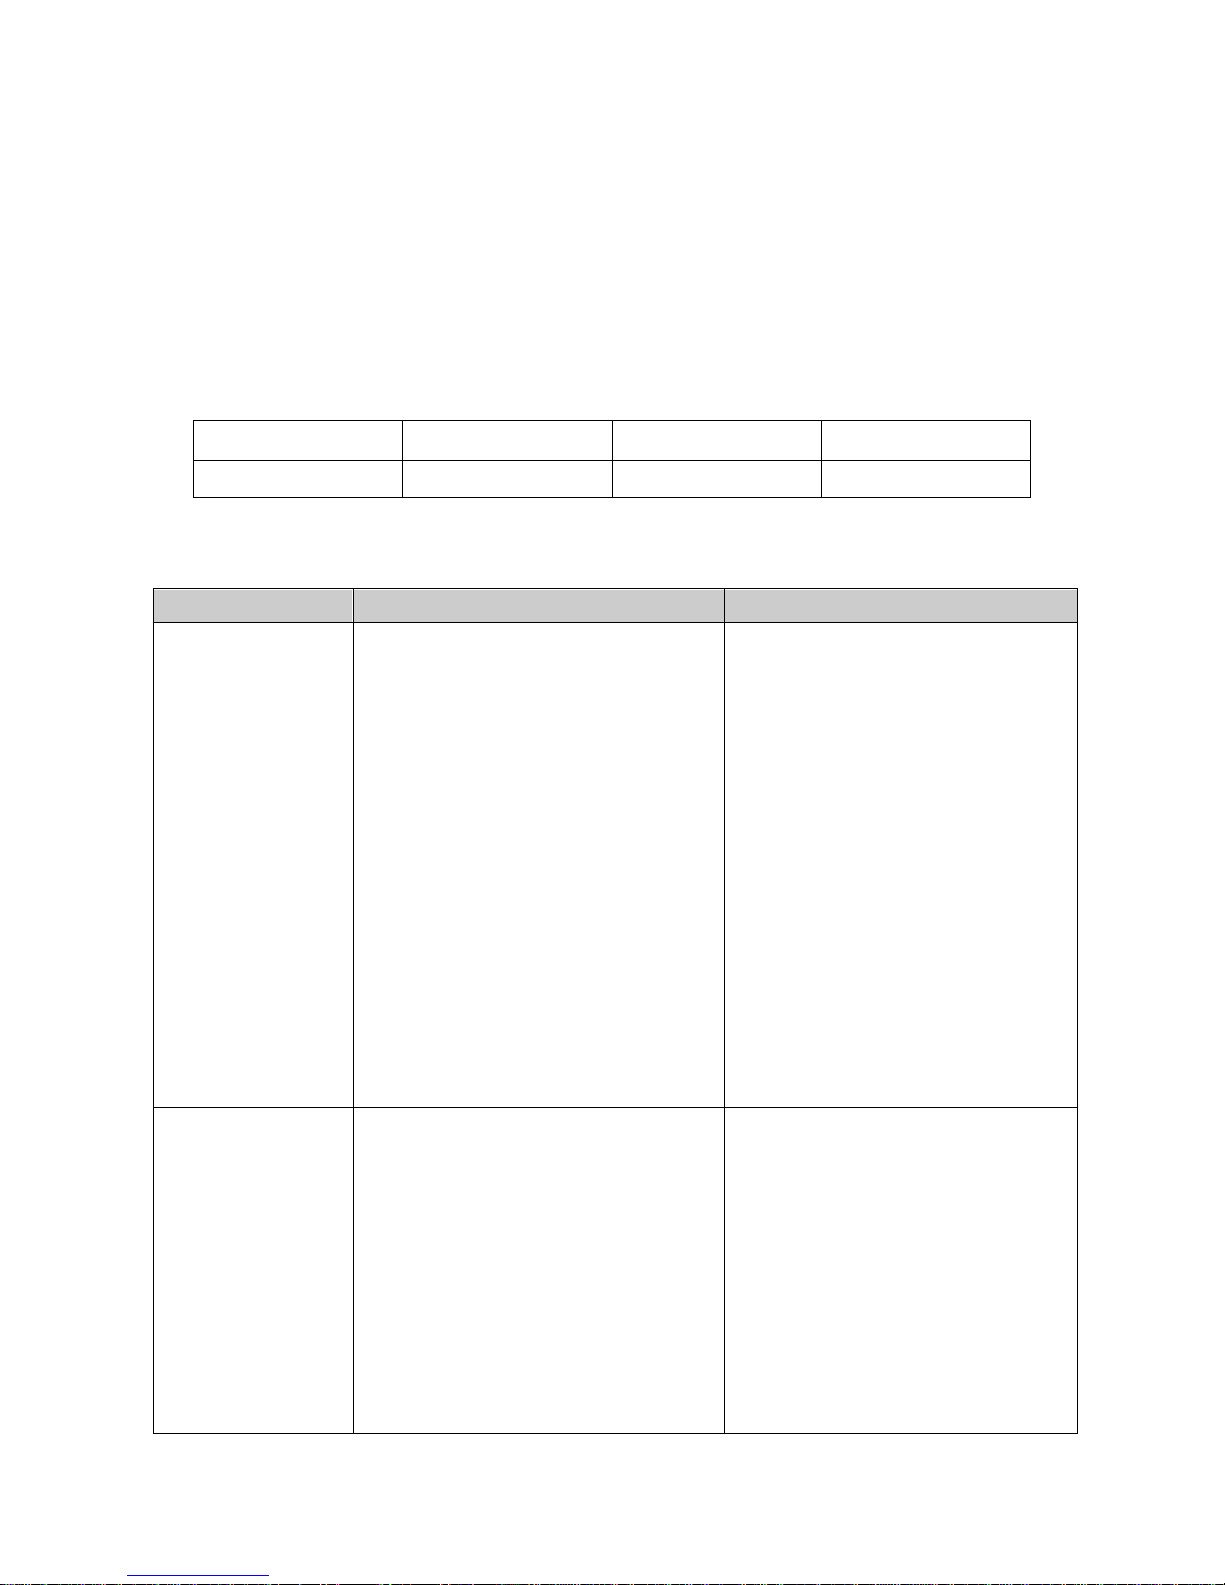
Product specification and main parameters
Nominal voltage
Nominal frequency
Nominal power
Nominal time
220-240V
50/60Hz
150W
≤20min
Trouble shooting
Phenomenon
Cause
Troubleshooting method
The running
machine stops
suddenly
A. Whether the power plug is
properly inserted
B. The quantity of materials put
into the machine is too large
C. Hard fruits and vegetables are
not cut
A. Make the plug inserted into the
socket
B. First, press "reverse" for 2-3
sec. to make the materials return
upwards; then press the
"forward" button (repeat the
process for about 3 times). If the
machine still does not run, please
clean the machine and then use
it.
C. Hard fruits and vegetables
(such as carrot) shall be
squeezed after being cut into
strips.
The juice amount
is small or juice
flows out of the
mainframe
A. Dry materials stored in
refrigerator are used for
squeezing
B. The rubber pad at the bottom of
squeezing cup is not installed
properly
A. The juice amount will increase
if the materials are squeezed
after being immersed in clear
water for sufficient water
absorption.
B. Please reinstall the squeezing
rubber pad by referring to the
installation method.

13
There is
abnormal noise
A. Accessories are not properly
installed
B. The machine is put on oblique
ground
C. Parts cause extrusion sound
during squeezing
A. Inspect whether the
accessories are properly
installed after the machine
stops
B. Please put the machine on a
plane
C. This is the sound caused by
extrusion of fruits and
vegetables, and please do not
worry about it.
The container
and accessories
are dyed after
use
A. Dreg attaches to the container
B. The container and
accessories are liable to be
dyed when materials with
pigment (such as carrot,
spinach,etc.) are used for
squeezing.
A. Clean the machine in time
after use
B. Clean the machine with
detergent after it is wiped with
edible oil.
Environment friendly disposal:
You can help protect the environment!
Please remember to respect the local regulations: hand in the
non-working electrical equipment to an appropriate waste disposal
centre.

14
Star-Light SJB-150R....................................................................................RO
Manual de utilizare
Storcator cu viteza redusa
SJB-150R
Imaginea este doar informativa si poate fi similara cu produsul propriu-zis.
Nu racordati la sursa de alimentare inainte sa fi citit aceste informatii, pe care trebuie sa
le pastrati in mod corespunzator pentru referinte ulterioare, deoarece procesul de
imbunatatire continua a produselor poate fi supus unor modificari fara vreo notificare
prealabila.

15
Caracteristicile produsului
1. Metoda de obtinere a sucului fara zdrobire promovata prin tehnologia de stoarcere la
viteza mica (slow squeezing) este utilizata la acest produs, pentru a se pastra aroma
naturala si nutrientii fructelor si legumelor. Produsul are functii multiple, inclusiv
producerea de suc din legume si suc din fructe etc.
2. Vasul de stoarcere poate fi separat de baza aparatului, acest aspect fiind util atunci cand
trebuie curatat.
3. Designul cu intrerupator cu doua pozitii face ca produsul sa fie mai sigur in timpul utilizarii
(fixati vasul de stoarcere pe baza aparatului; apoi asezati capacul frontal al gurii de
alimentare si mutati intrerupatorul in pozitia pornit pentru a porni produsul).
Nota: Produsul este destinat utilizarii casnice, nefiind adecvat pentru utilizarea in scop
comercial, in caz contrar durata sa de functionare poate fi redusa. Nu folositi produsul daca
sita rotativa prezinta urme de deteriorare.
Indicatii legate de siguranta
Va rugam sa cititi cu atentie manualul cu instructiuni inainte de utilizarea produsului si sa
utilizati produsul in conformitate cu instructiunile prezentate in manual. Nu utilizati produsul
in alte scopuri.
1. Asigurati-va ca aparatul nu este conectat la aceeasi sursa de alimentare cu alte
electrocasnice cu consum ridicat de energie. De asemenea, asigurati-va ca produsul va
fi folosit avand instalat un disjunctor de protectie de 30 A.
2. Pentru a preveni scurgerile de curent si alte pericole, utilizati aparatul doar in
conformitate cu instructiunile din manualul cu instructiuni.
3. Este interzisa scufundarea aparatului, a cablului de alimentare si a fisei in apa sau alte
lichide.
4. Monitorizati aparatul in timpul utilizarii, pentru a preveni accidentele.
5. In cazul in care constatati ca unele piese sau baza produsului prezinta urme de
deteriorare (in special, daca dispozitivul de siguranta sau cablul de alimentare sunt
deteriorate) nu utilizati aparatul. Nu incercati sa reparati aparatul singur, ci lasati
profesionistii sa se ocupe de aceste reparatii, pentru a preveni accidentele.
6. Nu lasati copiii sau persoanele cu discernamant redus sa opereze aparatul, daca
acestia nu sunt supravegheati sau daca nu au fost instruiti cu privire la modul in care
functioneaza aparatul.
7. Nu utilizati aparatul pe sau in apropiere de aragazul electric sau aragazul pe gaz la
temperaturi ridicate.
8. Este interzisa utilizarea degetelor, lingurilor sau a betisoarelor pentru impingerea
fructelor/legumelor in gura de alimentare a aparatului.

16
9. Nu atingeti si nu miscati piesele mobile in timpul utilizarii aparatului.
10. Nu introduceti placi de metal sau alte materiale conductoare in storcator, pentru a
preveni izbucnirea unui incendiu sau scurtcircuitarea.
11. Inainte de curatarea sau mutarea aparatului sau daca aparatul nu mai este utilizat, opriti
alimentarea si scoateti fisa din priza.
12. Asigurati-va ca nu puteti aparatul in apropiere de obiecte inflamabile.
13. In cazul in care cablul de alimentare este deteriorat, acesta trebuie inlocuit de producator,
agentul de service al acestuia sau de persoane calificate similar.
14. Asigurati-va ca tineti fisa cu mainile atunci cand o trageti afara din priza. Este interzisa
tragerea cablului de alimentare sau atingerea cablului cu mainile umede.
15. Asigurati-va ca storcatorul este pozitionat pe o suprafata stabila inainte de utilizarea sa.
16. Tineti la distanta de copii si nu puneti aparatul intr-o incapere inchisa.
17. Asigurati-va ca ati scos cablul de alimentare din priza dupa fiecare utilizare.
18. Opriti aparatul si deconectati de la sursa de alimentare inainte de schimbarea
accesoriilor sau apropierea de piese care se deplaseaza in timpul utilizarii.
19. Intotdeauna deconectati aparatul de la sursa de alimentare daca aparatul este lasat
nesupravegheat, precum si inainte de asamblare, dezasamblare si curatare.
20. Acest aparat nu va fi utilizat de copii. Tineti aparatul si cablul de alimentare al acestuia la
distanta de copii.
21. Aparatele pot fi folosite de persoane cu capacitati fizice, senzoriale sau mentale reduse,
sau de persoane carora le lipsesc experienta sau cunostintele in legatura cu aparatul
doar daca acestia sunt supravegheati sau daca au fost instruiti cu privire la modul in
care functioneaza aparatul in conditii de siguranta si daca inteleg riscurile asociate.
22. Copiii nu au voie sa se joace cu aparatul.
23. Acest aparat poate fi folosit doar de catre copii cu varsta de cel putin 8 ani si de catre
persoane cu capacitati fizice, senzoriale sau mentale reduse, sau de persoane carora le
lipsesc experienta sau cunostintele in legatura cu aparatul, doar daca acestia sunt
supravegheati sau daca au fost instruiti cu privire la modul in care functioneaza aparatul
in conditii de siguranta si daca inteleg riscurile asociate. Copiii nu au voie sa se joace cu
aparatul. Curatarea si lucrarile de intretinere care revin utilizatorului nu vor fi facute de
copii fara ca acestia sa fie supravegheati.

17
Diagrame schematice ale pieselor
1 – Capac gura de alimentare
2 – Melc spiralat
3 – Sita de stoarcere
4 – Perie rotativa
5 – Vas de stoarcere
6 – Gura evacuare pulpa
7 – Gura evacuare suc
8 – Corp principal (baza)
9 – Intrerupator
10 – Opritor
11 – Vas pentru pulpa
12 – Vas pentru suc
13 – Dispozitiv de impingere
14 – Perie pentru curatare

18
Metoda de asamblare
1. Pozitionati vasul de stoarcere pe baza aparatului.
①Introduceti vasul de stoarcere in pozitie la punctul marcat de pe baza aparatului.
2. Puneti sita de stoarcere in peria rotativa.
3. Asezati sita de stoarcere si peria rotativa in vasul de stoarcere.
La instalare, asigurati-va ca marcajul de pe sita de stoarcere este aliniat cu marcajul
de pe vasul de stoarcere.
Marcajul de pe sita
de stoarcere
Marcajul de pe vasul
de stoarcere
Marcaj

19
4. Asezati melcul spiralat in sita de stoarcere.
5. Asezati capacul pe gura de alimentare.
① Atunci cand este asezat orientat in jos, marcajul de pe capacul gurii de alimentare se
va alinia cu marcajul de pe vasul de stoarcere.
②③ Orientati simbolul „ ” din spatele partii proeminente a capacului gurii de alimentare
spre simbolul „ ” situat pe vasul de stoarcere in directia acelor de ceasornic si blocati in
pozitie.
6. Consultati imaginea. Asezati vasul pentru suc si vasul pentru pulpa in pozitiile corecte:
unul este folosit pentru sucul stors, iar celalalt pentru pulpa ramasa in urma stoarcerii
(cele doua vase au aceleasi dimensiuni).
Marcajul de pe
vasul de
stoarcere
Marcajul de pe
capacul gurii de
alimentare
Table of contents
Languages:
Other starlight Juicer manuals


