Suggested Configurations
Depending on what you want to do with your TV Jockey, you will be connecting your device in different
ways.
To watch TV on your monitor
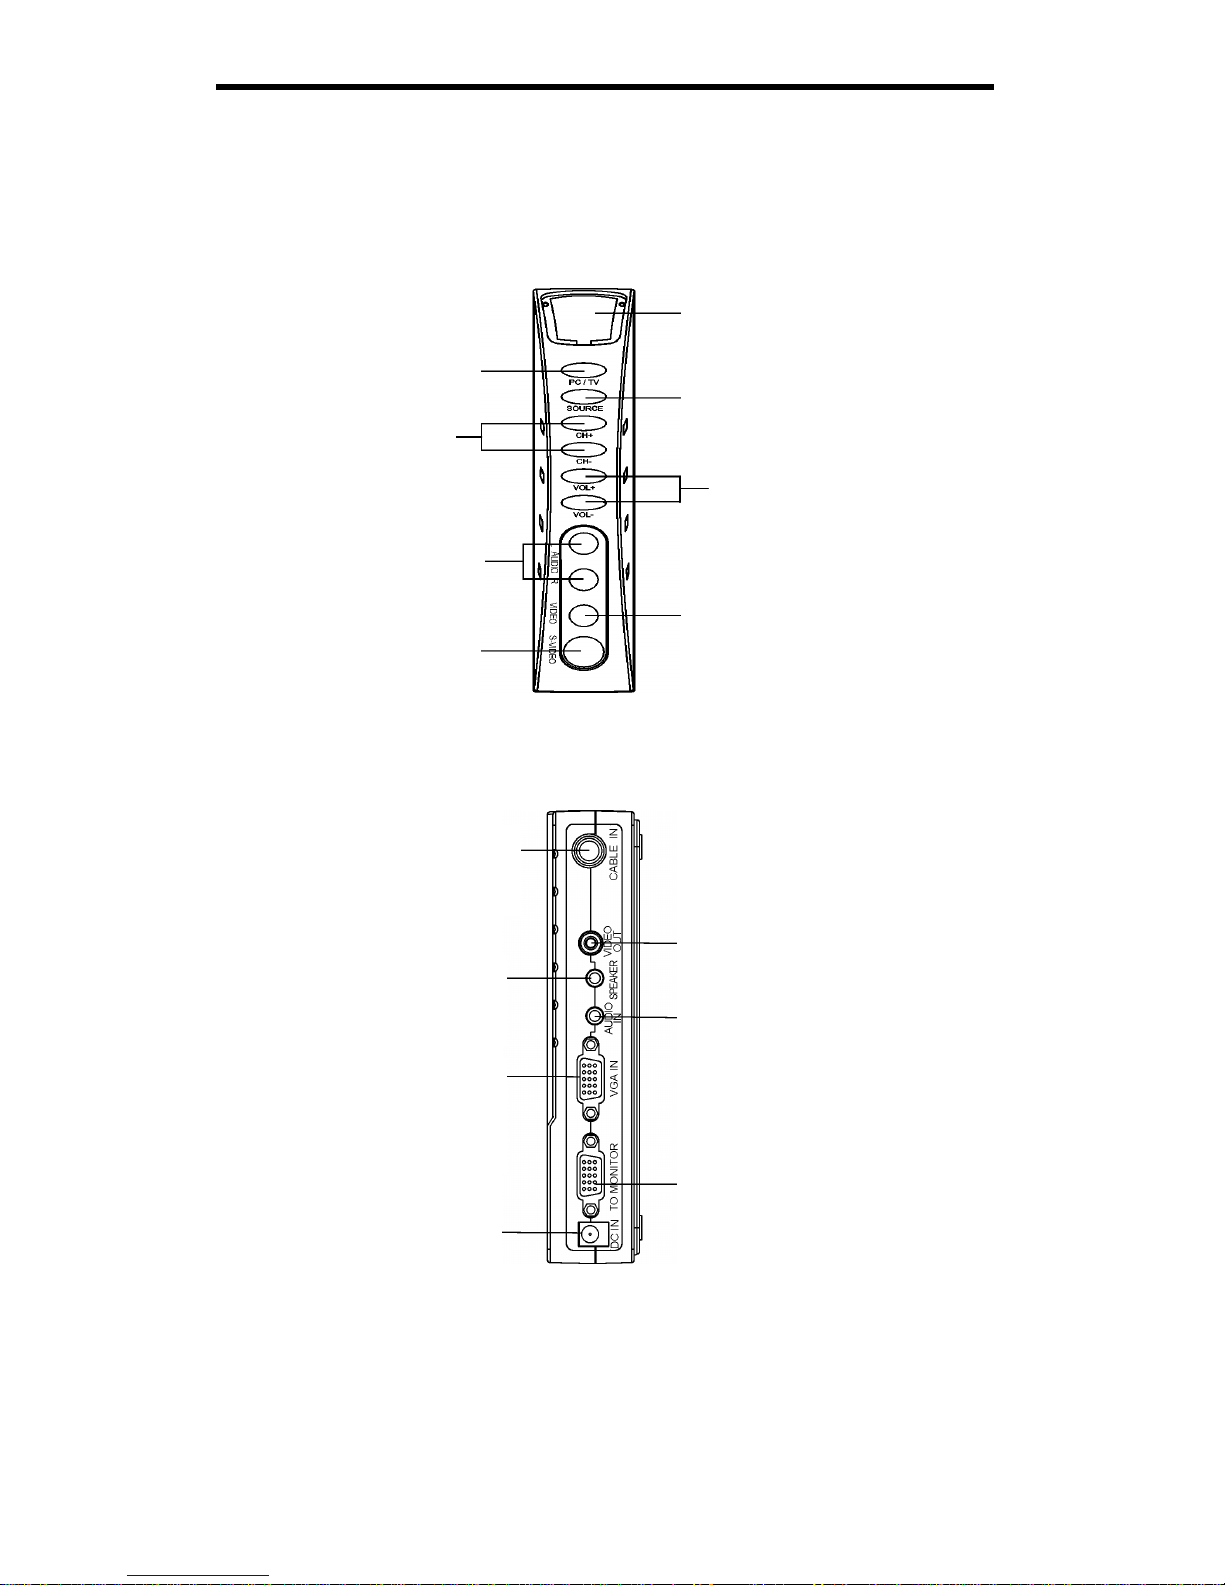
1. Connect your CATV or UHF/VHF antenna cable to the CABLE IN port on the back of the converter.
2. Connect your speakers or other audio output devices to the SPEAKER port on the back of the
converter.
3. Connect your PC monitor/projector to the TO MONITOR port on the back of the converter.
4. Connect the provided power adapter to the 12V DC port on the back of the converter and connect the
other end to an appropriate power source.
To watch TV and connect a video source (DVD player, VCR, camcorder, game console) to your
monitor
1. Connect your CATV or UHF/VHF antenna cable to the CABLE IN port on the back of the converter.
2. Connect your speakers or other audio output devices to the SPEAKER port on the back of the
converter.
3. Connect your PC monitor/projector to the TO MONITOR port on the back of the converter.
4. Connect the provided power adapter to the 12V DC port on the back of the converter and connect the
other end to an appropriate power source.
5. Depending on the video source (DVD player, VCR, game console, camcorder), connect your
audio/video input cables from your video source to the L AUDIO, R AUDIO, and VIDEO or S-
VIDEO ports on the front of your converter.
To watch TV, connect a video source (DVD player, VCR, camcorder, game console), and use your
PC
1. Connect your CATV or UHF/VHF antenna cable to the CABLE IN port on the back of the converter.
2. Connect your speakers or other audio output devices to the SPEAKER port on the back of the
converter.
3. Connect your PC monitor/projector to the TO MONITOR port on the back of the converter.
4. Using the provided audio cable, connect your PC’s sound card to the AUDIO IN port on the back of
the converter.
5. Using the provided video cable, connect your PC’s VGA Out pot to the VGA IN port on the back of
the converter.
6. Connect the provided power adapter to the 12V DC port on the back of the converter and connect the
other end to an appropriate power source.
7. Depending on the video source (DVD player, VCR, game console, camcorder), connect your
audio/video input cables from your video source to the L AUDIO, R AUDIO, and VIDEO or S-
VIDEO ports on the front of your converter.
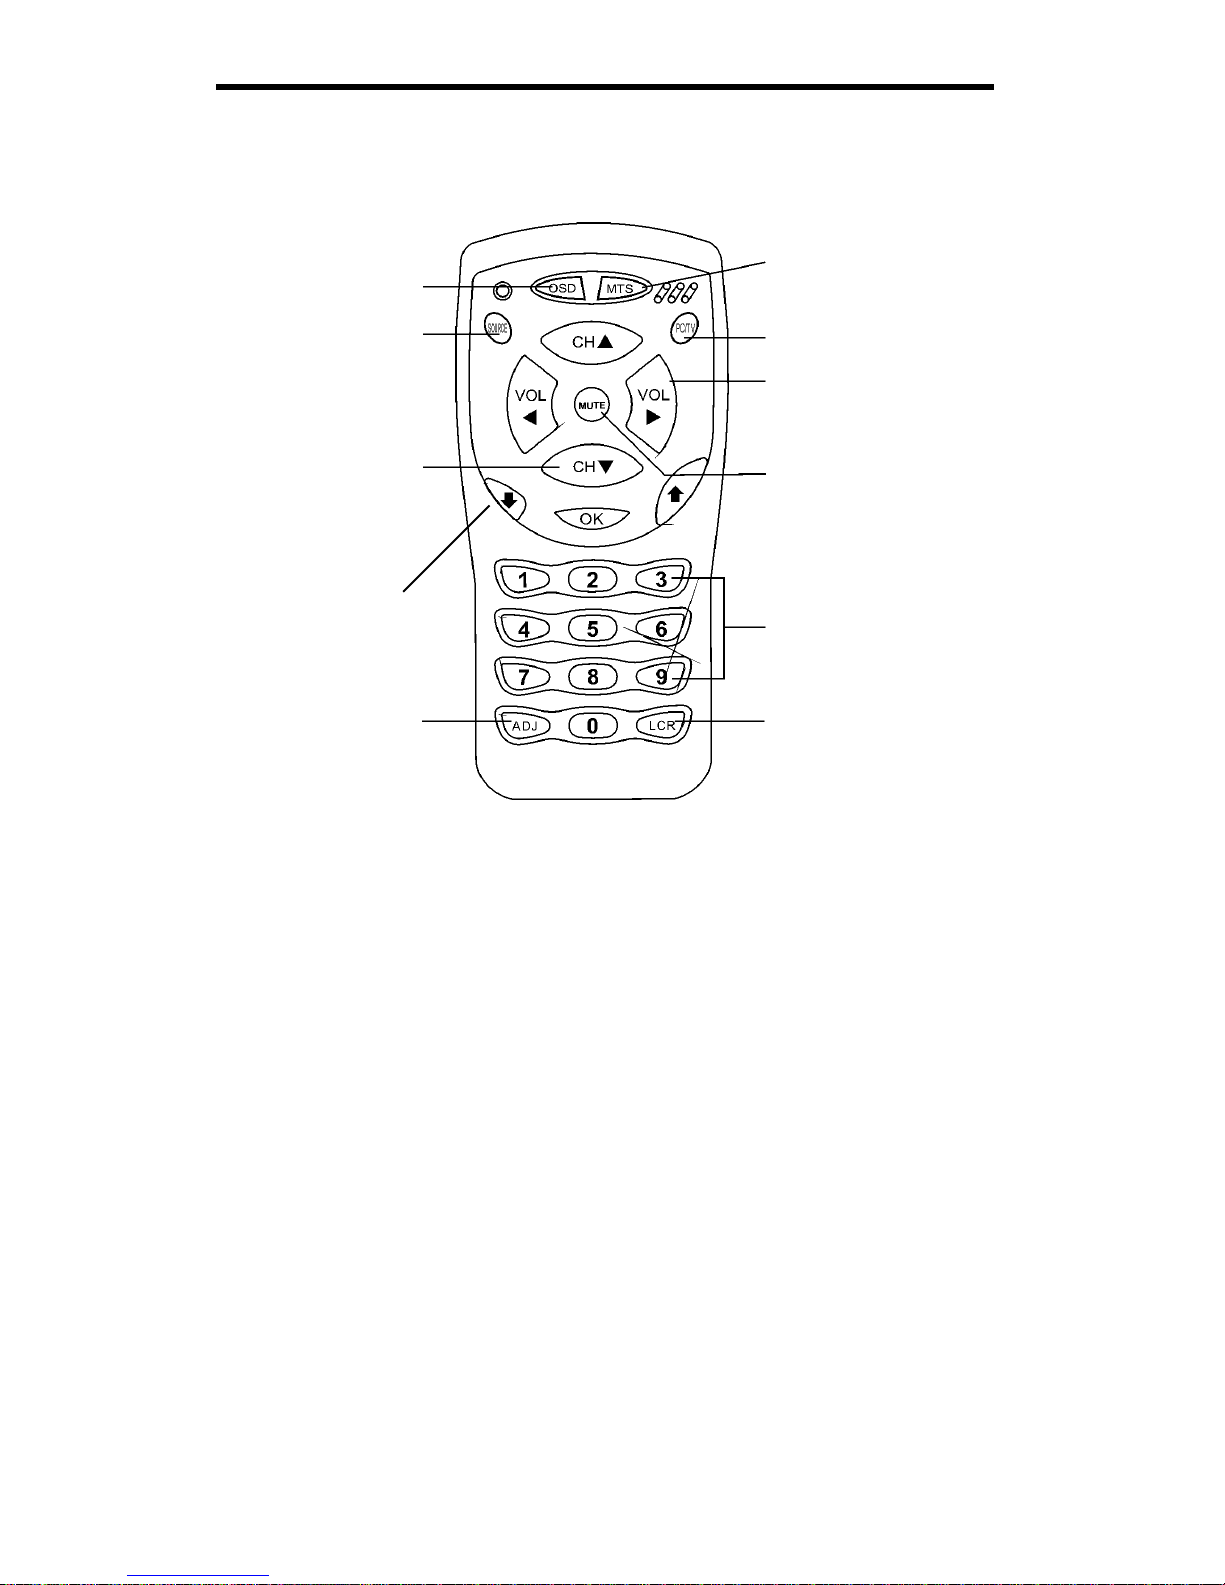
When your converter has been installed properly, the red LED should be lit and your monitor will display
the TV signal or PC signal, depending on the mode you have selected with the PC/TV button. When you
are in PC mode, you have to have the monitor and PC powered on. For TV mode, you only need to have
the monitor turned on.
NOTE: The SOURCE button scrolls through AIR TV (for connections to UHF/VHF Antennas), CATV
(for connections to CATV systems), S-Video (for connections to S-Video sources like some DVD players,
game consoles or camcorders), and Video (for video sources like VCRs).