STATESMAN F2270APW CAMBRIAN User manual

Please read these instructions carefully before use and retain for future reference.
Before switching on your appliance – Always check for any damage that may have been caused in transit.
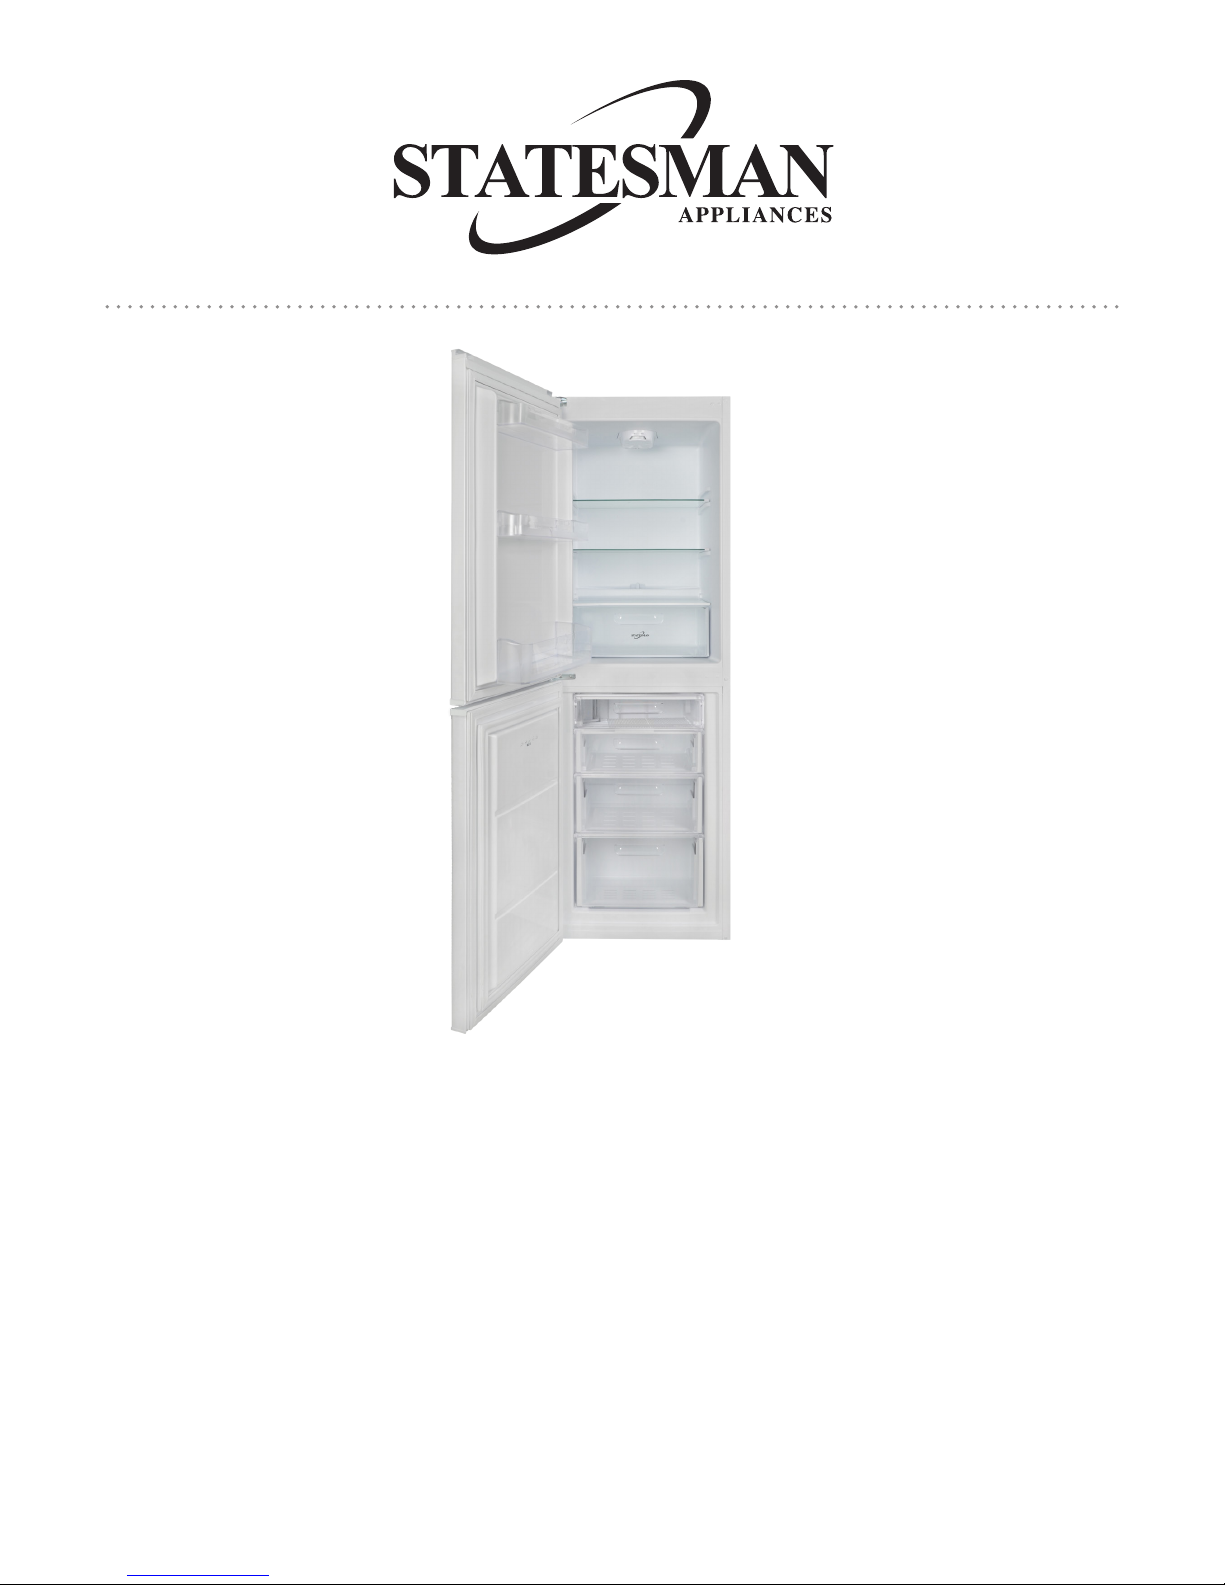
F2270APW CAMBRIAN
54CM 50/50 FREESTANDING FRIDGE FREEZER WHITE
Instruction Manual
Serial number:

2
CONTENTS
Important Safety Instructions .................................... 3-4
Technical Specications................................................5
Appliance Overview.......................................................6
Installation ............................................................... 7-12
Operating Instructions.................................................13
Cleaning and Maintenance.................................... 14-15
Troubleshooting Guide ................................................16
Fuse Replacement ......................................................17
Disposal Information ...................................................17

3
IMPORTANT SAFETY INSTRUCTIONS
Read and follow all of the instructions even if you feel you are familiar with the product, and
nd a place to keep this manual handy for future reference.
Important: This product is intended for domestic use only, for food refrigeration storage only. When
using electrical appliances, basic safety precautions should always be followed:
• Do not operate the appliance with a damaged cord or plug, after it malfunctions or has been
dropped or damaged in any way. All electrical repairs must be carried out by a qualied
electrician. Inadequate repairs may result in a major source of danger for the user and invalidate
the warranty.
• Check the voltage of the appliance matches the household voltage, which is located on the
rating label.
• Use of an extension cord is not recommended with this product.
• This appliance can be used by children aged from 8 years and above if they have been given
supervision or instruction concerning the use of the appliance in a safe way and understand the
hazards involved.
• Cleaning and user maintenance shall not be made by children.
• Keep the appliance and its cord out of reach of children.
• Children shall not play with the appliance.
• Appliances can be used by persons with reduced physical, sensory or mental capabilities or lack
of experience and knowledge if they have been given supervision or instruction concerning use
of the appliance in a safe way and understand the hazards involved.
• Always unplug the appliance before attempting to move. When disconnecting from the electricity
supply, pull the plug and not the cord.
• This product is for indoor use only.
• Do not store explosive substances such as aerosol cans with a ammable propellant in this
appliance.
• Always keep the ventilation openings clear of obstruction. Should they become blocked, clear
them straight away.
• The refrigerant of this product is R600a which is ammable. Ensure when moving the appliance
or during installation that the cooling system does not get damaged.
• Do not use mechanical devices such as a hair dryer or other means to accelerate the defrosting
process, other than those recommended by the manufacturer.
• Do not use electrical appliances inside the food storage compartments of the appliance, unless
they are of the type recommended by the manufacturer.
• To avoid a hazard due to the instability of the appliance, it must be xed in accordance with the
instructions.
• While carrying and positioning the fridge, do not damage the cooler gas circuit.
• This appliance is not intended for use at altitudes exceeding 2000m.
• Never touch the power cord/plug with wet hands as this could cause a short circuit or electric
shock.
• Do not use any metal or sharp objects to accelerate the defrosting process.
• Do not place glass bottles or beverage cans in the ice-making compartment as they can burst as
the contents freeze.
• Do not place explosive or ammable material in your fridge. Place drinks with high alcohol
content vertically in the fridge compartment and make sure that their tops are tightly closed.

4
• When removing ice from the ice-making compartment, do not touch it. Ice may cause frost burns
and/or cuts.
• Do not cover the body or top of fridge with lace. This aects the performance of your fridge.
• Secure any accessories in the fridge during transportation to prevent damage to the accessories.
WARNING: The appliance is heavy and care is needed when unpacking and moving it. Get
extra help and only hold the appliance by the casing – never hold by the door or the trim.
WARNING: Risk of child entrapment.
Before disposal of the old appliance, make sure that any locking mechanisms have been
broken o, doors have been removed but shelves have been left in so that children cannot easily
climb inside. Also remove the plug so the appliance is unusable.

5
TECHNICAL SPECIFICATION
Class Symbol Ambient average temperature °C
Extended temperature SN +10 to +32
Temperature N +16 to +32
Subtropical ST +16 to +38
Tropical T +16 to +43
Ambient Room Temperature Limits
Supplier Name / Trade Mark Statesman
Model Number F2270APW
Category Type Refrigerator with Freezer
Energy Eciency Class A+
Annual Energy Consumption 229kwh/year
Freezing Capacity (kg/24h) 4kg/24h
Total Gross Volume (Litre) 242L
Total Net Volume (Litre) 225L
Fridge Storage Net Volume (Litre) and Applicable Star Rating Compartment 147L
Freezer Storage Net Volume (Litre) 78L
Applicable Star Rating Compartment 4 Star
Refrigeration System (Frost Free, Static, Totally No Frost) Static
Temperature Rise Time 16 hours
Climate Class N
This appliance is intended to be used at an ambient temperature between “16” (lowest temperature)
°C and “32”(highest temperature) °C
Noise Emission (dB) 41dB (A)
Voltage (V) 220V-240V~
Frequency (Hz) 50Hz
Power Source AC

6
A: Fridge Compartment
B: Freezer Compartment
1. Thermostat Dial
2. Refrigerator Lamp and Cover
3. Refrigerator Shelves
4. Salad Crisper Shelf
5. Salad Crisper
6. Freezer Upper Flap / Drawer
7. Freezer Lower Flap / Drawer
8. Upper Freezer Drawer
9. Bottom Freezer Drawer
10. Ice Tray
11. Bottle Shelf
12. Door Shelves
13. Egg Holder
APPLIANCE OVERVIEW
1.
2.
3.
4.
5.
6.
7.
8.
9.
10.
12.
13.
11.
A.
B.

7
g. 1:
INSTALLATION
Before using your fridge freezer, you should pay attention to the following points:
• The operating voltage for your fridge freezer is 220-240V at 50Hz. Statesman does not accept
responsibility for any damages that occur due to ungrounded usage.
• Place your fridge freezer where it will not be exposed to direct sunlight.
• Your appliance should be at least 50cm away from stoves, gas ovens and heater cores, and at
least 5cm away from electrical ovens.
• Your fridge freezer should never be used outdoors or exposed to rain.
• When your fridge freezer is placed next to a deep freezer, there should be at least 2cm between
them to prevent humidity forming on the outer surface.
• Do not place anything on your fridge freezer, and install your fridge freezer in a suitable place so
that at least 15cm of free space is available above it.
• Do not place heavy items on the appliance.
• Use the adjustable front legs to make sure your appliance is level and stable. You can adjust the
legs by turning them in either direction. This should be done before placing food in the fridge
freezer.
• Before using your fridge freezer, wipe all parts with a solution of warm water and a teaspoon
of sodium bicarbonate, then rinse with clean water and dry. Place all parts in the fridge after
cleaning.
• Install the plastic distance guide (the part with black vanes at the rear) by turning it 90° (see g. 1)
to prevent the condenser from touching the wall.
• The refrigerator should be placed against a wall with a free space not exceeding 75mm.
IMPORTANT:
• When using your fridge for the rst time, or after transportation, keep it in an upright position
for at least 3 hours before plugging into the mains. This allows ecient operation and prevents
damage to the compressor.
• Your fridge may have a smell when it is operated for the rst time. This is normal and the smell
will fade away when your fridge starts to cool.

8
TRANSPORTATION AND CHANGING OF INSTALLATION POSITION
• Before transporting or changing the installation position, all the moving objects (ie. shelves, crisp
etc.) should be taken out or xed with bands in order to prevent them from getting damaged.
• Carry your fridge freezer in the upright position.
REPOSITIONING THE DOOR
It is possible to change the opening direction of the door if required. Please follow the instructions
below:
• Remove the screw that attaches the top door hinge to the bracket, ensuring you have a rm grip
of the door. Lift the door o the middle hinge and place carefully out of the way (see g. 2).
g. 2:
Top Hinge
• Remove the screws that attach the middle door hinge to the cabinet. Lift the freezer door o the
lower hinge and place carefully out of the way (see g. 3).
g. 3:
Middle Hinge

9
• Lie the appliance down carefully on its right hand side (your left hand side), ensuring the
oor surface is at and clean. Unscrew both leveling feet from the base. Using a cross head
screwdriver, remove the two screws that secure the lower door hinge to the cabinet. Using a at
head screwdriver, swap the hinge pin over to the hole on the right hand side of the hinge bracket.
Remove the two screws located at the left hand side of the base and x the hinge bracket into
place on the left hand side using the screws. Now replace the leveling feet (see g. 4).
g. 4: Hinge Bracket
Hinge Pin
• In both the top and the bottom of the freezer door there are bushing caps, remove both of these
and swap them to the hole at the opposite end of the door (see g. 5).
g. 5:
Freezer Door
Bushing Caps

10
• There are two plastic hole caps located on the appliance’s left hand side in the middle beam.
Remove these, and insert them into the two holes that are visible as a result of removing the
middle hinge bracket on the right hand side.
• Insert the freezer door on the lower hinge pin and balance it there. Turn the middle hinge bracket
180° and slot the pin into the top of the freezer door before xing the middle hinge to the cabinet
using the screws (see g. 6).
g. 6:
Turn the middle
hinge 180°
• Take the top hinge bracket that was removed earlier. Remove the screw that holds the hinge
onto the bracket (a). Remove the hinge pin (b) using a at head screwdriver and assemble on the
reverse side (c) (see g. 7).
g. 7:
ab
c

11
• Remove the top hinge screw caps carefully (see g. 8).
g. 8:
Remove Top
Hinge Screw Cap
• Swap the bush in the top of the refrigerator door over to the opposite side. On the bottom of the
refrigerator door, a metal door stopper is attached via a screw, remove this. In the instruction
manual bag, there is a similar metal stopper, this is for use when you reverse the doors. Attach
the stopper to the opposite end of the door using the screw. (see g. 9).
g. 9: Insert Top Hinge
Screw Caps
Insert the Two Screws
Fixing the Top Hinge

12
• Fix the top door hinge bracket to the top of the left hand side of the cabinet. Balance the
refrigerator door on the middle hinge pin.
• Insert the top hinge pin into the top of the refrigerator door and x to the hinge bracket using
the screw. Insert the top hinge screw right cap to the right hand side (you can nd the top hinge
screw right cap in the user manual bag).
• Ensure all screws are tightened and secure (see g. 10).
g. 10:

13
OPERATING INSTRUCTIONS
Adjusting the Temperature
The fridge freezer thermostat automatically regulates the inside temperature of the compartments.
By rotating the thermostat control knob from position 1 to 5, colder temperatures can be obtained
(see g. 11).
g. 11:
Thermostat Control Knob
Thermostat Settings:
• 1 – 2: For short-term storage of food in the freezer compartment, you can set the knob between
the minimum and medium position.
• 3 – 4: For long-term storage of food in the freezer compartment, you can set the knob to the
medium position.
• 5: For freezing fresh food. The appliance will work for longer. So, after the desired condition is
reached, return the knob to the previous setting.
Warnings about temperature adjustments:
• It is not recommended that you operate your fridge freezer in environments colder than 10°C in
terms of its eciency.
• Temperature adjustments should be made according to the frequency of door openings and the
quantity of food kept inside the fridge freezer.
• When you rst switch on the appliance, you should ideally try to run it without any food in for 24
hours and not open the door. If you need to use it straight away, try not to put a large quantity of
food inside.
• A 5 minute delay function is included to prevent damage to the compressor of your fridge freezer,
when you unplug it and then plug it in again to operate it, or when an energy breakdown occurs.
Your fridge freezer will start to operate normally after 5 minutes.
• Your fridge freezer is designed to operate in the ambient temperature intervals stated in the
standards, according to the climate class stated in the information label. It is not recommended
that your fridge freezer is operated in the environments which are out of the stated temperature
intervals. This will reduce the cooling eciency of the fridge.
• This appliance is designed for use at an ambient temperature within the 16°C – 32°C range.

14
CLEANING & MAINTENANCE
IMPORTANT: The power supply MUST be disconnected before cleaning.
• Do not clean the appliance by pouring water.
• Make sure that no water enters the lamp housing and other electrical components.
• The fridge freezer should be cleaned periodically using a solution of bicarbonate of soda and
lukewarm water.
• Clean the accessories separately with soap and water. Do not clean them in the dishwasher.
• Do not use abrasive products, detergents or soaps. After washing, rinse with clean water and
dry carefully. When you have nished cleaning, reconnect the plug to the mains supply with dry
hands.
• Clean the condenser with a broom at least twice a year. This will help you to save on energy
costs and increase productivity.
DEFROSTING THE FRIDGE COMPARTMENT
• Defrosting occurs fully automatically in fridge compartment during operation; the defrosted water
collected by the evaporating tray and evaporates automatically.
• The evaporating tray and water drain hole (back of the refrigerator crisper shelf) should be
cleaned periodically to prevent the water from collecting on the bottom of the fridge instead of
owing out (see g. 12).
g. 12:

15
DEFROSTING THE FREEZER COMPARTMENT
• The frost, which covers the shelves of the freezer compartment, should be removed periodically.
• Do not use sharp metal objects for this operation. They could puncture the refrigerant circuit and
cause irreparable damage to the unit. Use the plastic scraper provided.
• When there is more than 5mm of frost on the shelves, defrosting must be carried out.
• Before defrosting, place the frozen food in a cool place after wrapping it in sheets of newspaper
(this will help the food to maintain its temperature for longer).
• To accelerate the defrosting process, place one or more bowls of warm water in the freezer
compartment.
• Dry the inside of the compartment with a sponge or a clean cloth (see g. 4).
• Once the unit has been defrosted, place the food into freezer and remember to consume it in a
short period of time.
g. 13:
CLEANING THE EXTERIOR
• Use a clean, damp soft cloth to wipe the exterior surface of the appliance and dry thoroughly.
• Use a vacuum cleaner to remove dust from underneath the appliance and from around the
compressor which is situated at the back of the appliance, regularly to maintain adequate
ventilation. Use caution not to damage the coolant system.
Important: Do not use abrasive cloths, powders, household cleaners, bleach or wax polish to clean
the appliance as these can leave a smell in the appliance and can damage the exterior.
DOOR SEAL
Use a clean, damp soft cloth to wipe the door seal and in between the creases, avoid damaging the
door seal as this will aect the performance of your appliance.
GOING AWAY
If you are going away and do not want to leave the appliance left on, switch o at the socket and
remove the plug from the mains sockets ensuring not to pull the cord. Remove any food and follow
the cleaning instructions in the “Cleaning and Maintenance” section.
Note: Leave the door ajar as this will prevent odours and mould accumulating in the appliance and
will allow the appliance to dry completely.
REPLACING THE FRIDGE LED LAMP
The internal light is an LED lamp. To replace the lamp, please contact a qualied technician.

16
TROUBLESHOOTING GUIDE
If you are having problems with your appliance, please use our troubleshooting guide below. If you
are unable to resolve the issue using this guide please ring our Customer Service Department on
0844 848 5861. Please have the model code and purchase information available.
Issue Probable Cause
The appliance is not
operating
There is no power
The main power switch in your home is disconnected
The socket is faulty. To check this, plug the appliance into another
socket that you know is working
The appliance is performing
poorly
The appliance has been overloaded
The thermostat setting is on position 1 (if so set the thermostat dial
to a suitable value)
The doors aren’t closed properly
There is dust on the condenser
There isn’t enough space at the rear and/or side walls
The fridge is operating too
loudly
The compressor can sometimes cause more noise for a short period
of time when the appliance rst starts operating
A bubbling noise and splash can be caused by the ow of the
refrigerant through the tubes of the system. If you hear this noise
check that:
• The appliance is level
• Nothing is touching the rear of the appliance
• The objects on the appliance are vibrating
There is water in the lower
part of the refrigerator
The drain hole for the water is clogged (use the defrost drain plug to
clean the drain hole)

17
FUSE REPLACEMENT
DISPOSAL INFORMATION
The European Directive 2012/19/EU on Waste Electrical and Electronic Equipment
(WEEE), requires that old household electrical appliances must not be disposed of in
normal unsorted municipal waste.
Old appliances must be collected separately in order to optimise the recovery and
recycling of the materials they contain and reduce the impact on human health and the
environment.
The crossed out “wheeled bin” symbol on the product reminds you of your obligation,
that when you dispose of the appliance it must be separately collected. Consumers
should contact their local authority or retailer for information concerning the correct
disposal of their old appliance.
Fuse Cover
Fuse Replacement (Class I)
This appliance must be earthed. Remove the fuse cover with a small
at head screw driver. Take out the fuse and replace with a new fuse of
the same Amp. Replace the fuse cover and push back into place.

18

19

0844 848 5861
38 Bluestem Road,
Ransomes Europark
Ipswich, IP3 9RR
Table of contents
Other STATESMAN Refrigerator manuals

STATESMAN
STATESMAN BIFF5050FF User manual

STATESMAN
STATESMAN LF1418W User manual

STATESMAN
STATESMAN FF1855W User manual

STATESMAN
STATESMAN F1230APW User manual

STATESMAN
STATESMAN R155W User manual

STATESMAN
STATESMAN BIFF7030FF User manual

STATESMAN
STATESMAN FF1555W User manual

STATESMAN
STATESMAN TNF3500W User manual

STATESMAN
STATESMAN BU60LF Reference manual

STATESMAN
STATESMAN TL335LWE User manual

STATESMAN
STATESMAN LF1450W User manual

STATESMAN
STATESMAN TNF1860W User manual

STATESMAN
STATESMAN FF1755X User manual

STATESMAN
STATESMAN F1974AP User manual

STATESMAN
STATESMAN FF2310APS User manual

STATESMAN
STATESMAN TL235LW User manual

STATESMAN
STATESMAN TL335LW User manual

STATESMAN
STATESMAN L255W User manual