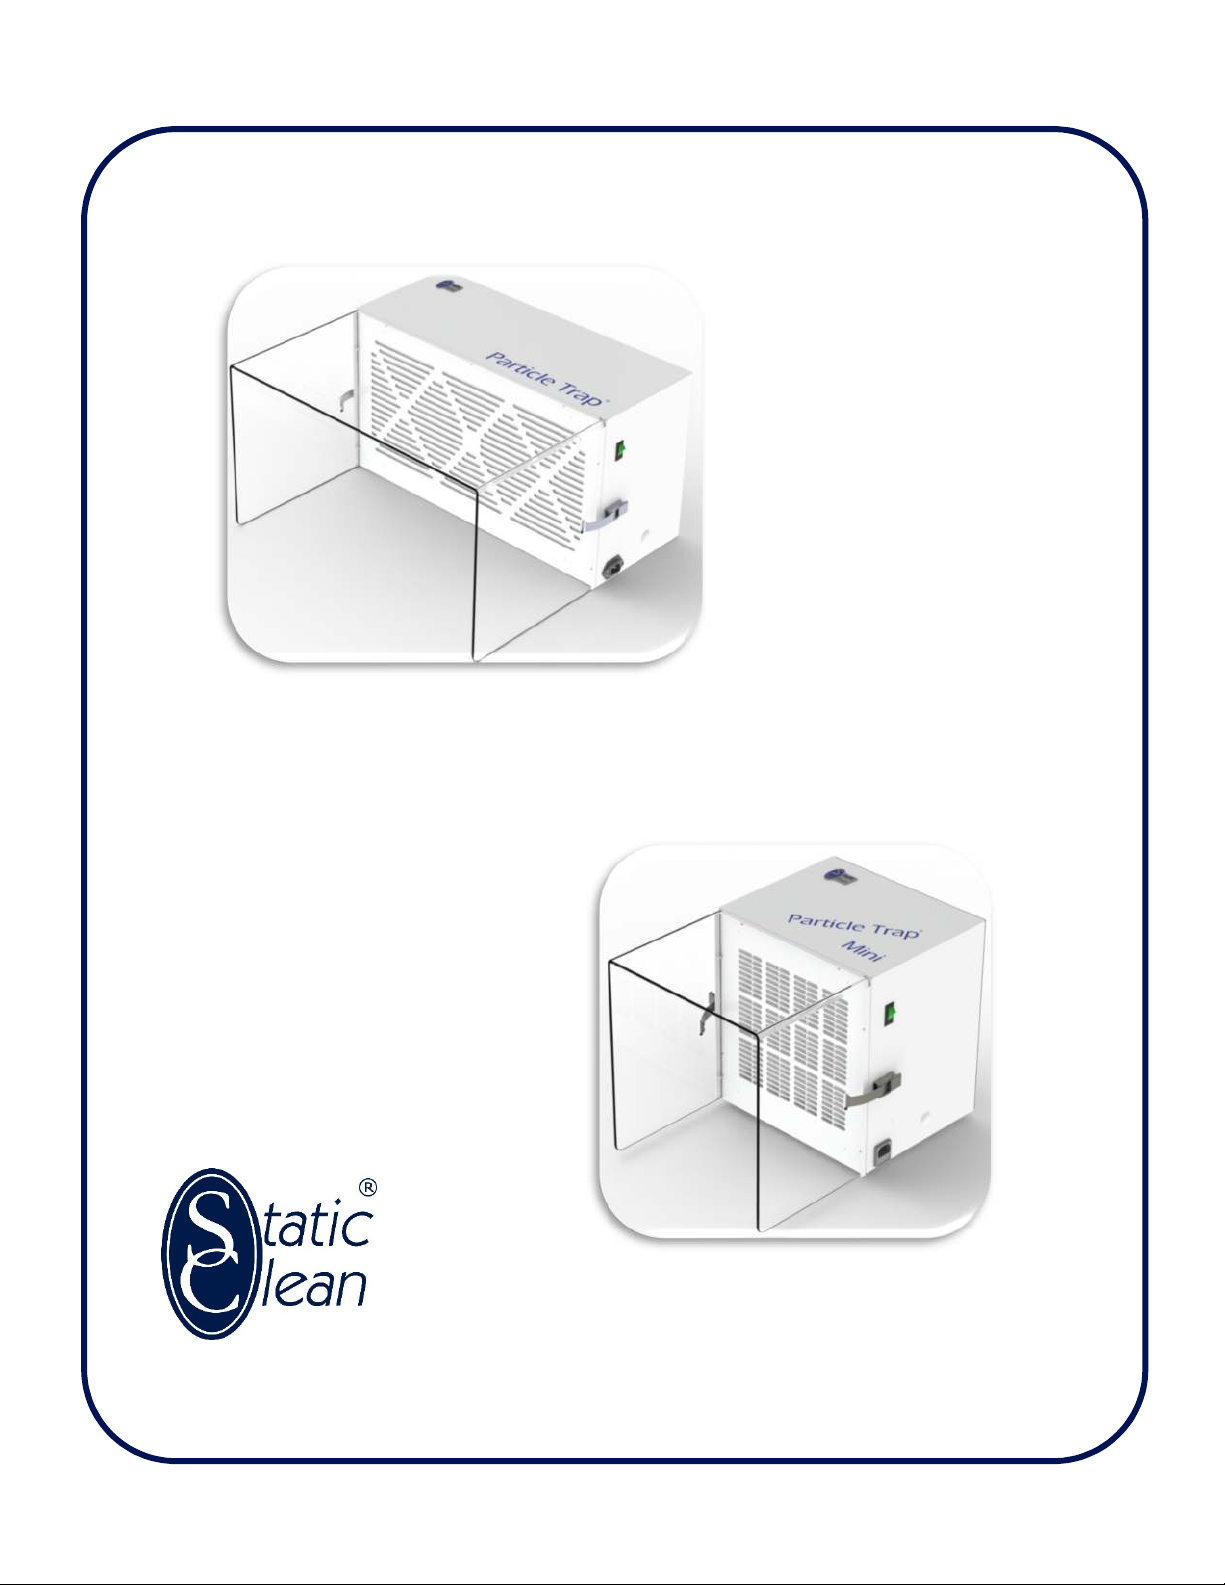
Particle Trap
®
Installation and Operation Manual
Static Clean International: Tel: 781 229-7799 / Fax: 781 229-4555 www staticclean com Made in USA p 5 of 7
V2019 2
Maintenance
The Particle Trap
®
Product Line requires very little maintenance other than routine replacement of the Pre-
Filters and HEPA Filter at various intervals The Pre-Filter should be replaced on a monthly Preventive
Maintenance (PM) schedule or by visual inspection for earlier replacement if the need dictates Replace pre-
filters every 30 days or 650 hours of operation; whichever comes first Change the pre-filter element more
frequently if contamination is seen accumulating on the pre-filter element prior to the regularly scheduled
replacement Replace the HEPA Filter every 1 to 3 years or 6200 hours of operation; whichever comes first
Failure to properly maintain and replace the pre-filter may shorten the effective life of the HEPA filter
Like most HEPA Filters, the life expectancy is between one and three years depending on usage and
environment For Cleanroom environments the HEPA Filter can last closer to three years, but in low level
cleanroom or general production environments, the HEPA Filter will have a lower lifespan
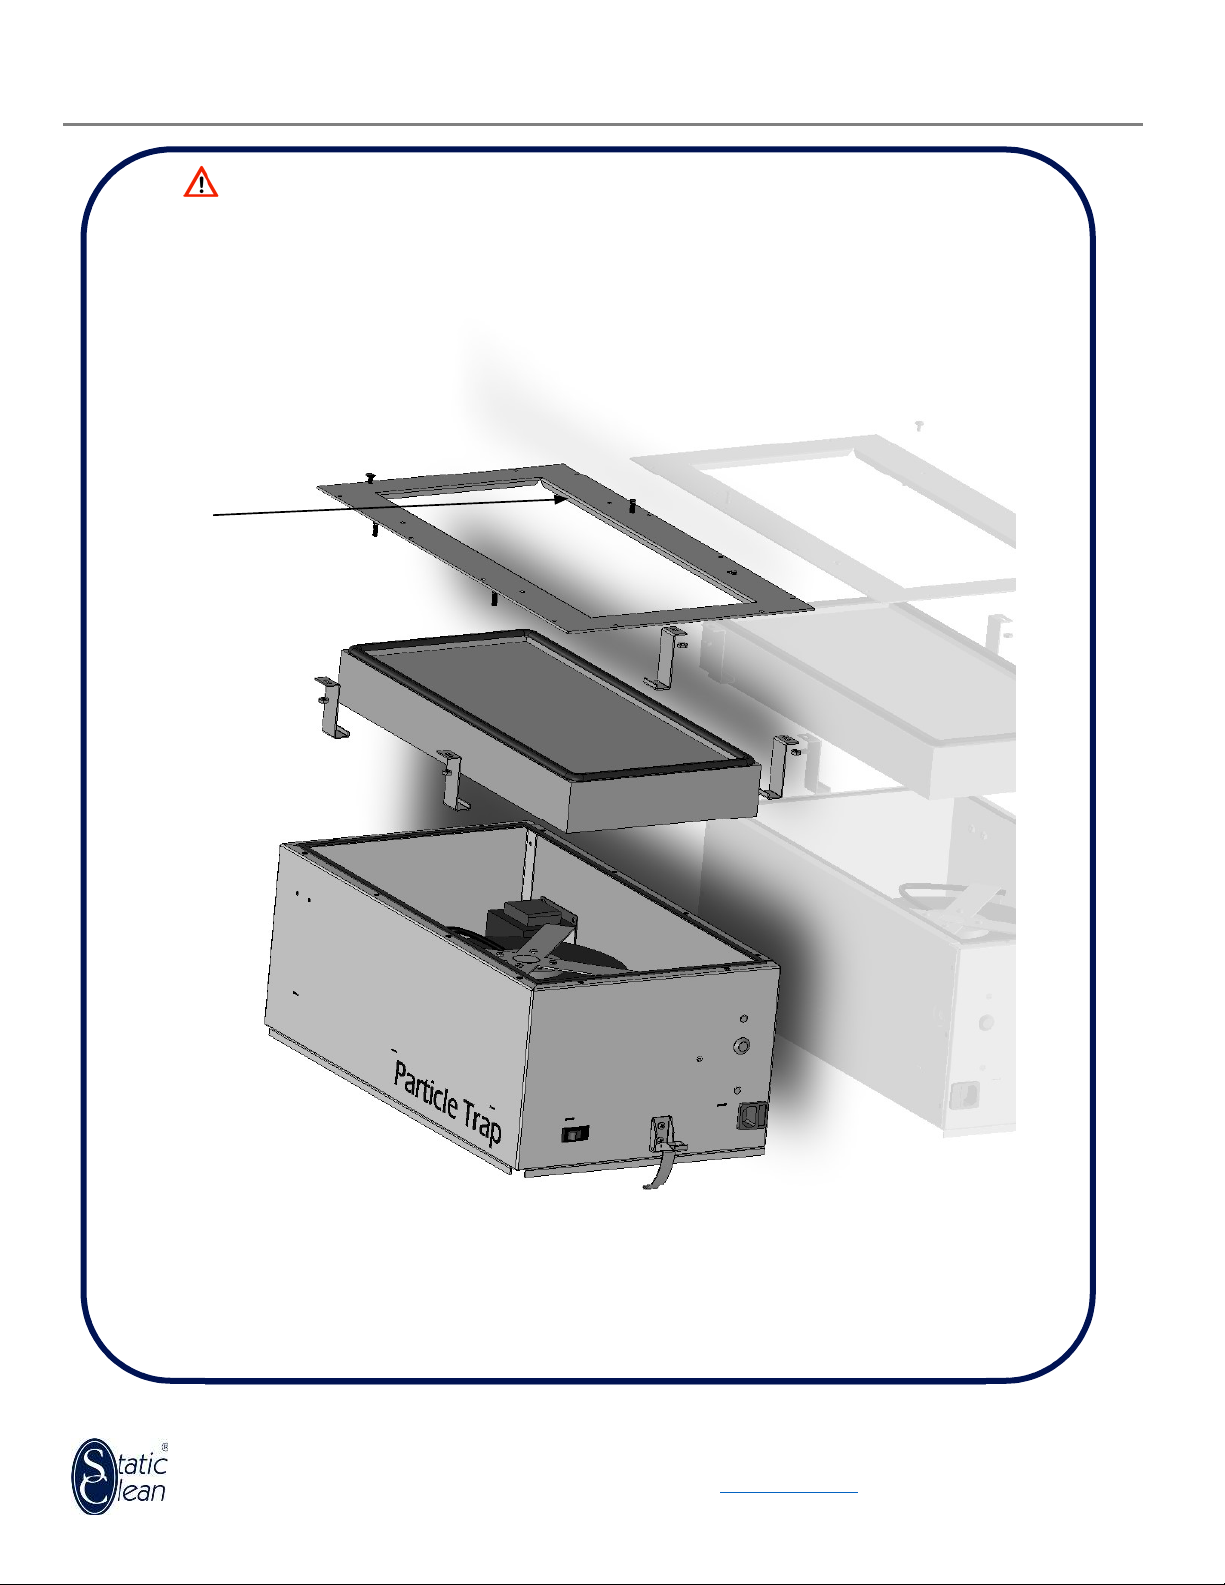
The Pre-filter element is replaced by releasing the draw latches on each side and removing the clear
polycarbonate Hood, which releases the front grill with the incorporated Pre-Filter channels Slide the old
filter out and the new filter in, (see the illustration on page 6)
NOTICE: the wire support mesh built into each Pre-Filter should be at the back, “downstream” and facing
inside the cabinet If you can see the wire after reassembly from the operators view, the filter is installed
backward
Pre-Filters are available as a case of six filters, ordered under part number;
PT6000 680-0006CASE per case of 6 Pre-Filter, Medical Grade
PT-Mini 680-0007CASE per case of 12, Pre-Filter, Medical Grade
Safety Precaution: HEPA Filter access.
The power source must be disconnected from the mains when accessing the HEPA Filter The internal fan
blades, and other electrical devices are exposed once the rear panel has been removed, and therefore no longer
have a guard Unplug the power cable to be certain power cannot be applied
The HEPA Filter is accessed by removing the rear panel that it is attached to
Remove the front hood and place the cabinet on a table lying face down Remove the #8 screws (see the
illustration on page 7) Loosen and rotate, or completely remove the four Filter Straps The HEPA Filter
may be stuck to the rear panel and require significant persuasion to break free The filter housing has a
gasket on one face, the gasket must engage the rear panel and be compressed, when placing the new filter on
the rear panel be mindful of the perimeter flanges, they must seat inside the filter metal frame
Procedure; At re-install, lay the rear panel on a work surface with flanges up-facing; place the HEPA Filter
onto the rear panel with the gasket down-facing and centered on the opening; engage (4) clips then tighten
slightly as you carefully align the HEPA filter so the flanges fit inside the HEPA filter frame Tighten all (4)
clips to seal gasket to rear panel
HEPA Filters are available individually, ordered as part number:
PT6000 680-0001 sold as each
PT-Mini 680-0005 sold as each