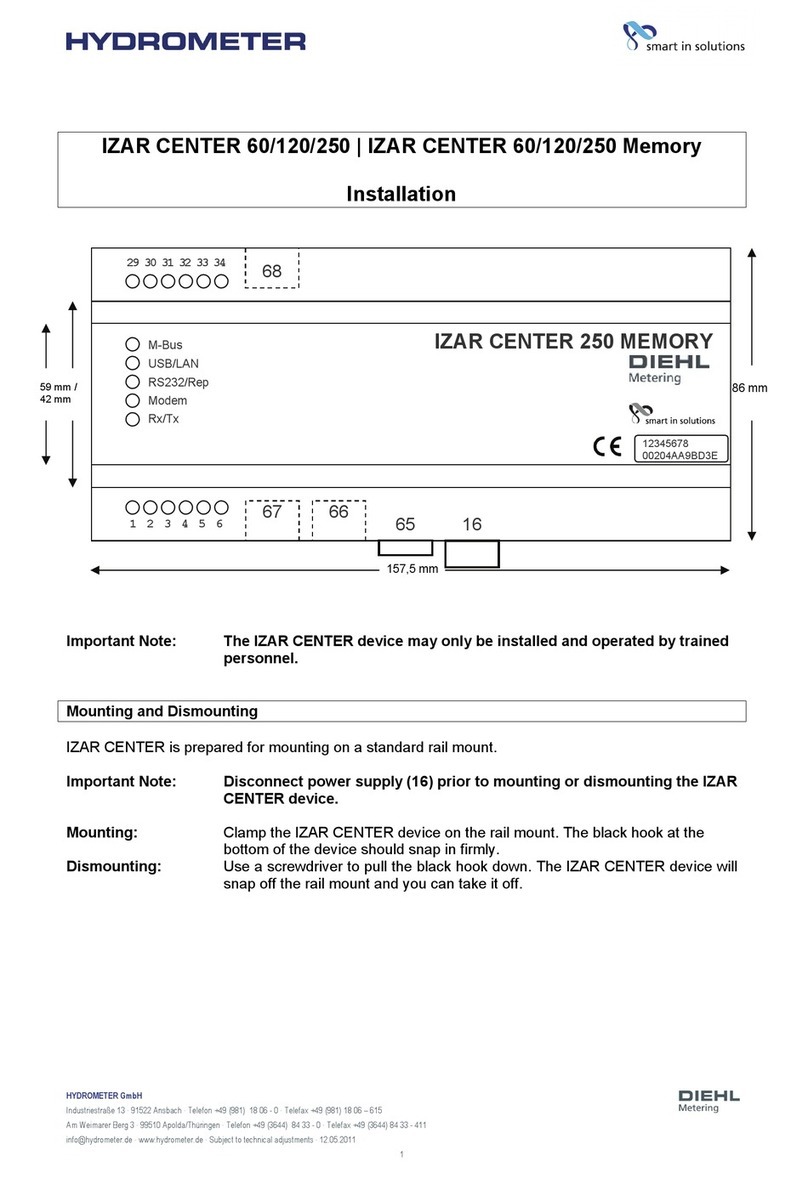
Static Power iSTS G User manual

iSTS-Model-G-User-Manual-v1
Model G
User Manual
Static Transfer Switch
Last Updated
23/01/19

1
Contents
1 Safety Instructions................................................................................................................3
1.1 Introduction .............................................................................................................................3
1.2 Transport, Storage, Unpacking ...............................................................................................3
1.3 Installation...............................................................................................................................3
1.4 Electrical Connection...............................................................................................................4
1.5 Synchronism ...........................................................................................................................4
1.6 Fire Regulations......................................................................................................................5
1.7 Standards Applied & Conformity .............................................................................................5
1.8 Warranty..................................................................................................................................6
2 System Overview ..................................................................................................................7
2.1 Description..............................................................................................................................7
2.2 Single Line Diagram –Single-Phase 2-Pole Models...............................................................8
2.3 Single Line Diagram –Three-Phase 4-Pole Models ...............................................................8
2.4 Overview.................................................................................................................................9
3 Installation...........................................................................................................................10
z3.1 Environment Check.............................................................................................................10
3.2 Connecting to Terminals .......................................................................................................11
3.3 Commissioning......................................................................................................................12
4 User Interface Panel............................................................................................................14
4.1 Preferred Switch....................................................................................................................14
4.2 Override Switch.....................................................................................................................14
4.3 Remote Connection Port - High Density DA-26 ....................................................................15
5 Display Screen Interface.....................................................................................................16
5.1 Home / Status Screen...........................................................................................................16
5.2 Status & Alarms ....................................................................................................................16
5.3 Mimic Display........................................................................................................................17
5.4 Manual Transfers..................................................................................................................17
5.5 Variables...............................................................................................................................18
5.6 Events...................................................................................................................................18
5.7 Control Screen......................................................................................................................19
5.8 Settings.................................................................................................................................20
5.9 Time & Date..........................................................................................................................20
5.10 Calibration...........................................................................................................................21
5.11 Steady State........................................................................................................................22

2
5.12 Transient State....................................................................................................................23
5.13 Output .................................................................................................................................24
5.14 Communication Settings .....................................................................................................25
6 Web Browser Interface .......................................................................................................26
6.1 Connecting to a PC...............................................................................................................26
6.2 Connecting to the Web Server..............................................................................................27
6.3 Control Panel ........................................................................................................................28
6.4 Email.....................................................................................................................................30
6.5 Advanced Settings ................................................................................................................31
6.6 Input Steady State Settings...................................................................................................32
6.7 Input Transient Settings ........................................................................................................34
6.8 Output Settings .....................................................................................................................36
7 Maintenance Bypass...........................................................................................................38
7.1 Overview...............................................................................................................................38
7.2 Using the OVERRIDE switch ................................................................................................38
7.3 Maintenance Bypass Procedure ...........................................................................................38
7.4 Reinstatement from Maintenance Bypass Procedure ...........................................................39
8 Fault Diagnosis ...................................................................................................................41
8.1 Fault Codes...........................................................................................................................41
8.2 Load Fault.............................................................................................................................43
9 Maintenance ........................................................................................................................44
10 Specifications....................................................................................................................45
11 Operating Parameters.......................................................................................................47
12 Contact Information..........................................................................................................48

3
1 Safety Instructions
1.1 Introduction
Some aspects of this manuals contents may differ to the equipment as supplied due to
technical improvements, specific model variations etc. If in any doubt in respect to the
procedures and safety issues consult the manufacturer and do not proceed until clarification is
received.
This manual contains important instructions that should be followed and fully understood
before proceeding and commissioning and operation to prevent harm to personnel and
equipment.
Installation and commissioning should be carried out only by qualified and experienced
electricians. The STS should be operated by technically qualified personnel that are
authorized, experienced and have knowledge and understanding of the equipment and the
critical loads, using the documented procedures.
Read this whole document thoroughly. Understand every aspect before proceeding. Request
further assistance if you do not understand any aspect of the operation of the STS. Support
and contact numbers are at the end of the manual.
These instructions cover normal operation in the automatic as well as in manual modes.
Special operating conditions, such as short circuit tests, input supplies, etc., are not covered in
this document. These operations require comprehensive knowledge of the overall system and
should be carried out by properly qualified, skilled and competent service personnel only.
1.2 Transport, Storage, Unpacking
The shipping packaging, either box or crate, has been fitted with Shockwatch drop sensor to
help determine whether the STS has been dropped during transit which can cause damage to
the product(s).
Procedure for Receiving Shipment:
•If the Shockwatch indicator is RED, it does not mean that damage has occurred, it only
indicates that the carton received an impact or movement. If the indicator on the label is
RED, make a notation to that effect on the bill of lading or delivery receipt or document.
Examine contents immediately for possible damage. If damage is discovered, inform
carrier immediately and follow normal procedure for a carrier inspection and filing of a
concealed damage claim.
•Take a picture of the carton and contents as a record.
•If the packaging is OK then please keep the packaging in a secure place in case the unit
needs to be returned for repair.
1.3 Installation
The following instructions are provided for the personal safety of operators and also for the
protection of the described product and connected equipment.
•Observe the prescribed accident prevention and safety rules for the specific application.

4
•When installing the STS strictly observe all information on technical data and operating
conditions. Comply with all warnings, and strictly follow the procedures and practices as
described in this manual.
•This STS is intended to be used in a controlled indoor environment and free of
conductive contaminants and protected against animal intrusion.
•It is important that the unit has adequate ventilation. Maintain air movement around and
through the unit. Do not block the air vents or restrict airflow over the heatsinks on the
side of the STS.
•The unit must be placed in a sufficiently ventilated area; the ambient temperature should
not exceed 40°C (104°F).
•Do not install the STS in an excessively humid environment or near water, relative
humidity should not exceed 90% at 20°C (680F).
•Avoid spilling liquids or dropping any foreign object into the STS.
•The electrical connections must be covered.
•Connecting cables must be supported.
•Earth connection must be checked for safe function after assembly.
1.4 Electrical Connection
•Cable lug size is limited to 35/50 mm² or 70 mm² using narrow palm lugs and 10 Amps
per terminal.
•All cables connecting to the STS should be supported and not weigh the rear of the STS
and strain the point of connection at the front of the STS.
•All electrical connections are to be realized by properly qualified, skilled and competent
service personnel only.
•Consider electrical distribution discrimination carefully. The STS has two incoming AC
power sources; your upstream protective devices must discriminate with downstream
protective devices. The upstream STS supply breaker /fuse should only open if the
downstream device protection is unable to trip or there is a fault within the STS.
1.5 Synchronism
The smoothest change-over occurs when the supplies are in synchronism. If an asynchronous
transfer occurs, large currents may flow into the load which can damage trip & protective
devices, blow fuses, saturate and cause damage to transformers. If possible it is best to make
sure the supplies are in synchronism.

5
1.6 Fire Regulations
Should a fire break out inside the system, use a fire extinguisher with CO2 or Halon. Do not
inhale vapours.
1.7 Standards Applied & Conformity
This equipment conforms to the following standards and EC Directives:
Standards to which conformity declared:
EN 60950-1 Information technology equipment Safety - General requirements
EN/AS 62310.1 Static transfer systems (STS) - General and safety requirements
EN/AS 62310.2 Static transfer systems (STS) - Electromagnetic compatibility (EMC)
requirements
EN/AS 62310.3 Static transfer systems (STS) - Part 3: Method for specifying performance
and test requirements
EN/AS 55024 Information technology equipment, Immunity characteristics, Limits and
methods of measurement
EN 60950-1-2006 Information technology equipment safety: General requirements
Application of Council Directives:
2006/95/EC Low Voltage Directive
73/23/EEC Low Voltage Directive
89/336/EEC EMC Directive, in version 92/31/EU
93/68/EEC EMC Directive Amendments
The product mentioned in this manual conforms to the relevant requirements to the appropriate
EU Directive, i.e. that this product meets all relevant EU Directives and that it can be sold
inside the European Union without national commercial hindrances.
Relevant EU Directives: EMC- and Low Voltage Directives:
•EU Directive on Electromagnetic Compatibility 89/336/EU, in version 92/31/EU,
93/68/EU
•EU Directive on Electrical Equipment designed for use within certain Voltage Limits
(Low
Voltage Directive) 73/23/EU, in version 93/68/EU
The directives themselves define only on a modest scale what to do and refer to the
harmonised standards. One of the EU harmonised product standards is applicable for rectifier
systems.

6
Year of CE Marking 2015/2016
1.8 Warranty
Static Power operating through its authorized agents warrants that the standard products will
be free of defects in materials and workmanship for a period of 24 months after the date of
invoice, or such other period as may be specified.
This warranty does not cover failures of the product which result from incorrect installation,
misuse, alterations by persons other than authorized agents or abnormal operating conditions.

7
2 System Overview
2.1 Description
A Static Transfer Switch (STS) provides seamless switching between two power sources to
provide interrupted power to a critical load.
The STS continuously monitors the supply sources for failure or degeneration and switches
automatically to the alternate source if the load will be affected. The break in the supply
transition is so short that it is not seen by the critical load. This switching process is undertaken
as a break before make transfer, preventing overlapping which can cause large and
unpredictable currents. Both the active conductor and the neutral are switched. Thyristors are
used to undertake the switching process.
In the case of downstream load fault conditions, the fault current drawn from the supply may
degrade or damage the supply sources; as a consequence should a fault current exist in the
load the STS will inhibit a transfer to the alternate source even if this causes source supply
degradation or loss. This is to ensure that the fault will not be transferred to the alternate
supply with the possibility of degrading both sources.

8
2.2 Single Line Diagram –Single-Phase 2-Pole Models
2.3 Single Line Diagram –Three-Phase 4-Pole Models

9
2.4 Overview
The STS includes a mechanically interlocked maintenance bypass via a 5 x circuit breaker
array.
•L1, L2, L3 refers to the phases, or Lines 1,2 and 3.
•N refers to Neutral
•S1 and S2 refers to Supply 1 and 2.
•PSU refers to Power Supply Unit.
•CB refers to Circuit Breaker.

10
3 Installation
3.1 Environment Check
It is important that the STS is installed into an environment that adheres to the following set of
specifications:
Environmental Parameters
Min
Max
Temperature
-20°C
45°
Humidity
5%
95%
•The STS unit should be bolted to the floor using the provided mounting rails.
•The STS should have at least 100mm of space between the back, sides and any walls,
with 1400mm in front of the STS, as shown in the diagram below.
1400mm 100mm
100mm
100mm

11
3.2 Connecting to Terminals
It is important that the cables are run in accordance with any local regulations. The cable entry
space may be at the top or bottom depending on the unit. The gland plate covering the cable
entry space must have a hole cut into it to fit the cable runs. All data cable is run to the User
Interface panel. The data cables should not be run close to the power cables (>50mm).
It is important that all cables are terminated using lugs and that the lugs are fastened to the
terminal blocks with the supplied bolts. The terminals will accommodate either a standard M10
or M16 cable lug.
The bolts should be torqued to 10Nm (7.5lb ft). Once the cables have been terminated, care
should be taken to double check that the cables have been placed in the correct position.
Connect cables to the locations marked with arrows.

12
3.3 Commissioning
Power-up Test: This section covers the steps required for the initial power up of the STS. As
always care should be taken when dealing with live voltages. A test load of at least 15A is
required. You can use the Commissioning Checklist to assist you.
1. Start with both input supplies off. If the unit has isolation breakers these should be off.
2. Connect Load.
3. Turn on Supply 1 (S1) and measure the voltages across the phases to neutral. Check that
the electronics starts-up. Then turn S1 off.
4. Turn on Supply 2 (S2) and measure the voltages across the phases to neutral. Check that
the electronics starts-up. Then turn S2 off.
5. Turn on Q1 and Q2.
6. Turn on S1; check the voltages on the User Interface (UI) LCD.
7. Turn on S2; then check voltages on the UI LCD.
8. Turn on Q3; input supply may dip causing a transfer.
9. With the unit on S1 (manually transfer if necessary); measure the voltage of the output and
measure the current/load on each phase.
10. Confirm these values on the UI LCD.
11. Transfer to S2; Measure the voltage of the output and measure the current/load on each
phase.
12. Confirm these values on the UI LCD.
13. Simulate supply failures and observe the unit transfer: ie. While on S1, fail S1; while on
S2, fail S2. Observe that the STS transfers okay.
14. Review the event list. Taking note of any COMMS or SCR events.
After initial power up: After a few seconds the display screen will power up and you will be
prompted to enter the date and time. We strongly encourage the setting of the date and time
so that real time event correlation can be undertaken. The Real Time Clock is backed up by a
battery clock.
The ALARM should not be active. If it is check the following states:
oON Supply 1 when priority is Supply 2
oON Supply 2 when priority is Supply 1
oSupply 1 or Supply 2 are not in spec.
oOverride Switch is in position 1 or 2
oSupply 1 & 2 are not in synchronism
oThe unit is too hot (thermal bi-metal switch on H.S. activated)
oThere is / was an overcurrent/ overload / load fault condition

13
Commissioning Checklist
Environment
Temperature
Min: -20º Max: 40º
Humidity
Min: 5% Max: 90%
IP rating
Water and Dust hazards
Situating
Positioning
Mounting
Cabling
Power
Data
Terminated
Checked
Power-up Test
Input supplies and Breakers OFF
Connect Load
Turn on S1
L1 V=
L2 V=
L3 V=
Electronics
Turn off S1
Turn on S2
L1 V=
L2 V=
L3 V=
Electronics
Turn off S2
Turn on breakers Q1 & Q2
Turn on S1: UI LCD Voltages
Turn on S2: UI LCD Voltages
Turn on Q3
S1 to Output:
L1 V=
L2 V=
L3 V=
L1 I=
L2 I=
L3 I=
N I=
UI LCD Voltage and Currents
S2 to Output:
L1 V=
L2 V=
L3 V=
L1 I=
L2 I=
L3 I=
N I=
UI LCD Voltage and Currents
Event List Check

14
4 User Interface Panel
4.1 Preferred Switch
This switch allows the preferred source to be set to Supply 1, Supply 2 or None (0), which will
take affect only when the preferred source is set to None (0) on the STS software. Refer to the
Web Browser Interface section for instructions on changing the preferred source through LAN
connectivity.
If the STS is forced to automatically transfer the critical load to the alternate source the STS
will automatically transfer back to the preferred again when the preferred source is within
tolerance and after a pre-set settling delay.
4.2 Override Switch
Setting the override switch to 1 or 2 will force the STS to stay on that supply even if faults are
detected on that source. This switch overrides all other settings. It should not be used to
transfer the critical load between sources (a break may result).
NOTE: The override provides control logic bypass only, it does not provide an alternative path
for the load power.
WARNING! The override switch initiates instantaneous transfers and may transfer faults to the
load.
WARNING! Never attempt to operate the OVERRIDE switch if the supplies are not in
synchronism. There is no interlock to prevent the switch from being operated when the
supplies are not available or not in synchronism. Refer to the LCD variables display and mimic
diagram to check the synchronism state, (SYNC LED will be RED, variables display will show
degrees out of synchronism. Only operate when less than 10 degrees). If the control is not
operating you may need to use other means to determine that the supplies are in synchronism.
Do not operate the OVERRIDE switch onto an absent supply.

15
4.3 Remote Connection Port - High Density DA-26
UI Breakout
The relays can switch up to 220 DC, 250 AC.
Remote contacts are wet contacts and do not require external voltage to be applied.
PINS
CONNECTION
FUNCTION
1 to 2
N/O
Load Fault
3 to 2
N/C
Load Fault
4 to 5
N/O
General Alarm
6 to 5
N/C
General Alarm
7 to 8
N/O
Not in Sync
9 to 8
N/C
Not in Sync
10 to 11
N/O
ON A (Supply 1)
12 to 11
N/C
ON A (Supply 1)
13 to 14
N/O
ON B (Supply 2)
15 to 14
N/C
ON B (Supply 2)
16 to 19
REMOTE CONTACT
Emergency power off
17 to 19
REMOTE CONTACT
Transfer to Supply 1
18 to 19
REMOTE CONTACT
Transfer to Supply 2
19 20 21 22 23 24 25 26
10 11 12 13 14 15 16 17 18
1 2 3 4 5 6 7 8 9

16
5 Display Screen Interface
5.1 Home / Status Screen
Acolour touch-screen LCD provides the user with an easy to navigate real-time information
and control interface.
Touch feedback is indicated by an audible ‘beep’.
5.2 Status & Alarms
The Home/Status screen shows a mimic diagram and status indication as text. This is the
default screen and a period of inactivity will result in the LCD returning to this location.
The mimic diagram allows easy identification of state changes, showing system status. All
states are bi-colour where green indicates the normal, or ‘on’state.

17
5.3 Mimic Display
The availability of supply 1 and 2 is indicated by their respective bar on the mimic diagram.
The synchronization hold-off bar between the two sources on the mimic diagram is located
between the two supply bars. Green is in synchronism.
The area directly before the two bars converge shows which supply is online.
5.4 Manual Transfers
Press and hold the transfer button for 3 seconds to affect a transfer. This transfer touch
zone can be removed if desired (to make the install more secure) via the “Control” menu and
selecting the “Allow Transfer”, “OFF” option. The unit can still be transferred using the priority
switch at the rear of the STS.

18
5.5 Variables
The Variables screen shows the following:
•Output Voltage (phase to neutral / phase)
•Output Current
•Output Power Factor.
•Output Power (kWatts).
•Output Power (kVA)
•Frequency for each source
•1 Source Input Voltage
•2 Source Input Voltage
•Phase Angle between Sources 1 & 2
These variables refresh approximately every three seconds.
5.6 Events
Up to 200 events can be stored. Once the list is full, the oldest events are pushed from the
bottom of the list and are replaced by any new events. See the Fault Codes section for more
information.
230
231
230
100
23
23
0.99
1: 50.0Hz
0°
230
231
230
100
23
23
0.99
2: 50.0Hz
230
231
230
100
23
23
0.99

19
5.7 Control Screen
The control interface provides access to essential parameters and set-up information:
•Alarm Reset: Clears persistent alarms (such as SCR Short or SCR Open).
•Alarm Sound: Enables/Disables the alarm sound.
•Status Screen: Normal/Safe. Enables/Disables the transfer touch zone on the
status screen.
•Preferred Source: Sets the preferred source supply (supply 1, supply 2 or none). This
will only make changes when the hardware preferred switch (at the rear of the unit) is
set to ‘0’ (middle position)
•Sync Break Override: Sets the break time (in ms) for an out of sync transfer
•Auto Re-Transfer: Sets the STS to transfer back to the preferred supply automatically
after a self-initiated (non-manual) transfer.
•Timer: Sets the delay (in seconds) between the preferred supply being recognized as
OK, and the transfer attempt back to that supply.
Sync Break & Mode Angle Detection Setting
Provides access to adjust the allowable not in synchronism transfer. (Default is 30oand is
adjustable between 5o–180o), Manual transfers are inhibited when supplies are outside this
range, however, automatic transfers will experience a 50 msec break, settable (0 –150 msec).
Table of contents
Other Static Power Switch manuals
Static Power
Static Power iSTS W User manual

Static Power
Static Power iMax G User manual

Static Power
Static Power iSTS B1 User manual

Static Power
Static Power iSTS C User manual
Static Power
Static Power iSTS R User manual

Static Power
Static Power iSTS R User manual

Static Power
Static Power iSTS F1 User manual

Static Power
Static Power iSTS F3 User manual
