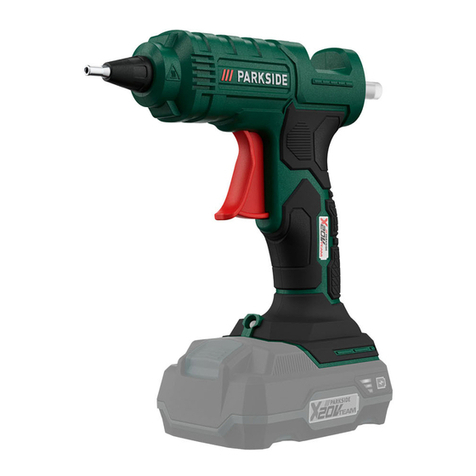
stayer CG L20 User manual

CG L20
Área Empresarial Andalucía Sector I
Calle Sierra de Cazorla nº7
C.P: 28320 Pinto (Madrid) SPAIN
info@grupostayer.com www.grupostayer.com
es Manual de instrucciones
gb Operating instructions

ES
Declaramos bajo nuestra responsabilidad, que el producto descrito bajo “Datos técnicos” está
en conformidad con las normas o documentos normalizados siguientes: EN 62841-1, EN 55014-
1, EN 55014-2, EN 50581, EN IEC 63000, EN 60335-2-29 de acuerdo con las regulaciones
2006/42/EC, 2014/30/EU, 2011/65/EU
IT
Noi dichiariamo sotto la nostra unica e sola responsabilità che questo prodotto si trova in
conformità con le norme o i documenti normalizzati seguenti: EN 62841-1, EN 55014-1, EN
55014-2, EN 50581, EN IEC 63000, EN 60335-2-29 in conformità con i regolamenti 2006/42/EC,
2014/30/EU, 2011/65/EU.
GB
We declare under our sole responsibility that this product is in conformity with the following
standards or standardized documents: EN 62841-1, EN 55014-1, EN 55014-2, EN 50581, EN
IEC 63000, EN 60335-2-29 according to EU Regulations 2006/42/EC, 2014/30/EU, 2011/65/EU.
DE
Erklären unter unserer Verantwortung, dass das Produkt unter "Technische Daten" beschrieben
im Einklang mit den Normen oder normativen Dokumenten wie folgt lautet: EN 62841-1, EN
55014-1, EN 55014-2, EN 50581, EN IEC 63000, EN 60335-2-29 in Übereinstimmung mit den
Vorschriften 2006/42/EC, 2014/30/EU, 2011/65/EU.
FR
Nous déclarons sous notre seule et unique responsabilité que ce produit est conforme aux
normes ou documents normalisés suivants: EN 62841-1, EN 55014-1, EN 55014-2, EN 50581,
EN IEC 63000, EN 60335-2-29 conformément aux réglementations 2006/42/EC, 2014/30/EU,
2011/65/EU.
P
Declaramos sob a nossa única responsabilidade que este produto está em conformidade com os
regulamentos ou documentos normalizados seguintes: EN 62841-1, EN 55014-1, EN 55014-2,
EN 50581, EN IEC 63000, EN 60335-2-29 de conformidade com os regulamentos 2006/42/EC,
2014/30/EU, 2011/65/EU.
TR
63000, EN 60335-2-29 yönetmeliklere uygun olarak 2006/42/EC, 2014/30/EU, 2011/65/EU.
PL
CZ
v souladu s následujícími normami a normativními dokumenty: EN 62841-1, EN 55014-1, EN
CE, 2014/30/EU, 2011/65/EU.
EL
2014/30/EU, 2011/65/EU.
ESIT. Dichiarazione di conformità GB. Declaration of Conformity
DE. Konformitätserklärung FR. Déclaration de Conformité P. Declaração de conformidade
TR.CZ.EL
Ramiro de la fuente
Director Manager
2022
Área Empresarial Andalucía Sector 1
C/ Sierra de Cazorla, 7
28320 Pinto (Madrid) SPAIN
Email: sales@grupostayer.com
Email: info@grupostayer.com

DATOS TÉCNICOS
/ DATA SHEET
CG L20
Li-ion
Vdc 18
Ah 2.0 - 6.0
min 60
n 0.7 - 11
dB(A) 70
dB(A) 80
N5000
ml 310
kg 2
m/s² <2.5
rpm
LPA
LWA

A
C
B
D
1
5
9
8
67
2 3 4

- 5 -
es
it
gb
de
p
tr
cz
el
fr
Instrucciones generales de seguridad para
herramientas eléctricas
1) Puesto de trabajo
a) Mantenga limipo y bien iluminado su puesto de
trabajo
áreas de trabajo pueden provocar accidentes.
b) No utilice la herramienta eléctrica en un entorno
con peligro de explosión, en el que se encuentren
combustibles líquidos, gases o material en polvo.
Las herramientas eléctricas producen chispas que pue-
c) Mantenga alejados a los niños y otras personas de
su puesto de trabajo al emplear la herramienta eléc-
trica.
sobre el aparato.
2) Seguridad eléctrica
a) El enchufe de la herramienta eléctrica debe corres-
ponder a la toma de corriente utilizada. No es admisi-
ble modicar el enchufe en forma alguna. No emplee
adaptadores con herramientas eléctricas dotadas de
una toma de tierra. -
dos a las respectivas tomas de corriente reducen el ries-
go de una descarga eléctrica.
b) Evite que su cuerpo toque partes conectadas a tie-
rra como tuberías, radiadores, cocinas y refrigerado-
res. El riesgo a quedar expuesto a una sacudida eléctrica
es mayor si su cuerpo tiene contacto con tierra.
c) No exponga las herramientas eléctricas a la lluvia
y evite que penetren líquidos en su interior. Existe el
peligro de recibir una descarga eléctrica si penetran cier-
tos líquidos en la herramienta eléctrica.
d) No utilice el cable de red para transportar o col-
gar la herramienta eléctrica, ni tire de él para sacar el
enchufe de la toma de corriente. Mantenga el cable
de red alejado del calor, aceite, esquinas cortantes o
piezas móviles. Los cables de red dañados o enredados
pueden provocar una descarga eléctrica.
e) Al trabajar con la herramienta eléctrica a la intem-
perie utilice solamente cables de prolongación ho-
mologados para su uso en exteriores.
exteriores reduce el riesgo de una descarga eléctrica.
f) Si fuera necesario utilizar la herramienta eléctrica
en un entorno húmedo, utilice un interruptor de pro-
tección diferencial.-
riesgo de una descarga eléctrica.
3) Seguridad de personas
a) Esté atento a lo que hace y emplee la herramien-
ta eléctrica con prudencia. No utilice la herramienta
eléctrica si estuviese cansado, ni tampoco después
de haber consumido alcohol, drogas o medicamen-
tos. El no estar atento durante el uso de una herramienta
eléctrica puede provocarle serias lesiones.
b) Utilice un equipo de protección y en todo caso
unas gafas de protección. El riesgo de lesionarse se
reduce considerablemente si, dependiendo del tipo y la
-
-
rilla antipolvo, zapatos de seguridad con suela antidesli-
zante, casco, o protectores auditivos.
c) Evite una puesta en marcha fortuita del aparato.
Asegúrese de que la herramienta eléctrica está apa-
gada antes de conectarla a la toma de corriente y/o la
batería, de desconectarla o de transportarla. Si trans-
porta la herramienta eléctrica sujetándola por el interrup-
la toma de corriente con el aparato conectado, puede dar
lugar a un accidente.
d) Retire las herramientas de ajuste o llaves jas
antes de conectar la herramienta eléctrica. Una he-
rramienta o llave colocada en una pieza rotante puede
producir lesiones al ponerse a funcionar.
e) Evite trabajar con posturas forzadas. Trabaje so-
bre una base rme y mantenga el equilibrio en todo
momento. Ello le permitirá controlar mejor la herramien-
-
perada.
f) Lleve puesta una vestimenta de trabajo adecuada.
No utilice vestimenta amplia ni joyas. Mantenga su
pelo, vestimenta y guantes alejados de las piezas
móviles. La vestimenta suelta, las joyas y el pelo largo
se pueden enganchar con las piezas en movimiento.
g) Siempre que sea posible utilizar equipos de aspi-
ración o captación de polvo, asegúrese que éstos es-
tén montados y que sean utilizados correctamente.
reducir los riesgos de aspirar polvo nocivo para la salud.
4) Trato y uso cuidadoso de herramientas eléctricas
a) No sobrecargue el aparato. Use la herramienta
prevista para el trabajo a realizar. Con la herramienta
adecuada podrá trabajar mejor y más seguro dentro del
margen de potencia indicado.
b) No utilice herramientas con un interruptor defec-
tuoso. Las herramientas que no se puedan conectar o
desconectar son peligrosas y deben hacerse reparar.
c) Saque el enchufe de la red y/o retire la batería an-
tes de realizar un ajuste en la herramienta, cambiar
de accesorio o guardar el aparato. Esta medida pre-
ventiva reduce el riesgo de conectar accidentalmente el
aparato.
d) Guarde las herramientas eléctricas fuera del alcan-
ce de los niños. No permita que las utilcen personas
que no estén familiarizadas con ellas o que no hayan
leído estas instrucciones. Las herramientas utilizadas
por personas inexpertas son peligrosas.
e) Cuide sus herramientas eléctricas con esmero.
Controle si funcionan correctamente, sin atascarse,
las partes móviles de la herramienta y si existen par-
tes rotas o deterioradas que pudieran afectar a su
funcionamiento. Si la herramienta eléctrica estuviese
defectuosa, hágala reparar antes de volver a utilizar-
la. Muchos de los accidentes se deben a aparatos con un
f) Mantenga los útiles limpios y alados. Los útiles
mantenidos correctamente se dejan guiar y controlar me-
jor.
g) Utilice las herramientas eléctricas, los accesorios,
las herramientas de inserción, etc. de acuerdo con
estas instrucciones. Considere en ello las condicio-
nes de trabajo y la tarea a realizar. El uso de herra-
mientas eléctricas para trabajos diferentes de aquellos
para los que han sido concebidas puede resultar peligro-
so.
- 6 -
es
datos técnicos de la maquina adquirida, buscar actualiza-
ciones de manuales de nuestras maquinas en la página
web: www.grupostayer.com
1_INSTRUCCIONES ESPECIFICAS DE
SEGURIDAD
Mantenga manos y ropa alejados de la línea de expul-
sión del cartucho y del soporte del cartucho. De no
hacerlo podría mancharse.
Trabaje siempre en zonas bien ventiladas y utilice
protecciones acordes al contenido del cartucho que
esté utilizando. De no hacerlo podría mancharse, intoxi-
carse o herirse.
Lea detenidamente las instrucciones y especicacio-
nes del cartucho que utilice con la herramienta. De no
hacerlo podría intoxicarse o herirse al aplicar el producto.
Detenga inmediatamente la herramienta eléctrica si
el útil se bloquea.
Asegure la pieza de trabajo.-
banco, se mantiene sujeta de forma mucho más segura
que con la mano.
Mantenga limpio su puesto de trabajo. La mezcla de
diversos materiales es especialmente peligrosa. Las
aleaciones ligeras en polvo pueden arder o explotar.
Antes de depositarla, esperar a que se haya detenido
la herramienta eléctrica. El útil puede engancharse y
hacerle perder el control sobre la herramienta eléctrica.
USO Y CUIDADO DE BATERÍAS
No intente abrir la batería. Podría provocar un cortocir-
cuito.
Proteja la batería del calor excesivo como, p. ej.,
del agua y de la humedad. Existe el riesgo de ex-
Si la batería se daña o usa de forma inapropiada puede
que éste emane vapores. Ventile con aire fresco el re-
cinto y acuda a un médico si nota alguna molestia. Los
vapores pueden llegar a irritar las vías respiratorias.
-
rramienta eléctrica. Solamente así queda protegida la ba-
tería contra una sobrecarga peligrosa.
-
-
mienta eléctrica. Si se utilizan baterías diferentes, como,
p. ej., imitaciones, baterías recuperadas, o de otra mar-
ca, existe el riesgo de que éstos exploten y causen daños
personales o materiales.
-
mienta eléctrica no mantenga accionado el interruptor de
La batería viene equipado con un sensor de temperatura
que solamente adm te su recarga dentro del margen de
temperatura entre 0 °C y 45 °C. De esta manera se al-
canza una larga vida útil de la batería.
Únicamente use los cargadores que se detallan en la
página con los accesorios. Solamente estos cargadores
han sido especialmente adaptadas a las baterías de io-
nes de litio empleados en su herramienta eléctrica.
La batería se suministra parcialmente cargada. Con el
cárguela completamente en el cargador.
La batería de iones de litio puede recargarse siempre
que se quiera, sin que ello merme su vida útil. Una inte-
La batería de iones de litio va protegida contra altas des-
cargas. Si la batería está descargado, un circuito de pro-
-
trica. El útil deja de moverse.
La herramienta eléctrica no puede sobrecargarse si ésta
se utiliza de forma reglamentaria. En caso de una solici-
-
luciones.
La herramienta eléctrica solamente funciona de nuevo a
plenas revoluciones una vez que la batería haya alcanza-
do la temperatura admisible
2_INSTRUCCIONES DE PUESTA EN
SERVICIO
COLOCACIÓN
Lea íntegramente las advertencias de peligro e instruc-
ciones. En caso de no atenerse a las advertencias de
peligro e instrucciones siguientes, ello puede ocasionar
UTILIZACIÓN REGLAMENTARIA
La herramienta eléctrica ha sido diseñada para aplicar de
forma uniforme, constante y controlada el contenido de
cartuchos de todo tipo de siliconas y pegamentos, ade-
cuándose a su viscosidad y adhesividad.
DESCRIPCIÓN ILUSTRADA
imagen de la herramienta eléctrica en la página ilustrada.
1 Soporte
2
3 Barra de empuje.
4 Pomo de empuje.
5 Interruptor.
6
7 Regulador de velocidad
8 Batería
9
MONTAJE
Antes de cualquier manipulación en la herramienta
eléctrica (p.ej. en su mantenimiento, cambio de útil,
etc.), así como al transportarla o guardarla, desco-
necte la batería.
Montaje del batería
Solamente utilice baterías de iones de litio originales
Stayer de la tensión indicada en la placa de caracte-
rísticas de su herramienta eléctrica.
El uso de otro tipo de baterías puede provocar daños

- 7 -
es
it
gb
de
p
tr
cz
el
fr
e incluso un incendio.
Carga del batería
Únicamente use los cargadores que se detallan en la
página con los accesorios. Solamente estos cargadores
han sido especialmente adaptados a las baterías de io-
nes de litio empleadas en su herramienta eléctrica.
Observación: La batería se suministra parcialmente car-
-
ría, antes de su primer uso, cárguela completamente en
el cargador.
La batería de iones de litio puede recargarse siempre
que se quiera, sin que ello merme su vida útil. Una inte-
En caso de una desconexión automática de la he-
rramienta eléctrica no mantenga accionado el inte-
rruptor de conexión/desconexión. La batería podría
dañarse.
-
eléctrica. No proceda con brusquedad.
Durante la carga del batería no es posible conectar la
herramienta eléctrica.
La batería viene equipada con un sensor de temperatura
NTC que solamente admite su recarga dentro del mar-
gen de temperatura entre 0ºC y 45ºC. De esta manera se
alcanza un larga vida útil de la batería.
Montaje/Desmontaje de la herramienta (Fig A - D)
-
tador para cartuchos de 310ml será necesario que des-
monte y luego vuelva a ensamblar el soporte (1).
Montaje
1- Inserte el soporte (1) en la junta (2) girándolo en senti-
do de las agujas del reloj (Fig. A)
2- Inserte el pomo de empuje (4) en la barra de empuje
(3)
la herramienta (Fig. B)
4- Encaje la pletina de empuje en la barra (3 - Fig. C) y a
Desmontaje
Para desmontar la herramienta siga los pasos del aparta-
do anterior en orden inverso.
Instalación de cartuchos
1- Corte la punta de la boquilla del cartucho a instalar de
2- Enrosque la boquilla incluida con su cartucho de sili-
cona en el tubo.
3- Con la herramienta apagada y con la batería (8) des-
conectada, retire la barra de empuje (3) tirando del pomo
(4) hasta que la barra haga tope en la junta del soporte
(2).
4- Inserte el cartucho encajándolo en el soporte (1), de
tal manera que la boquilla sobresalga por la parte frontal
mientras que la parte posterior del cartucho apoye contra
la junta del soporte (2) y la barra de empuje (3).
Soporte para cartuchos de 310 ml.
Con el el soporte (1) desmontado, Inserte el anillo O, la
junta y la arandela con agujeros en la junta del soporte
3_OPERACIÓN
CONEXIÓN/DESCONEXIÓN
Inserte la batería (8) tras asegurarse de que esta dispone
Para la puesta en marcha de la herramienta eléctrica pul-
simultáneamente presionado el interruptor (5). para man-
tener la herramienta en funcionamiento mantenga pulsa-
do el interruptor (5).
mayor o menor velocidad en la herramienta.
Para desconectar la herramienta eléctrica soltar el inte-
rruptor (5).
OPERACIÓN
-
licona.
con el regulador de velocidad (7) al mínimo e ir presio-

- 8 -
es
nando lentamente el interruptor (5) para controlar la can-
tidad de material que es expulsado del cartucho.
Ajuste la velocidad de la herramienta de acuerdo a las
necesidades del tipo de silicona que esté empleando, au-
mentando la velocidad para materiales menos viscosos
o de secado rápido. Se recomienda regular la velocidad
lentamente para no forzar la herramienta.
Al terminar el trabajo, suelte el interruptor (5). La má-
quina seguirá expulsando material durante 2 segundos
sobre el cartucho.
-
quier resto de silicona que pueda quedar antes de que
esta se seque.
MANTENIMIENTO Y LIMPIEZA
Antes de cualquier manipulación en la herramienta
eléctrica (p.ej. en su mantenimiento, cambio de útil,
etc.), así como al transportarla o guardarl a, colocar
en posición central el selector de sentido de giro.
Vd. podría accidentarse en caso de un accionamiento
Mantenga limpia la herramienta eléctrica y las rejillas de
Si el batería fuese inservible diríjase a un servicio técnico
autorizado para herramientas eléctricas Stayer.
control, la herramienta eléctrica llegase a averiarse, la
-
rizado para herramientas eléctricas Stayer.
TRANSPORTE
Las baterías de iones de litio incorporados están sujetos
mercancías peligrosas. Las baterías pueden ser trans-
portados por carretera por el usuario sin más imposicio-
nes.
En el envío por terceros (p. ej., transporte aéreo o por
agencia de transportes) deberán considerarse las exi-
-
un experto en mercancías peligrosas al preparar la pieza
para su envío. Únicamente envíe baterías si su carcasa
no está dañada. Si los contactos no van protegidos cú-
bralos con cinta adhesiva y embale la batería de manera
que éste no se pueda mover dentro del embalaje.
Observe también las prescripciones adicionales que pu-
dieran existir al respecto en su país.
ELIMINACIÓN
Recomendamos que las herramientas eléctricas, acce-
sorios y embalajes sean sometidos a un proceso de re-
Sólo para los países de la UE:
¡No arroje las herramientas eléctricas a la basura!
Conforme a la Directriz Europea 2012/19/UE sobre apa-
-
-
rado las herramientas eléctricas para ser sometidas a un
Baterías / pilas: Iones de Litio
Iones de Litio:
Observe las indicaciones comprendidas en el
apartado “Transporte”
No arroje las baterías/pilas a la basura, ni al fuego, ni al
agua. Las baterías/pilas deberán guardarge y reciclarse
Conforme a la directriz 2006/66/CE deberán re-
ciclarse las baterías/pilas defectuosas o agota-
das.
CARACTERÍSTICAS TÉCNICAS
rpm
LPA
LWA
= Batería
= Voltaje
= Energía de la batería
= Tiempo de carga
= Nivel de potencia acústica
= Capacidad del cartucho
= Peso
Estos datos son válidos para tensiones nominales de [U]
230/240 V ~ 50/60 Hz 110/120 V ~ 60 Hz. Los valores
-
INFORMACIÓN SOBRE RUIDOS Y VIBRACIONES
¡Llevar cascos de protección auditiva!
EN
62841-1.
-
den dentro de determinadas tolerancias (conformes a las
normas que rigen actualmente).

- 9 -
es
it
gb
de
p
tr
cz
el
fr
General Power Tool Safety Warnings
1) Work area safety
a) Keep work area clean and well lit. Cluttered or dark
areas invite accidents.
b) Do not operate power tools in explosive
atmospheres, such as in the presence of ammable
liquids, gases or dust. Power tools create sparks which
may ignite the dust or fumes.
c) Keep children and bystanders away while operating
a power tool. Distractions can cause you to lose control.
2) Electrical safety
a) Power tool plugs must match the outlet. Never
modify the plug in any way. Do not use any adapter
plugs and matching outlets will reduce risk of electric
shock.
b) Avoid body contact with earthed or grounded
surfaces, such as pipes, radiators, ranges and
refrigerators. There is an increased risk of electric shock
if your body is earthed or grounded.
c) Do not expose power tools to rain or wet conditions.
Water entering a power tool will increase the risk of
electric shock.
d) Do not abuse the cord. Never use the cord for
carrying, pulling or unplugging the power tool. Keep
cord away from heat, oil, sharp edges or moving parts.
Damaged or entangled cords increase the risk of electric
shock.
e) When operating a power tool outdoors, use an
extension cord suitable for outdoor use. Use of a cord
suitable for outdoor use reduces the risk of electric shock.
f) If operating a power tool in a damp location is
unavoidable, use a residual current device (RCD)
protected supply. Use of an RCD reduces the risk of
electric shock.
3) Personal safety
a) Stay alert, watch what you are doing and use
common sense when operating a power tool. Do
not use a power tool while you are tired or under the
inuence of drugs, alcohol or medication. A moment
of inattention while operating power tools may result in
serious personal injury.
b) Use personal protective equipment. Always wear
eye protection. Protective equipment such as dust mask,
non-skid safety shoes, hard hat, or hearing protection
used for appropriate conditions will reduce personal
injuries.
c) Prevent unintentional starting. Ensure the switch
is in the o-position before connecting to power
source and/or battery pack, picking up or carrying
the tool.
switch or energising power tools that have the switch on
invites accidents.
d) Remove any adjusting key or wrench before turning
the power tool on. A wrench or a key left attached to
a rotating part of the power tool may result in personal
injury.
e) Do not overreach. Keep proper footing and balance
at all times. This enables better control of the power tool
in unexpected situations.
f) Dress properly. Do not wear loose clothing or
jewellery. Keep your hair, clothing and gloves away
from moving parts. Loose clothes, jewellery or long hair
can be caught in moving parts.
g) If devices are provided for the connection of dust
extraction and collection facilities, ensure these are
connected and properly used. Use of dust collection
can reduce dustrelated hazards.
4) Power tool use and care
a) Do not force the power tool. Use the correct power
tool for your application. The correct power tool will
do the job better and safer at the rate for which it was
designed.
b) Do not use the power tool if the switch does not turn
it on and o. Any power tool that cannot be controlled
with the switch is dangerous and must be repaired.
c) Disconnect the plug from the power source and/or
the battery pack from the power tool before making
any adjustments, changing accessories, or storing
power tools. Such preventive safety measures reduce
the risk of starting the power tool accidentally.
d) Store idle power tools out of the reach of children
and do not allow persons unfamiliar with the power
tool or these instructions to operate the power tool.
Power tools are dangerous in the hands of untrained
users.
e) Maintain power tools. Check for misalignment
or binding of moving parts, breakage of parts and
any other condition that may aect the power tool’s
operation. If damaged, have the power tool repaired
before use. Many accidents are caused by poorly
maintained power tools.
f) Keep cutting tools sharp and clean. Properly
maintained cutting tools with sharp cutting edges are less
likely to bind and are easier to control.
g) Use the power tool, accessories and tool bits etc.
in accordance with these instructions, taking into
account the working conditions and the work to be
performed.
from those intended could result in a hazardous situation.

- 10 -
gb
This manual is consistent with the date of manufacture of
data of the machine acquired manual check for updates
of our machines on the website:
www.grupostayer.com
WARNINGS
Keep hands and clothing away from the cartridge
ejection line and cartridge holder. Failure to do so
could result in staining.
Always work in well ventilated areas and wear
protection appropriate to the contents of the cartridge
you are using. Failure to do so may result in staining,
poisoning or injury.
Carefully read the instructions and specications of
the cartridge you are using with the tool. Failure to do
so could result in poisoning or injury when applying the
product.
Stop the power tool immediately if the tool becomes
blocked.
Secure the workpiece. A workpiece clamped with
clamping devices, or in a vise, is held much more securely
than by hand.
Keep your workstation clean.
is particularly dangerous. Powder mixtures can burn or
explode.
Wait until the power tool has stopped before putting
it down. The tool may become entangled and cause you
to lose control of the power tool.
BATTERIES USE AND CARE
Do not open the battery. Danger of shortcircuiting.
Protect the battery against heat, e. g., against continuous
explosion.
In case of damage and improper use of the battery,
vapours may be emitted. Provide for fresh air and seek
medical help in case of complaints. The vapours can
irritate the respiratory system.
power tool. This measure alone protects the battery
against dangerous overload.
listed on the nameplate of your power tool. When using
other batteries, e. g. imitations, reconditioned batteries or
other brands, there is danger of injury as well as property
damage through exploding batteries.
can be damaged.
The battery is equipped with a temperature control
which allows charging only within a temperature range
of between 0 °C and 45 °C. A long battery service life is
achieved in this manner.
Observe the notes for disposal.
Use only the battery chargers listed on the accessories
page. Only these battery chargers are matched to the
lithium ion battery of your power tool.
The battery is supplied partially charged. To ensure full
capacity of the battery, completely charge the battery in
the battery charger before using your power tool for the
The lithiumion battery can be charged at any time
without reducing its service life. Interrupting the charging
procedure does not damage the battery.
The lithiumion battery is protected against deep
discharging. When the battery is empty, the machine is
tool no longer rotates.
Temperature Dependent Overload Protection
When using as intended for, the power tool cannot be
subject to overload. When the load is too high or the
exceeded, the speed is reduced. The power tool will
not run at full speed until reaching the allowable battery
temperature. position. Unintentional actuation of the On/
Open the keyless chuck 2 by turning in rotation direction ,
until the tool can be inserted. Insert the tool. Firmly tighten
the collar of the keyless chuck 2 by hand in rotation
direction . This automatically locks the drill chuck.
The locking is released again to remove the tool when the
collar is turned in the opposite direction.
2_FUNCTIONAL DESCRIPTION
PLACING OR FIXING THE TOOL
Read all safety warnings and all instructions. Failure to
follow the warnings and instructions may result in electric
PRODUCT FEATURES
The numbering of the product features refers to the
illustration of the machine on the graphics page.
Screwdriver bit
1 Support
2 Bracket gasket.
3 Push rod.
4 Push knob.
5 Switch.
6 Safety button
7 Speed regulator
8 Battery
9 Battery disconnect button
ASSEMBLY
Battery charging
Useonlythebatterychargerslistedonthe accessories
page. Only these battery chargers are matched to the
lithium ion battery of your power tool.
Note: The battery is supplied partially charged. To ensure
full capacity of the battery, completely charge the battery
in the battery charger before using your power tool for the
The lithium ion battery can be charged at any time
without reducing its service life. Interrupting the charging
procedure does not damage the battery.
Do not continue to press the On/O switch after the
machine has been automatically switched o. The
battery can be damaged.

- 11 -
es
it
gb
de
p
tr
cz
el
fr
To remove the battery 5, press the battery unlocking
button 9 and pull the battery out of the power tool toward
the rear. Do not exert any force.
The battery is equipped with a NTC temperature control
which allows charging only within a temperature range
of between 0º C and 45º C. A long battery service life is
achieved in this manner.
Observe the notes for disposal.
Assembly/Disassembly of the tool (Fig A - D)
For cleaning of the tool or installation of the 310ml
cartridge adapter it will be necessary to disassemble and
then reassemble the bracket (1).
Assembly
1- Insert the bracket (1) into the joint (2) by turning it
clockwise (Fig. A).
2- Insert the push knob (4) into the push rod (3).
3- Insert the push rod (3) through the rear hole of the tool
(Fig. B).
4- Fit the pusher plate on the pusher bar (3 - Fig. C) and
then screw the two parts together (Fig. D).
Disassembly
To disassemble the tool, follow the steps in the previous
section in reverse order.
Installing cartridges
2- Screw the nozzle included with your silicone cartridge
onto the tube.
disconnected, remove the push rod (3) by pulling the
knob (4) until the rod stops in the joint of the support (2).
that the nozzle protrudes from the front while the back of
the cartridge rests against the seal of the holder (2) and
the push bar (3).
Cartridge holder for 310 ml cartridges.
With the bracket (1) removed, insert the O-ring, gasket
and washer with holes into the bracket gasket (2). Use
3_USE
CONNECTION/DISCONNECTION
Insert the battery (8) after making sure that the battery
To start the power tool, press the safety button (6) and
then simultaneously press and hold the switch (5). To
keep the tool running, keep the switch (5) pressed.
Depending on the pressure exerted on the trigger, a
higher or lower speed of the tool will be achieved.
OPERATION
Press the switch (5) to start the silicone feed.
At the beginning of the operation, it is recommended
to start the operation with the speed regulator (7) at
minimum and slowly press the switch (5) to control the
amount of material that is ejected from the cartridge.
Adjust the speed of the tool according to the needs of the
type of silicone you are using, increasing the speed for
less viscous or fast drying materials. It is recommended
to adjust the speed slowly so as not to force the tool.
At the end of the job, release the switch (5). The machine
will continue to eject material for an additional 2 seconds to
prevent dripping, reducing the pressure on the cartridge.
silicone before it dries.

- 12 -
gb
4_MAINTENANCE AND SERVICE
MAINTENANCE AND CLEANING
Before any work on the machine (e. g., maintenance,
tool change, etc.) as well as during transport and
storage, set the rotational direction switch to the
centre position.
switch can lead to injuries.
For safe and proper working, always keep the machine
and ventilation slots clean.
When the battery is no longer operative, please refer to
an authorised aftersales service agent for Stayer power
tools.
If the machine should fail despite the care taken in
manufacturing and testing procedures, repair should be
carried out by an aftersales service centre for Stayer
power tools.
TRANSPORT
he contained lithiumion batteries are subject to the
Dangerous Goods Legislation requirements. The user
can transport the batteries by road without further
requirements. When being transported by third parties
(e.g.: air transport or forwarding agency), special
requirements on packaging and labelling must be
observed. For preparation of the item being shipped,
consulting an expert for hazardous material is required.
Dispatch batteries only when the housing is undamaged.
in such a manner that it cannot move around in the
packaging. Please also observe possibly more detailed
national regulations.
DISPOSAL
The machine, accessories and packaging should be
sorted for environmental-friendly recycling.
Only for EC countries:
Do not dispose of power tools into house-hold
waste!
According the European Guideline 2012/19/EU for
Waste Electrical and Electronic Equipment and its
implementation into national right, power tools that a
re no longer usa-ble must be collected separately and
disposed of in an environmentally correct manner.
Battery packs/batteries:
Li-Ion:
Please observe the instructions in section
“Transport”. Do not dispose of battery packs/batteries
batteries should be collected, recycled or disposed of in
an environmental-friendly manner.
Only for EC countries:
Defective or dead out battery packs/batteries must be
recycled according the guideline 2006/66/CE.
TECHNICAL SPECIFICATIONS
ipm
rpm
LPA
LWA
= Battery
= Voltage
= Battery power
= Battery charging time
= No load speed
= Tightening torque
= Percussions
= Wood drilling capacity
= Steel drilling capacity
= Stone drilling capacity
= Weight
= Sound power level
= Sound pressure level
= Vibration
The values given are valid for nominal voltages [U]230/240
V-50/60 Hz - 110/120 V - 60Hz. For lower voltage and
INFORMATION ON NOISE AND VIBRATIONS
Wear hearing protection helmets!
Measured values established in accordance with EN
62841-1.
understood within certain tolerances (in accordance with
the standards currently in force).


comply with the security and quality required.
To understand the application area of this text, we
- Users or consumers, as private individuals whose
acts are not related to their main comercial, business
activity or their main profession or trade. Legal persons
and entities without legal personality which act with
enviroment.
- Professionals, whom obtain comercial, business or
garden tools and welding tools, subject to the following
conditions:
manufacturing defects or consistency issues, bearing in
mind that any issue must be easily visible or provable,
as the product will be tested at our labs to verify said
issues. If the product has been subjected to industrial or
professional use, said guarantee will cover exclusively
2- The following cases are exempt from the guarantee:
a. Any kind of defect or malfunctioning caused by
not applying the safety and maintenance instructions
given in the User’s guide.
b. Any damage caused by using other brand’s
accessories, incompatible accessories with the tool
model or faulty accessories.
associated Technical Support Services.
d. Products with minimal deviations from the features
that do not impact on the tool’s optimal performance
and its value.
e. Products which have been connected to a
on the tool’s features, causing an electrical failure.
wear due to the normal use of the tool, being
said components consumables, accessories or
components subject to wear that must be replaced
by the owner.
g. Products that show any kind of misuse or
application which deviates from its original intended
uses, listed in the Users guide.
h. Products that show lack of correct maintenance
from the owner. The owner is responsible for the
tool’s maintenance in order to preserve its service
life.
i. Accessories and tool consumables, as their
intended use has a limited service life that includes
wear.
3- In order to claim the guarantee rights, the tool
physically, and process it with the tool’s vendor or the
Authorized Technical Support Services before shipping
the tool. A copy of the purchase receipt or invoice must
be attached to the form where the purchase date can
clearly be seen. Shipping costs are not included if the
product is delivered to the vendor or the Technical
Support Services without processing the repair form
assume the shipping costs, nor the costs derived from
testing the tool to locate the issue.
5- Guarantee transfer is completely forbidden, the
guarantee does not cover second-hand products.
6- Duringtheguaranteeapplicationduetomanufacturing
defects or consistency issues, the product will remain
Technical Support Services. During this period of time
the tool’s owner is not entitled to receive a substitution
tool in place of the product that is being repaired.
7- In order to correct the manufacturing defects or
consistency issues contemplated in the guarantee
necessary components free of charge in order for
the tool to perform according to the quality and safety
product for a similar one in cases where reparations
would not be possible.
https://www.stayer.en/
WARRANTY GENERAL CONDITIONS

para que todos productos cumplan con los parámetros de
seguridad y calidad requeridos.
diferenciamos:
- Consumidores o usuarios, como las personas
consumidores a efectos de esta norma las personas
jurídicas y las entidades sin personalidad jurídica que
actúen sin ánimo de lucro en un ámbito ajeno a una
actividad comercial o empresarial.
- Profesionales, como aquellos que sacan un rédito
electroportátiles, de jardín y equipos de soldadura con
arreglo a las siguientes condiciones.
el usuario o consumidor, teniendo en cuenta que
visible o comprobable, ya que se analizará dicho
producto en nuestros laboratorios para analizar dicha
disconformidad. En el caso de que el producto en
profesional o similar, dicha garantía se limita
compra por parte del primer comprador.
2- Los siguientes casos no están contemplados en
la garantía:
a. Defecto en el producto, derivados de la no
mantenimiento del producto, indicadas en su
manual de instrucciones.
b. Que la herramienta haya sido dañada, debido
a que se han utilizado accesorios, consumibles o
repuestos de otras marcas, no compatibles con
provoquen daños en el equipo o herramienta.
c. Que la máquina o producto haya sido manipulada,
Autorizados.
d. Variaciones mínimas de las características
funcionamiento y en el valor del producto.
e. Productos que hayan sido conectados con una
características del equipo, provocando un fallo
eléctrico.
f. Cualquier producto que haya sufrido algún
desgaste en alguna de sus piezas, por el uso normal
de la herramienta, siendo esta pieza un consumible,
accesorios o elemento sujeto al desgaste que
debería de cambiarse por su propio uso por parte
del usuario.
g. Cualquier producto que presente una falla,
debida a un manejo inadecuado de la herramienta,
incompatible con los usos o aplicaciones indicadas
en el manual de la herramienta.
h. Productos que presenten una falla debida a que
el propietario no ha cumplido con el mantenimiento
correcto de la herramienta. El comprador es el
encargado de realizar los mantenimientos del
producto que compra, para respetar su vida útil.
i. Losaccesoriosy consumibles de las herramientas,
debido a que tienen una vida limitada y se desgastan
en condiciones normales por su uso.
de la garantía, antes que nada se deberá rellenar el
tramitarlo directamente con el vendedor del producto
o con los Servicios de Asistencia Técnica Autorizados
correspondientes. Se deberá adjuntar una copia del
fecha en la que se produjo la compra. Los gastos de
envío no estarán cubiertos en el caso de que se envíe
la herramienta al vendedor o al servicio técnico sin
haberlo tramitado con anterioridad.
4- En el caso de que los Servicios deAsistencia Técnica
de dicha anomalía.
se aplicará en equipos de segunda mano.
los Servicios de Asistencia Técnica Autorizados, sin
derecho por parte del consumidor de obtener un equipo
7- Para proceder a eliminar las faltas de conformidad o
las piezas necesarias de forma gratuita para que la
herramienta o equipo funcione correctamente acorde
reserva el derecho de poder sustituir el equipo por uno
equipo.
https://www.stayer.es/
CONDICIONES GENERALES DE LA GARANTÍA

Área Empresarial Andalucía - Sector I
Calle Sierra de Cazorla nº7
C.P: 28320 Pinto (Madrid) SPAIN
info@grupostayer.com
www.grupostayer.com
Table of contents
Languages: