Steam Planet WS-112 User manual

Rev 3/2012
1 | P a g e
WS-112
Installation & Operations Manual
Note: You must read all installation & operation instructions prior to assembly and use of this unit.

Rev 3/2012
2 | P a g e
Table of Contents
Part 1
Installation Manual …………………………………………… 3 –15
Cleaning & Maintenance …………………………………………… 16
Part 2
S6 Operations Manual
a. Safety Notes …………………………………………… 17
b. Parameter for Steam Cabin …………………………. 17
c. Control Box Electrical Diagram ………………… 18
d. S6 Wiring Diagram ………………………..………… 19
e. Control Diagram ……..…………………………… 20-21
f. Operation Instructions ……..…………………………… 22-25
g. Wireless FM Transmitter ………………………… 26
h. Steam Generator Cleaning ………………………… 27
i. Troubleshooting …………………………………………… 27-28
NOTICE TO INSTALLERS (if applicable)
THE FLEXIBLE DRAIN HOSE THAT IS INCLUDED WITH THIS UNIT IS FOR INSTALLATION
INTO AN OPEN FLOOR DRAIN ONLY. SUBSTITUTING THE EXISTING DRAIN SHOE FOR A
DIFFERENT ONE WILL NOT VOID THE WARRANTY AS LONG AS THERE NO DAMAGE OR
EVIDENCE OF MISUSE TO THE BASE
Note: Within the Warranty period, please don’t take off the decals from the computer
control boxes and the steam generator without manufacturer’s permission. Please do not
maintain or change the circuit by yourself. Usually most of the problems could be
troubleshoot over the phone. When calling for service questions, please provide your model
number, serial number, Purchase Order, and type of problem you are having.

Rev 3/2012
3 | P a g e
Part 1
Electric Parameter
Size
Model
System
Voltage
Power
Frequency
Length
Width
Height
WS112(32)
Steam System
220V
3KW
60-50Hz
59 Inch
32 Inch
84.5 Inch
WS112(36)
Steam System
200V
3KW
60-50Hz
59 Inch
36 Inch
84.5 Inch
WS112(40)
Steam System
200V
3KW
60-50Hz
59Inch
40 Inch
84.5 Inch

Rev 3/2012
4 | P a g e
Rev 3/2012
5 | P a g e
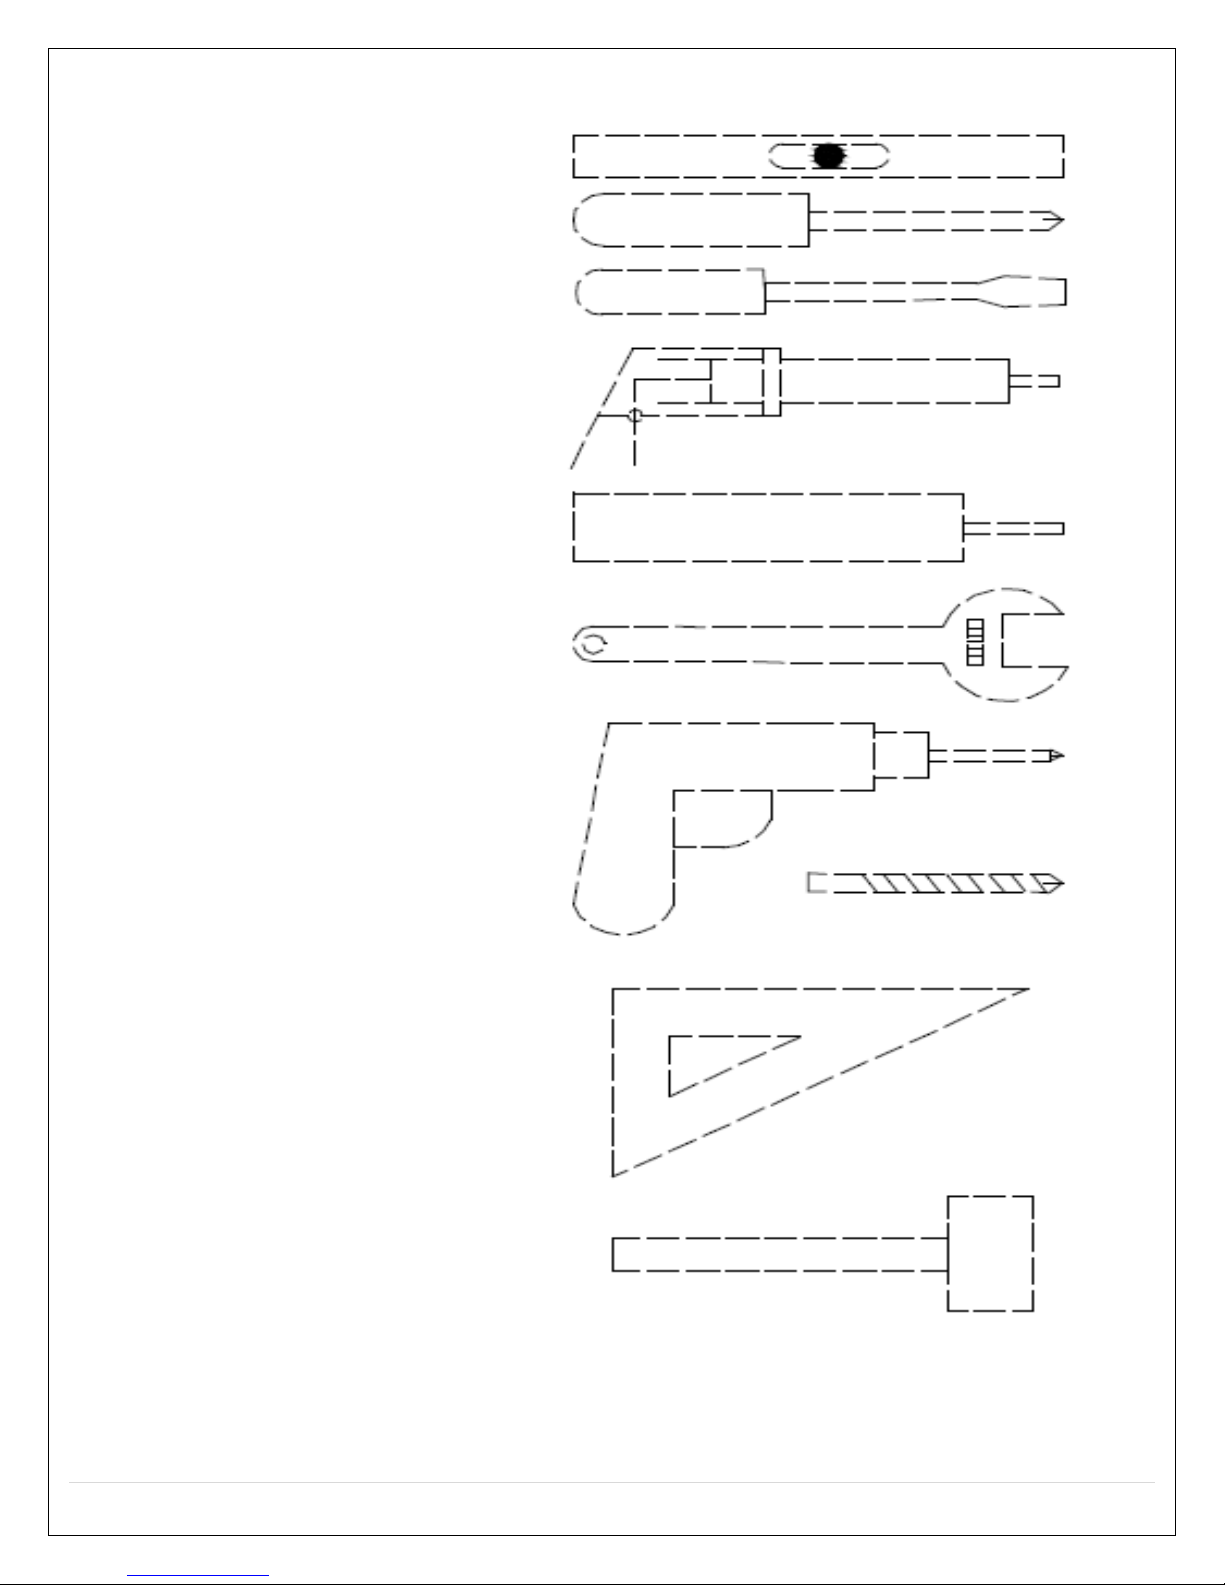
Tools required for installation:
Leveler
Screw driver
Silicone
Spanner
Electric Drill
Triangle Ruler
Hammer
Rev 3/2012
6 | P a g e
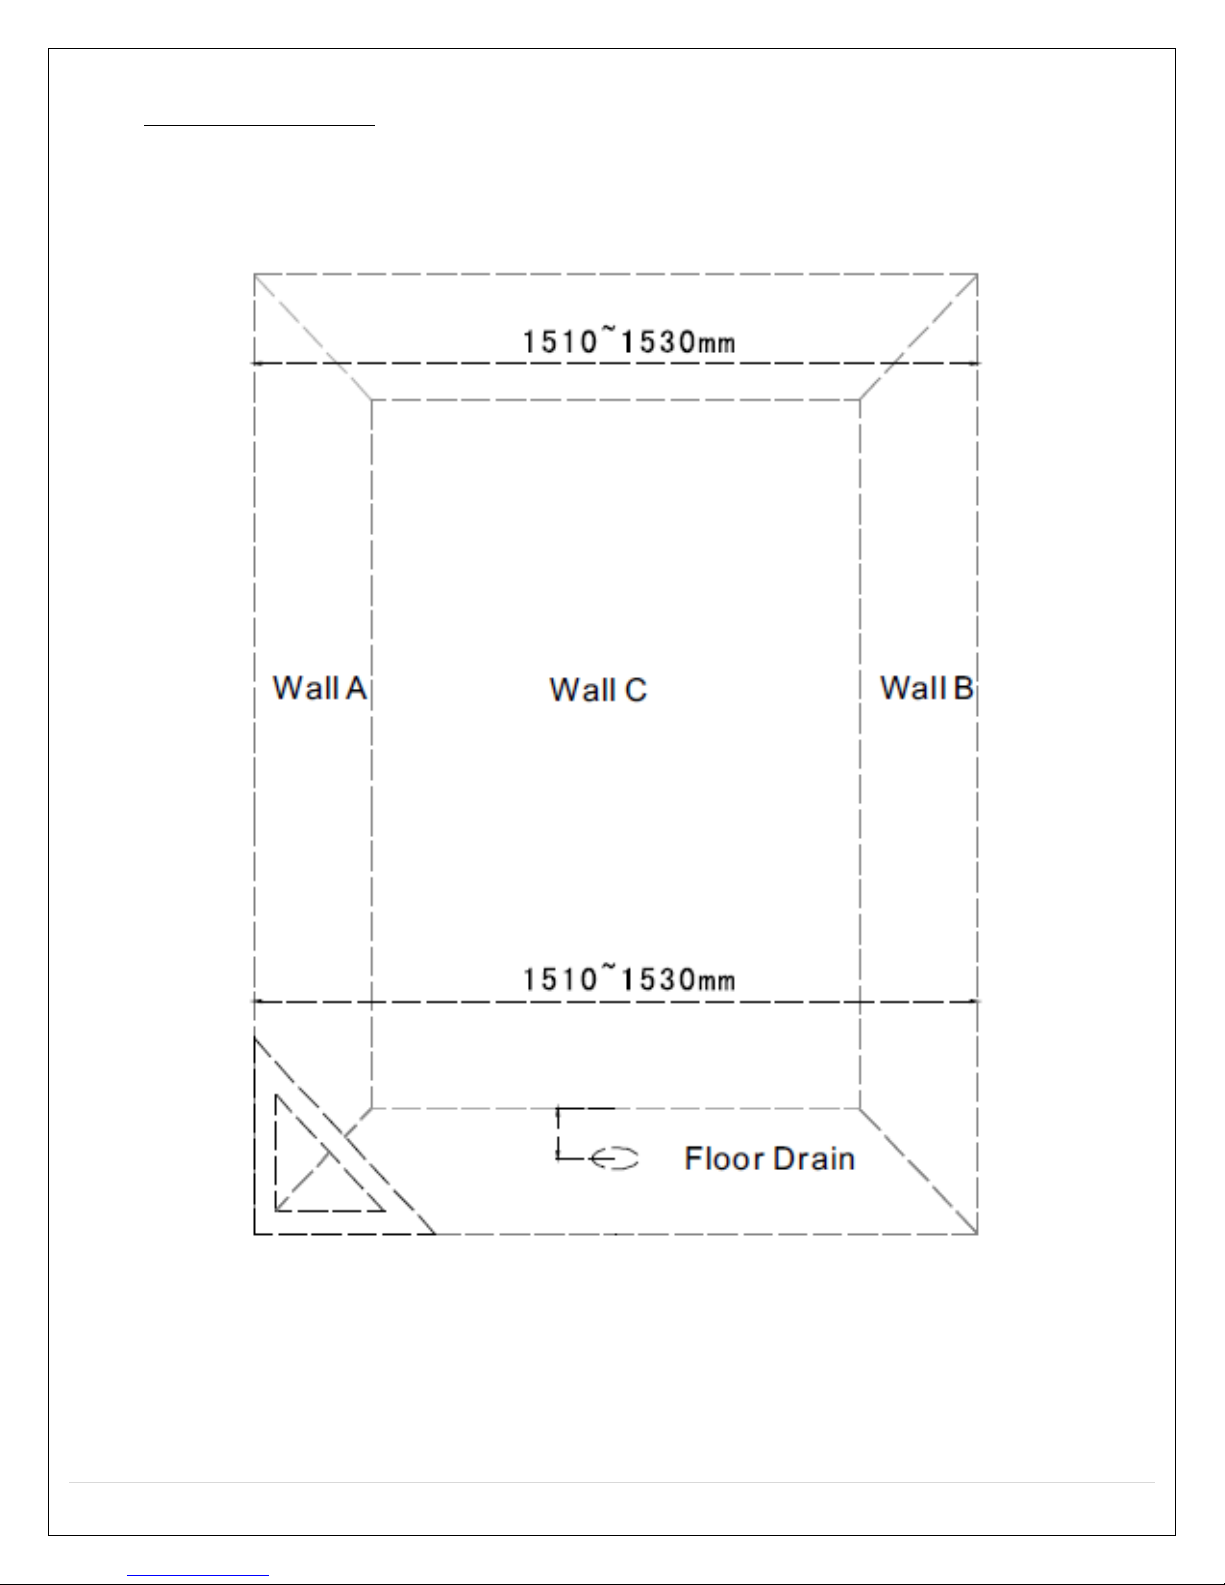
Place of Installation
The distance between Wall A and Wall B should be within 1510 to 1530mm
(59.5 to 60.3 inches). The distance between Wall A and Wall B bottom to
2000mm (78.75inches) height should be less than 10mm (.4inches).
1510mm to 1530mm = 59.5” to 60.3”

Rev 3/2012
7 | P a g e
Door Frame Installation
Drill holes on Wall A and B, use the inflating nut.
i. Note: For California: Get the door frame fixed to wall with tapping screws
and blocks
820mm = 32.3in

Rev 3/2012
8 | P a g e
Installing Shower Walls
Get Power supply and water supply connected
Attach all the panels with taping screws

Rev 3/2012
9 | P a g e
Attach All Side Panels to the Floor (not with custom stone base)
Drill hose on the floor (or optional acrylic base)
Attach all sides with tapping screws and blocks

Rev 3/2012
10 | P a g e
Apply silicone to seal the gap between panels and floor. Leave the corners without silicone.

Rev 3/2012
11 | P a g e
Install the front fixed glass

Rev 3/2012
12 | P a g e
Install the glass door with hinges.

Rev 3/2012
13 | P a g e
Install the door handle & adjustable handheld shower bar

Rev 3/2012
14 | P a g e
Installing the ceiling
Connect the power and water supply to the wooden ceiling
Install the ceiling with tapping screws and down the decoration cap

Rev 3/2012
15 | P a g e
Install the aluminum trim

Rev 3/2012
16 | P a g e
Once all is connected, place the wooden shower grid floors and benches inside the unit.
Please, do not use the unit for at least 24hours or until the silicone is completely dried.

Rev 3/2012
17 | P a g e
Cleaning
1. Daily cleaning will be much easier if you squidgy the surface frequently. You may
use Windex and a soft cloth; never use the detergents with acetone and ammonia
content. Never use any abrasive, gritty cleaning or scouring materials.
2. After every 20 cycles are finished, it is suggested that the steam generator should be
cleaned. When cleaning the generator, 5 to 10 grams of citric acid diluted with 1.5 to
1.7 liters of warm water should be prepared, than poured into the steam generator
through the rubber pipe. After 8 to 12 hours connect the power and press the
heating key, enabling the detergent to vaporize.
3. We strongly advise to use a filtration system for the steam generator unit.
Recommended filtration system is Whirlpool WHKF-DWHV.
General Use and Maintenance
A. Drops of water will continue to drain out the jets and suction for some time after the
use for some time, this is normal.
B. Abrasive cleaners must not be used on chrome or gold plated fittings.
C. Always shut off the power supply when the system is not in use.

Rev 3/2012
18 | P a g e
Part 2
Safety Notes:
1. The power supply must be installed according to the local standard and with GFCI
(Ground Fault Current Interrupter). Test the GFCI before using to confirm its security
and validity
2. The ground for electrical appliances should be connected to fixed earth wire forever.
3. To avoid electric shock, replacing the power supply wire should be done by a
professional electrician or distributor. Users should not change it by themselves.
4. To avoid shock, no extension power line should be used. The socket should be in the
right position. Broken electric wire should be changed in time.
5. It is forbidden to make any change, adding, or cutting to the product.
6. It is forbidden to use the product while intoxicated.
7. Children should us the product under adult supervision.
8. Adjust the water temperature slowly from colder to warmer to avoid being scalded.
9. Stop using the product if you feel uncomfortable.
Parameter for Steam Cabin:
Rated Power: 3.0KW
Rated Voltage: Double Phase AC240V
Rated Electric Current: 16A
Frequency: 50Hz
Power Supply: On Wall
Rated Water Pressure: 0.2 –0.6MPa
Water Supply: DN 15 tie-in, hot/cold water
Water Supply Location: On Floor
Diameter of Drainage Pipe: Φ50 (drainage pipe supplied with product)
Length of Drainage Pipe: 1000mm (the maximum length after streched)

Rev 3/2012
19 | P a g e
Electrical Diagram for Control Box:

Rev 3/2012
20 | P a g e
S6 Wiring Diagram
Table of contents
Other Steam Planet Shower Cabin manuals


