Steelcase RoomWizard User manual

Classic Mode User Guide
RoomWizard™
®

Part number 370-0171-04
©2009 Steelcase Corporation
All rights reserved
RoomWizardTM
User Guide for Classic Mode

Information in this document is subject to change without notice. Reproduction in any manner
without written permission of Steelcase Corporation is forbidden.
Steelcase Corporation reserves the right to make changes in product design, or detail, and to
discontinue any product or material without notice.
RoomWizard is a trademark of Steelcase, Inc. All other registered trademarks and trademarks
used herein are the property of their respective owners.
This product is covered by one or more of the following patents:
D460,759. Other patents pending.

1
RoomWizard™Classic Mode
Table of Contents
Overview . . . . . . . . . . . . . . . . . . . . . . . . . . . . . . . . . . . . . . . . . . . . . . . . . . 3
About this manual. . . . . . . . . . . . . . . . . . . . . . . . . . . . . . . . . . . . . . . . . 3
What is RoomWizard? . . . . . . . . . . . . . . . . . . . . . . . . . . . . . . . . . . . . . . . . 5
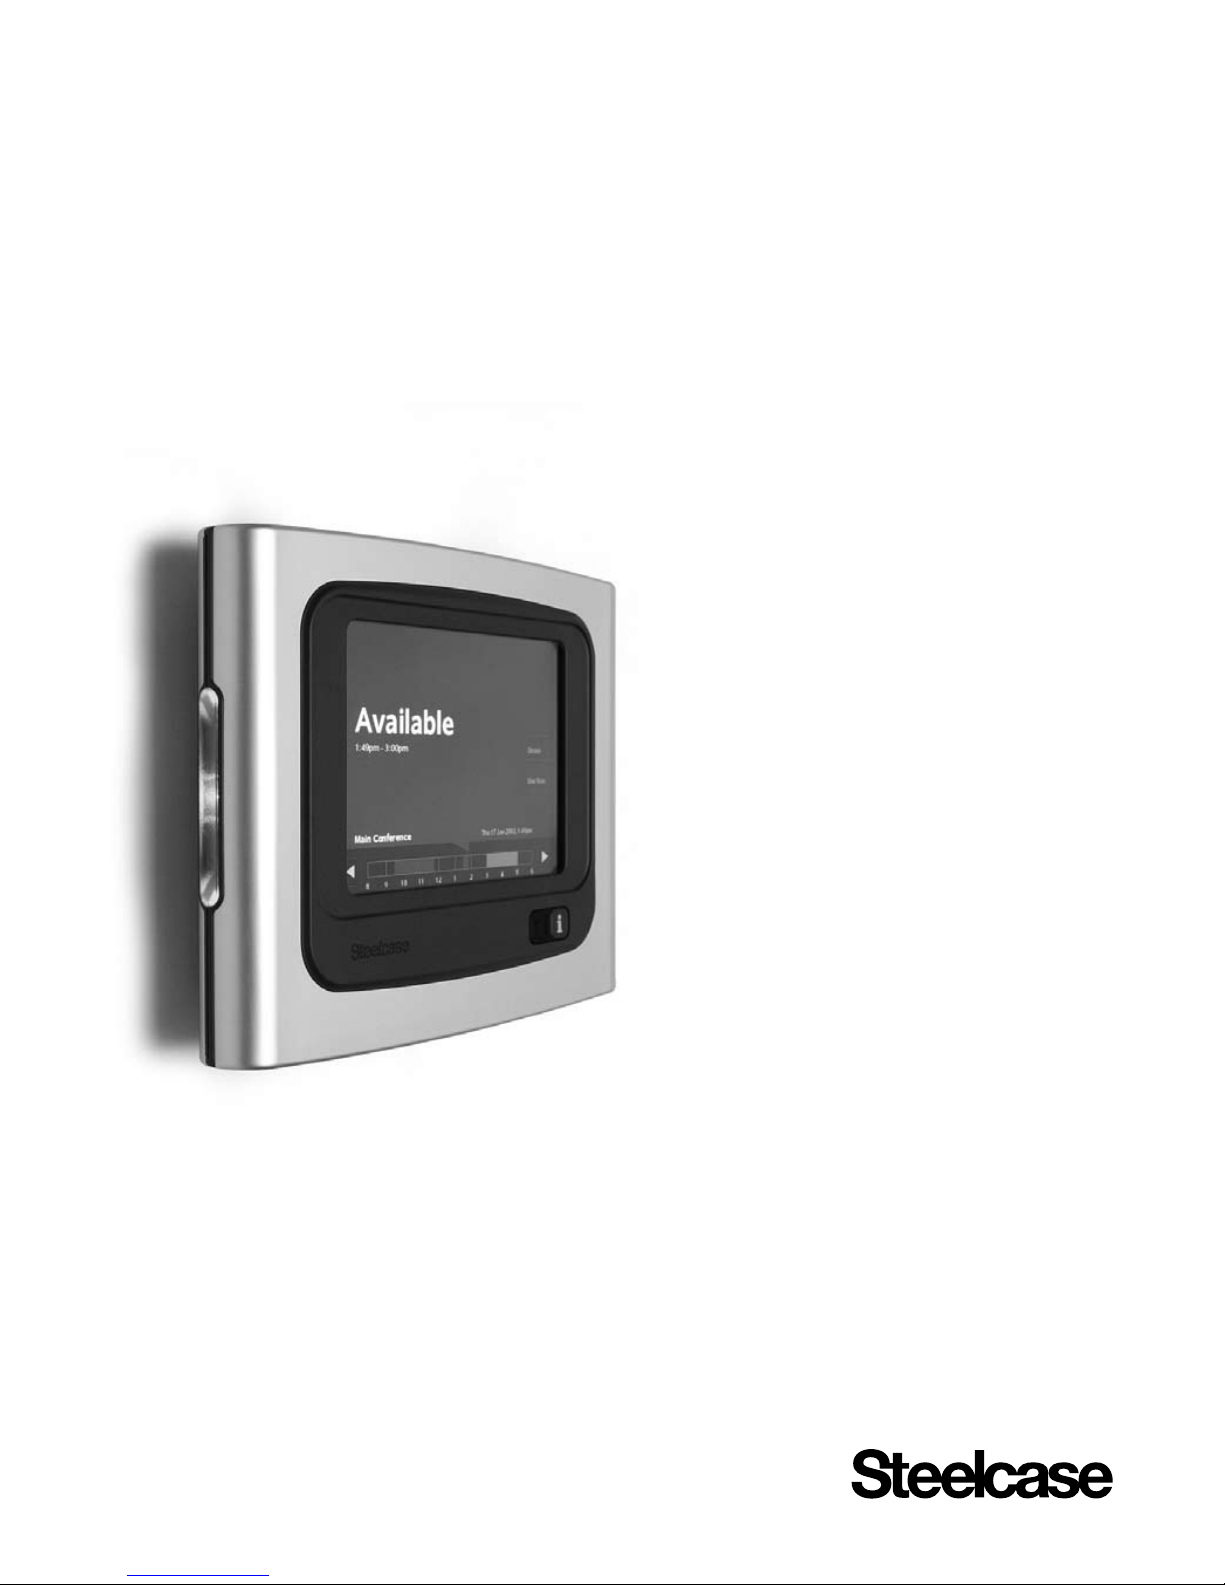
About The RoomWizard Information Appliance. . . . . . . . . . . . . . . . . . . 6
About the RoomWizard Reservation System . . . . . . . . . . . . . . . . . . . . 6
Introducing the RoomWizard Web Pages . . . . . . . . . . . . . . . . . . . . . . . . . . 8
Basics . . . . . . . . . . . . . . . . . . . . . . . . . . . . . . . . . . . . . . . . . . . . . . . . . 8
The Menu. . . . . . . . . . . . . . . . . . . . . . . . . . . . . . . . . . . . . . . . . . . . . 8
The Calendar . . . . . . . . . . . . . . . . . . . . . . . . . . . . . . . . . . . . . . . . . . 9
Other Groups of RoomWizards . . . . . . . . . . . . . . . . . . . . . . . . . . . . 9
The Timeline. . . . . . . . . . . . . . . . . . . . . . . . . . . . . . . . . . . . . . . . . . . 9
Tips, Hints and Help . . . . . . . . . . . . . . . . . . . . . . . . . . . . . . . . . . . . . . 10
Making a Reservation . . . . . . . . . . . . . . . . . . . . . . . . . . . . . . . . . . . . . . . . 11
The Advanced Reservation Form . . . . . . . . . . . . . . . . . . . . . . . . . . . . 12
Reservation Options . . . . . . . . . . . . . . . . . . . . . . . . . . . . . . . . . . . . . . 13
Purpose and Host . . . . . . . . . . . . . . . . . . . . . . . . . . . . . . . . . . . . . 13
Confidential Meetings. . . . . . . . . . . . . . . . . . . . . . . . . . . . . . . . . . . 13
Host Email . . . . . . . . . . . . . . . . . . . . . . . . . . . . . . . . . . . . . . . . . . . 13
Invite People . . . . . . . . . . . . . . . . . . . . . . . . . . . . . . . . . . . . . . . . . 14
Using the “Check Names” Button . . . . . . . . . . . . . . . . . . . . . . . . . 14
Using the “Add” Button . . . . . . . . . . . . . . . . . . . . . . . . . . . . . . . . . 15
Send Reservation Details to Attendees. . . . . . . . . . . . . . . . . . . . . . 16
Send Captured Whiteboard Notes to Attendees. . . . . . . . . . . . . . . 16
Cost Center . . . . . . . . . . . . . . . . . . . . . . . . . . . . . . . . . . . . . . . . . . 17
Start and End Times. . . . . . . . . . . . . . . . . . . . . . . . . . . . . . . . . . . . 18
Phone . . . . . . . . . . . . . . . . . . . . . . . . . . . . . . . . . . . . . . . . . . . . . . 18
Notes . . . . . . . . . . . . . . . . . . . . . . . . . . . . . . . . . . . . . . . . . . . . . . . 18
User-defined Text Fields. . . . . . . . . . . . . . . . . . . . . . . . . . . . . . . . . 18
Passwords for Meetings. . . . . . . . . . . . . . . . . . . . . . . . . . . . . . . . . 19
Passwords for Rooms . . . . . . . . . . . . . . . . . . . . . . . . . . . . . . . . . . 19
Service Menus . . . . . . . . . . . . . . . . . . . . . . . . . . . . . . . . . . . . . . . . 20
Repeating the Reservation . . . . . . . . . . . . . . . . . . . . . . . . . . . . . . . 20
Finding Reservations or Available Rooms . . . . . . . . . . . . . . . . . . . . . . . . . 22
Find an Existing Reservation . . . . . . . . . . . . . . . . . . . . . . . . . . . . . . . . 22
Finding an Available Room . . . . . . . . . . . . . . . . . . . . . . . . . . . . . . . . . 22
Changing or Deleting a Reservation . . . . . . . . . . . . . . . . . . . . . . . . . . . . . 24
The RoomWizard Touch Screen . . . . . . . . . . . . . . . . . . . . . . . . . . . . . . . . 25
RoomWizard Information Sharing . . . . . . . . . . . . . . . . . . . . . . . . . . . . 25
Interacting with RoomWizard . . . . . . . . . . . . . . . . . . . . . . . . . . . . . . . 26
Getting Introductory Information . . . . . . . . . . . . . . . . . . . . . . . . . . . 26
Looking at Earlier or Later Reservations . . . . . . . . . . . . . . . . . . . . . 26
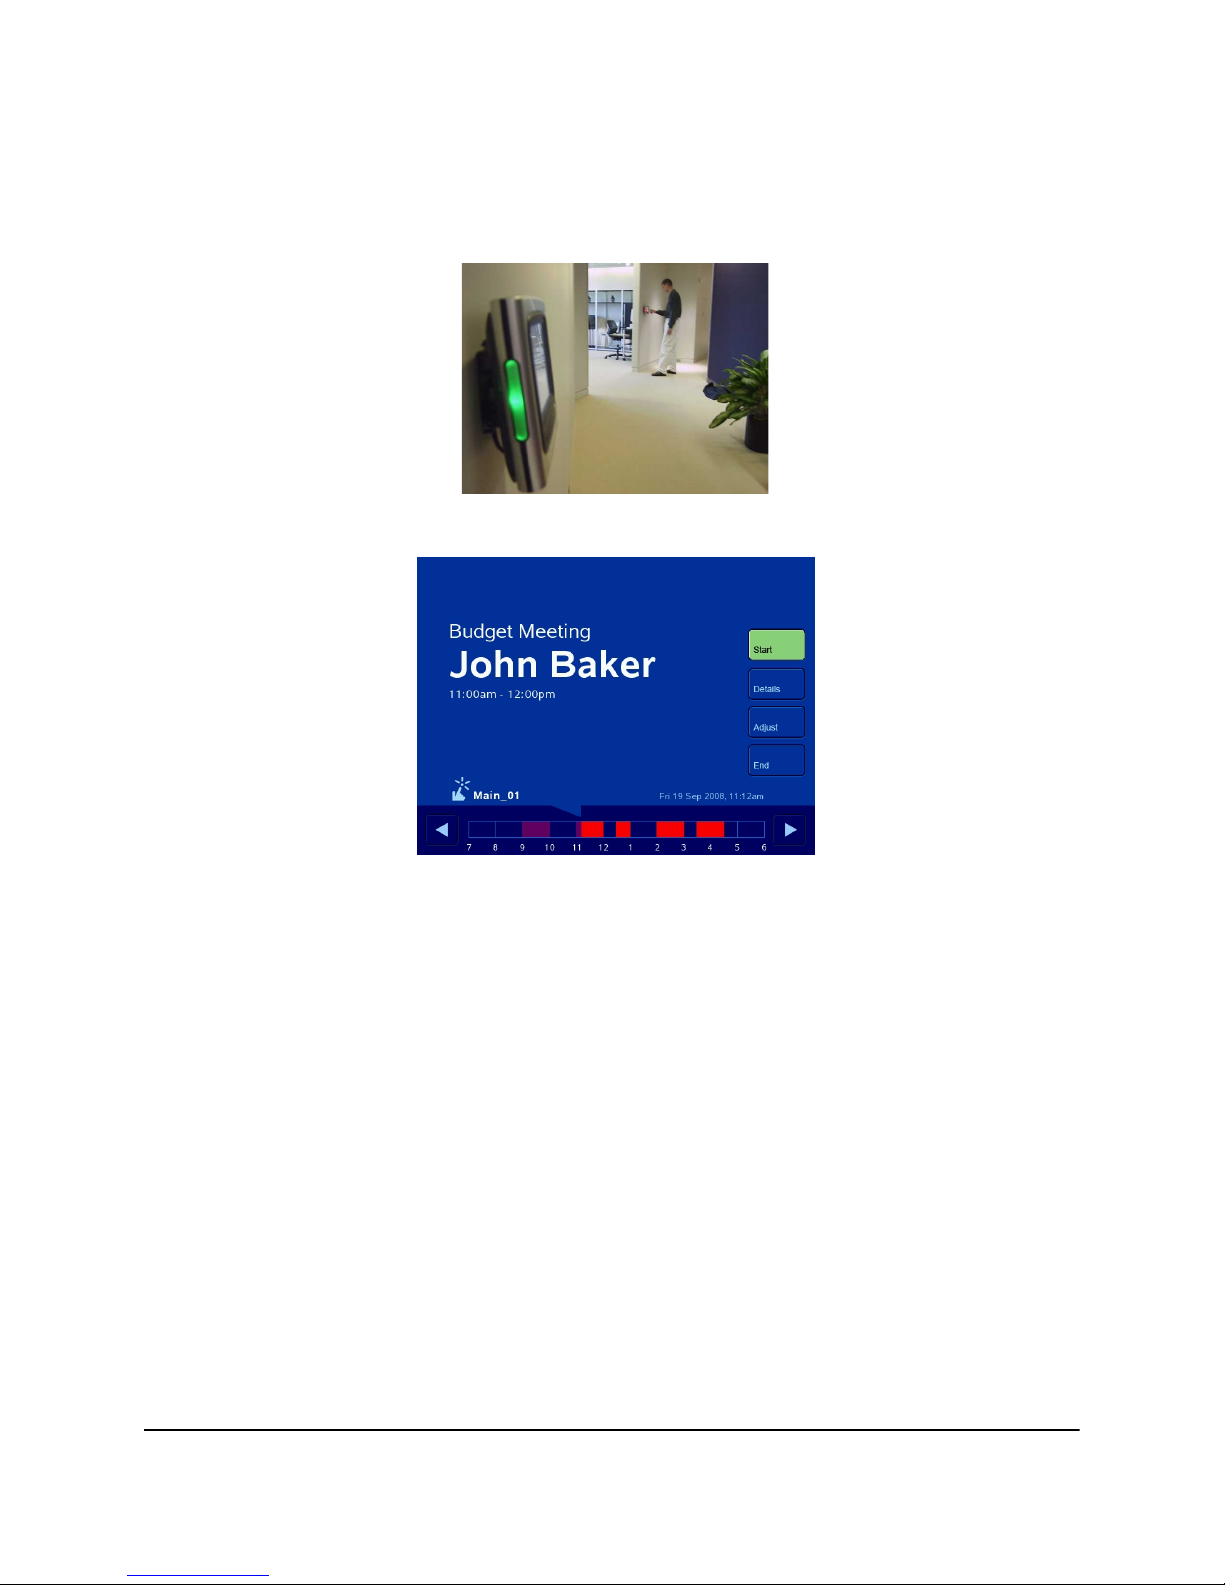
Starting Your Meeting. . . . . . . . . . . . . . . . . . . . . . . . . . . . . . . . . . . 27
Getting Room and Reservation Details . . . . . . . . . . . . . . . . . . . . . . 27
Changing the Current Reservation . . . . . . . . . . . . . . . . . . . . . . . . . 29
Making an Impromptu Reservation. . . . . . . . . . . . . . . . . . . . . . . . . 31
One-Click Publishing and Impromptu Meetings . . . . . . . . . . . . . . . 31
Proper Cleaning of the Touch Screen . . . . . . . . . . . . . . . . . . . . . . . . . . . . 33
Technical Support . . . . . . . . . . . . . . . . . . . . . . . . . . . . . . . . . . . . . . . . . . 33
Summary — Quick Reference . . . . . . . . . . . . . . . . . . . . . . . . . . . . . . . . . . 34
Web Interface. . . . . . . . . . . . . . . . . . . . . . . . . . . . . . . . . . . . . . . . . . . 34
Front Panel. . . . . . . . . . . . . . . . . . . . . . . . . . . . . . . . . . . . . . . . . . . . . 35
Warranty . . . . . . . . . . . . . . . . . . . . . . . . . . . . . . . . . . . . . . . . . . . . . . . . . . 36

2
RoomWizard™Classic Mode

3Overview
RoomWizard™Classic Mode
OVERVIEW
Welcome to RoomWizard™, your web-based scheduling system for meeting rooms and other shared spaces.
RoomWizard incorporates the use of an interactive flat-screen display that is mounted near the meeting room
entrance with the convenience of a web-based room reservation system that you can access from any computer
on the network.
RoomWizard enables you to:
•view information about your reservation outside the room at meeting time, so participants know they’re in
the right place
•easily adjust your current reservation
•release a room for the benefit of colleagues in need of a space
•quickly determine occupied and available rooms by a red or green light
•grab a room for an uninterrupted impromptu meeting
RoomWizard web pages enable you to:
•reserve a room when you need it from any network computer
•set up meeting reminders for participants
•benefit from One-Click Publishing, the option that provides interactivity with CopyCam®Image Capture
systems
•view a year’s worth of reservations for any room
ABOUT THIS MANUAL
RoomWizard adapts to a variety of corporate environments. This manual describes how to use RoomWizard as
a stand alone device with its own web-based room reservation system. Other manuals in this series include the
User Guide for RoomWizard in Synchronized Mode, when it is integrated, or synchronized, with your
corporate calendar system for reserving rooms, and the System Manager Guide, for IT professionals and
facility managers who install and manage RoomWizard systems.

Overview 4
RoomWizard™Classic Mode
RoomWizard’s appliance-like design makes it so easy to use that most people won’t need to read this manual.
We believe that the best way to get a quick and effective understanding of how RoomWizard works is to take the
virtual tour at www.steelcase.com/roomwizard by clicking on “Launch Demo.”

5What is RoomWizard?
RoomWizard™Classic Mode
WHAT IS ROOMWIZARD?
RoomWizard is a reservation system for meeting rooms and shared spaces of all kinds. A RoomWizard touch-
sensitive “information appliance” is mounted outside each meeting room. RoomWizard is part of your corporate
network and it includes its own web-based technology. The front panel displays up-to-the-minute information
about a room’s schedule for that day, plus it enables you to view details and make changes in real time using the
touch screen.
From any computer on the network, you can use an ordinary web browser to access the reservation system built
into each RoomWizard. Each RoomWizard communicates using web technology to form a complete reservation
system: with other RoomWizards, with email, and even with electronic whiteboard systems in the meeting
rooms.
With the One-Click Publishing option, RoomWizard interacts with CopyCam whiteboards in the meeting room to
help you preserve and distribute meeting notes. These whiteboard systems can capture handwritten notes on
the whiteboard and save them to a built-in server. You can enjoy the convenience of returning to your office after
a meeting with the meeting notes waiting for you in emails sent to you from RoomWizard. Meeting participants
are not bothered with copying meeting notes. Your captured whiteboard notes serve for archival purposes, to
forward the notes to others, for incorporation into the next presentation, or to print for use in the next meeting.
RoomWizard with One-Click Publishing ensures that you and all meeting participants can receive meeting notes
immediately in email.

What is RoomWizard? 6
RoomWizard™Classic Mode
ABOUT THE ROOMWIZARD INFORMATION APPLIANCE
Outside a meeting room, the RoomWizard appliance transforms an empty space into a room that can
communicate about its schedule, about the current reservation, and about its facilities. Illuminated LEDs indicate
whether the room is in use at any particular moment, with red meaning “in use” and green meaning “available.”
If a meeting is in progress, RoomWizard displays the meeting’s host and purpose.
RoomWizard is also interactive, so it not only provides quick and easy access to information about the
reservations for that day, you can use the RoomWizard touch screen to communicate with the web-based
reservation system in real time:
•If a meeting runs longer than expected, and assuming another reservation does not interfere, it is easy to
extend the current room reservation. Just press the “Adjust” button on the RoomWizard touch screen and
enter a new end time.
•If a meeting finishes early, you can use the RoomWizard touch screen to let others know. As you walk out
the door, press the “End” button and then press “Yes” to make the room available for others.
•You can claim an available room any time by pressing the “Use Now” button on the touch screen. Anyone
searching for a room reservation can see that the room is now occupied, so even impromptu meetings can
be uninterrupted.
ABOUT THE ROOMWIZARD RESERVATION SYSTEM
RoomWizard uses web technology to create an interactive system that links with other RoomWizard appliances,
with other web-based technologies, and with your corporate email system. When you access the RoomWizard
web pages, you can search for an available room, make reservations, invite meeting participants, and schedule
an automatic meeting reminder.
You can reserve a room in your building or anywhere your corporate network extends.

7What is RoomWizard?
RoomWizard™Classic Mode
Each RoomWizard is associated with a unique web address that you can obtain from your system manager. On
any computer connected to the same network as the RoomWizard, you can view a RoomWizard web page by
entering that address in a web browser.
For the room (or group of rooms) associated with the web address you enter, the web page can display
reservations for up to two years in the future or a year in the past. You can view and change reservations from
RoomWizard web pages.
note:NOTE:
Your system manager has a number of options when they set up the system at your location, so you may not see
every option described here.

Introducing the RoomWizard Web Pages 8
RoomWizard™Classic Mode
INTRODUCING THE ROOMWIZARD WEB PAGES
RoomWizard enables you to make, change, and delete reservations using a standard web browser from any
computer connected to the same Local Area Network (LAN) as the RoomWizard. You can use any common web
browser with Windows®, Macintosh®, or other systems.
Your system manager or IT manager has either given you a web address (http://…) to access your RoomWizard
system or has placed a link on your home page, intranet portal, or other web site.
Remember that you can make RoomWizard easily accessible by adding the address to your web browser’s
Favorites or Bookmarks.
BASICS
When you browse to a RoomWizard web address, you’ll see a page like this:
RoomWizard web pages are easily identified by the RoomWizard logo and perhaps your own company’s logo.
RoomWizard web pages also include a menu bar of options, a calendar, and at least one timeline. Each feature
is described below.
The Menu
The menu is the blue horizontal bar immediately below the RoomWizard (and your company’s) logo. The menu
appears on every RoomWizard page and enables you to navigate between pages.
Click any of the menu options (“Reservation,” “Find,” “Help,” “About”) to go directly to the related part of the
system. If you are viewing a page that you reached through the menu, the corresponding menu name is
emphasized in bold white to show where you are.
note:NOTE:
The first page you see is the Reservation page. You can always return to it at any time by clicking “Reservation”
in the menu.

9Introducing the RoomWizard Web Pages
RoomWizard™Classic Mode
The Calendar
RoomWizard web pages provide a calendar where you specify the date of your meeting. To select a meeting
date, just click the calendar year, month, and date. The top left corner of the calendar says either Today is: (if
today’s date is being shown) or Go to today if a date other than today is selected. Click “Go to today” to return
to today’s date in the calendar.
Other Groups of RoomWizards
Your system manager has a number of options when they set up the system at your location, including the ability
to create groups of rooms (and their associated RoomWizards) and to link several groups for easy access from
the web page.
The web page that you see when you browse to the address that you were provided may be for a group of
rooms. In that case, the web page includes a room name and a timeline for each room in the group.
In addition, there may be a pull-down list immediately below the menu that provides access to the calendar and
reservation schedules for additional groups of rooms.
For example, you might work and normally reserve rooms in the Headquarters building. However, if RoomWizard
is a feature of your company’s West Coast, London, and Paris offices, your system manager can link the
RoomWizards in all these locations.
Your system manager can create several groups of RoomWizards, in different wings, different floors, different
buildings, different continents. The groups can be linked, so you can access them from one web address by
choosing a group from the pull-down list.
The Timeline
A timeline displays the schedule for one room for the date selected on the calendar. In the example below, the
timeline shows the schedule for a room called “Main_01.” Reserved blocks of time appear in red and available
blocks of time are dark blue.
note:NOTE:
Your company’s system manager configures the hours shown in the timeline and many other options.
If a timeline represents the reservations for the current day, a shadow progresses over the timeline to indicate
past and future reservations.
The timeline is an interactive tool that provides many kinds of information in addition to the current room
schedule. You can click on almost any part of a timeline:

Introducing the RoomWizard Web Pages 10
RoomWizard™Classic Mode
•Click the room name to view a description of the room’s features, facilities, location, and possibly a
photograph of the room. This is the room’s “home page.” It includes the reservation timeline for that room
only, so you cannot see other rooms in the same group for comparison.
•Click a blue part of the timeline to reserve the room for the selected date and time. A reservation form
appears, as described in “Making a Reservation” on page 11.
•Click a red part of the timeline to view the reservation in more detail and possibly edit or delete it.
RoomWizard displays the reservation form as it was filled out when the reservation was originally made. You
(or anyone) can view, edit, or delete the reservation. Reservations that are protected by a password require
you to enter the password before you can view or change the reservation. See “Passwords for Meetings” on
page 19.
note:NOTE:
Click the “Reservation” menu option at the top of the web pages to return to your starting point.
TIPS, HINTS AND HELP
The RoomWizard web-based reservation system includes several helpful features:
•If you “hover” your mouse-pointer over the timeline, RoomWizard provides additional information in a pop-
up window. For example: hover over the name of a room in a timeline to view more information about the
room or hover over a red block to view the host and purpose of the reservation.
•RoomWizard web pages provide descriptive information in a small typeface beside nearly every option and
field.
•Click the RoomWizard menu item labelled “Help” at any time to view a pop-up window containing additional
relevant explanation. The pop-up window also provides access to the on-line version of this manual.

11 Making a Reservation
RoomWizard™Classic Mode
MAKING ARESERVATION
The RoomWizard web-based reservation system enables you to use any web browser on any computer
connected to the same LAN to make a reservation.
•If you know the room you want to use, you can browse to the associated RoomWizard web address,
provided by your system manager. There you can view the room’s existing reservations on the date of your
choice and make a reservation at a time that is available.
•Alternatively you can browse to the Reservation web page for a group of RoomWizards using the address
your system manager provides. There, you can view the timelines for a group of rooms to compare the
availability of each room on the selected date before your make your choice.
•In addition, you can search for a room based on availability or specified features using the “Find” menu
option. Refer to “Finding an Available Room” on page 22.
To make a reservation:
1Using a computer connected to the Local Area Network, open any web browser application and enter the
web address provided by your system manager for RoomWizard. The RoomWizard Reservation page
appears for a room or group of rooms, as configured by your system manager.
2Select a date from the calendar.
3If the web page provides links to other groups of rooms, choose the group you want from the pull-down list.
You can view the timelines for each room in the group.
4In the timeline for the room you choose, click an available (dark blue) time in the timeline for that day.
note:NOTE:
If you click an existing reservation, represented by the red block in the timeline, RoomWizard assumes you want
to view or edit an existing reservation.
When you click a blue portion of the timeline to make a reservation, the simple reservation form appears
below the timeline.
This form enables you to enter the minimum information for a reservation.
note:NOTE:
Your system manager may bypass the simple registration form so the advanced reservation form is the default.
Refer to “The Advanced Reservation Form” on page 12.
5Enter the Purpose of the reservation.

Making a Reservation 12
RoomWizard™Classic Mode
6Enter the Host associated with the reservation.
Remember, the purpose and host appear on the RoomWizard touch screen outside of the meeting room
during your meeting.
7If necessary, adjust the reservation start or end time.
8Click “Save” to save your reservation or “Quit” if you change your mind and decide not to make a
reservation.
note:NOTE:
If you don’t want to save a reservation, you can also simply click another item on the menu bar to leave the
reservation form. The reservation is not made until you click “Save.”
Depending on the options in your company’s RoomWizard system, you may also find additional fields on the
simple reservation form. Your system manager has chosen which fields to display.
THE ADVANCED RESERVATION FORM
The RoomWizard’s advanced reservation form enables you to specify additional options. Your system
manager has the option to make the advanced reservation the default form. Depending on the RoomWizard
options that your system manager implemented in your location, you can:
•request services such as catering or audio/visual support
•protect your reservation with a password
•automatically send invitations and meeting reminders to meeting participants in email
•set up the reservation on a recurring basis
•choose when whiteboard captures are emailed to meeting invitees for the One-Click Publishing option
To use the advanced reservation form:
1Click an available (dark blue) time in the room’s timeline.
2If you see the simple reservation form, click the advanced reservation link to the right of the “Purpose”
field.
3Enter the information and select the options that you want to include in your reservation. You can enter as
much or as little information as you choose. Refer to the next section for a description of the RoomWizard

13 Making a Reservation
RoomWizard™Classic Mode
reservation options. Your system manager can enable or disable options, so you may not have access to all
the options that are described, and some fields may be required by you system manager.
4Click “Save.”
RESERVATION OPTIONS
The following sections describe each of the options you may see on the simple and advanced reservation forms.
Your system manager has many options when configuring the RoomWizard system, so you may not see all the
options described below, or they may be requirements instead of options.
Purpose and Host
The “Purpose” and “Host” fields provide you with a way to describe your meeting at the simplest level for
recognition by meeting participants or others interested in your reservation. Use the “Purpose” field to explain in
one or two words what the meeting is about. For example, “Project Meeting,” “Sales Lunch” or “Training
Session.” Think about what would best help people recognize the meeting.
Use the “Host” field to enter the name of the key person you want to be associated with the reservation. This
might be your name, or the person for whom you are making the reservation.
note:NOTE:
“Host” and “Purpose” appear on the RoomWizard appliance outside of the room while your meeting is in
progress. Thinking about what you want displayed at that time can often help you decide how to use these fields.
If RoomWizard is integrated with your company email database, you can type a partial name or email address
and RoomWizard completes and validates the address when you:
•save the reservation
•click the “Check Names” button
•click the “Add” button
In addition, RoomWizard automatically checks the name you enter in the “Host” field and enters the
corresponding email address in the “Host email” field of the advanced reservation form.
Confidential Meetings
You have the option to classify meetings as “confidential.” This enables you to document the details of your
meeting in the reservation form, but the details are not available for public view.
If you want to have a confidential meeting, select the “Confidential” box that is located on the advanced
reservation form. The host name is displayed on the RoomWizard appliance, but reservation details such as the
invitees and meeting purpose are not available.
Host Email
The “Host email” field on the advanced reservation form enables you to provide contact information that may
be useful for people associated with your meeting. This email address also enables the host to receive:
•an automatic reminder email with information about the pending reservation, including a link to the
RoomWizard reservation web page. Refer to “Send Reservation Details to Attendees” on page 16.

Making a Reservation 14
RoomWizard™Classic Mode
•meeting notes captured on CopyCam whiteboards if the One-Click Publishing option is enabled. Refer to
“Send Captured Whiteboard Notes to Attendees” on page 16.
If RoomWizard is linked to your company email database, it automatically recognizes names and email
addresses as you enter them. When you enter a Host name that is in the corporate email database, RoomWizard
automatically adds that person’s email address to this field if it is available.
Invite People
While you are reserving a room, you can also invite those you wish to attend the meeting. List meeting
participants in the “Invite people” field so they can receive:
•an automatic reminder email with information about the pending RoomWizard reservation, including a link to
the reservation form. Refer to “Send Reservation Details to Attendees” on page 16.
•meeting notes captured on CopyCam whiteboards if the One-Click Publishing option is enabled. Refer to
“Send Captured Whiteboard Notes to Attendees” on page 16.
During your room reservation, you can view a list of the invited people in the RoomWizard touch screen by
pressing “Details” and then “Invitees.”
note:NOTE:
If a reservation is confidential, you won’t have access to the “Invitees” button on the RoomWizard touch screen.
To invite meeting participants while you make your room reservation:
•Enter names or the email addresses in the “Invite people” field of the advanced reservation form.
If RoomWizard is integrated with your company email database, you can enter multiple participants
separated by semicolons. You can enter partial names (e.g. “John” for “John Smith”), or portions of an email
address (for example “jsmit” for “jsmith@mycompany.com”). RoomWizard can complete and validate the
addresses based on your corporate email database, both when you save the reservation and when you
click the “Check Names” button.
If RoomWizard is not integrated with your company email database, enter the person’s full name or
complete email address. It must be correct, since RoomWizard cannot validate it.
Using the “Check Names” Button
When RoomWizard is integrated with your company email database, the “Check Names” button enables you to
confirm that the names and email addresses you entered or partially entered are unique and valid entries.
When you click “Check Names,” RoomWizard checks each email address in the “Host email” and “Invite people”
boxes one at a time. If there is only one name in your company email database that partially or fully matches the
name you entered, that name is automatically used.

15 Making a Reservation
RoomWizard™Classic Mode
If there are two or more matches for a name or email address, you see a dialog that lists the possible choices.
Select the correct person and click “Save.”
If no names in the company database match what you typed, RoomWizard displays a scrolling list of all the
people in the company database. Select the person you intended to invite and click “Save.”
Using the “Add” Button
When RoomWizard is integrated with your company email database, you can add names to the “Invited people”
list in the advanced reservation form by selecting them from the entire database.
To add names to “Invite...” in the advanced reservation form from the company database:
1Click the “Add” button.
2Select a name from the scrolling list of names from the corporate email database.
3Click “Add” to add the names to the “Invited people” list in your reservation.
4Repeat for every person you want to invite.
5Click “Save.”
If the “Invite...” list already includes some entries when you click the “Add” button, those addresses are validated
first, as though you had used the “Check Names” button. If RoomWizard encounters names that it cannot
recognize, you see a list of partial matches to select from.

Making a Reservation 16
RoomWizard™Classic Mode
When all the names currently present in the “Invite...” list are validated, you see a list of everyone in the company
email database, plus a separate list of the participants that are already in the Invited people list.
Send Reservation Details to Attendees
If your company is like most, you sometimes find that meeting rooms may be reserved but not used. (We like to
call these “phantom” meetings.) To remedy this, RoomWizard can send the “Host” and “Invited people” a
reminder email that includes a hotlink to the reservation web page where they can view all reservation details.
To have RoomWizard automatically send a reminder email that includes reservation details to invitees and the
host:
•Check the box beside “Send reservation details to attendees” in the advanced reservation form.
note:NOTE:
Your system manager can activate this reminder email option so it is required and present on both the simple and
advanced reservation forms. If the “Send details of reservation to invitees” option is available on the advanced
form only, it is not required.
Send Captured Whiteboard Notes to Attendees
RoomWizard is a web-based system and so are the CopyCam Image Capture systems. CopyCam enables you
to capture meeting notes written on the whiteboard, so during the meeting no one needs to be distracted by the
need to copy notes from the board.
These whiteboards save the captured notes to a web server that is built into the whiteboard. With the One-Click
Publishing option, the whiteboards are integrated with RoomWizard and your corporate email server. As a result,
RoomWizard can automatically email the captured whiteboard notes from your meeting to the host and invitees
that you entered when you made the meeting reservation.
When a meeting room is equipped with a CopyCam whiteboard system and the One-Click Publishing option is
enabled, the RoomWizard appliance near the door includes this icon:

17 Making a Reservation
RoomWizard™Classic Mode
You can press that icon at any time to view information about One-Click Publishing.
To activate One-Click Publishing for your meeting reservation:
•Check the box beside “Send captured whiteboard notes to attendees” in the advanced reservation form.
The advanced reservation form provides two options for sending captured whiteboard notes as attachments in
email:
•You can choose to send captured whiteboard notes in emails as they are captured. One email with one
attachment is sent for each capture. No email is sent at the end of the meeting.
•If you choose the option to send captured images at the end of the meeting, only one email is sent at the
close of the meeting. That email has all the notes captured for the duration of the reservation, even if you
change the reservation from the web page or locally at the RoomWizard.
Because RoomWizard, the whiteboard, and the web-based reservation system are all synchronized, when you
make a reservation the names you enter as the meeting host and invitees become the individuals who receive
emails that contain the captured whiteboard notes. They all receive any whiteboard notes captured in that room
during your reservation.
If your meeting continues beyond your reservation and you continue to capture images, those images are saved
as usual to the CopyCam web server, but they are not emailed to the host or attendees. Instead the notes are
emailed to the room administrator.
To learn the name of the room administrator you can:
•press the “Details” button on the touch screen, then press the “Room” button.
•press the One-Click Publishing icon on the touch screen.
note:NOTE:
You can easily extend your reservation using the RoomWizard touch screen, so captured whiteboard notes
continue to be emailed to the host and invitees. Refer to “Changing the Current Reservation” on page 29.
Cost Center
Your company may track the use of rooms so that reservations can be charged back to your department, or your
facilities department may be interested in knowing who uses what rooms. RoomWizard enables your system
manager to determine for each room whether or not a cost center is required.
If the cost center number is required in order for you to make a reservation, both the simple and advanced
reservation forms include a “Cost Center” field. If entering cost center information is not a requirement but the
system manager has included it as an option, then only the advanced reservation form includes the field.
Other manuals for RoomWizard
3
Table of contents
Popular Control Panel manuals by other brands

RSI VIDEO TECHNOLOGIES
RSI VIDEO TECHNOLOGIES XT610 COMPLETE SETUP AND PROGRAMMING MANUAL

Logitech
Logitech SMARTDOCK Setup guide

Jade Bird
Jade Bird JBE-P2L1 Installation & operation manual

Alfred Hermes
Alfred Hermes ZAS-2020 User manual and instructions

LEGRAND
LEGRAND Celiane 673 23 user guide

Commend
Commend ID8 TD manual