Steelmaster 4800 User manual
4800
Owner’s Manual
4800 Currency Counter


1
4800 TABLE OF CONTENTS
1. Product View
1.1. Front and Rear Views
1.2. LED Display
2. Operation
2.1 Operation Modes
2.2 The Right Way to Load the Bills
3. Troubleshooting
3.1 Error-Message Display Codes
3.2 Adjustment Screw
3.3 Changing the Wear and Tear Parts
3.4 Operational Problems
4. Specifications
5. Safety/Warnings
5.1 Cleaning the Machine
5.2 Maintenance Notice
6. Warranty
Page
2
3
4
5
6
7
7
8
9
10
11
12

2
4800
1. PRODUCT VIEW
1. Hopper
2. Retractable Handle
3. Lid
4. Control Panel
5. LED Display
6. External Display
7. Stacker
1.1 Front and Rear Views
8. Adjustment Screw
9. External Display Outlet
10. Power Outlet
11. Fuse
12. Power Switch
1
2
3
4
6
7
8
9
10
11
12
5

3
4800 1. PRODUCT VIEW
1
2
4
1.2 LED Display
1. Count Mode Indicator
2. Bill Count Display
3. Batch/Add Display
4. Add/Batch Mode Indicators,
Alarm Indicator
3

4
4800
2. OPERATION
2.1 Operation Modes
1. Add Mode
2. Batch Mode
3. +1 For Batch Mode
4. Reset/Clear
(ADD) ADD MODE
To turn on ADD Mode, press ADD. ADD mode allows you to count multiple stacks
of bills while maintaining a grand total amount.
(PST) BATCH MODE
1) To turn on Batch Mode, press PST. Batch mode allows you to select how many
bills will be counted.
2) After the PST button is pressed, press the ADD button to select how many you
would like counted based on pre-determined amounts 100, 50, 20, 10, 5, 1.
3) Load the bills in the hopper and the machine will stop counting when the
selected number is obtained.You can press the +1 button to adjust the
amount to the exact count you want.
(RST) RESET/CLEAR
Press RST to clear the selection and restart.
1
2
3
4

5
4800 2. OPERATION
2.2 The Right Way to Load Bills
Please load the bills in the machine the same as the following steps

6
4800
3. TROUBLESHOOTING
3.1 Error-Message Display Codes
Code No. Malfunction causes Solutions
E01 The left counting sensor is broken or dirty Replace or clean sensor
E02 The right counting sensor is broken or dirty Replace or clean sensor
E03 The code disc is dirty or loose Tighten or clean sensor
E04 The hopper sensor is broken or dirty Replace or clean sensor
E05 The stacker sensor is broken or dirty Replace or clean sensor
E10 Ambient light is too high
UV sensitivity light is too high
Lower the ambient light
Lower the UV light
E11 The plastic button is broken Replace button
Code No. Alarms Meaning Solutions
EE4 The broken bill or half bill is being checked out Take out the broken or half bill in
the stacker, then press (reset) to
continue counting
EE8 The bill width size is not within the proper range Take out the first bill (fake bill) in the
stacker and press reset (RST) to
continue counting
EE9 Two bills are counted as one Turn the adjustment screw clockwise
7
4800 3. TROUBLESHOOTING
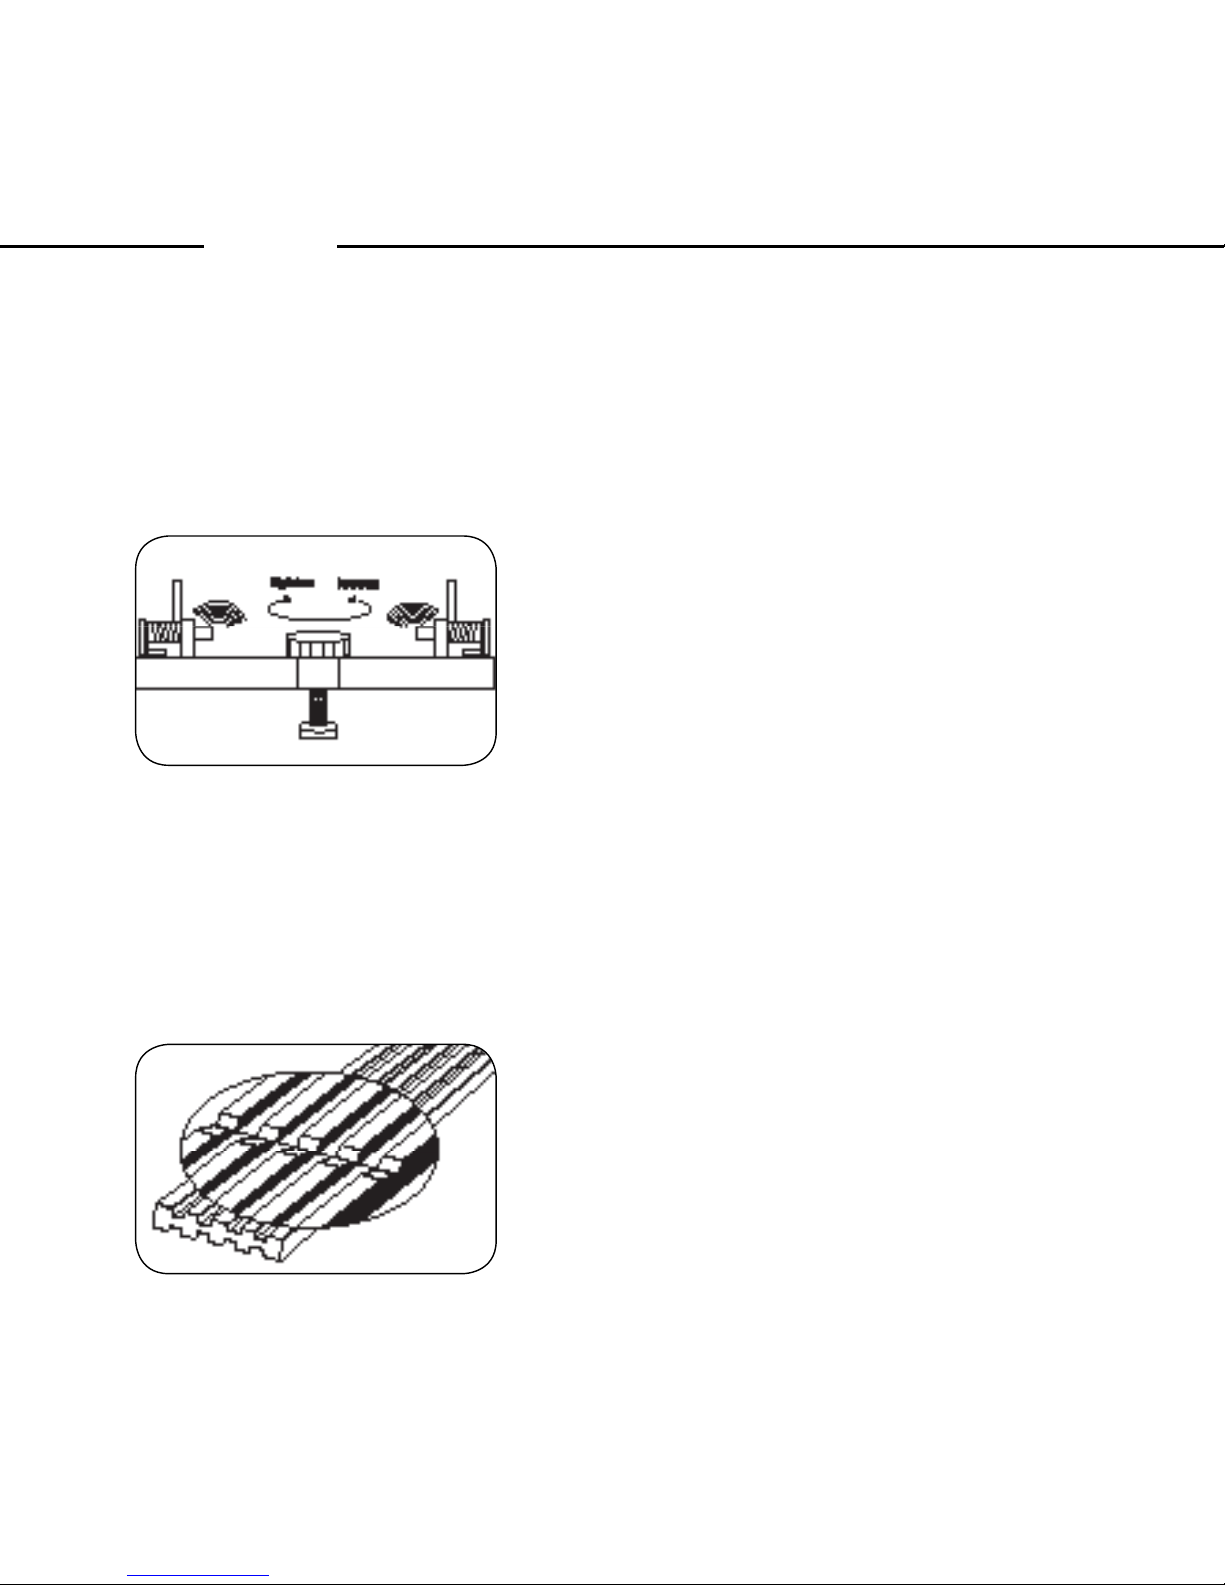
3.2 Adjustment Screw
Due to long transportation and long use, the screw may become loose. When
counting is not accurate, turn the up/down screw clockwise to increase the friction.
3.3 Changing The Wear And Tear Parts
When the rubber tongue is worn out, please flip it and use the other side.
IMAGE TBD

8
4800
3. TROUBLESHOOTING
3.4 Operational Problems
Note: When counting is not accurate, please check the following:
No power
Is the power cord
securely connected?
Is the fuse is blown? Is the power switch on?
The power is on, but
unit is not working
Is the hopper sensor
dirty? If so, please clean
with a brush
Make sure the hopper
sensor line is well
connected to main board
The belt may be too
loose or too tight, adjust
the belt
Wrong counting
Turn the screw clockwise
to increase the friction
Clean counting sensor Check the rubber tongue
and if it’s worn out,
change to the other side
or add a new one

9
4800 4. SPECIFICATIONS
Dimensions: 9.45" x 11.42" x 8.66"
Weight: 14.3 lbs
Counting Speed: 1,080 bills/min
Power consumption: working ≤90W
Sleeping: <3W
Power Source: 220V ± 10% 50 Hz
110V ± 10% 60Hz
Noise: <60dB
Hopper Capacity: 170 bills
Ambient Temperature: 32° F - 104° F
Ambient Humidity: 60%h - 90%h
Counting Range: 1 - 999
Preset Range: 5 - 999
Banknote Size: Length 4.33" - 7.48"
Width 1.97" - 3.35"
Thickness .003" - .005"
4. Specifications

10
4800
5. SAFETY/WARNINGS
5.1. Cleaning the Machine
Warning: Before doing any cleaning, turn the power switch off and disconnect
the power cord from the machine.
1. Cleaning the Optical Sensors
It is very important to clean all the sensors in the machine with a soft brush
to avoid any paper particles or dust from sticking to the light-transmitter or
the light-receiver sensors.
This should be done every day. If necessary, the glass surfaces of the
detectors may also be wiped with a soft cloth soaked with alcohol.
2. Cleaning the inside of the machine periodically
It is necessary to clean the inside of the machine once a month. Unplug the
machine and lift the top cover to gain access to the interior.
3. Additional Recommendations
Avoid operating the machine in a dusty or dirty room. To guard the machine
from the elements, always keep it protected with the supplied plastic cover
(when not in use).
CAUTION: DO NOT CHANGE THE POSITION OF THE DETECTORS
AND/OR OPTICAL SENSORS

11
4800 5. SAFETY/WARNINGS
5.2 Maintenance Notice
1. The machine must be safely connected to the power source.
2. The machine must be kept in dry and ventilated place to avoid strong sunlight.
3. The machine must be kept far away from strong magnetic fields and the
interference of Hertzian waves.
4. The effective power must be in the scope of 220V ± 10% or 110V± 10%,
otherwise it will affect the machine’s operation.
5. The fuse rating is 2A/250V, it cannot be increased or reduced.
6. 80% of all the operational problems may be caused by dust and dirt inside
the machine, keep the machine clean at all times.

12
4800
6. WARRANTY
6. Warranty
STEELMASTER®provides a limited, three-year replacement warranty for
this unit (4800).
This warranty is limited and conditional as the following:
• Three-years from the date of original purchase. Applies only to the original
purchaser. All warranty claims must be accompained by the proof of purchase.
• Warranty is limited to defects in workmanship or material. It does not apply to
damages in handling the product, general misuse, poor maintenance or shipping.
• Warranty liability does not extend or cover any loss, harm or damages from
miscounts or failures in currency counting or counterfeit detection. Warranty
does not guarantee the absolute accuracy of the unit in all environments
and conditions.
• The warranty allows for the replacement of this or similar unit within the warranty
period only and STEELMASTER®discretion.
• All warranty returns must be authorized in writing and proper approved forms
included in the prepaid return package.
• All approved warranty returns need to be returned to:
Block, Inc.; MMF Division
1111 Wheeling Road
Wheeling, Illinois 60090 USA
Customer Service/Support
800.323.8181


4800
1505503
Table of contents


