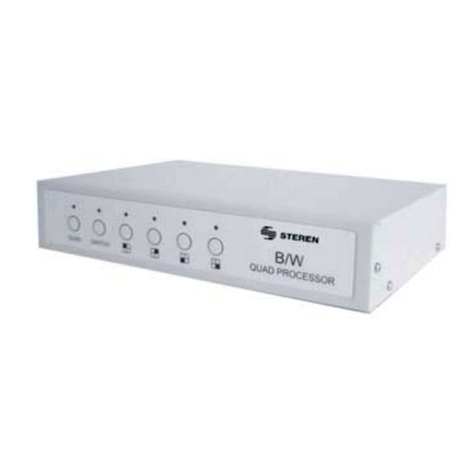
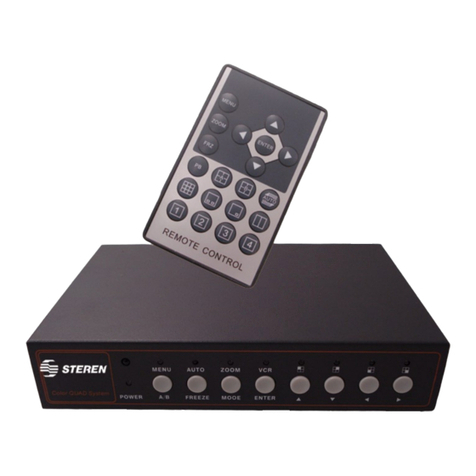
Steren CCTV-905 User manual


ENGLISH
ENGLISH-04
IMPORTANT
Before using your new CCTV multiplexer for four cameras with
audio, please read this instruction manual carefully. After reading
it, please keep this instruction manual for future references.
This device must be placed in an area with adequate ventilation.
Do not expose this device to direct sunlight, dust, or humidity.
Always use a clean dry cloth in order to clean this device.
If the power cord is damages, it must be replaced. See the
manufacturer, a service agent, or qualied personnel in order to.
FEATURES
Includes four video input jacks BNC.
One input and one BNC output jack for VCR.
BNC monitor output jack.
RCA audio input and output jacks.
PAL or NTSC formats.
•
•
•
•
•
•
•
•
•

ENGLISH
ENGLISH-05
CONTROLS
FRON PANEL
1.- Power indicator light.
Illuminates when the device is in use.
2.- IR sensor.
Receives the infrared signal from the remote control.
3.- Menu / ESC / Mosaic.
Menu: Access for the setup menu ESC: Exits setup mode
MOSAIC: Allows you to view all four cameras at the same time on one
screen.
1
2
3456
78 9 10

ENGLISH
ENGLISH-06
4.- Auto / Freeze.
Allows you to access the automatic sequence mode and freezes the
image.
5.- Zoom/PIP.
6.- VCR / Enter.
VCR allows you to access the VCR. Enter applies the changes that
have been made in the setup menu.
7.- CH1 / Up.
Allows you to select the camera connected to the channel 1 input jack.
Arrow key allows you to navigate in the setup menu.
8.- CH2 / Down.
Allows you to select the camera connected to the channel 2 input jack.
Arrow key allows you to navigate in the setup menu.
9.- CH3 / Up.
Allows you to select the camera connected to the channel 3 input jack.
Arrow key allows you to navigate in the setup menu.
10.- CH4 / Up.
Allows you to select the camera connected to the channel 4 input jack.
Arrow key allows you to navigate in the setup menu.

ENGLISH
ENGLISH-07
REAR PANEL
1.- Video Input.
Allows you to connect up to four cameras with BNC plugs.
2.- Input/Output for VCR.
VCR IN: Accept 1 composite video input for playback from the VCR.
VCR OUT: Provide 1 composite video output for recording in the VCR.
3.- Video Output.
Allows you to connect a monitor through a BNC plug.
4.- Audio Input/Output.
Audio IN: Aceppt 4 composite audio inputs from the camera.
Audio OUT: Provide 1 composite audio output for the main monitor.
5.- 3.5 mm Audio Output.
Audio output for a 3.5mm plug.
6.- Power Input.
Allows you to connect the included power adaptor.
12
3
4
5
6

ENGLISH
ENGLISH-08
REMOTE CONTROL
1.- Menu
Enters or exits the main
menu
2.- Zoom
Allows you to zoom in/out
on an image
3.- FRZ
Allows you to freeze the
image
4.- Arrow keys
Allows you to navigate
within a menu
5.- Enter
Allows you to select an option
within the menus
6.- A
Allows you to view all four cameras
at the same time
7.- AUTO
Allows you to run the automatic sequence function
8.-Muti channel display.
Allows you to view the screen in different styles
9.- Channel 1, Channel 2, Channel 3, Channel 4
Allows you to view camera 1, 2, 3, or four respectively
10.- PB
access to the record / playback VCR
1
2
3
4
5
6
7
8
9
10

ENGLISH
ENGLISH-09
CONNECTIONS
1. Locate the BNC inputs on the rear panel of the recorder
2. Connect camera 1 to the input jack labeled as “CH1”. Do the same
for cameras 2, 3, and 4. In the event of having cameras with audio plug
the audio cable to the entry called “AUDIO IN” and the number that
matches the camera.
3. Connect a monitor in the jack labeled as “VIDEO OUTPUT” with a
BNC connector and “AUDIO OUT” with RCA jack for audio.
4. If you wish to use a VCR, connect it to the VCR input/output jack
5. Connect the power jack to the power input and the other end to the
electrical power source.

ENGLISH
ENGLISH-10
SYSTEM STARTUP
After powering your device on, the system will start up and the monitor
will display the four cameras with the following information:
Top: Date and time
Screen: Channel number (CH1-CH4)
SETUP MENU
Press the Menu button on the remote control in order to enter the main
menu. You will se the following sub-menus:
a) System Setup.
b) Display Setup.
c) Auto Sequence.
d) Camera Setup.
e) Monitor Setup.
f) Event Setup.
g) Event Report.
Use the arrow keys in order to select one of the options.
Press the enter button in order to save the changes or the ESC button
in order to exit this menu.

ENGLISH
ENGLISH-11
a) System Setup.
Setting up the system date and time:
Use the arrow keys in order to select the date
Afterwards, press the left/right arrow keys in order to adjust the month
digit(s). Press the down arrow key in order to switch to select the day
and adjust it using the left/right arrow keys. Repeat this same
procedure in order to adjust the time.
Setting NTSC or PAL format (system format)
Press the down arrow key in order to select the system format and
adjust it using the left/right arrow keys.
System ID Number
Use the arrow keys in order to select the system ID option and adjust it
using the arrow keys in order to adjust from 01-16
Key Lock
Allows you to activate or deactivate the key lock. On means the keys
are locked and off means they are not.
Factory Reset
This option allows you to return the multiplexer to the default factory
settings. All changes made by the user will be lost.
to exit press Menu button.

ENGLISH
ENGLISH-12
b) Display Setup.
Information on-screen:
Allows you to choose whether to display camera information on the
screen. Use the arrow keys in order to select this option and the
ENTER button in order to change the selection.
Screen Position:
Allows you to move the screen horizontally (x) or vertically (y) on your
monitor. Use the up/down arrow keys in order to select this option and
the right/left arrow keys in order to adjust the screen.
Border Coloring:
Allows you to choose the border color (separation between camera
screens in MOSAIC setting) between black, gray, white, or none. In
order to select this option use the up/down arrow key and press ENTER
in order conrm your selection.
to exit press menu button

ENGLISH
ENGLISH-13
c) Auto Sequence.
This option allows you to setup the sequence in which the screen will
change between displaying the mosaic, camera 1, camera 2, camera 3,
and camera 4.
The times available are between 1 and 99 seconds or skip.
In order to select mosaic or the desired camera use the up/down arrow
keys and use the right/left arrow keys in order to increase or decrease
the number of seconds.
In order to select the auto sequence option, press the AUTO button on
your remote control
d) Camera Setup.
This option allows you to name the cameras as well as adjust the
brightness, contrast, color, and hue of each camera selected.
In order to select this option use the up/down arrow keys and use the
right/left arrow keys in order to change the values. Use the ENTER key
in order to save the changes.
e) Monitor Setup.
This option allows you to setup your monitor. You can program the
monitor to power on/off t a certain time. Also the sensitivity and speed
can be congured. In order to select this option use the up/down arrow
keys and use the right/left arrow keys in order to change the values.
Use the ENTER key in order to save the changes

ENGLISH
ENGLISH-14
f) Event Setup
This option allows you to activate/deactivate alarms or lost events on
each camera.
g) Event Report
This option displays the occurred events. It will display the event
number (1-10), the date, time, camera number, and the occurred event.
If you wish to delete the list of events, press the down arrow key until
you reach DELETE LIST and press the ENTER button.
FUNCTION
1.- Power the device on and make the necessary congurations
2.- Press the button of the camera you wish to view or the QUAD for
viewing all four cameras on one screen.
3.- If you want the image of a camera for some time (1 Second, 2 or
even 99 seconds) press the button Auto. The display time of the
cameras should be congured previously. See Auto sequence.
VCR FUNTION
Recording Funtion: The output “VCR OUT” sends a signal of a camera
to a VCR. Press the button VCR / enter, display will show the camera
recording (A1, A1, A3 and A4), select the camera recording by pressing
the button VCR / Enter.

ENGLISH
ENGLISH-15
Playback Function: The “VCR IN” to replicate what works recorded a
VCR, press the button VCR / Enter and select the camera where you
want to see the playback (A1 A2 A3 or A4), if you want to see the full
screen press controls, top / down, right or left depending on the
selected camera.
AUDIO
To listen to the audio depends on the camera connected.
Press the VCR / enter once to listen to the audio 1, 2 times to listen to
the audio 2, three times to listen to the audio 3 and 4 times to listen to
the audio 4. Finally press 5 times to exit.
SPECIFICATIONS
Input: 12V - - - 1A
REMOTE CONTROL
Input: 3V - - - (Battery)
AC ADAPTOR
Input: 110-260V~ 50/60Hz 15W
Output: 12V - - - 1A
Product design and specications are subject to change without
previous notice.

WARRANTY
This Steren product is warranted under normal usage against defects in workmanship and
materials to the original purchaser for one year from the date of purchase.
CONDITIONS
1.- This warranty card with all the required information, invoice or purchase ticket, product
box or package, and product, must be presented when warranty service is required.
2.- If the product stills on the warranty time, the company will repair it free of charge.
3.- The repairing time will not exceed 30 natural days, from the day the claim was received.
4.- Steren sell parts, components, consumables and accessories to customer, as well as
warranty service, at any of the addresses mentioned later.
THIS WARRANTY IS VOID IN THE NEXT CASES:
If the product has been damaged by an accident, acts of God, mishandling, leaky batteries,
failure to follow enclosed instructions, improper repair by unauthorized personnel, improper
safe keeping, among others.
a) The consumer can also claim the warranty service in the purchase establishment.
b) If you lose the warranty card, we can reissue it, if you show the invoice or purchase ticket.
Product: CCTV multiplexer for four cameras with audio
Part number: CCTV-905
Brand: Steren

RETAILER INFORMATION
Name of the retailer
Address
Product
Brand
Part number
Serial number
Date of delivery
In case your product fails or have questions, please contact your nearest dealer. If
you are in Mexico, please give a call to our Call Center.
Call Center
01 800 500 9000


IMPORTANTE
Antes de utilizar el multiplexor CCTV P/4 cámaras con audio lea este
instructivo para evitar cualquier mal funcionamiento. Guárdelo para
futuras referencias.
El equipo debe ser colocado en un lugar con ventilación adecuada.
No exponga el equipo a la luz directa del sol o polvo o humedad.
Siempre utilice un paño suave, limpio y seco para la limpieza del
equipo.
Si el cordón de alimentación es dañado éste debe ser reemplazado
por el fabricante o su agente de servicio o por personal calicado
para evitar algún riesgo.
CARACTERISTICAS
Cuenta con 4 entradas de vídeo compuesto por conector BNC.
Tiene una entrada y una salida BNC para videograbadora.
Salida de monitor por BNC.
Entrada y salida RCA de audio.
Formatos: PAL o NTSC.
•
•
•
•
•
•
•
•
•
ESPAÑOL
Antes de utilizar su nuevo Kit Convertidor Analógico/Digita Ant es
de utilizar su nuevo Kit Convertidor Analógico/Digital lea
este instructivo para evitar cualquier mal funcionamiento.
ESPAÑOL-02

ESPAÑOL
CONTROLES
PANEL FRONTAL
1.- Indicador de energía.
Enciende cuando el equipo está en uso.
2.-Sensor IR.
Recibe la señal IR del control remoto.
3.-Menú / ESC / Mosaico.
Menú: Accede al menú de conguración ESC: Sale del modo de
conguración. MOSAICO: Permite visualizar las 4 cámaras al mismo
tiempo en una sola ventana.
1
2
3456
78 9 10
ESPAÑOL-03

ESPAÑOL-04
ESPAÑOL
4.-Auto / Freeze.
Permite acceder a la función de secuencia automática y congela la
imagen.
5.-Zoom / PIP.
6.-VCR / Enter.
VCR permite acessar a la videograbadora y Enter aplica los cambios de
selección del panel de conguración.
7.-Canal 1 (CH1) / Arriba.
Permite elegir la cámara conectada al canal 1 y permite moverse y selec-
cionar parámetros en el menú de conguración.
8.-Canal 2 (CH2) /Abajo.
Permite elegir la cámara conectada al canal 2 y permite moverse y selec-
cionar parámetros en el menú de conguración.
9.-Canal 3 (CH3) / Izquierdo.
Permite elegir la cámara conectada al canal 3 y permite cambiar valores
en el menú de conguración.
10.-Canal 4 (CH4) / Derecho.
Permite elegir la cámara conectada al canal 4 y permite cambiar valores
en el menú de conguración.

PANEL TRASERO
1.-Entrada de vídeo.
Permite conectar hasta 4 cámaras de video con conector BNC.
2.-Entrada/Salida de VCR.
Entrada: Permite reproducir de un VCR
Salida: Permite grabar en un VCR.
3.-Salida de video
Permite conectar un monitor a través de un conector BNC.
4.-Entrada/salida de audio.
Entrada: Permite conectar audio de las cámaras que cuenten con salida
de audio RCA
Salida: permite conectar el audio del monitor por RCA.
5.-Salida de audio 3,5mm
Salida de audio por conector 3,5mm
6.-Entrada de corriente
Permite conectar el adaptador de corriente suministrado.
ESPAÑOL-05
ESPAÑOL
12
3
4
5
6
Table of contents
Languages:
Other Steren Multiplexer manuals
Popular Multiplexer manuals by other brands

GE Security
GE Security S707V installation instructions

Paradyne
Paradyne TIM1500 installation instructions

Comnet
Comnet FVTXA4C1 Series Installation and operation manual

HEIDENHAIN
HEIDENHAIN MSE 1000 operating instructions

Positron
Positron GAM-12-M Quick installation guide

Actisense
Actisense NMEA 0183 quick start guide