STERILUX SterOx System V Series User manual
SFT-0034-V02-IFU_SterOx_System_V-Series
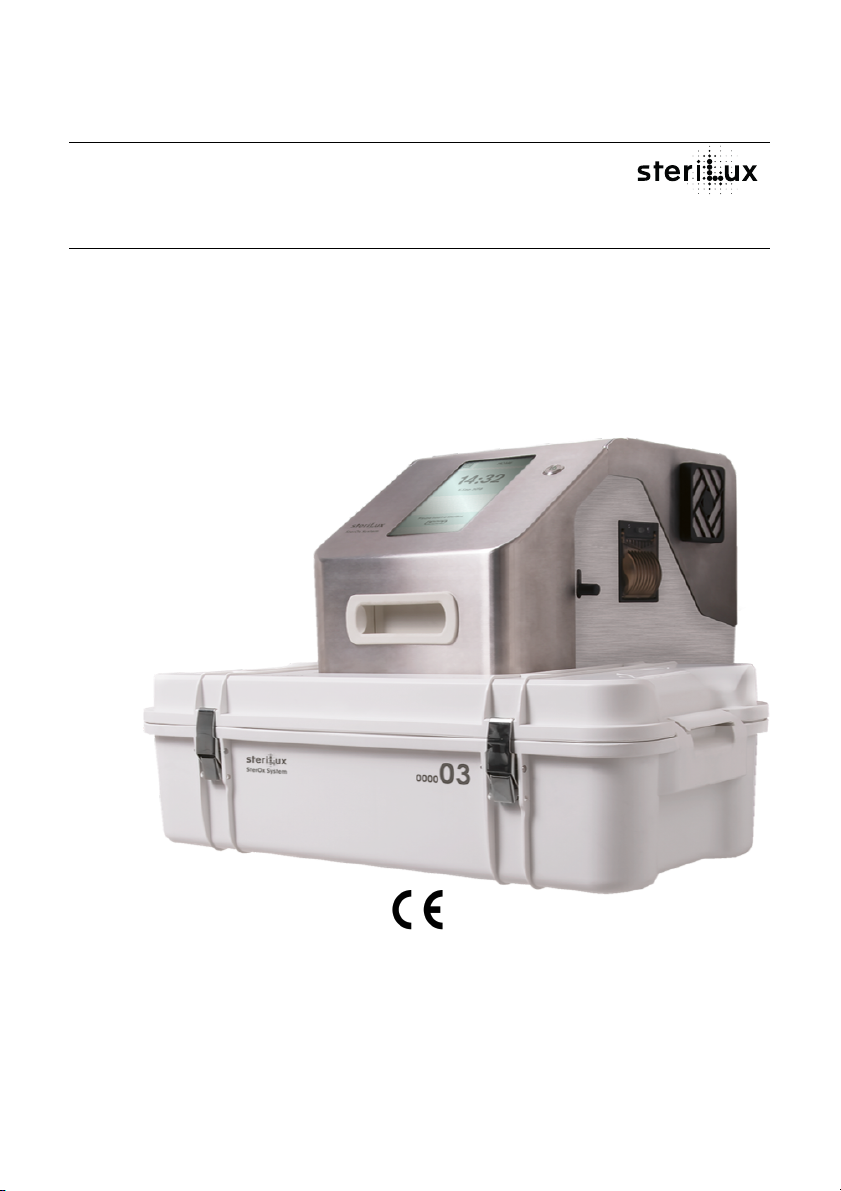
SterOx System V-Series
Ozone Sterilizer Instruction for Use

2

3
All rights reserved
No portion of this manual can be printed, transmitted, rewritten, stored in a data recovery
system, translated in any foreign or computer language, in any form or through any devices,
without written consent by SteriLux SA.
Information in this manual is subject to change without any warning or prior notice by
SteriLux SA.
SteriLux SA
Chemin du Viaduc 12
1008 Prilly – Switzerland
T: +41 (0) 21 546 43 33 | E: info@sterilux.ch | www.sterilux.ch

4
Table of contents
1 Introduction....................................................................................................................................................................................................................................................... 5
2 Symbols............................................................................................................................................................................................................................................................... 6
3 Important information ...................................................................................................................................................................................................................................7
3.1 Dis claimers ......................................................................................................................................................................................................................................................................................................................................................................................................................7
3.2 Declaration of Conformity..........................................................................................................................................................................................................................................................................................................................................................................................7
3.3 Field of application.......................................................................................................................................................................................................................................................................................................................................................................................................7
3.4 Warning............................................................................................................................................................................................................................................................................................................................................................................................................................ 8
4 Products overview........................................................................................................................................................................................................................................... 9
4.1 SteriBase V-Series (SKU-0006)................................................................................................................................................................................................................................................................................................................................................................................. 9
4.2 SteriBox V-Serie s (SKU-0007)...................................................................................................................................................................................................................................................................................................................................................................................10
5 Principles of operation................................................................................................................................................................................................................................. 11
6 Setting up your SteriBase V-Series..........................................................................................................................................................................................................12
6.1 Installing your device .................................................................................................................................................................................................................................................................................................................................................................................................12
6.2 Powering your device.................................................................................................................................................................................................................................................................................................................................................................................................13
6.3 Installing nitrogen supply.........................................................................................................................................................................................................................................................................................................................................................................................13
6.4 Settingthe time and date.........................................................................................................................................................................................................................................................................................................................................................................................14
6.5 Settingthe language..................................................................................................................................................................................................................................................................................................................................................................................................14
6.6 Setting the users ..........................................................................................................................................................................................................................................................................................................................................................................................................14
6.7 Settingthe contents...................................................................................................................................................................................................................................................................................................................................................................................................14
6.8 Connecting to a Wireless Network........................................................................................................................................................................................................................................................................................................................................................................15
7 Using the SteriBox V-Series and preparing instruments.................................................................................................................................................................16
7.1 Using the SteriBox V-Series......................................................................................................................................................................................................................................................................................................................................................................................16
7.2 Preparing and loading instruments in the SteriBox V-Seri es .......................................................................................................................................................................................................................................................................................................................17
8 Using your SterOx System V-Series........................................................................................................................................................................................................20
8.1 Preparing device for use..........................................................................................................................................................................................................................................................................................................................................................................................20
8.2 Selecting a cycle.........................................................................................................................................................................................................................................................................................................................................................................................................20
8.3 Running a Cycle ...........................................................................................................................................................................................................................................................................................................................................................................................................21
8.4 Stopping a Cycle.........................................................................................................................................................................................................................................................................................................................................................................................................22
9 Storing and retrieving cycle information............................................................................................................................................................................................. 23
9.1 Retrieving cycle information using the touchscreen......................................................................................................................................................................................................................................................................................................................................23
9.2 Retrieving cycle information using a USB stick................................................................................................................................................................................................................................................................................................................................................23
9.3 Retrieving cycle information using an email address ................................................................................................................................................................................................................................................................................................................................... 24
10 Shutting device down ................................................................................................................................................................................................................. 24
10.1 Normal shutdown.......................................................................................................................................................................................................................................................................................................................................................................................................24
10.2 Emergency shutdown ...............................................................................................................................................................................................................................................................................................................................................................................................24
11 Maintaining your SterOx System V-Series..........................................................................................................................................................................25
11.1 Cleaning t he Ste riBox V -Series..............................................................................................................................................................................................................................................................................................................................................................................25
11.2 Cleaning the SteriBase V-Se ries an d exte rior surface of the SteriBox V-Series ...................................................................................................................................................................................................................................................................................25
11.3 Run a Peripherals Checks........................................................................................................................................................................................................................................................................................................................................................................................ 25
11.4 Preventive maintenance..........................................................................................................................................................................................................................................................................................................................................................................................26
12 Troubleshooting your SterOx System V-Series.................................................................................................................................................................. 27
13 Spare parts......................................................................................................................................................................................................................................29
14 Recycling and disposal..............................................................................................................................................................................................................30
15 Warranty............................................................................................................................................................................................................................................31
16 Specifications ................................................................................................................................................................................................................................32
17 Appendix..........................................................................................................................................................................................................................................33
17.1 Electromagnet ic compatibility – Envi ronment ................................................................................................................................................................................................................................................................................................................................................33
17.2 Electromagnetic compatibility – Pe rforman ce Leve ls ..................................................................................................................................................................................................................................................................................................................................34
17.3 Accessories replacement........................................................................................................................................................................................................................................................................................................................................................................................35

5
1 Introduction
Congratulations on selecting the SterOx System V-Series. The SterOx System V-Series is a
compact, environmentally-friendly sterilization device based on ozone as sterilizing agent
composed of two components: the SteriBase V-Series and the SteriBox V-Series.
The details of installing, operating, and maintaining your SterOx System V-Series are all
contained within these instructions for use manual. Please read these instructions before
starting to operate this device and keep them for future reference. Calibration tests were
performed at the factory; the sterilizer does not require any special commissioning settings.
Operational, maintenance and replacement instructions must be followed.
The SterOx System V-Series is suitable for terminal sterilization of metal and nonmetal
devices compatible with ozone sterilization. The SterOx System V-Series has not been
designed to sterilize liquids, textile fabrics, powders, bio-medical waste, porous materials
or any other materials not compatible with ozone sterilization. The processing of such loads
may result in incomplete sterilization and / or damage to the load and / or to the sterilizer.
For more information about instruments compatibility with ozone sterilization, please
contact SteriLux SA directly.
6
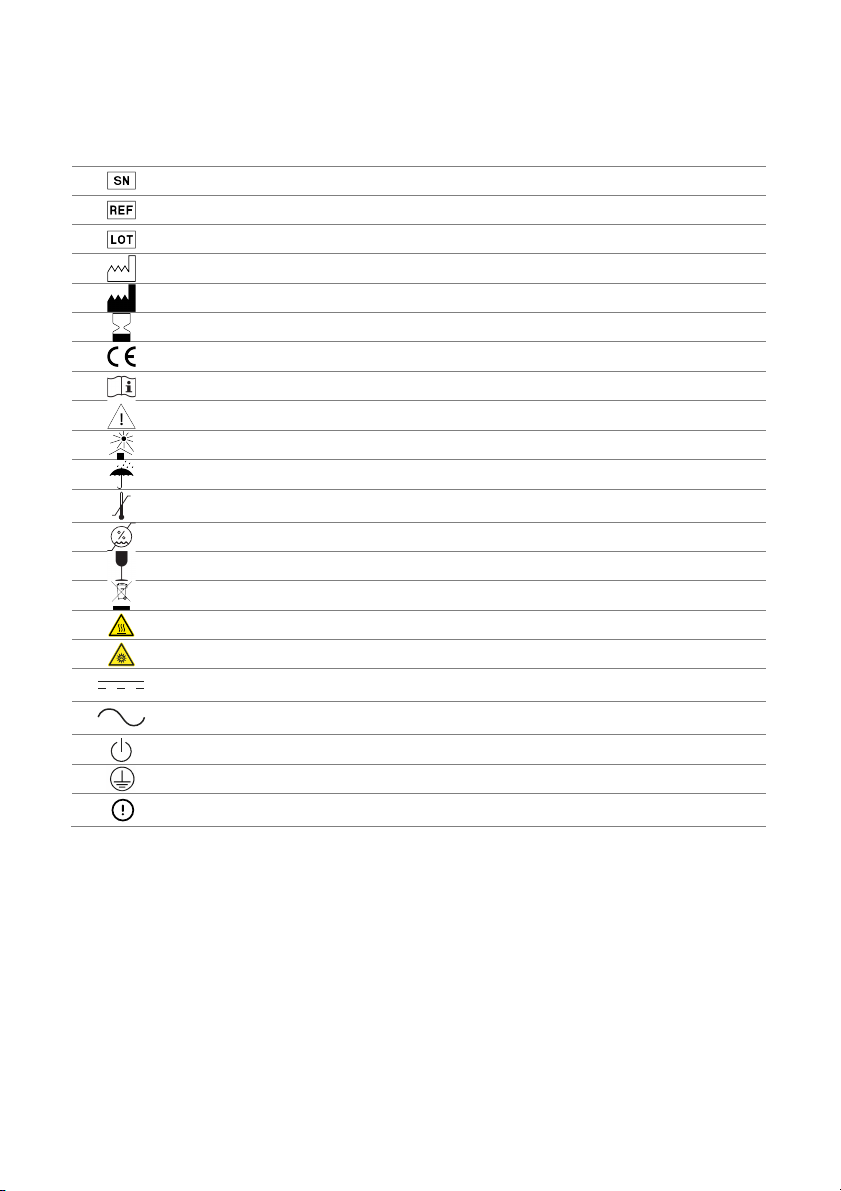
2 Symbols
The following table displays the different symbols used in the margins of this manual and/or
on the product and summarizes their meaning.
Serial number
Catalogue number
Batch code
Date of manufacture
Manufacturer
Use-by date
CE marking
Consult instructions for use
Caution, consult the instructions for use for important cautionary information
Keep away from sunlight
Keep dry
Temperature limit
Humidity limitation
Fragile, handle with care
Waste Electrical and Electronic Equipment
Caution, hot surface
Caution, UV radiation
Direct Current
Alternative current
Stand-by / Switch button
Protective Conductor Terminal
Potential hazard to the operator

7
3 Important information
3.1 Disclaimers
The protection provided by the equipment may be impaired if the operator does not use the
SterOx System V-Series in a manner specified in the present document. Failure to follow the
present document instructions and recommendation may lead to machine malfunction
and serious injuries. Do not permit any person other than certified personnel to supply parts
for service or maintain your SterOx System V-Series. SteriLux SA shall not be liable for
incidental, special or consequential damages caused by any maintenance or services
performed on the SterOx System V-Series by a third party, or for the use of equipment or
parts manufactured by a third party, including lost profits, any commercial loss, economic
loss, or loss arising from personal injury.
Never attempt to remove the SteriBase V-Series cover by removing the screws. Doing so
may damage the device and/or pose a hazard to the operator. The door at the back of the
SteriBase V-Series should only be opened by trained staff or technicians responsible for
maintenance or repair.
The use of this sterilizer is limited to the range of application indicated in this technical
document and must only be operated with fully functional accessories, consumables and
spare parts recommended or supplied by SteriLux SA. SteriLux SA shall not be liable for
incidental, special or consequential damage caused by the use of products, accessories,
consumables or spare parts not recommended or supplied by SteriLux SA and/or damaged
or suspected of damage.
The operations of preparation and sterilization of devices must be carried out by qualified
personnel only.
It is imperative to sterilize only instruments and other devices that are specified as
sterilisable by the manufacturer.
3.2 Declaration of Conformity
The SterOx System V-Series falls into the definition of a Low Voltage Device, as defined by
Article 1 of 2014/35/EU.
The manufacturer declares under its sole responsibility, that the product listed below is in
conformity with:
1) Safety Objectives referred to in Article 3 and set out in Annex I of European Directive
2014/35/EU, as amended.
2) The relevant Essential Requirements of Article 3 of European Directive 2014/53/EU, as
amended, and that Annex III (Module B on EU-type Examination) has been followed for
their conformity assessment.
3) The relevant Essential Requirements of Article 4 of European Directive 2011/65/EU, as
amended.
3.3 Field of application
This sterilizer has been designed for indoor use only.

8
3.4 Warning
Careful monitoring of the shelf-life and/or the maximum allowable number of cycles of the
different components of the SterOx System V-Series is essential to ensure the required
sterility assurance level (SAL) at the end of the cycle. Never use components that have an
expired shelf-life or exceeded the allowable number of cycles.
Do not remove or erase labels and markings present on individual products.
Always allow the sterilizer to cool down to room temperature before transporting and use a
suitable transport box.
Avoid pouring or splashing of water or liquids on the SteriBase V-Series as this may cause
short circuits. Do not place any liquid or liquid container of any type on the SteriBase V-
Series or close to it.
When using the SterOx System V-Series, ensure that the power cable port remains
accessible and removable all the time.
Keep the SterOx System V-Series away from children and pets at all time.
In case of malfunction or failure, the operator may be exposed to higher ozone
concentration. In case of suspected malfunction, shut the device down using the power
switch, ventilate and evacuate the room as quickly as possible for at least 30 minutes.
Any person suspected to have come in contact with ozone or who has effectively been in
contact with ozone shall seek medical assistance and follow-up as soon as possible.
The SteriBase V-Series contains lamps that emit ultraviolet (UV) radiations.

9
4 Products overview
4.1 SteriBase V-Series (SKU-0006)
1 Touchscreen
2 Start button
3 Handle
4 Manual levers (of the
Lamp Unit)
5 Cooling fan
6 Thermal printer
7 Nitrogen plug
8 Power switch
9 Power cable port
When you receive your SteriBase V-Series, the items listed below should be included. If any
of the items are missing or damaged, contact your supplier immediately.
• SteriBase V-Series
• Power cord
• Backdoor access key
• Instructions for use
Note: The SteriBase V-Series has a 10-year shelf-life.
10
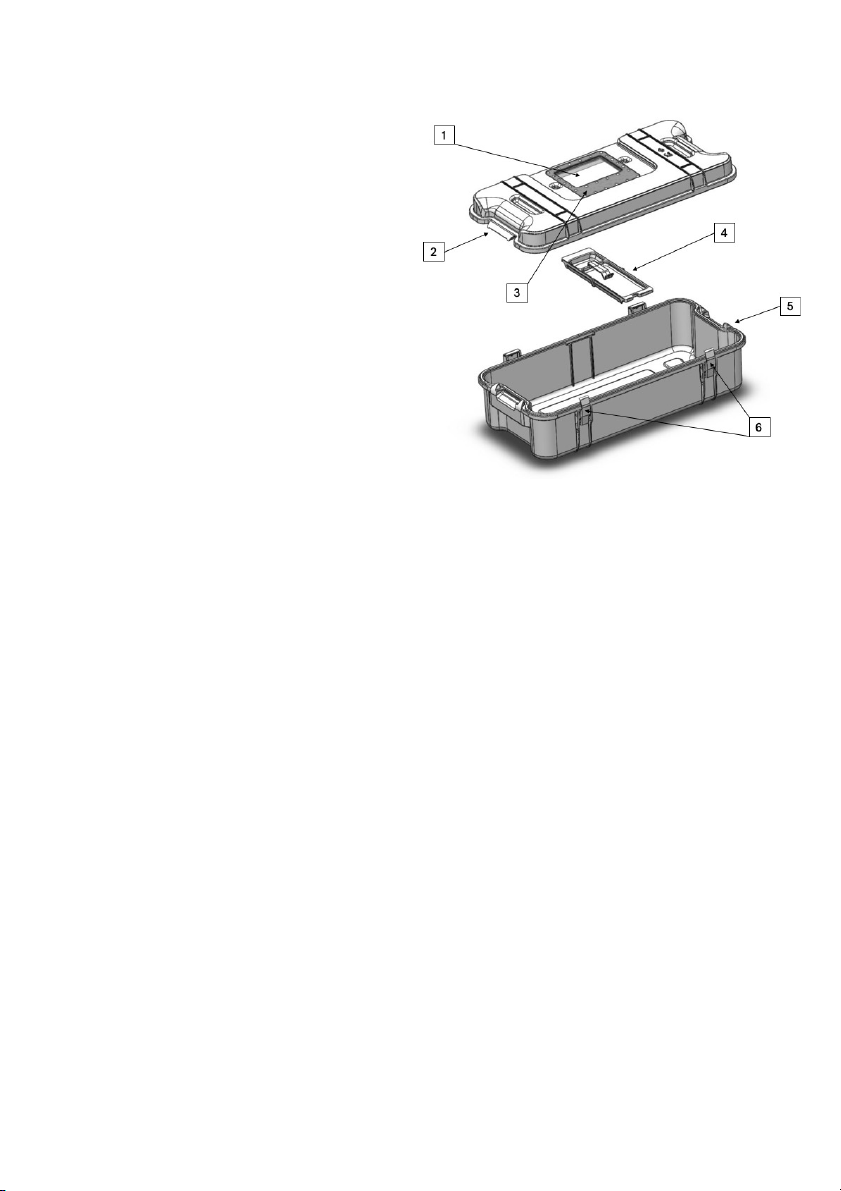
4.2 SteriBox V-Series (SKU-0007)
1 Quartz window
2 Lid
3 Incorporated RFID tag
4 Module and clip
5 Bottom
6 Locks
When you receive your SteriBox V-Series, the items listed below should be included. If any
of the items are missing, contact your supplier immediately.
• SteriBox V-Series Lid
• SteriBox V-Series Bottom
• SteriBox V-Series Module and clip
• Instructions for use
• Declaration of conformity
Always use parts belonging to the same serial number of a SteriBox V-Series assembly (Lid,
Bottom, Module and clip).
Note: The SteriBox V-Series has a 3-year shelf-life or 1’000 cycles.

11
5 Principles of operation
The SterOx System V-Series is an ozone-based sterilizer. 172 nm UV lamps contained in the
Lamp Unit inside the SteriBase V-Series (
1
) transform oxygen (O2) from ambient air into
ozone (O3) (
2
). Ozone further reacts with water (H2O) to form hydroxyl and hydroperoxyl
radicals (
3
) which are responsible for the inactivation of micro-organisms causing infections
and disease transmissions (
4
). At the end of the sterilization process, a 254 nm UV lamp also
contained in the Lamp Unit transforms remaining ozone back into oxygen (
5
).

12
6 Setting up your SteriBase V-Series
6.1 Installing your device
There are several factors that may affect the performance of your SteriBase V-Series. Please
review these factors and select a suitable location in which to install the device. After each
relocation of the sterilizer, installation must be carried out according to the protocol.
Safety of any system incorporating the device is the responsibility of the assembler of the
system.
When transporting the SteriBase V-Series, never carry the SteriBase V-Series alone. Two
persons shall carry it by using the specific handles present on the SteriBase V-Series. Always
keep the SteriBase V-Series vertical when out of its packaging.
The SterOx System V-Series is conceived for use outside patient surroundings. Neither the
SteriBase V-Series nor the SteriBox V-Series should be in direct contact with the patient.
• Temperature and Humidity
Avoid installing your SteriBase V-Series in direct sunlight or close to a heat or cold source
(e.g. vents or radiators). The operating temperatures have to be between 20 – 30°C with
relative humidity of 20 – 70%.
• Spacing
The cooling fans and vents of the SteriBase V-Series should remain uncovered and
unobstructed. Leave a minimum of 200 mm between the top, side and back of the device
and any wall or partition. It will ensure proper ventilation and removal of power supply if
necessary. The main power switch acts as a disconnecting device and must remain easily
accessible in case the device needs to be disconnected.
• Venting
The SteriBase V-Series should be operated indoor in a clean, dust-free environment, with a
good ventilation system.
• Work surface
The sterilizer must be placed on a flat and horizontal surface that can support a total weight
of 200 kg. Do not install the sterilizer near water sources.
• Altitude and pressure
The SteriBase V-Series and the SteriBox V-Series cannot be used in altitude superior to
2’000 m above sea level. The system must be used in an environment with atmospheric
pressure of 1atm ± 0,095. The SteriBox V-Series must not undergo pressure changes
exceeding 5’000 Pa.
• Electromagnetic environment
Your SteriBase V-Series has been tested and meets applicable standards for
electromagnetic emissions (class A product). In a domestic environment this product may

13
cause radio interference in which case the user may be required to take adequate
measures. For more information on electromagnetic compatibility, please refer to
chapter 17.
• Electrical requirements
The SterOx System V-Series has been designed to be powered from the power cable port.
Connect the sterilizer to an AC power supply, properly grounded and fused power sources
with the following voltage rating: single phase 110/240 V – 50/60 Hz – 3 A. The system must
be used within ± 10 % of the nominal voltage (110/240 V). Do not plug into multiple outlet
receptacles.
The SteriBase V-Series has been designed to withstand transient overvoltage up to levels of
Overvoltage category II.
The SterOx System V-Series must be connected to a mains socket outlet with a protective
earthing connection. The manufacturer will not be responsible for damages to the operator
caused by an unsuitable electrical installation or missing of the protective earth connection.
Always observe the electrical instructions, standards and regulations for the electrical
connection of the sterilizer. In case of doubt, please consult a qualified technician. It is
important to never modify, bend or twist the power cord. Never place heavy objects on the
cable or place it near a heat source. Do not use staples or nails to secure the cable. In case
of damage to the plug or cable, immediately disconnect the power supply. To completely
disconnect the power supply from the SteriBase V-Series, pull the separable power cord out
of the device and turn off power switch.
6.2 Powering your device
To power your SteriBase V-Series, connect the power cord to the power cable port (AC inlet
receptacle on the right side of the device). Ensure the power switch is in the OFF position
and connect the device to your power source. Turn the power switch in the ON position and
click on the Start button.
6.3 Installing nitrogen supply
To function properly, your SteriBase V-Series requires a nitrogen gas supply. SteriLux SA
distributes a compact nitrogen kit (SKU-0018) that includes:
• disposable 110 bar 2.2L nitrogen cylinder
• pressure reducer
• connecting tube 4mm diameter
To install it, remove the nitrogen cylinder protection from the bottle and firmly screw the
pressure reducer on the nitrogen bottle. Connect one end of the connecting tube to the
pressure reducer and slightly open the nitrogen bottle until you can feel a small nitrogen
flow coming out of the tube. Then, connect the other end of the tube to the nitrogen plug on
your SteriBase V-Series. Open the nitrogen cylinder until the arrow on the manometer
reaches at least 4 l/min and maximum 5 l/min.
Once you are done installing the nitrogen supply, go to the main menu, select
MAINTENANCE and click on MAINTENANCE PROGRAM.
Note: It is possible to use other commercially available nitrogen supply cylinders. However,
if you decide to go with another alternative, you must have SteriLux SA written approval
prior to installing it on your SteriBase V-Series.

14
6.4 Setting the time and date
1. PARAMETERS DATE AND TIME
2. From the DATE AND TIME screen, press to set the hours and minutes then
press to save your changes
3. From the DATE AND TIME screen, press to set the day, month and year then
press to save your changes
6.5 Setting the language
1. PARAMETERS LANGUAGE
2. From the LANGUAGE screen, select your desired language. Your selection will be
automatically saved
6.6 Setting the users
1. PARAMETERS USER SETTINGS
2. From the EDIT USER screen, you can:
a. Create new user by pressing ADD USER
b. Edit existing users by clicking on the user you want to modify
c. Delete existing users by clicking on the user you want to delete then
3. When creating a new user or editing existing users, a touchscreen keypad will appear
allowing you to create and modify your entries at any time. To save your entries, press
Save, to discard press Cancel.
6.7 Setting the contents
1. PARAMETERS CONTENT SETTINGS
2. From the EDIT CONTENT screen, you can:
a. Create new content by pressing ADD CONTENT
b. Edit existing contents by clicking on the content you want to modify
c. Delete existing contents by clicking on the content you want to delete then
3. When creating a new content or editing existing contents, a touchscreen keypad will
appear allowing you to create and modify your entries at any time. To save your entries,
press Save, to discard press Cancel.

15
6.8 Connecting to a Wireless Network
1. PARAMETERS WI-FI
2. Verify that Wi-Fi is enabled
3. Press and click on Connect to a Wi-Fi network
4. Select your Wi-Fi within the list of Wi-Fi
5. Enter the Wi-Fi password if required and press OK

16
7 Using the SteriBox V-Series and preparing instruments
7.1 Using the SteriBox V-Series
When removing the SteriBox V-Series from the SteriBase V-Series, exercise caution as the
quartz window area may be hot.
Opening the SteriBox V-Series
1. Disengage both locks
2. Stand behind the SteriBox V-Series and grab the handles on both sides of the lid
3. Pull the lid towards yourself
4. Rest the lid on its outer surface
5. Take the module out with sterile gloves and place it inside the lid
Closing the SteriBox V-Series
1. Align the lid with the bottom of the SteriBox V-Series
2. Engage the locks
3. Push the locks downward until they are secured
Inserting the SteriBox V-Series into the SteriBase V-Series
1. Slide the SteriBox V-Series inside the SteriBase V-Series with the locks facing you
2. The touchscreen will automatically display the pop-up message SteriBox #
inserted when the SteriBox V-Series has been correctly inserted
Removing the SteriBox V-Series from the SteriBase V-Series
1. If the Lamp Unit manual levers are in upward position, simply slide the SteriBox V-
Series out of the device
2. If the Lamp Unit manual levers are in downward position, grab both levers and pull
them up to upward position. Then slide the SteriBox V-Series out of the device
Important information
Never force the lid to close as this might alter the physical integrity of the SteriBox V-Series.
Always handle the lid with care as the quartz window is very fragile, it has been tested to
withstand 1 Joule of Impact, corresponding to a normalized impact rating IK06.
The SteriBox V-Series shall be stored in a clean and dry environment. Do not stack more
than 3 SteriBox V-Series on top of each other. The SteriBox must be stored on a flat surface
that can support up to 20 kg.

17
7.2 Preparing and loading instruments in the SteriBox V-Series
Before loading any instruments in the SteriBox V-Series, consult the instructions for use or
SteriLux SA directly to check for instruments compatibility. The maximum load to be
sterilised – including the weight of any sterilization basket, rack or other accessories – must
not exceed 7.5 kg, otherwise SteriLux SA cannot guarantee sterility of the load.
SteriLux SA guarantees the performance of its products only when their physical integrity
has not been altered. In the event of leaks, cracks or other damage, or suspected damage,
the equipment should not be used. Therefore, an inspection must be carried out before each
use. In case the quartz window presents a crack, do not use as the airtightness of the
SteriBox V-Series may be altered and the operator risks being exposed to higher ozone
concentration.
Clean Instruments
Clean, rinse and dry all instruments before loading them into the SteriBox V-Series.
Disinfectant residues and solid debris may inhibit sterilization and damage the instruments.
Lubricated instruments must be wiped thoroughly, and any excess lubricant should be
removed before loading. Improper cleaning, rinsing or drying can cause the sterilization
cycle to malfunction. Breach of the appropriate preparation instructions can lead to non-
sterility of the instruments. Sterility cannot be guaranteed if the material to be sterilized is
dirty, contains dust, residues or biofilms.
Add distilled water on the HUMIDIFY Blotting Paper
For effective sterilization, it is mandatory to add 5mL of distilled water on the HUMIDIFY
Blotting Paper. If there is any doubt about the amount of water added, remove the
HUMIDIFY Blotting Paper and dispose of it. Dry the module and repeat the operation with a
new HUMIDIFY Blotting Paper. A smaller or larger amount of water will not guarantee
effective sterilization. Refer to the HUMIDIFY Blotting Paper Instructions for Use for detailed
instructions.
Unwrapped instruments
You can arrange unwrapped instruments either directly in the SteriBox V-Series as it is, or in
a sterilization basket (the SteriBox V-Series has been designed to fit with standard size
sterilization baskets).
Avoid stacking or pilling of instruments in the SteriBox V-Series, as this might impede the
sterilization process.
Wrapped instruments (single wraps)
Place the instruments into single layer bags. Tyvek® sterilization pouches have been cleared
for use and are recommended with the sterilization cycle of the SterOx System V-Series.
Place the wrapped instruments in the SteriBox V-Series or on a rack and arrange them to
avoid overlap. Always ensure that porous side of the pouches are facing upwards.
The use of cloth wraps in the SterOx System V-Series is strictly forbidden. SteriLux SA highly
recommends the use of Tyvek®-plastic sterilization pouches.

18
Compatibility of materials
1
The following materials are compatible with the ozone sterilization process (non-exhaustive
list).
• Stainless Steel
• Glass
• ABS
• Acrylic (PMMA, PlexiglasTM)
• Polycarbonate (LexanTM)
• Polypropylene
• PTFE (TeflonTM)
• Polysulfone (UdelTM)
• Polyetherimide (UltemTM)
• PEEK
• Polyethylene
• Polyoxymethylene
• PVC
• Silicone
The following materials ARE NOT compatible with the ozone sterilization process (non-
exhaustive list):
• Natural rubber
• Nitrile
• Nylon
• Latex
Use of these materials may lead to instrument or equipment damage. If you are unsure of
your instrument’s material or construction, do not load into your SterOx System V-Series
until you have checked with the instrument manufacturer and/or SteriLux SA.
All instruments
The SterOx System V-Series has not been designed to sterilize liquids, textile fabrics,
powders, bio-medical waste, porous materials or any other materials not compatible with
ozone sterilization. Instruments will remain sterile after a successful cycle until the locks of
the SteriBox V-Series are disengaged (maximum storage of sterile instruments 1 year).
Unwrapped instruments, once exposed to ambient or external conditions, cannot be
maintained in a sterile state. If sterile storage is desired, either leave the SteriBox V-Series
securely closed, or wrap the instruments to be sterilized in sterilization pouches.
It is proscribed to reprocess tools that came in contact with a patient suffering or suspected
to suffer from any form of prion-related diseases (e. g. Creutzfeldt-Jacob disease (CJD), the
new variant of CJD, Gerstmann-Sträussler-Scheinker syndrome, Kuru's disease, Fatal
Familial Insomnia, Scrapie, Feline spongiform encephalopathy). Complete destruction of all
prions cannot be guaranteed.
Routine Monitoring
OZONE STRIP type 4 Chemical Indicator suitable for the SterOx System V-Series should be
placed in the SteriBox V-Series as described in its related Instruction for Use. Under no
1
Only stainless steel has been cleared for use in the SterOx System V-Series, other materials show good
compatibility with ozone in the literature.

19
circumstances should an OZONE STRIP type 4 Chemical Indicator be reused. It must be dry
and in good condition, free from dirt, UV or sunlight exposition, stains or dust. Use of OZONE
STRIP type 4 Chemical Indicator will allow you to ascertain whether the instruments have
been exposed to sterilization condition and is highly recommended. Loads to be sterilized
can be accepted as sterile only if the SteriBase V-Series has indicated that the cycle was
performed correctly AND the OZONE STRIP type 4 Chemical Indicator provided evidence of
meeting sterilization condition independently. Refer to the OZONE STRIP type 4 Chemical
Indicator Instructions for Use for detailed instructions.
Note for hollow instruments
SteriLux SA cannot guarantee that the inside of hollow instruments can be sterilized by the
SterOx System V-Series. Overall, channels with greater length than 10 cm and smaller inner
diameter than 3 mm of material different than stainless steel have not been cleared to be
reprocessed in the SterOx System V-Series.

20
8 Using your SterOx System V-Series
8.1 Preparing device for use
Once the device is installed and before any cycle is launched, clean and disinfect the lid,
bottom and module of the SteriBox V-Series (see chapter 11 for further details). Pay special
attention to thoroughly clean the quartz windows, both on the SteriBox V-Series and the
SteriBase V-Series, using isopropyl alcohol (IPA).
8.2 Selecting a cycle
The SterOx System V-Series proposes three cycles.
The Standard Cycle is designed to sterilize all unwrapped instruments compatible with
ozone sterilization. Unwrapped instruments will remain sterile after a successful cycle until
the SteriBox V-Series is opened. Once exposed to ambient or external conditions,
unwrapped instruments cannot be maintained in a sterile state. If sterile storage outside of
the SteriBox V-Series is desired, wrap the instruments to be sterilized in sterilization pouches
as explained in chapter 7.2. The cycle takes place at room temperature and ambient
pressure and lasts 16 hours.
The Pouch Cycle is designed to sterilize all wrapped instruments compatible with ozone
sterilization. Wrapped instruments can be stored sterile outside of the SteriBox V-Series.
Wrap and place the instruments as explained in chapter 7.2. The cycle takes place at room
temperature and ambient pressure and lasts 22 hours.
The Speed Cycle is NOT a sterilization cycle but a high-disinfection cycle. It is designed to
disinfect ozone-compatible semi-critical devices (i.e. a device that comes into contact with
mucous membranes or non-intact skin) and non-critical devices (i.e. a device that only
comes into contact with intact skin but not mucous membranes). The cycle takes place at
room temperature and ambient pressure and lasts 3 hours.
To launch any of these three cycles:
1. press START NEW CYCLE
2. select the cycle of your choice by pressing Select cycle
3. press
Other manuals for SterOx System V Series
2
Table of contents
Other STERILUX Laboratory Equipment manuals

Popular Laboratory Equipment manuals by other brands

Sentinel
Sentinel ELIMINATOR manual

Bullard
Bullard TacSight SE35 user manual

IKA
IKA C-MAG HS4 operating instructions

MiCo BioMed
MiCo BioMed Veri-Q PCR 316 QD-P100 user manual

Thermo Scientific
Thermo Scientific iCAP RQ ICP-MS Pre-installation requirements guide

Oxford Instruments
Oxford Instruments Cypher SPM user guide


DYT
DYT H2F instruction manual

Esco
Esco MAW-4D user manual

IKA
IKA RO 5 operating instructions

BASENHURT
BASENHURT Tebas-Economic EFka300 pH/Chlor Installation and maintenance instructions

Schuett Biotec
Schuett Biotec schuett solaris operating instructions

Agilent Technologies
Agilent Technologies 8511B Operating and service manual