Sterling Porter Pro User manual

Porter Pro
Backpack Vacuum
Thank you for choosing the Sterling Porter Pro Backpack Vacuum. This
commercial appliance is well constructed and should provide you with
years of professional service, if you take the time to read this manual. It is
important to learn the steps for proper assembly, operation and mainte-
nance. It will also make the product easier to use and save you even more
time and money. We suggest you keep this manual on hand for future
reference. We stand behind this product and can provide assistance at any
time with a knowledgeable and dedicated customer service sta. Please
contact us anytime at 844 VACS R US or SterlingNA.com.
1. Main Unit
2. Exhaust Grill
3. On/O Power Switch
4. Canister Lid Tabs
5. Waist Band
6. Shoulder Straps
7. Back Board Panel
8. Carry Handle
9. Hose Inlet
10. Canister Lid
11. Flexible Hose
12. Flexible Hose Handle
13. Variable Suction Control
14. Telescopic Tube Release Button
15. Telescopic Tube
16. Waist Band Back Support Panel
17. Waist Band Tool Carrier
18. Dusting Brush
19. Crevice Tool
20. Blower Port
21. Pet Hair Remover
22. Floor To Carpet Brush
23. Blower Attachments (x3)
24. HEPA Dust Bag
25. Shake-Out Bag
26. HEPA Pre-Motor Filter
27. Exhaust Filter
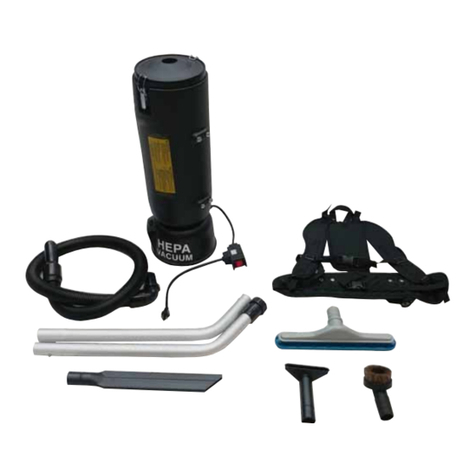
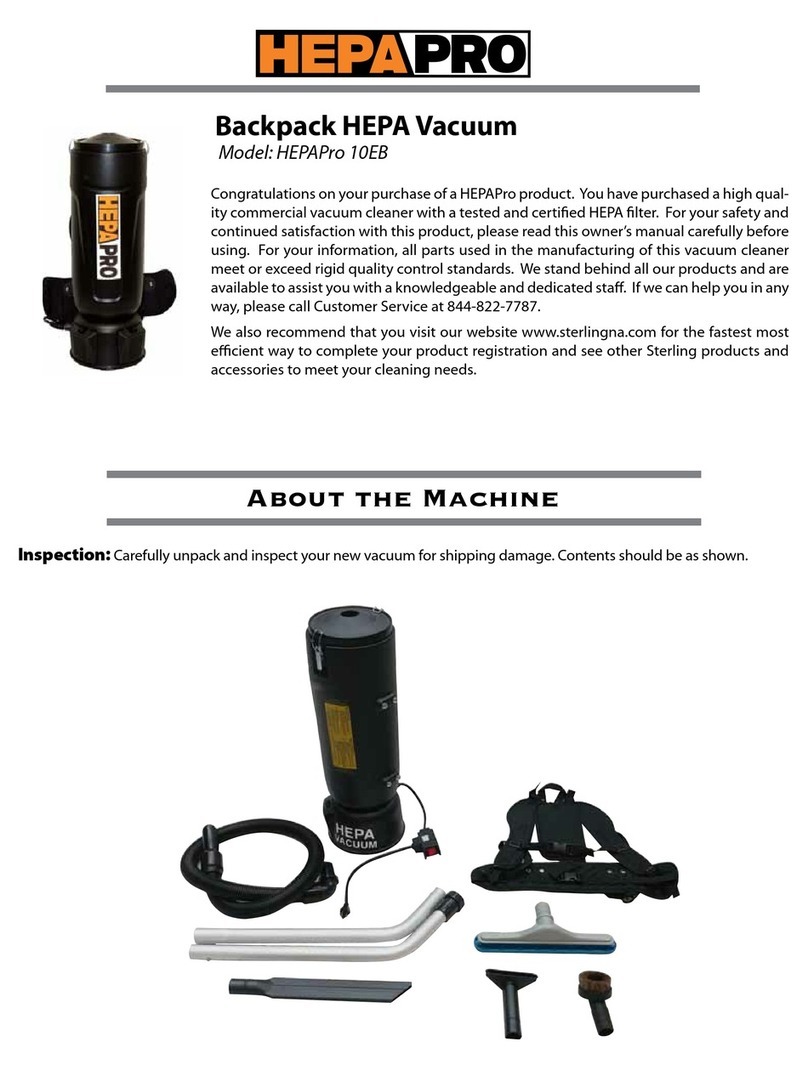
Package Contents

Important Safety Instructions
When using an electrical vacuum, basic safety precautions should always be followed, including the following:
READ ALL INSTRUCTIONS BEFORE USING YOUR VACUUM CLEANER
WARNING: To reduce the risk of re, electrical shock, or injury:
1. Do not leave vacuum unattended when plugged in. Unplug from outlet when not in use and before servicing.
2. Do not use outdoors or on wet surfaces.
3. Do not allow to be used as a toy. Close attention is necessary when used by or near children.
4. Use only as described in this manual. Use only manufacturer’s recommended attachments.
5. Do not use with damaged cord or plug. If vacuum is not working properly, has been dropped, damaged, left outdoors, or
dropped in water, return it to an authorized service center.
6. Do not pull or carry by cord, use cord as a handle, close a door on cord, or pull cord around sharp edges or corners.
7. Do not unplug by pulling on cord. To unplug, grasp the plug, not the cord.
8. Do not handle plug or vacuum with wet hands.
9. Do not put any object into openings. Do not use with any opening blocked. Keep free of dust, lint, hair and anything that may
reduce air ow.
10. Keep hair, clothing, ngers, and all parts of body away from openings and moving parts.
11. Turn o the control before unplugging.
12. Use extra care when cleaning on stairs.
13. Do not use to pick up ammable or combustible liquids such as gasoline or use in areas where they may be present.
14. Do not pick up anything that is burning or smoking, such as cigarettes, matches, or hot ashes.
15. Do not use without dust bag and/or lters in place.
16. Look on your vacuum and follow all label and marking instructions.
17. Keep end of hose, wands and other openings away from your face and body.
18. Always unplug this vacuum before connecting or disconnecting vacuum hose.
19. Store the vacuum indoors. Put the vacuum away after use to prevent tripping accidents.
20. Using improper voltage may result in damage to the motor and possible injury to the user. Correct voltage is listed on the rating
label.
21. Use only on dry, indoor surfaces.
22. Do not use for any purpose other than as described in this user’s guide.
23. If the vacuum is damaged, it must be repaired by an authorized service center or a similarly qualied person.
24. Do not run vacuum over cord. Keep cord away from heated surfaces.
25. GROUNDING INSTRUCTIONS - This vacuum must be grounded. If it should malfunction or break down, grounding provides
the path of least resistance for electric current to reduce the risk of electric shock. This vacuum is equipped with a cord having
an equipment-grounding conductor and grounding plug. The plug must be inserted into an appropriate outlet that is properly
installed and grounded in accordance with all local codes and ordinances.
WARNING: Improper connection of the equipment-grounding conductor can result in the risk of electric shock. Check with a
qualied electrician or service person if you are in doubt as to whether the outlet is properly grounded. Do not modify the plug
provided with the vacuum – if it will not t the outlet, have a proper outlet installed by a qualied electrician.
This vacuum is for use on a normal 120-volt circuit and has
a grounding attachment plug that looks like the plug illus-
trated in sketch A in Figure 20. Make sure that the vacuum is
connected to an outlet having the same conguration as the
plug. No adaptor should be used with this vacuum.
SAVE THESE INSTRUCTIONS FOR HOUSEHOLD
OR COMMERCIAL USE ONLY
WARNING: To reduce the risk of electric shock, this vacuum has a polarized plug (one blade is wider than the other). This plug will
t in a polarized outlet in only one direction. If the plug does not t fully in the outlet, reverse the plug. If it still does not t, contact
a qualied electrician to install the proper outlet. Do not change the plug in any way.

IMPORTANTES CONSIGNES DE SECURITE
Lorsque vous utilisez un aspirateur électrique, les consignes de sécurité de base devraient toujours être respectées, y compris les suivantes.
LISEZ TOUTES LES CONSIGNES DE SECURITE AVANT D’UTILISERVOTRE ASPIRATEUR TURBO PORTABLE
ATTENTION: pour limiter les risques d’incendie, de choc électrique ou prévenir les blessures:
1. Ne laissez jamais cet aspirateur branché. Débranchez le lorsque vous ne vous en servez pas.
2. N’utilisez jamais cet aspirateur dehors ou sur des surfaces humides
3. Cet aspirateur n’est pas un jouet et ne devrait pas être utilisé comme tel. Ne laissez pas les enfants sans surveillance lorsque vous utili-
sez l’aspirateur en leur présence .
4. N’utilisez cet aspirateur que de la manière indiquée dans ce manuel d’utilisation. N’utilisez que les pièces recommandées par le fabricant.
5. N’utilisez jamais cet aspirateur si le l électrique ou la prise sont endommagés. N’utilisez jamais cet aspirateur s’il est tombé ou a été
endommagé, si vous l’avez laissé dehors ou s’il est tombé dans l’eau. Retournez le à un centre de réparation agréé.
6. Ne portez pas l’aspirateur par le l électrique, n’utilisez pas le l comme poignée, ne fermez pas une porte sur le l et ne tirez pas sur
le l s’il est enroulé autour de coins ou de bords tranchants.
7. Ne passez pas l’aspirateur sur le l électrique, ne laissez pas le l traîner sur des surfaces chaudes.
8. Pour débrancher l’aspirateur, ne tirez pas sur le l. Saisissez la prise et tirez sur cette dernière.
9. N’utilisez pas l’aspirateur et ne touchez pas la prise si vous avez les mains mouillées.
10. Ne mettez pas d’objets dans les ouvertures. N’utilisez pas l’appareil s’il y a obstruction d’une ouverture quelconque, elles doivent être
exemptes de poussière, de peluches, de cheveux ou tout élément pouvant réduire le ux d’air.
11. Ne laissez pas vos cheveux, vos doigts, des vêtements amples ou toute partie du corps près des ouvertures et des parties mobiles.
12. N’aspirez pas des éléments en train de se consumer ou de brûler: cigarettes, allumettes, ou cendres chaudes.
13. Arrêter l’aspirateur au moyen du bouton avant de le débrancher.
14. Soyez extrêmement prudent(e) en aspirant dans des escaliers.
15. N’utilisez pas votre aspirateur pour aspirer des liquides ou des produits inammables tels que l’essence et ne l’utilisez pas dans des
zones où ces produits peuvent être présents.
16. Regardez votre aspirateur et suivez toutes les instructions présentes sur les étiquettes et les marquages.
17. Maintenez le bout du tuyau ou des parties exibles et autres ouvertures éloignés de votre visage et de votre corps.
18. N’utilisez pas votre aspirateur turbo portable sans avoir mis en place le ltre à poussière.
19. Débranchez toujours votre aspirateur lorsque vous mettez en place / enlevez le tuyau.
20. Rangez votre aspirateur dans la maison. Rangez le dès que vous avez terminé de l’utiliser pour éviter de trébucher sur l’appareil
21. L’utilisation d’un voltage incorrect peut endommager le moteur voire provoquer des blessures à l’utilisateur. Le voltage correct est
mentionné sur la plaque signalétique.
22. Utilisez uniquement l’aspirateur à l’intérieur de la maison, sur des surfaces sèches.
23. Utilisez uniquement l’aspirateur pour les fonctions décrites dans le manuel de l’utilisateur.
24. Si l’aspirateur est endommagé, il doit être réparé par le fabricant ou par un agent agréé ou une personne qualiée pour éviter tout accident.
25. INSTRUCTIONSVISANT LA MISE À LATERRE -Cet appareil doit être mis à la terre. En cas de défaillance ou de panne, la mise à la terre
fournit au courant un chemin de moindre résistance qui réduit le risque de choc électrique. Cet appareil est pourvu d’un cordon muni
d’un conducteur de terre et d’une che avec broche de terre. La che doit être branchée dans une prise appropriée correctement
installée et mise à la terre conformément aux règlements et ordonnances municipaux.
AVERTISSEMENT: Un conducteur de terre mal raccordé peut entraîner un risque de choc électrique. Consulter un électricien ou
un technicien d’entretien qualié si vous n’êtes pas certain que
la prise est correctement mise à la terre. Ne pas modier la che
fournie avec l’appareil – si elle ne peut être insérée dans la prise,
faire installer une prise adéquate par un électricien qualié. Cet
appareil est destiné à un circuit de 120 V et est muni d’une che
de mise à la terre semblable à celle illustrée par le croquis A de la
gure 10.3.1. S’assurer que l’appareil est branché à une prise de
courant ayant la même conguration que la che. Aucun adapta-
teur ne devrait être utilisé avec cet appareil
CONSERVER CES INSTRUCTIONS Pour usage ménager commerçant
AVERTISSEMENT: An de réduire le risque de choc électrique, cer appareil est muni d’une che polarisée (une des lames est plus
large). Cette che ne peut étre insérée dans une prise polarisée que d’une seule facon. Si la che ne peut étre insérée dans la prise, re-
tourner la che. Si la tche ne peut toujours pasétre insérée dans la prise, consulter un faire installer une prise adéquate par un électricien
qualié. Ne pas modier la che.

Inserting the Dust Bag
NOTE: This unit can be used with the shake-out bag alone, however it must be
cleaned after every use if there is no dust bag installed.
IMPORTANT:It is recommended that a disposable dust bag is used for optimal
operation.
1. Unplug the hose connecting power cord and remove the exible hose.
2. To open the canister lid, press on the canister lid tabs on each side of the unit and
lift canister lid. (Fig. 1)
3. Pull the tab on the dust bag holder out slightly and ip upwards. (Fig. 2)
4. Holding the dust bag in your hand, slice it rmly between the slots in the bag
holder. (Fig. 2)
5. The cardboard face of the new bag should rest securely in the dust bag cover
guides. (Fig. 3)
6. Ensure that the shake-out bag is in place. (Fig. 4)
7. Flip the dust bag hold over pressing the tab on the bag holder until it clicks, then
replace the canister lid.
8. The canister lid can be replaced on the unit with the hose opening on the right or
left, as per your preference. (Fig. 5)
Assembly Instructions
WARNING: To reduce the risk of electric shock, the power cord must be disconnected before removing the dust bag, shake-
out bag, changing the lters or performing maintenance or trouble-shooting checks.
NOTE: Always remove the power plug from the wall outlet before assembling or removing accessories.
Fig. 1
Fig. 2
Attaching the Flexible Hose to the Vacuum
The Flexible hose should be connected to the vacuum before strapping the unit to
your back.
1. To connect the exible hose into the hose inlet, insert the threaded end of the
exible hose into the hose inlet and turn counter-clockwise until it locks into
place. (Fig. 6)
2. Plug the power cord into the electrical outlet.
3. To remove the exible hose, unplug the power cord and then turn the hose clock-
wise and pull the exible hose out.
Fig. 3 Fig. 4 Fig. 5
Fig. 6

Operating Instructions
Manual Suction Control
Your vacuum cleaner includes a manual variable suction control on the exible hose
handle. The suction power can be adjusted by moving the suction regulator to the
desired position between Open and Closed. (Fig. 10)
Open gives you less suction, closed maximum suction. For example, less suction is
required on upholstery and draperies compared to thick carpets, which require maxi-
mum suction.
Using the Floor to Carpet Brush
1. To attach the oor to carpet brush to the telescopic tube, insert the telescopic
tube into carpet to oor brush. (Fig. 11)
2. Step on the oor to carpet selector to adjust the height of the brushes. There are
two (2) dierent heights, one for oors and one for carpets. (Fig. 12)
3. To remove the telescopic tube from the oor to carpet brush, pull the telescopic
tube out from the oor to carpet brush.
Attaching the Telescopic Tube to the Flexible Hose Handle
1. Holding the telescopic tube, insert the handle into the telescopic tube receptacle. Push the handle in. (Fig. 7)
2. Push forward on the plastic button and pull the inner tube outward to extend for a longer reach. (Fig. 8)
3. To remove the telescopic tube from the exible hose, press on the telescopic tube release button and pull it out. (Fig. 9)
NOTE: Always remove the power plug from the wall outlet before assembling or removing accessories.
Fig. 7 Fig. 8 Fig. 9
Fig. 10
Fig. 11
Fig. 12
Table of contents
Other Sterling Vacuum Cleaner manuals

