12
SECTION V.
OPERATION & MAINTENANCE
A. Normal Operation
1) It is normal for the Total Dissolved Solids
(T.D.S.) of the water to be elevated during
the first 5 gallons of operation; this is due to
the sanitizing solution and the new post
filter. After this water is rinsed to drain, the
removal rate should stabilize at a value
greater than 75%. Water pressure affects
the production rate and quality.
2) R.O. systems produce drinking water at
relatively slow rates; it can take up to 8
hours or more to fill the storage tank.
Normal operation is to let the storage tank
fill with water and then draw water as is
needed. When the pressure in the storage
tank falls to a given pressure (as the water
is being used) the automatic shut-off valve
(A.S.O. valve) will start water production
and the system will refill the storage tank.
When the storage tank is full and no water
is being used, the A.S.O. valve will
automatically shut off the feed water to
conserve water.
The more water that is used (up to the capacity of
the system) the better the R.O. system will function.
After periods of non-use, such as a vacation, it is
better to empty the holding tank and allow the
system to produce fresh water for use. If the
system is not used for 3-4 weeks or longer, it is a
good idea to re-sanitize the system and to change
the activated carbon and sediment filters.
B. Changing Filter & Sanitizing the system
NOTE: THIS R.O. SYSTEM CONTAINS FILTERS
WHICH MUST BE REPLACED AT REGULAR
INTERVALS TO MAINTAIN PROPER
PERFORMANCE. USE ONLY FACTORY
APPROVED FILTERS.
Please see Page 3 for the recommended interval
for changing the filters. Local conditions may
dictate more frequent changes.
Use a drip pan to catch any water that may spill
when the filter housings are removed:
1) Close the saddle tapping valve by turning
fully clock wise and open the dispensing
faucet by lifting the handle. Allow the
storage tank to empty.
2) Loosen and remove the Filter Housings and
Discard the cartridges.
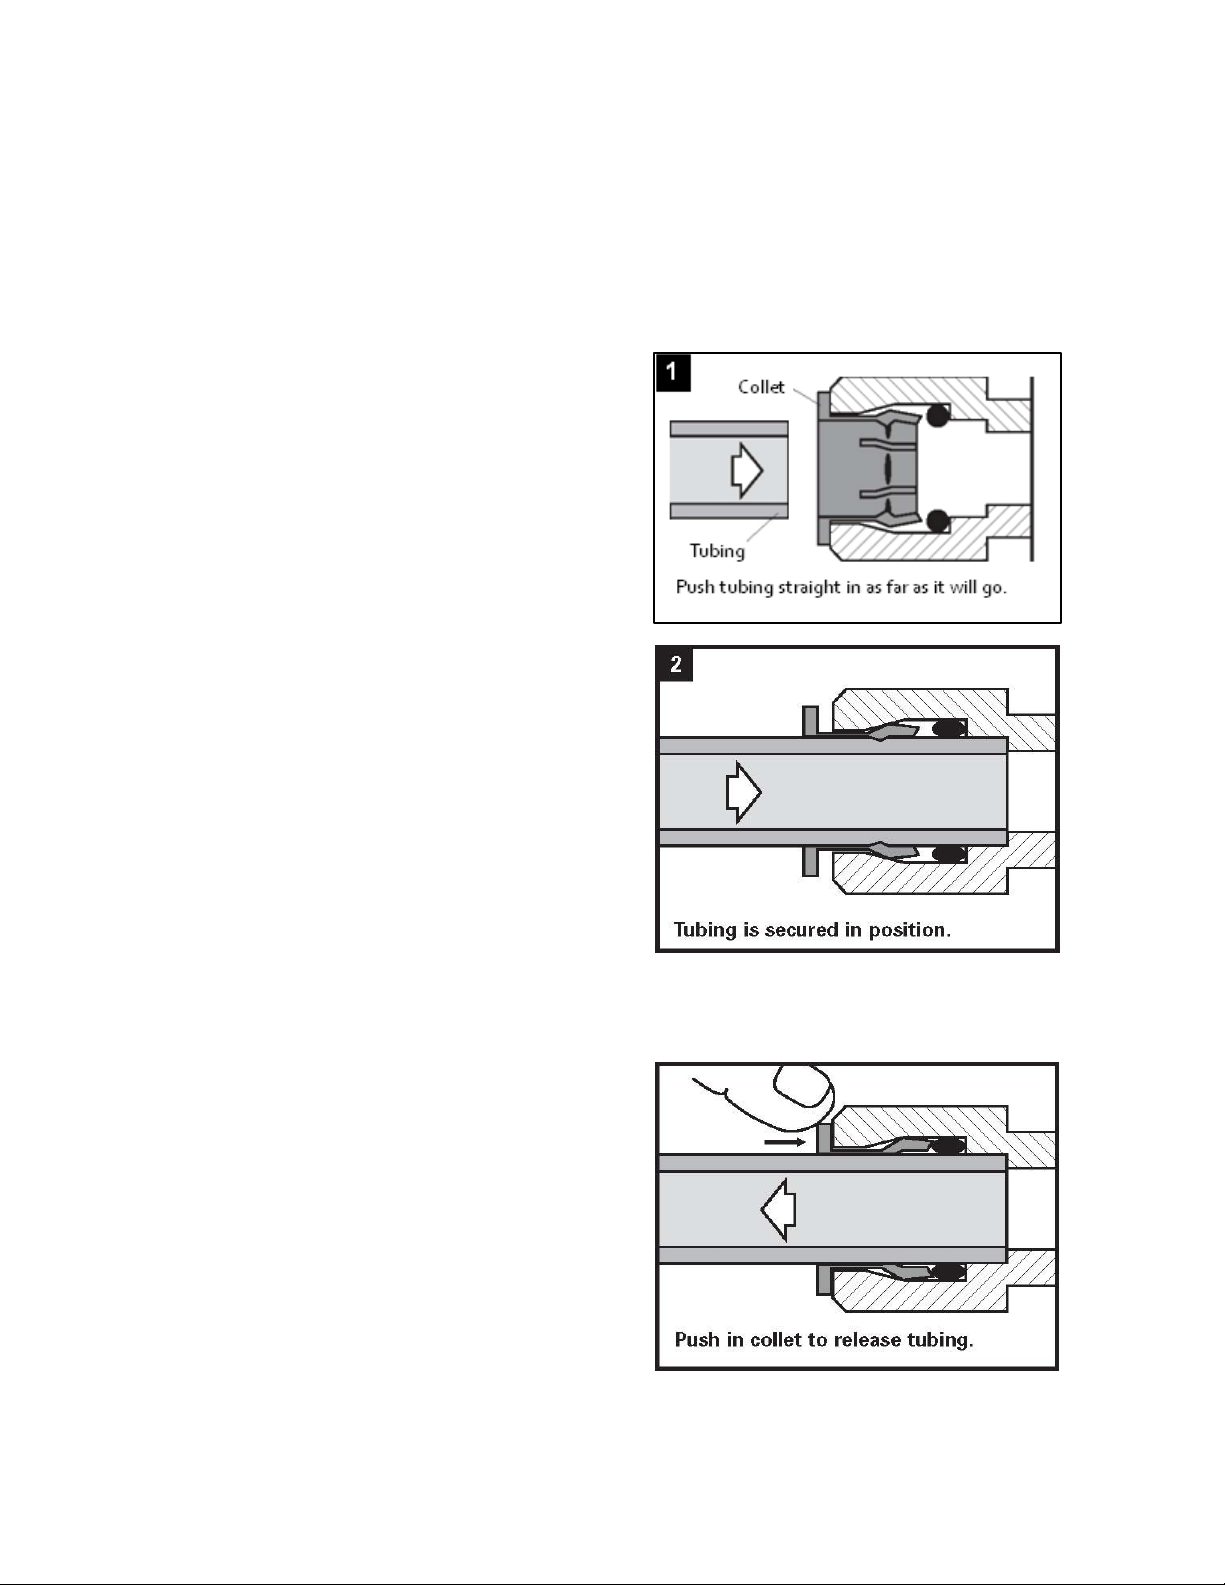
3) Disconnect the ¼” tubing from the cap of
the membrane housing. Unscrew the
membrane housing cap and remove the
R.O. membrane. Place it in a clean, leak-
proof container until it is reinstalled.
4) Wash the inside of the housings using a
mild detergent and a soft cloth. Do not use
abrasive cleaners or pads. Thoroughly rinse
all soap from the housings before
reassembly.
5) Steps to sanitize the system and replace the
filter cartridge(s):
NOTE: The system should be sanitized
before installing the carbon post filter
cartridge or the carbon pre-filter cartridges.
a) Use a good quality unscented 5-1/4%
liquid household bleach.
b) Add one cap full of bleach (this is 2 tsp.
or 10 ml) to the sediment filter housing.
Install the sediment pre-filter only.
Check the housing o-ring for proper
position in its groove, replace sediment
filter housing on R.O. assembly
c) Add one cap full of bleach to each of the
carbon pre-filter housings. Carefully fill
the housings with tap water and
temporarily install the housings, without
carbon filter cartridge.
d) Add one cap full of bleach to the R.O.
membrane housing and replace the
R.O. membrane housing cap and
reconnect the ¼” tubing to the cap.
e) Disconnect the ¼” tubing from the end
of the carbon post filter that runs to the
storage tank and put 50 drops of bleach
(1/2 tsp. or 3 ml) into the tubing and
reconnect it to the end of the post filter.
f) The dispensing faucet should be open,
slowly open the saddle tapping valve on
the feed water line.
g) Let the water run from the faucet for 5
seconds, then shut off the faucet.
h) Let the system stand for 15 minutes.
i) At the end of the 15 minutes, open the
dispensing faucet and allow it to run for
10 minutes.