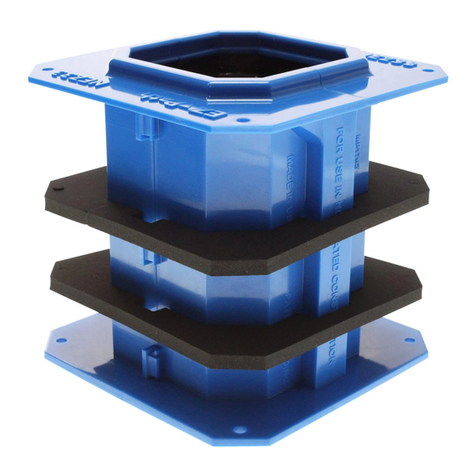
REMOVING LID TO FACILITATE INSTALLATION AROUND EXISTING CABLES
Pathway lid is removed to allow device to be installed around existing cable bundles. Use Catalog Number
EZP544W or EZP144F and follow instructions provided with product to ensure compliant installation.
1. Cut label at seam of pathway on both sides and place pathway on a flat surface with the lock at
center of pathway facing up (See Fig. 5).
2. Push down slightly on the channel below the lock, slide lid to the left to deactivate lock and remove lid
(See Fig. 6).
3. Cut and remove elastic band wrapped around intumescent pads and remove top intumescent pad.
4. Place pathway channel around cables.
5. Replace intumescent pad within lid and align slot in lid over channel lock (See Fig. 7).
6. Slide slot in lid over channel lock to full extent and slide pathway lid to the right to reactivate lock
(See Fig. 8).
7. Install pathway per instructions above.
INSTALLING or PULLING CABLES
A resilient liner provides an adjustable seal within the pathway. Liner must be protected from damage
while adding or removing cables. Wrap cable ends with a suitable low friction tape before inserting into
the pathway. Where cable lubricants are used, low solids, water-based products are recommended.
This device is designed to be fully functional at all cable loadings from completely empty to visually
filled and cables should easily slide through the pathway using minimal effort. IF RESISTANCE IS
ENCOUNTERED, DO NOT FORCE CABLES OR CABLE BUNDLES THROUGH THE PATHWAY.
DAMAGE MAY RESULT. Upper curved liner may be depressed if necessary when inserting cables using
a flat, smooth implement and removing after cables are installed.
GROUNDING
At the option of the installer, this pathway may be grounded. After pathway has been installed, insert
ground screws where indicated (See Fig. 9).
WALL LABELING
Wall labels are provided with the pathway as well as wall plate kits. Larger orange colored label is intend-
ed to be used to identify the pathway installer as well as to provide applicable UL System information.
Smaller secondary labels are included with multi-gang wall brackets as an optional method for identifying
or marking cable types, uses, or trades. Two sets of labels are provided for marking both sides of wall.
MAINTENANCE
No maintenance of the pathway is normally required. Interior of device should be inspected before and
after any modifications to cable bundle. If any damage to intumescent pads lining top and bottom of the
pathway is found, contact the factory to determine if replacement is required.
ALIGN
FIG. 7
STEP 1
STEP 2
FIG. 8
FIG. 9
Important Notice: All statements, technical information, and recommendations contained herein are based upon testing believed to be reliable, but the accu-
racy and completeness thereof is not guaranteed.
LIMITED WARRANTY: STI warrants that its products will be free of defects for one year from the date of purchase. In the event a product does not conform to
this warranty, the sole and exclusive remedy is, at STI’s option, replacement of the product or refund of the purchase price. The warranty provided herein shall
be void and of no effect in the event that the product is not installed in accordance with STI’s published instructions, listed systems and applicable building and
safety codes. THIS WARRANTY IS IN LIEU OF ALL OTHER REPRESENTATIONS AND EXPRESSED OR IMPLIED WARRANTIES (including the implied
warranties of merchantability or fitness for a particular use) AND UNDER NO CIRCUMSTANCES SHALL STI BE LIABLE FOR ANY DIRECT, INDIRECT,
SPECIAL, INCIDENTAL OR CONSEQUENTIAL DAMAGES OR LOSSES, INCLUDING, WITHOUT LIMITATION, ANY LOSS OF REVENUE, PROFIT OR
USE. Prior to use, the user shall determine the suitability of the product for its intended use, and the user assumes all risks and liability for subsequent use. No
person other than an officer of STI is authorized to bind STI to any other warranty for any product for which this warranty is issued.
MADE IN USA • PRINTED IN USA – COPYRIGHT © 2016 SPECIFIED TECHNOLOGIES INC.
Page 2 of 2 Installation Sheet • EZ-PATH® Series 44+ Fire Rated Pathway ZIS1050-0576
Specified Technologies Inc. • Somerville, NJ 08876 USA
US Toll Free: (800) 992-1180 • Outside US: + 1 908 526 8000
www.stifirestop.com
FIG. 6
PUSH
CUT
STEP 1
FIG. 5
ZIS1050 0576 EZD44S.indd 2 2/26/16 8:55 AM


