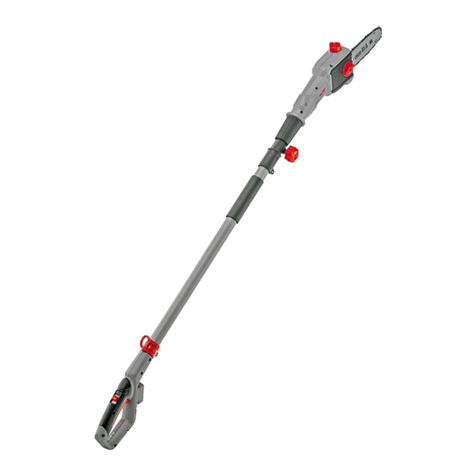
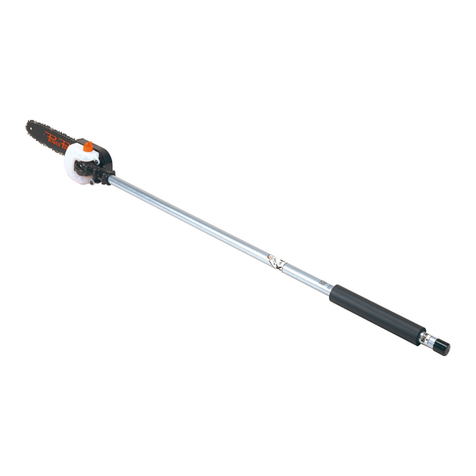
Stiga PRS 1501 User manual

171501389/3 04/2023
PRS 1501
IT
Dispositivo potatore - MANUALE DI ISTRUZIONI
ATTENZIONE: prima di utilizzare la macchina, leggere attentamente
il presente libretto.
CS Odvětvovací zařízení - NÁVOD K POUŽITÍ
POZOR: Před použitím stroje si pozorně přečtěte tento návod
k použití.
DA
DE
EL
Beskærer - BRUGSANVISNING
ADVARSEL: Læs instruktionsbogen omhyggeligt igennem,
før du tager denne maskine i brug.
Hochentaster - GEBRAUCHSANWEISUNG
ACHTUNG: vor Inbetriebnahme des Geräts die Gebrauchsanleitung
aufmerksam lesen.
EN
ES
ET
Σύστημα κλαδευτήρι - ΕΓΧΕΙΡΙΔΙΟ ΟΔΗΓΙΩΝ
Προσοχή: πριν χρησιμοποιήσετε το μηχάνημα, διαβάστε προσεκτικά
το παρόν εγχειρίδιο.
Device Pruner - OPERATOR’S MANUAL
WARNING: read thoroughly the instruction booklet before
using this machine.
Dispositivo podador - MANUAL DE INSTRUCCIONES
CUIDADO: antes de utilizar esta máquina, lea atentamente el manual
de instrucciones.
Oksalõikur - KASUTUSJUHEND
TÄHELEPANU: enne masina kasutamist lugege tähelepanelikult
kasutusjuhendit.
FI
FR
HR
NL
NO
TR
RU
SL
SV
PT
PL
Karsimissaha - KÄYTTÖOHJEET
VAROITUS: lue käyttöopas huolellisesti ennen koneen
käyttöä.
Dispositif d’élagueuse - MANUEL D’UTILISATION
ATTENTION: lire attentivement le manuel avant d’utiliser
cette machine.
Obrezivač - PRIRUČNIK ZA UPORABO
POZOR: Prije nego pristupite uporabi stroja,
pažljivo pročitajte upute.
Snoei-inrichting - GEBRUIKERSHANDLEIDING
LET OP: Voordat u de deze machine gaat gebruiken dient u eerst deze
handleiding aandachtig door te lezen.
Beskjæringsutstyr - INSTRUKSJONSBOK
ADVARSEL: Les denne bruksanvisningen nøye før du bruker
maskinen.
Urządzenie do przycinania gałęzi - INSTRUKCJE OBSŁUGI
UWAGA: Przed użyciem urządzenia przeczytaj uważnie niniejszą
instrukcję.
Dispositivo de poda - MANUAL DE INSTRUÇÕES
ATENCAO! Antes de usar a moto-roçadeira, ler com atenção
este manual de instruções.
Садовые ножницы - РУKОВОДСТВО ПО ЭKСПЛУАТАЦИИ
ВНИМАНИЕ: Прежде чем пользоваться оборудованием, внимательно прочтите зто
руководсво по зксплуатации.
Naprava za obrezovanje - PRIROČNIK ZA UPORABU
POZOR: Preden uporabite stroj, pazljivo preberite priročnik
z navodili.
Beskärningsverktyg - BRUKSANVISNING
VARNING: Läs igenom hela detta häfte innan du använder
maskinen.
Budama aparatı - KULLANIM KILAVUZU
DİKKAT! Makineyi kullanmadan önce talimatlar içeren kılavuzu dikkatle
okuyun.


i
ITALIANO - Istruzioni Originali ..................................................................... IT
ENGLISH - Translation of the original instructions .......................................... EN
FRANÇAIS - Traduction de la notice originale ................................................ FR
DEUTSCH - Übersetzung der Originalbetriebsanleitung .................................. DE
ESPAGNOL - Traducción del Manual Original ............................................... ES
NEDERLANDS - Vertaling van de oorspronkelijke gebruiksaanwijzing .......... NL
PORTUGUÊS - Tradução do manual original ............................................... PT
ΕΛΛΗΝΙΚΑ - Μετάφραση του πρωτοτύπου των οδηγιών χρήσης ................ EL
TÜRKÇE - Orijinal Talimatların Tercümesi ...................................................... TR
POLSKI - Tłumaczenie instrukcji oryginalnej .................................................. PL
SLOVENŠČINA - Prevod izvirnih navodil ........................................................ SL
РУССКИЙ - Перевод оригинальных инструкций ....................................... RU
HRVATSKI - Prijevod originalnih uputa ........................................................... HR
SVENSKA - Översättning av bruksanvisning i original .................................... SV
SUOMI - Alkuperäisten ohjeiden käännös ...................................................... FI
DANSK - Oversættelse af den originale brugsanvisning ................................ DA
NORSK - Oversettelse av orginal bruksanvisning ........................................... NO
ČESKY - Překlad původního návodu k používání ........................................... CS
EESTI - Algupärase kasutusjuhendi tõlge ......................................................... ET

ii
IT - ATTENZIONE! - Questo accessorio può essere applicato solo sui modelli di decespuglia-
tori/tagliabordi con asta giuntabile, indicati sotto.
Per Comandi-Manutenzioni-Dati Tecnici-Avvertenze:
fare rifemento al Manuale di Istruzioni della macchina sulla quale viene montato l’accesso-
rio.
EN - WARNING! - This accessory can be applied only on models of brush cutters / trim-
mers with jointed rod, shown below.
For Commands - Maintenance - Technical Data - Warnings:
refer to the Instruction Manual of the machine on which you t the accessory.
FR - ATTENTION! - Cet accessoire peut être appliquée que sur les modèles des débrouss-
ailleuses / coupe-bordures avec une tige de xation assemblable, indiquées ci-dessous.
Pour Commandes - Maintenance - Données Techniques - Avertissements:
reportez-vous au manuel d’instructions de la machine sur laquelle vous monté l’accessoi-
re.
DE - ACHTUNG! - Dieses Zubehör kann nur bei modellen der Freischneider / Trimmer mit
Gelenkstange angebracht werden, unten gezeigt.
Für Befehle -Wartung - Technische Daten - Warnungen:
lesen Sie die Bedienungsanleitung der Maschine, auf dem Sie das Zubehör anpassen.
ES -
¡ATENCIÓN! -
Este accesorio se puede aplicar sólo en los modelos de desbrozadoras / recor-
tadoras con varilla articulada, que se muestran a continuación.
Para Comandos - Mantenimiento - Datos técnicos - Advertencias:
hacer referencia el manual de instrucciones de la máquina en la que está montado el accesorio.
NL -
LET OP! - Dit accessoire kan alleen worden toegepast op modellen van bosmaaiers /
trimmers met gelede staaf, hieronder weergegeven.
Voor Opdrachten - Onderhoud - Technisch Data - Waarschuwingen:
doen verwijzing de gebruiksaanwijzing van de machine waarop deze is gemonteerd acces-
soire.
PT - ATENÇÃO! -
Este acessório pode ser aplicada apenas em modelos de roçadeiras / apara-
dores com haste articulada, mostrados abaixo.
Para Comandos - Manutenção - Datos Técnico - Avisos:
fazer referência o manual de instruções da máquina na qual está montada acessório.
EL - ΠΡΟΣΟΧΗ! - Αυτό το εξάρτημα μπορεί να εφαρμοστεί μόνο σε μοντέλα κόφτες
βούρτσα / Ψαλίδια με συνένωση ράβδο, όπως φαίνεται παρακάτω.
για Εντολές - Συντήρηση - Τεχνική - προειδοποιήσεις:
κάνει αναφορά Εγχειρίδιο Οδηγιών της μηχανής στην οποία έχει τοποθετηθεί
αξεσουάρ.
TR - DİKKAT! - Bu aksesuar yalnızca aşağıda gösterilen fırça kesiciler / eklemli çubuk
makasları, modelleri uygulanabilir.
Için-Bakım - Teknik - Uyarıları - Komutları:
bu aksesuar monte edildiği makinenin Talimat Kılavuzu rifemento yapmak.
PL - OSTRZEŻENIE! - Ten element dodatkowy można być stosowana tylko w modelach z kosy /
nożyce z przegubowego pręta, przedstawione poniżej.
Dla Polecenia - Maintenance - Techniczno - Ostrzeżenia:
zrobić odnośnik Instrukcji obsługi maszyny, na której jest zamontowany osprzęt.
SL - POZOR! - Ta dodatek se lahko uporablja samo na modelih motorne kose / trat z
spojen palica, prikazane spodaj.
Za Ukazi - za vzdrževanje - tehnično-opozorila:
storiti referenčna navodilih za uporabo stroja, na katerem je montiran opremo.
RU - ВНИМАНИЕ! - Этот аксессуар может быть применен только на моделях
кусторезов / триммеров с сочлененной стержня, как показано ниже.
для Команды - технического - обслуживания - технико - предупреждения:
сделать ссылки руководства по эксплуатации машины, на которой он установлен
аксессуар.

iii
1) DATI TECNICI PRS 1501
2) Peso a secco senza barra e catena 1,18 kg
3) Passo catena 3/8” mini
4) Spessore maglia motrice 1,27 mm
5) Lunghezza barra 250 mm
6) Capacità serbatoio olio 125 cm3
7) ACCESSORI
8) Combinazione barra
Lunghezza
Larghezza Scanalatura
118801758/0
25 cm / 10”
1,27 mm / 1,20”
9) Combinazione catena (Passo 3/8” mini). 118801759/0
10) Livello di potenza acustica garantito 111 dB(A)
11) Frequenza massima di rotazione del mandrino 10,7 m/s
HR - POZOR! - Ovaj dodatak može se primijeniti samo na modele šikare / trimera s eksi-
bilna zglobna štapa, prikazane u nastavku.
Za Naredbe - Održavanje - Tehničko - Upozorenja:
učiniti upućivanje upute za uporabu stroja na kojem je montiran pribor.
SV - VARNING! - Detta tillbehör kan endast användas på modeller av röjsågar / trimmers
med ledad stång, som visas nedan.
För Kommandon - Underhåll - Tekniska - Varningar:
gör hänvisning bruksanvisningen för den maskin där den är monterad tillbehör.
FI - VAROITUS! - Tämä lisälaite voidaan soveltaa vain malleja raivaussahat / trimmerit
nivelöityjä sauva, alla.
Komennot - Huolto - Tekninen - Varoitukset:
tehdä viite Käyttöohje koneen, johon se on asennettu lisälaite.
DA - ADVARSEL! - Dette tilbehør kan kun anvendes på modeller af buskryddere / Trimmere
med ende stang, der er vist nedenfor.
Til Kommandoer - Maintenance - Teknisk - Advarsler:
gøre henvisning instruktionen for den maskine, som den er monteret tilbehør.
NO - ADVARSEL! - Dette tilbehøret kan bare brukes på modeller av ryddesager / trimmere
med leddet stang, som vist nedenfor.
For Kommandoer - Maintenance - Teknisk - Advarsler:
gjøre henvisning bruksanvisningen for maskinen der det er montert tilbehør.
CS - UPOZORNĚNĺ! - Toto příslušenství lze použít pouze na modelech křovinořezy / vyžínače s
kloubovým tyčí, je uvedeno níže.
Příkazy pro - údržba - technicko - varování:
dělat referenční návodu pro stroje, na kterém je namontována příslušenství.
ET - HOIATUS! - Seda lisavarustust saab kasutada ainult allpool näidatud reguleeritava võlliga
võsalõikurite / nööriga trimmerite mudelitel.
Käskude-hoolduse-tehniliste andmete-hoiatuste jaoks:
vaadake selle seadme kasutusjuhendit, millele lisavarustus on paigaldatud.
B 26 J - B 26 JA - T 26 J - T 26 JA

iv
2
4
5
3
2
3
1
1
3
6 7
2
5
5
41
2
4
4
5
6
1
2
6
1
8 9
1
1
3
4
4
10
11
12
> 5 mm
13

v
2
4
5
3
2
3
1
1
3
6 7
2
5
5
41
2
4
4
5
6
1
2
6
1
8 9
1
1
3
4
4
10
11
12
> 5 mm
13

vi
2
4
5
3
2
3
1
1
3
6 7
2
5
5
41
2
4
4
5
6
1
2
6
1
8 9
1
1
3
4
4
10
11
12
> 5 mm
13

vii
1] EN - TECHNICAL
SPECIFICATIONS
2] Dry weight without bar and
chain
3] Chain pitch
4] Driving link thickness
5] Bar length
6] Oil tank capacity
7] ACCESSORIES
8] Bar Combination
Length
Groove width
9] Chain combination (Pitch 3/8”
mini) 10] Guaranteed sound power
level
11] Maximum rotational frequency
of the spindle
1] FR - CARACTÉRISTIQUES
TECHNIQUES
2]
Poids à sec sans guide ni chaîne
3]
Pas de la chaîne
4]
Épaisseur du maillon moteur
5]
Longueur du guide
6]
Capacité du réservoir d’huile
7] ACCESSOIRES
8]
Combinaisons de guide chaine
Longueur
Largeur Fente
9]
Combinaisons de chaine (Pas 3/8”
min.)
10]
Niveau de puissance acoustique
garanti
11] Fréquence maximum de rotation du
mandrin
1] DE - TECHNISCHE DATEN
2]
Nettogewicht (ohne Kettenschwert
und Kette)
3]
Kettenteilung
4]
Stärke Antriebsglied
5]
Länge Kettenschwert
6]
Fassungsvermögen Öltank
7] ZUBEHÖR
8] Schwertkombinazion
Schwert
Breite Nut
9] Kettenkombinazion
(Teilung 3/8” Mini)
10] Garantierter Schallleistungspegel
11] Max Spindeldrehzahl
1] ES - DATOS TÉCNICOS
2]
Peso en seco sin barra ni cadena
3]
Paso cadena
4]
Grosor del eslabón motor
5]
Longitud barra
6]
Capacidad depósito de aceite
7] ACCESORIOS
8]
Combinacion de barra
barra
Anchura Ranura
9]
Combinacion de cadena (Paso 3/8”
mini)
10]
Nivel de potencia acústica
garantizado
11]
Frecuencia máxima de rotación del
mandril
1] NL - TECHNISCHE
GEGEVENS
2]
Droog gewicht zonder kettingblad
en ketting
3]
Steek ketting
4]
Dikte drijfschalm
5]
Steek tanden
6]
Lengte kettingblad
7] TOEBEHOREN
8] Combinaties van blad
Lengte
Breedte Gleuf
9] Combinaties van ketting
(Steek 3/8”
mini)
10] Gegarandeerd geluidsniveau
11] Maximale rotatiefrequentie van de
spindel
1] PT - DADOS TÉCNICOS
2]
Peso a seco sem barra e corrente
3]
Passo da corrente
4]
Espessura do elo de tracção
5]
Comprimento da barra
6]
Capacidade do depósito de óleo
7] ACESSÓRIOS
8]
COMBINAÇÕES DA LÂMINA-
GUIA
Comprimento
Ranhura
9]
COMBINAÇÕES DA CORRENTE
(Distância
3/8” mini)
10] Nível de potência acústica
garantido
11] Frequência máxima de rotação
do mandril
1] EL - ΤΕΧΝΙΚΑ ΧΑΡΑΚΤΗΡΙΣΤΙΚΑ
2]
Βgάρος χωρίς καύσιμο, μπάρα
και αλυσίδα
3]
Βήμα αλυσίδας
4]
Πάχος κινητήριου κρίκου
5]
Μήκος μπάρας
6]
Χωρητικότητα δοχείου λαδιού
7 ] Α Ξ Ε Σ Ο Υ Α Ρ
8]
ΣΥΝΔΥΑΣΜΟΙ ΛΑΜΑΣ
Μήκος
Πλάτος Εγκοπής
9]
ΣΥΝΔΥΑΣΜΟΙ ΑΛΥΣΙΔΑΣ (Βήμα
3/8” mini)
10]
Στάθμη εγγυώμενης ηχητικής
ισχύος
11] Μέγιστη συχνότητα περιστροφής
του τσοκ
1] TR - TEKNİK VERİLER
2]
Kol ve zincir hariç boş ağırlık
3]
Zincir adımı
4]
Sürücü bakla kalınlığı
5]
Kol uzunluğu
6]
Yağ deposu kapasitesi
7] AKSESUARLAR
8]
PALA KOMBİNASYONLARI
Uzunluk
Oyuk Genişliği
9]
ZİNCİR KOMBİNASYONLARI
(Adım 3/8” mini)
10] Garanti edilen ses gücü seviyesi
11] İş mili dönüşü azami frekansı
[
1] PL - DANE TECHNICZNE
2]
Ciężar na sucho bez drążka i
łańcucha
3]
Rozstaw łańcucha
4]
Gęstość siatki przenośnika
5]
Długość drążka
6]
Pojemność zbiornika oleju
7] AKCESORIA
8]
KOMBINACJE SZPADY
Długość
Szerokość Wyżłobienia
9]
KOMBINACJE ŁAŃCUCHA
(Skok 3/8” minimalny)
10] Gwarantowany poziom mocy aku-
stycznej
11] Maksymalna częstotliwość obrotów
wrzeciona

viii
1] SL - TEHNIČNI PODATKI
2]
Ciężar na sucho bez drążka i
łańcucha
3]
Rozstaw łańcucha
4]
Gęstość siatki przenośnika
5]
Długość drążka
6]
Pojemność zbiornika oleju
7] PRIPOMOČKI
8]
KOMBINACIJA DROGA
dolžina
širina utora
9]
KOMBINACIJA VERIGE (korak
3/8” mini)
10] Zagotovljena raven zvočnega tlaka
11] Maksimalna frekvenca rotacije
vretena
1] RU - ТЕХНИЧЕСКИЕ
ХАРАКТЕРИСТИКИ
2]
Вес в сухом состоянии без шины
и цепи
3]
Шаг цепи
4]
Толщина ведущего звена
5]
Длина шины
6]
Объем масляного бака
7] АКСЕССУАРЫ
8]
КОМБИНАЦИИ ШИНЫ
Длина
Ширина выемки
9]
КОМБИНАЦИИ ЦЕПИ (Шаг 3/8”
мини)
10] Гарантируемый уровень звуковой
мощности
11] Максимальная частота вращения
шпинделя
1] HR - TEHNIČKI PODACI
2]
Neto težina, bez šipke i reznog
noža
3]
Korak reznog noža
4]
Debljina pokretnog dijela
5]
Duljina reznog noža
6]
Obujam uljnog skladišta
7] PRIBOR
8]
KOMBINACIJE VODILICE
dužina
širina žlijeba
9]
KOMBINACIJE LANCA (korak
3/8” mini)
10] Zajamčena razina zvučne snage
11] Maksimalna frekvencija vrtnje
vretena
1]
SV - TEKNISKA
SPECIFIKATIONER
2]
Nettovikt utan svärd och kedja
3]
Kedjedelning
4]
Drivlänkens tjocklek
5]
Svärdlängd
6]
Oljetank, volym
7] TILLBEHÖR
8]
KOMBINATIONER AV STÅNG
längd
Rännans bredd
9]
KOMBINATIONER AV KEDJA
(min. avstånd 3/8”)
10] Garanterad ljudeektsnivå
11] Spindelns maximala rotationsfrek-
vens
1] FI - TEKNISET TIEDOT
2]
Kuivapaino ilman terälevyä ja
ketjua
3]
Ketjun jako
4]
Vetolenkin paksuus
5]
Terälevyn pituus
6]
Öljysäiliön tilavuus
7] TARVIKKEET
8]
TERÄLEVYN KETJUN
Pituus
Leveys Uritus
9]
TERÄLEVYN YHDISTELMÄT
(hammasväli 3/8” mini)
10] Taattu äänitehotaso
11] Karan maksimipyörimistaajuus
1] DA - TEKNISKE DATA
2]
Vægt uden brændstof, sværd
og kæde
3]
Kædedeling
4]
Drivleddets tykkelse
5]
Sværdets længde
6]
Olietankens kapacitet
7] TILBEHØR
8]
KOMBINATIONER AF SVÆRD
Længde
Sporbredde
9]
KOMBINATIONER AF KÆDE
(Deling 3/8” mini)
10] Garanteret lydeektniveau
11] Maksimal omdrejningsfrekvens
for spindel
1] NO - TEKNISKE DATA
2]
Tørrvekt uten sverd og kjede
3]
Kjededeling
4]
Drivleddets tykkelse
5]
Sverdets lengde
6]
Oljetankens kapasitet
7] TILBEHØR
8]
KOMBINASJONER AV SVERD
lengde
bredde åpning
9]
KOMBINASJONER AV
KJEDE (kjededeling 3/8” mini)
10] Garantert lydeektnivå
11] Maksimal rotasjonsfrekvens ved
doren
1] CS - TECHNICKÉ PARAMETRY
2]
Suchá hmotnost bez vodící lišty
a řetězu
3]
Rozteč řetězu
4]
Tloušťka hnací spojky
5]
Délka lišty
6]
Objem olejové nádrže
7] PŘÍSLUŠENSTVÍ
8]
KOMBINACE VODICÍ LIŠTY
Délka
Šířka drážky
9]
KOMBINACE VODICÍ
AŘETĚZU (Rozestup 3/8”
mini)
10] Zaručená úroveň akustického výkonu
11] Maximální frekvence otáčení vřetena
1] ET - TEHNILISED ANDMED
2]
Kaal
3]
Samm, Kett
4]
Keti läbimõõt
5]
Saeplaadi pikkus
6]
Õlipaagi maht
7]
LISASEADMED
8]
LATT
Pikkus
Soone laius
9]
KETT
(
Samm
3/8” mini)
10] Garanteeritud müravõimsuse tase
11] Võlli maksimaalne
pöörlemissagedus

9IDENTIFICATION OF MAIN COMPONENTS / SYMBOLS
EN
1) Warning! Danger.
2) Read the instruction booklet before using this
machine.
3) Your hearing is at risk of irreparable damage.
Anyone operating this machine under normal con-
ditions during continuous daily use may be expo-
sed to a noise level equal to or exceeding 85 dB
(A). The operator must wear Personal Protective
Equipment (PPE). Whenever the machine is in
use, safety goggles must be worn to safeguard
against ying objects, as must ear protectors, such
as a soundproof helmet, in order to protect the
1. IDENTIFICATION OF MAIN COMPONENTS
2. SYMBOLS
WARNING: The machine you have purchased has been manufactured for domestic use.
1 2 3 4 5 6
1
23
45
6
7
MAIN COMPONENTS
1. Starter unit
2. Connecting rod
3. Chain catcher
4. Bar
5. Chain
6. Bar cover
7. Chain oil tank cap
IDENTIFICATION PLATE
11. Name and address of the manufacturer
12. Type of machine
13. Sound power level
14. Year of manufacture
15. Serial number
16. Article code
17. Conformity marking
18. Maximum rotational frequency of the spindle
- s/n
15
13
17
14
11 12
16
Type:
Art.N.
Pruner Saw Attachment
Max rotational frequency of the spindle:
m/s
18
IMPORTER FOR UK
17

SAFETY REQUIREMENTS 10
EN
A) TRAINING
1) Read the instructions carefully. Become ac-
quain ted with the controls and the proper use of
the machine. Learn how to stop the engine quickly.
2) Only use the machine for the purpose for which
it was designed, that is “limbing trees with di-
mensions suitable for the length of the bar”
or wooden objects with the same characteristics.
Any other use may be dangerous and damage
the machine.3) Never allow children or persons
unfamiliar with these instructions to use the ma-
chine. Local regulations may restrict the age of
the operator.
4) The machine must never be used by more than
one person.
5) Never use the machine :
– when people, especially children or pets are in
the vicinity;
– if the user is tired or unwell, or has taken medi-
cine, drugs, alcohol or any substances which
may slow his reexes and compromise his
judgement;
– if the user is not capable of holding the ma chi ne
rmly with two hands and/or of remaining stan-
ding on the ground whilst working.
6) Remember that the operator or user is respon-
sible for accidents or hazards occurring to other
people or their property.
B) PREPARATION
1) Before using the machine, check its general
condition.
2) Always wear adequate clothing when using the
machine which do not hamper movements in any
manner.
– Always wear slim-tting protective clothing, t-
ted with shear-proof protection devices.
– Always wear protective gloves and eye-goggles
and safety anti-shear boots with non-slip soles.
– Always wear ear and hearing protection de-
vices.
– Never wear scarves, shirts, necklaces, or any
hanging or apping accessory that could catch
in the machine or in any objects or materials in
the work area.
– Tie your hair back if it is long.
3) Before starting your work, make sure that all the
protection devices are correctly tted.
C) OPERATION
1) Do not operate the engine in a conned space
where dangerous carbon monoxide fumes can col-
lect.
2) Work only in daylight or good articial light.
3) Take on a rm and well-balanced position:
– where possible avoid working on wet slippy
ground or in any case on uneven or ripid ground
which does not guarantee stability for the oper-
ator;
– avoid using unstable ladders or platforms;
– never run, but walk carefully paying attention to
the lay of the land and any eventual obstacles.
4) Check that when the machine is running idle,
there is no movement of the chain and, after pres-
s ing the throttle trigger, the engine quickly returns
to minimum speed.
5) Take care not to hit the bar hard against foreign
objects or ying debris caused by the movement
of the chain.
D) MAINTENANCE AND STORAGE
1) Keep all nuts, bolts and screws tightly fastened
to be sure the equipment is in safe working con-
dition. Routine maintenance is essential for safety
and for maintaining a high performance level.
2) Always wear protective gloves when handling
the cutting device.
3) Make sure the chain is well sharpened. Any
work on the chain and bar require specic experi-
ence and special tools. For safety purposes, we
recommend you contact your dealer to ensure
work is done correctly.
4) For safety reasons, never use the machine with
worn or damaged parts. Damaged parts are to be
replaced and never repaired. Only use original
spare parts. Parts that are not of the same quality
can seriously damage the equipment and com-
promise safety.
5) Store the machine out of the reach of children!
E) TRANSPORTATION AND HANDLING
3. SAFETY REQUIREMENTS
operator’s hearing. If the operator is working in an
area where there is a risk of falling objects, a safety
helmet must also be worn.
4) Wear protective footwear and gloves!
5) Danger: objects thrown up by machine! Keep
people or animals at least 15 m away from the
machine during operation!
•) Work in an obstacle-free area, choosing the
most suitable tilt of the cutting unit in relation
to the ground. Make sure it is correctly tted on
the brush cutter.
•) Always work in stable, safe positions. Do not
work on stairs, steps and, in general, on surfa-
ces that are not perfectly stable.
•) The user must comply with any National Regu-
lations which can limit machine use.
6) Danger! Electrocution. Keep a distance of at
least 15 m from overhead line cables.

ASSEMBLING THE ROD
(if supplied separately) (Fig. 1)
– Insert the rod (1) in the sleeve (2) so that the
hole (3) coincides with the screw (4).
– Tighten the two screws (4) and (5) completely.
The head of the screw (4) must not stick out
when tightened.
Wait until the motor is suciently cold
before removing the pruner device.
ASSEMBLING THE BAR AND CHAIN
DANGER! Unpacking and complet-
ing the assembly should be done on a at and
stable surface, with enough space for ma-
chine handling and its packaging, always
making use of suitable equipment.
Disposal of the packaging should be done in
accordance with the local regulations in force.
DANGER! Always wear heavy-duty
gloves when handling the bar and chain.
injury.
Kickback is the result of tool misuse and/or in-
correct operating procedures or conditions and
can be avoided by taking proper precautions as
given below:
• Only use replacement bars and chains
specied by the manufacturer. Incorrect re-
placement bars and chains may cause chain
breakage and/or kickback.
• Follow the manufacturer’s sharpening and
maintenance instructions for the saw chain.
Decreasing the depth gauge height can lead to
increased kickback.
G) HOW TO READ THE MANUAL
Certain paragraphs in the manual contain particu-
larly signicant information and are marked with
various levels of highlighting with the following
meaning:
IMPORTANT These give details or further
information on what has already been indicated,
and aim to prevent both damage to the machine,
and the machine from causing damage.
DANGER! Non-observance will re-
sult in the risk of serious injury or death to
oneself or others.
11 SAFETY REQUIREMENTS / USING THE MACHINE
EN
1) Whenever the machine is to be handled or tran-
sported you must:
– turn o the engine, wait for the chain to stop and
disconnect the spark plug cap;
– mount the bar cover;
– only hold the machine using the handgrips and
position the bar in the opposite direction to that
used during operation.
2) When using a vehicle to transport the machine,
position it so that it can cause no danger to per-
sons and fasten it rmly in place to avoid it from
tipping over, which may cause damage or fuel
spillage.
F) CAUSES AND OPERATOR PREVENTION
OF KICKBACK:
Kickback may occur when the nose or tip of the
guide bar touches an object, or when the wood
closes in and pinches the saw chain in the cut.
Tip contact in some cases may cause a sudden re-
verse reaction, kicking the guide bar up and back
towards the operator.
Pinching the saw chain along the top of the guide
bar may push the guide bar rapidly back towards
the operator.
Either of these reactions may cause you to loose
control of the saw which could result in serious
personal injury. Do not rely exclusively upon the
safety devices built into your saw.
As a chain saw user, you should take several steps
to keep your cutting jobs free from accident or
11
4. USING THE MACHINE

• Checking the oil delivery
DANGER! Make sure the bar and the
chain are in place when you check the oil de-
livery.
Start the engine, keep it running at medium power
and check if the chain oil is delivered as shown in
the gure (Fig. 10).
You can adjust the chain oil ow using a screw-
driver on the adjuster screw (1) of the oiler, which
is on the bottom of the machine (Fig. 10).
• Directions for use
– When starting the motor make sure the chain is
NOT resting on the ground and does not come
into contact with foreign bodies; for this purpose,
position the rod appropriately.
– Follow the instructions supplied with the brush
cutter to start the motor.
– Prune by making a rst cut from below on the
part to be cut, then cut from above, to avoid
barking and damage to the plant.
– When pruning operate outside the area in which
cut material falls.
– Never bring the cutting blades close to body
parts while working.
– Always t the bar guard when the device is
swtched o.
Mount the bar and chain very carefully so as
not to impair the safety and eciency of the
machine. If in doubt, contact your dealer.
DANGER! Perform all operations
with the engine o.
– Unscrew the nut (1) and remove the cover (2) to
get to the drive sprocket and point where the bar
is to be tted (Fig. 2).
– Mount the bar (4) by inserting the stud bolt (3) in
the groove and push it towards the back of the
starter unit (Fig. 3).
– Mount the chain in the right direction around the
drive sprocket and along the bar rail (Fig. 4). If
the tip of the bar has a nose sprocket, make sure
the drive links t correctly in the sprocket rims.
– Check that the chain tension adjuster pin (5) is
tted properly in the hole on the bar; if it isn’t,
turn the chain tension adjuster screw (6) using
a screwdriver until the pin is completely inserted
(Fig. 5).
– Fit the guard (2) back on without tightening the
nut (1).
– Turn the chain tension adjuster screw (6) to ad-
just the chain tension (Fig. 6).
– Raise the bar (4) and tighten the nut (1) on the
guard (2) securely using the wrench (Fig. 7).
– Check the chain tension. The tension is correct
when the drive links do not slip out of the chain
guides if you hold the chain in the middle of the
bar (Fig. 8).
– Using a screwdriver, make the chain run along
the guides to check it moves smoothly without
resistance.
ATTACHING THE PRUNER (Fig. 9)
– Pull out the stop pin (1) and push the rod (2) right
down until the stop pin (1) clicks into the hole (3)
in the rod. This is easier to do if you rotate the
bottom of the rod (2) slightly in both directions.
The pin (1) is in place when it is completely lo-
dged in the hole.
– Once inserted, tighten the knob (4) securely.
SETTING AT WORK
Please also read the instructions manual for the
brush cutter the device pruner is applied to.
Before starting work please:
– ll the relevant tank with oil;
– check that all the screws on the machine and the
bar are tightly fastened;
– check that the chain is sharp and there are no
signs of any damage;
– check that handgrips and protection devices
are clean and dry, correctly mounted and well
fastened to the machine;
– check that the handgrips are well fastened;
– check the chain tension.
USING THE MACHINE / MAINTENANCE AND STORAGE 12
EN

or vice-versa.
SHARPENING THE CHAIN (Fig. 12)
DANGER! To ensure that the chain-
saw works safely and eciently, it is essential
that the cutting components are well-sharp-
ened.
Sharpening is necessary when:
• The sawdust looks like dust.
• Cutting becomes more dicult.
• The cut is not straight.
• Vibrations increase.
• Fuel consumption increases.
DANGER! If the chain is not su-
ciently sharpened, the kick-back’s risk in-
creases.
A specialized centre will sharpen the chain using
the right tools to ensure minimum removal of ma-
terial and even sharpness on all the cutting edges.
13 MAINTENANCE AND STORAGE
EN
If you sharpen the chain yourself, use special
round-section les with the right diameter de-
pending on the type of chain (see “Chain Main-
tenance Table”). You need a certain amount of
skill and experience to avoid damaging the cutting
edges.
Sharpen the chain as follows:
– Disassemble the pruner from the brush cutter
and secure the bar with the chain in a vice, so
that the chain can run smoothly.
– Tighten the chain if it is loose.
– Mount the le in the guide and then insert it in
the tooth at a constant angle from the cutting
edge.
– Sharpen in a forward motion a few times and
repeat this on all the cutting edges facing the
same way (right or left).
– Turn the bar over in the vice and repeat on all the
other cutting edges.
– Check that the limiter tooth does not stick out
further than the inspection instrument and le
any projecting parts with a at le, rounding o
the edge.
– After sharpening, remove all traces of ling and
dust and lubricate the chain in an oil bath.
Replace the chain whenever:
– The length of the cutting edges reduces to 5
mm or less;
– There is too much play between the links and
the rivets.
BAR MAINTENANCE (Fig. 13)
To avoid asymmetrical wear on the bar, make sure
it is turned over periodically.
To keep the bar in perfect working order, proceed
as follows:
– grease the bearings on the nose sprocket (if
present) with the syringe;
– Clean the bar groove with the scraper (not in-
cluded);
– clean the lubrication holes;
– with a at le, remove burr from the edges and
level o the guides.
Replace the bar whenever:
– the groove is not as deep as the height of the
drive links (which must never touch the bottom);
DANGER! During maintenance oper-
ations:
– Disassemble the pruner rod from the brush
cutter.
– Use protective gloves when handling the
bar and chain.
– Keep the bar protection devices on, except
when intervening directly on the bar or the
chain.
– Never dispose of oils, fuel or other polluting
materials in unauthorised places.
GREASING (Fig. 11)
– Grease every 20 hours using the specic grease
gun.
– Use lithium-based grease for high temperatures
and extreme pressures.
CHAIN SPROCKET
Regularly check the condition of the sprocket with
your local retailer and replace it when it is worn.
Do not mount a new chain with a worn sprocket
5. MAINTENANCE AND STORAGE

Chain pitch Limiter tooth level (a) File diameter (d)
inches: 3/8 Mini
mm: 9,32
a = 0,45 mm (0,018”) d = 4 mm(5/32”)
– the inside of the guide is worn enough to make the
chain lean to one side.
Given product evolution, the tools may be replaced in
time with others having similar interchangeable and
operating safety characteristics.

DICHIARAZIONE CE DI CONFORMITÁ (Istruzioni Originali)
(Direttiva Macchine 2006/42/CE, Allegato II, parte A)
1. La Società: ST. S.p.A. – Via del Lavoro, 6 – 31033 Castelfranco Veneto (TV) – Italy
2. Dichiara sotto la propria responsabilità, che la macchina: Dispositivo potatore
h) Livello di potenza sonora garantito:
n) Persona autorizzata a costituire il
FascicoloTecnico:
o) Castelfranco Veneto, 01/03/2023
CEO Stiga Group
Sean Robinson
171516126/6
111 dB(A)
ST. S.p.A.
Via del Lavoro, 6
31033 Castelfranco Veneto (TV) - Italia
3. É conforme alle specifiche delle direttive:
a) Tipo / Modello Base: PRS 1501
c) Numero di Serie: 23A••CHA000001 ÷ 99L••CHA999999
d) Motore:
•MD: 2006/42/EC
4. Riferimento alle Norme armonizzate:
EN ISO 11680-1:2011
EN IEC 63000:2018
e)) Ente Certificatore:
f) Esame CE del tipo:
•RoHs II : 2011/65/EU - 2015/863/EU
N°0598 – SGS Fimko Ltd.
Takomotie 8, FI-00380 Helsinki, Finland
MD-162

UK DECLARATION OF CONFORMITY
(Supply of Machinery (Safety) Regulations 2008, S.I. 2008 No. 1597, Annex II, part A)
1. The company: ST. S.p.A. – Via del Lavoro, 6 – 31033 Castelfranco Veneto (TV) – Italy
2. Hereby declares under its own responsibility that the machine (function):
Hedge trimmer device
3. Conforms to UK Regulations:
•S.I. 2008/1597 - Supply of Machinery (Safety) Regulations 2008
•S.I. 2012/3032 - The Restriction of the Use of Certain Hazardous Substances in Electrical and Electronic
Equipment Regulations 2012
h) Guaranteed sound power level:
n) Person authorised to compile the technical file:
o) Castelfranco Veneto, 01/03/2023 CEO Stiga Group
Sean Robinson
ST. S.p.A.
Via del Lavoro, 6
31033 Castelfranco Veneto (TV) - Italia
4. Reference to harmonised standards:
EN ISO 10517:2019
EN IEC 63000:2018
a) Homologation type:
c) Serial number:
d) Engine:
STIGA LTD
Unit 8, Bluewater Estate Plympton,
Devon, PL7 4JH, England
UK Importer:
23A••HTR000001 ÷ 99L••HTR999999
HET 1501
107 dB(A)
171516125/5

FR (Traduction de la notice originale)
Déclaration CE de Conformité
(Directive Machines 2006/42/CE, Annexe II,
partie A)
1. La Société
2. Déclare sous sa propre responsabilité que
la machine : Appareil sécateur
a) Type / Modèle de Base
c) Série
d) Moteur: /
3. Est conforme aux prescriptions des
directives :
e) Organisme de certification
f) Examen CE du Type
4. Renvoi aux Normes harmonisées
h) Niveau de puissance sonore garanti
n) Personne habilitée à établir le Dossier
Technique :
o) Lieu et Date
EN (Translation of the original instruction)
EC Declaration of Conformity
(Machine Directive 2006/42/EC, Annex II,
part A)
1. The Company
2. Herby declares under its own
responsibility that the machine:
Pruner device
a) Type / Base Model
c) Serial number
d) Engine: /
3. Conforms to directive specifications:
e) Certifying body
f) EC examination of Type
4. Reference to harmonised Standards
h) Sound power level guaranteed
n) Person authorised to create the
Technical Folder:
o) Place and Date
DE (Übersetzung der
Originalbetriebsanleitung)
EG-Konformitätserklärung
(Maschinenrichtlinie 2006/42/EG, Anhang
II, Teil A)
1. Die Gesellschaft
2. Erklärt auf eigene Verantwortung, dass
die Maschine: Pruner-Gerät
a) Typ / Basismodell
c) Seriennummer
d) Motor: /
3. Den Anforderungen der folgenden
Richtlinien entspricht:
e) Zertifizierungsstelle
f) EG-Baumusterprüfung
4. Bezugnahme auf die harmonisierten
Normen
h) Garantierter Schallleistungspegel
n) Zur Verfassung der technischen
Unterlagen befugte Person:
o) Ort und Datum
NL (
Vertaling van de oorspronkelijke
gebruiksaanwijzing)
EG-verklaring van overeenstemming
(Richtlijn Machines 2006/42/CE, Bijlage II,
deel A)
1. Het bedrijf
2. Verklaart onder zijn eigen
verantwoordelijkheid dat de machine:
Pruner-apparaat
a) Type / Basismodel
c) Serienummer
d) Motor: /
3. Voldoet aan de specificaties van de
richtlijnen:
e) Certificatie-instituut
f) EG-onderzoek van het Type
4. Verwijzing naar de Geharmoniseerde
normen
h) Gegarandeerd niveau van
geluidsvermogen
n) Bevoegd persoon voor het opstellen van
het Technisch Dossier
o) Plaats en Datum
ES (Traducción del Manual Original)
Declaración de Conformidad CE
(Directiva Máquinas 2006/42/CE, Anexo
II, parte A)
1. La Empresa
2. Declara bajo su propia
responsabilidad que la máquina:
dispositivo de poda
a) Tipo / Modelo Base
c) Matrícula
d) Motor: /
3. Cumple con las especificaciones de
las directivas:
e) Ente certificador
f) Examen CE del Tipo
4. Referencia a las Normas
armonizadas
h) Nivel de potencia sonora garantizado
n) Persona autorizada a realizar el
Manual Técnico:
o) Lugar y Fecha
PT (Tradução do manual original)
Declaração CE de Conformidade
(Diretiva de Máquinas 2006/42/CE, Anexo
II, parte A)
1. A Empresa
2. Declara sob a própria responsabilidade
que a máquina: dispositivo de podar
a) Tipo / Modelo Base
c) Matrícula
d) Motor: /
3. É conforme às especificações das
diretivas:
e) Órgão certificador
f) Exame CE do Tipo
4. Referência às Normas harmonizadas
h) Nível garantido de potência sonora
n) Pessoa autorizada a elaborar o Caderno
Técnico
o) Local e Data
EL (
Μετάφραση του πρωτοτύπου των οδηγιών
χρήσης)
EK-Δήλωση συμμόρφωσης
(Οδηγία Μηχανών 2006/42/CE, Παράρτημα II,
μέρος A)
1. Η Εταιρία
2. Δηλώνει υπεύθυνα ότι η μηχανή: Συσκευή
κλαδευτηρίου
a) Τύπος / Βασικό Μοντέλο
c) Αριθμός μητρώου
d) Κινητήρας:/
3. Συμμορφώνεται με τις προδιαγραφές της
οδηγίας:
e) Οργανισμός πιστοποίησης
f) Εξέταση CE του Τύπου
4. Αναφορά στους Κανονισμούς
εναρμόνισης
h) Στάθμη εγγυημένης ακουστικής ισχύος
n) Εξουσιοδοτημένο άτομο για την κατάρτιση
του Τεχνικού Φυλλαδίου:
o) Τόπος και Χρόνος
TR (Orijinal Talimatların Tercümesi)
AT Uygunluk Beyanı
(2006/42/CE Makine Direktifi, Ek II,
bölüm A)
1. Şirket
2. Şahsi sorumluluğu altında aşağıdaki
makinenin: Budama cihazı
a) Tip / Standart model
c) Sicil numarası
d) Motor: /
3. Aşağıdaki direktiflerin özelliklerine
uygun olduğunu beyan etmektedir:
e) Sertifikalandıran kurum
f) ... Tipi CE incelemesi
4. Harmonize standartlara atıf
h) Garanti edilen ses güç seviyesi
n) Teknik Dosyayı oluşturmaya yetkili
kişi:
o) Yer ve Tarih
MK (Превод на оригиналните упатства)
Декларација за усогласеност со ЕУ
(Директива за машини 2006/42/CE, Анекс
II, дел A)
1. Компанијата
2. изјавува со целосна лична
одговорност дека следната машина:
Уред за кастрење
а) Тип / основен модел
c) етикета
d мотор:/
3. Усогласено со спецификациите
според директивите:
e) тело за сертификација
f) тест СЕ за типот
4. Референци за усогласени нормативи
h) Гарантирано ниво на звучна моќност
n) овластено лице за составување на
Техничката брошура
o) место и датум

NO (Oversettelse av orginal bruksanvisning)
EF-Samsvarserklæring
(Maskindirektiv 2006/42/EF, Vedlegg II, del A)
1. Firmaet
2. Erklærer på eget ansvar at maskinen:
Beskjæringsapparat
a) Type / Modell
c) Serienummer
d) Motor: /
3. Oppfyller kravene i direktivene:
e) Sertifiseringsorgan
f) EF-typeprøving
4. Henvisning til harmoniserte standarder
h) Garantert lydeffektnivå
n) Person som har fullmakt til å utferdige
teknisk dokumentasjon:
o) Sted og dato
SV (Översättning av bruksanvisning i
original)
EG-försäkran om överensstämmelse
(Maskindirektiv 2006/42//EG, bilaga II,
de la)
1. Företaget
2. Försäkrar på eget ansvar att
maskinen : Beskärare enhet
a) Typ / Basmodell
c) Serienummer
d) Motor: /
3. Överensstämmer med föreskrifterna i
direktivet
e) Intygsorgan_ Anmält organ
f) EG typgodkännande
4. Referens till harmoniserade
standarder
h) Garanterad ljudeffektnivå
n) Auktoriserad person för upprättandet
av den tekniska dokumentationen:
o) Ort och datum
DA (Oversættelse af den originale
brugsanvisning)
EF-overensstemmelseserklæring
(Maskindirektiv 2006/42/EF, bilag II, del A)
1. Firmaet
2. Erklærer på eget ansvar, at maskinen:
Beskæremaskine
a) Type / Model
c) Serienummer
d) Motor: /
3. Er i overensstemmelse med
specifikationerne ifølge direktiverne:
e) Certificeringsorgan
f) EF-typeafprøvning
4. Henvisning til harmoniserede
standarder
h) Garanteret lydeffektniveau
n) Person, der har bemyndigelse til at
udarbejde det tekniske dossier:
o) Sted og dato
FI (Alkuperäisten ohjeiden käännös)
EY-VAATIMUSTENMUKAISUUSVAKUUTUS
(Konedirektiivi 2006/42/EY, Liite II, osa A)
1. Yritys
2. Vakuuttaa omalla vastuullaan, että kone:
Leikkauslaite
a) Tyyppi / Perusmalli
c) Sarjanumero
d) Moottori : /
3. On yhdenmukainen seuraavien direktiivien
asettamien vaatimusten kanssa:
e) Sertifiointiyritys
f) EY-tyyppitarkastus
4. Viittaus harmonisoituihin standardeihin
h) Taattu äänitehotaso
n) Teknisten asiakirjojen laatimiseen
valtuutettu henkilö:
o) Paikka ja päivämäärä
CS (Překlad původního návodu k
používání)
ES –Prohlášení o shodě
(Směrnice o Strojních zařízeních
2006/42/ES, Příloha II, část A)
1. Společnost
2. Prohlašuje na vlastní odpovědnost, že
stroj: Prořezávací zařízení
a) Typ / Základní model
c) Výrobní číslo
d) Motor: /
3. Je ve shodě s nařízeními směrnic:
e) Certifikační orgán
f) ES zkouška Typu
4. Odkazy na Harmonizované normy
g) Naměřená úroveň akustického
výkonu
h) Zaručená úroveň akustického
výkonu
j) Čistý instalovaný výkon
n) Osoba autorizovaná pro vytvoření
Technického spisu:
o) Místo a Datum
PL (Tłumaczenie instrukcji oryginalnej)
Deklaracja zgodności WE
(Dyrektywa maszynowa 2006/42/WE,
Załącznik II, część A)
1. Spółka
2. Oświadcza na własną
odpowiedzialność, że maszyna:
Urządzenie sekatora
a) Typ / Model podstawowy
c) Numer seryjny
d) Silnik: /
3. Spełnia podstawowe wymogi
następujących Dyrektyw:
e) Jednostka certyfikująca
f) Badanie typu WE
4. Odniesienie do Norm
zharmonizowanych
h) Gwarantowany poziom mocy
akustycznej
n) Osoba upoważniona do zredagowania
Dokumentacji technicznej:
o) Miejscowość i data
HU (Eredeti használati utasítás fordítása)
EK-megfelelőségi nyilatkozata
(2006/42/EK gépirányelv, II. melléklet "A"
rész)
1. Alulírott Vállalat
2. Felelősségének teljes tudatában kijelenti,
hogy az alábbi gép: Metszővágó készülék
a) Típus / Alaptípus
c) Gyártási szám
d) Motor: /
3. Megfelel az alábbi irányelvek előírásainak:
e) Tanúsító szerv
f) CE vizsgálat típusa
4. Hivatkozás a harmonizált szabványokra
h) Garantált zajteljesítmény szint
n) Műszaki Dosszié szerkesztésére
felhatalmazott személy:
o) Helye és ideje
HR (Prijevod originalnih uputa)
EK Izjava o sukladnosti
(Direktiva 2006/42/EZ o strojevima,
dodatak II, dio A)
1. Tvrtka:
2. pod vlastitom odgovornošću izjavljuje
da je stroj: Uređaj za obrezivanje
a) Vrsta / Osnovni model
c) Matični broj
d) Motor: /
3. sukladan s temeljnim zahtjevima
direktiva:
e) Certifikacijsko tijelo
f) Tipsko ispitivanje EZ
4. Primijenjene su slijedeće harmonizirane
norme:
h) Zajamčena razina zvučne snage
n) Osoba ovlaštena za pravljenje Tehničke
datoteke:
o) Mjesto i datum
RU (Перевод оригинальных инструкций)
Декларация соответствия нормам ЕС
(Директива омашинном
оборудовании 2006/42/ЕС,
Приложение II, часть A)
1. Предприятие
2. Заявляет под собственную
ответственность, что машина:
Устройство секатора
a) Тип / Базовая модель
c) Паспорт
d) Двигатель: /
3. Соответствует требованиям
следующих директив:
e) Орган по сертификации
f) Экспертиза типа ЕС
4. Ссылки на гармонизированные
нормы
h) Гарантируемый уровень
звуковой мощности
n) Лицо, уполномоченное на
подготовку технической
документации:
o) Место и дата
Other manuals for PRS 1501
8
Table of contents
Other Stiga Pole Saw manuals

Stiga
Stiga MP 500 Li 48 User manual

Stiga
Stiga MP 700 Li 48 User manual

Stiga
Stiga MH 48 LI User manual

Stiga
Stiga PRS 1501 User manual

Stiga
Stiga PRS 1501 User manual

Stiga
Stiga MP 900 Li 48 User manual

Stiga
Stiga MP 24 Li User manual

Stiga
Stiga MP 500 Li 48 User manual

Stiga
Stiga PRS 1501 User manual

Stiga
Stiga PRS 1501 User manual