Stihl FS 88 User manual

STIHL
FS
BB,
7DB
Instruction
Manual
Owner's
Manual
Assembling
SafetyPrecautions
Operating
Instructions
Maintenance

Contents
Parts and Controls Starting 34 This manual contains warnings,
-Version with Bike Handle 2Adjusting Carburetor 37 operating and safety precautions for the
-Version with Loop Handle 4Operating Instructions 40 STIHL
FS
88 and FS 108 brushcutters.
-Version with Loop Handle and Checking Spark Plug
41
Pay special attention to the safety
Standoff Lever 4Cleaning Air Filter
41
precautions outlined on pages 6to 17.
Safety Precautions and Lubricating Gearbox 42 Allow only persons who understand this
Working Techniques 6Lubricating Drive Shaft 42 manual to operate your brushcutter.
Selecting the Cutting Tool 18 Sharpening Cutting Tools
To
receive maximum performance and
Mounting the Bike Handle 20 -Grass Cutting Blade 230-4 43 satisfaction from your STIHL brush-
Mounting
loop
Handle with -Grass Cutting Blade 230-8 44 cutter,
it
is
important that you read and
Standoff Lever
21
-Brush Knife 250 45 understand the maintenance and safety
Mounting the Loop Handle -Circular Saw Blade 200 precautions before using your brush-
-Version A22 (chisel tooth) 46 cutter. Contact your STIHL dealer
or
the
-Version B23 -Circular Saw Blade 200 STIHL distributor for your area if you do
Mounting the Deflector 24 (scratcher tooth) 47 not understand any of the instructions
in
-Fitting stop 24 Replacing Starter Rope and this manual.
Mounting the Cutting Tools 25 Rewind Spring 48
-STIHL Supercut 2-2 26 Spark Arresting Screen
in
Warn
ng!
-STIHL Supercut 20-2 26 Muffler
51
Because abrushcutter
is
ahigh-speed
-STIHL Autocut 25-2 26 Storing the Machine
51
cutting tool some special safety pre-
-STIHL Autocut 30-2 26 Maintenance Chart 52 cautions must be observed to reduce
-STIHL Autocut 24-2 27 Specifications 53 the risk of personal injury. Careless or
-STIHL Polymatic 30-2 27 Special Accessories 55 improper use may cause serious or
-STIHL Polycut 40-3 28 even fatal injury. Make shure your unit is
-STIHL Fixed Line Head 28 equipped with the proper deflector,
-Grass Cutting Blade 230 29 handle and harness for the type of
-Brush Knife 250 29 cutting attachment being used. Always
-Circular Saw Blade 200 30 wear
proJ<.er
eye protection.
Fuel
31
Fueling 32 STIHL's philosophy
is
to continually
Fitting the Harness 32 improve all of its products. As aresult,
engineering changes and improve-
ments are made from time to time.
If
the
Printed on chlorine-free paper operating characteristics or the appear-
ance of your brushcutter differs from
those described
in
this manual, please
contact your STIHL dealer for informa-
©1996
Andreas
Stihl.
Waiblingen
100813970
STIHL®
tion and assistance.
0458 357 3021. M
5.
C 6 S
Printed
in
Japan
1

Parts and Controls
2
1
2
9
Version with Bike Handle
1=Handle support
2=Throttle trigger
3=Slide control
4=Throttle trigger interlock
5=Bike handle
6=Throttle cable retainer
7=Carrying loop
8=Throttle cable /stop switch wire
9=Spark plug terminal
10 =Air filter cover
11
=Choke lever
12 =Machine support
13 =Fuel tank
14 =Fuel filler cap
15 =Starter grip
16 =Carburetor adjusting screws
17 =Muffler
18 =Deflector (for all cutting
tools, without skirt)
19 =Metal cutting
Itool
(cutting blade 230)

Definitions 8.
Throttle
cable/stop
switch
wire. 16.
Carburetor
adjusting
screws.
Connect operator's control grip to For tuning carburetor.
1. Handle
support.
the powerhead.
Connects the drive shaft
to
the handle bars.
17.
Muffler.
9.
Spark
plug
terminal. Attenuates exhaust noises
Connects the spark plug
to
the and diverts exhaust gases away
2.
Throttle
trigger. ignition wire. from operator.
Controls the speed of the engine.
10.
Air
filter cover. 18. Deflector.
3. Slide
control.
Covers the air filter element. The deflector
is
designed to reduce
Starting throttle lock and stop switch. the risk of injury from foreign objects
Keeps the throttle partially open flung backwards toward the operator
during starting and switches the 11.
Choke
lever. by the cutting tool and from contact
engine's ignition off and stops the Eases engine starting with the cutting tool.
engine.
by
enriching mixture.
19.
Cutting
tool.
4.
Throttle
trigger
interlock.
12. Machine
support.
The cutting attachment,
i.
e.
blade,
Must
be
depressed before the For resting machine
on
the ground. made from metal for different pur-
throttle trigger can
be
activated. poses (special accessory).
13. Fuel
tank.
5. Bike handle. For fuel and oil mixture.
To
hold
the
brushcutter
with both hands. 14. Fuel filler cap.
.......>
For closing the fuel tank.
6. Throttle cable retainer.
Fixes the throtlle cable
on the drive shaft. 15. Starter grip.
The grip of the pull starter,
which
is
the device to start
7. Carrying lOop. the engine.
The device to connect the
brushcutler to the harness.
3

8
Version
with
Loop
Handle
and
loop
handle
with
standoff
lever
1=Loop handle
2=Standoff lever
3=Carrying loop
(not all markets)
4=Slide control
5=Throttle trigger
6=Throttle trigger interlock
7=Throttle cable /stop switch wire
8=Spark plug terminal
9=Air filter cover
10=
Choke lever
11
=Machine support
4
19
17
18
12 =Fuel tank
13 =Fuel filler cap
14 =Starter grip
15
=Carburetor adjusting screws
16 =Muffler
17 =Deflector (for mowing heads)
18 =Line limiting blade
19 =Cutting tool

Definitions
8.
Spark
plug
terminal.
16. Muffler.
Connects the spark plug
to
the Attenuates exhaust noises
1.
Loop
handle. ignition wire. and diverts exhaust gases away
For easy control of from operator.
machine during cutting work. 9.
Air
filter
cover.
Covers the air filter element. 17. Deflector.
2.
Standoff
lever. The deflector
is
designed to reduce
Helps keep unit at asafe distance 10.
Choke
lever. the risk of injury from foreign objects
from operator's feet and legs. Eases engine starting flung backwards toward the operator
by enriching mixture. by the cutting tool and from contact
with the cutting tool.
3.
Carrying
loop.
The device to connect the 11.
Machine
support.
brushcutter to the harness. For resting machine on the ground. 18.
Line
limiting
blade.
Metal blade at the deflector
in
order
to
keep the line of the mowing head
4.
Slide
control.
12. Fuel tank. at the proper length.
Starting throttle lock and stop switch. For fuel and oil mixture.
Keeps the throttle partially open
during starting and switches the 19.
Cutting
tool.
engine's ignition off and stops the 13. Fuel
filler
cap. The cutting attachment,
i.
e.
cutting
engine. For closing the fuel tank. head, for different purposes
(special accessory).
5.
Throttle
trigger. 14.
Starter
grip.
Controls the speed of the engine. The grip of the pull starter,
which is the device
to
start
....,.
the engine.
6.
Throttle
trigger
interlock.
Must
be
depressed before the
throttle trigger can be activated. 15.
Carburetor
adjusting
screws.
For tuning carburetor
7.
Throttle
cable/stop
switch
wire.
Connect operator's control grip to
the powerhead.
5

Safety Precautions and
Working Techniques
&
anlgl
Because abrushcutter is
, a high-speed, fast-cutting
•power tool, special safety
precautions must be obseNed to reduce
the risk of personal injury.
It
is important that you
read, fully understand
and obseNe the following
safety precautions and
warnings. Read the owner's manual and
the safety instructions periodically. Care-
less or improper use of any brushcutter
may cause serious or fatal injury.
Have your STIHL dealer show you how
to
operate your brushcutter.
ObseNe
all
applicable local safety regulations,
standards and ordinances.
Warning!
The use of any brushcutter may be
hazardous.
If
the rotating cutting
1001
comes
in
contact with your body, it will
cut you. When it comes
in
contact with
solid foreign objects such as rocks
or
bits of metal, it may fling them directly or
by ricochet
in
the direction of bystanders
or
the operator.
Striking such objects could damage the
cutting attachment and may cause
blades to crack, chip or break.
STIHL does not recommend the use of
rigid blades when cutting
in
stony areas.
Thrown objects or damaged blades may
result
in
serious or fatal injury to the
operator or bystanders.
6
Warning!
Minors should never be allowed
to
use
abrushcutter. Bystanders, especially
children, and animals should not be
allowed
in
the area where abrushcutter
is
in
use.
Never let the brushcutter run unattended.
Warning!
Do not lend
or
rent your brushcutter
without the owner's manual. Be sure
that anyone using your brushcutter un-
derstands the information contained
in
this manual.
Most of these safety precautions and
warnings apply to the use of all STIHL
brushcutters. Different models may have
different parts and controls. See the
appropriate section of your owner's
manual for adescription of the controls
and function of the parts of your model
bruShcutter.
Safe use of abrushcutter involves
1. the operator
2.
the brushcutter
3.
the use of the brushcutter.

THE OPERATOR!
Physical Condition
You
must be
in
good physical condition
and mental health and not under the
influence of any substance (drugs,
alcohol, etc.) which might impair vision,
dexterity or judgment. Do not operate a
brushcuJter when you are fatigued.
Be
alert -
if
you get tired while operating
your brushcutter, take abreak.
Tiredness may result
in
loss of control.
Working with any brushcutter can be
strenuous.
If
you have any condition that
might
be
aggravated by strenuous work,
check with your doctor before operating
abrushcutter.
Prolonged use of abrushcutter (or other
machines) exposing the operator
to
vibrations may produce whitefinger di-
sease (Raynaud's phenomenon) or car-
pal tunnel syndrome. These conditions
reduce the hand's ability
to
feel and regu-
late temperature, produce numbness
and burning sensations and may cause
nerve and circulation damage and tissue
necrosis.
Warnlngl
Antivibration systems do not guarantee
that you will not sustain whitefinger di-
sease or carpal tunnel syndrome.
Therefore, continual and regular users
should monitor closely the condition of
their hands and fingers.
If
any of the
above symptoms appear, seek medical
advice immediately.
U)
o
o
.q:
en
o
o
o
Proper Clothing
(i
Warning!
Brushcutter operation can
0·0
cause serious injury
to
eyes,
ears and person. The de-
flector provided with your brushcutter
may not protect the operator from all
foreign objects (gravel, glass, wire, etc.)
thrown by the wheeling cutting attach-
ment. Thrown objects may also ricochet
and strike the operator. Therefore,
to
re-
duce the risk of injury
to
your eyes never
operate abrushcutter unless wearing
goggles or properly fitted safety glasses
with adequate top and side protection
complying with ANSI Z
87.1
(or your app-
licable national standard).
To
reduce the risk of injury
to
your face
STIHL recommends that you also wear
aface shield or face screen over your
goggles or safety glasses.
WarnIng!
Brushcutter noise may damage your
hearing. Wear sound barriers (ear plugs
or ear mufflers) to protect your hearing.
Continual and regular users should have
their hearing checked regularly.
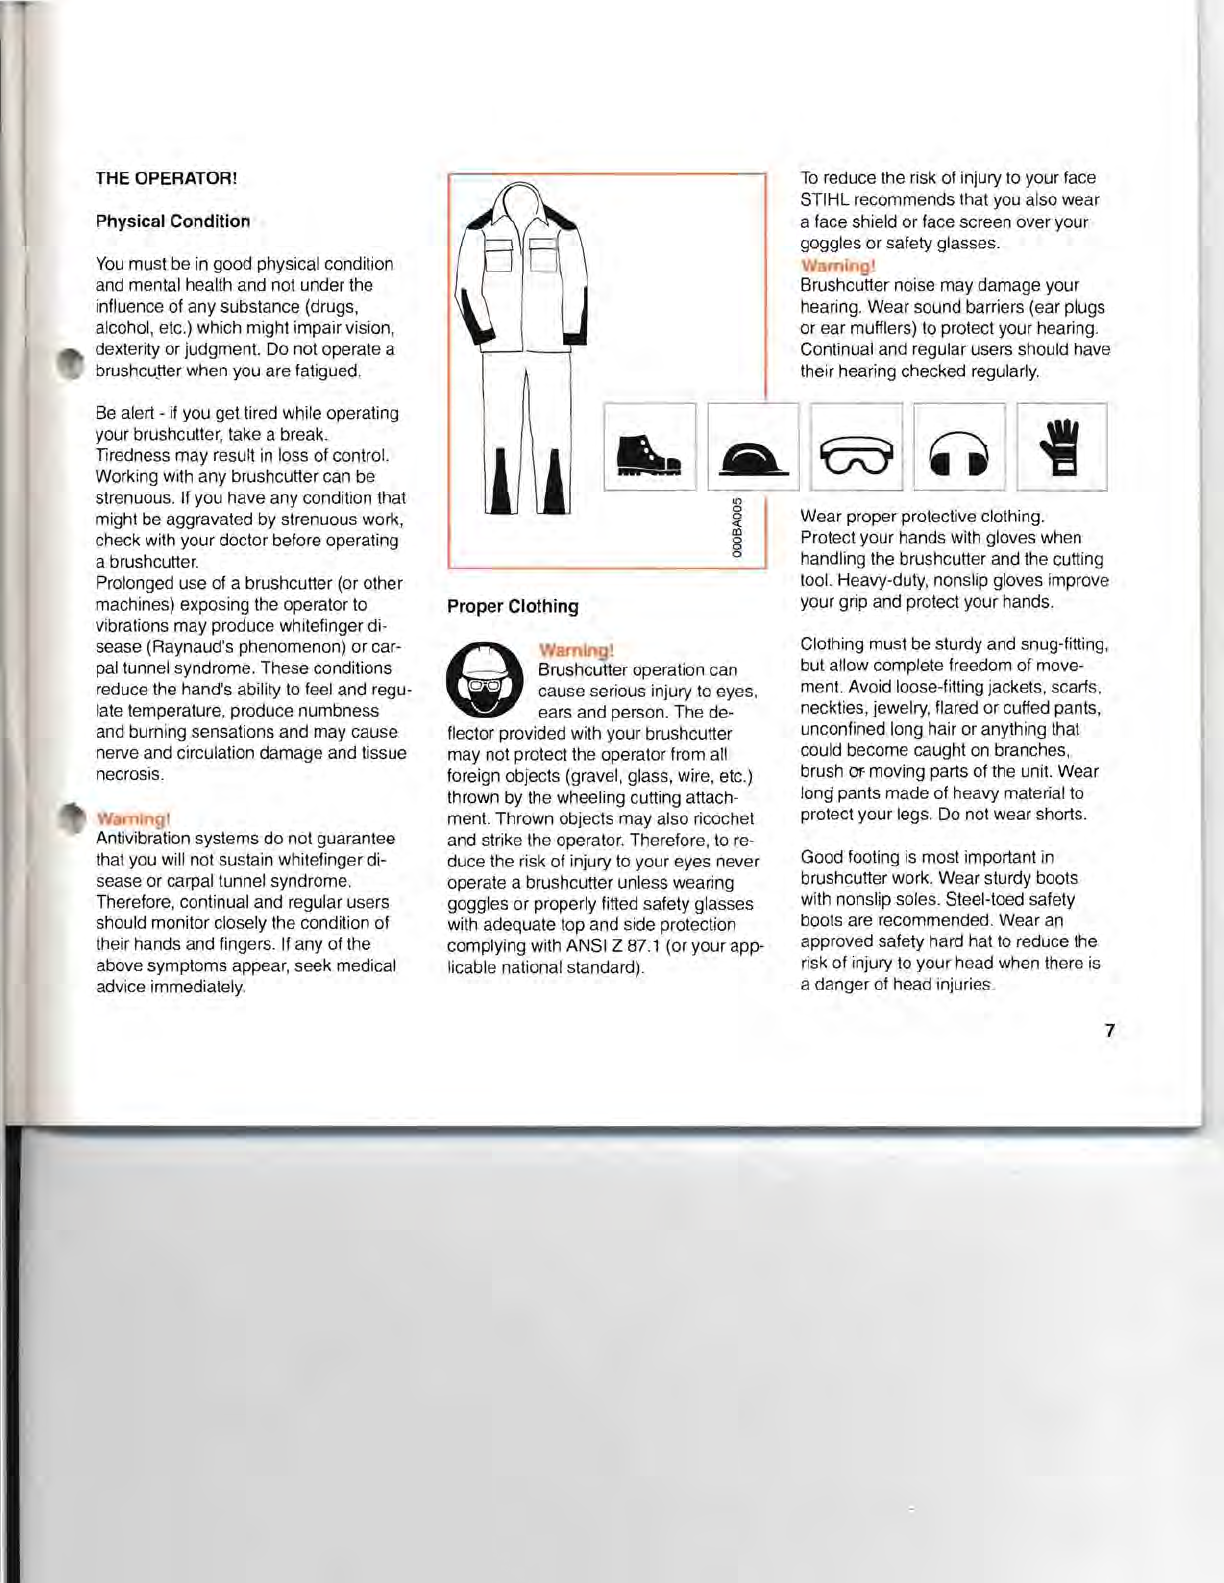
Wear proper protective clothing.
Protect your hands with gloves when
handling the brushcutter and the cutting
tooi. Heavy-duty, nonslip gloves improve
your grip and protect your hands.
Clothing must be sturdy and snug·fitting,
but allow complete freedom of move-
ment. Avoid loose-fitting jackets, scarfs,
neckties, jewelry, flared or cuffed pants,
unconfined long hair or anything that
could become caught
on
branches,
brush
Of-
moving parts of the unit. Wear
long' pants made of heavy material
to
protect your legs. Do not wear shorts.
Good footing
is
most important
in
brushcutter work. Wear sturdy boots
with nonslip soles. Steel-toed safety
boots are recommended. Wear
an
approved safety hard hat
to
reduce the
risk of injury to your head when there is
adanger of head injuries.
7

,...
o
o
ca
o
g
A
~
~
0
«
al
0
0
0
B
o
o~
o
~
Warning'
Never modify abrushcutter
in
any
way.
Only attachments supplied by STIHL or
expressly approved by STIHL for use
with the specific STIHL brushcutter
models are authorized. Although certain
unauthorized attachments are useable
for the STIHL brushcutter, their use
may,
in
fact, be extremely dangerous.
THE USE OF THE
BRUSHCUTIER
For illustrations and definitions of the
brushcutter parts see the chapter on
"Parts and Controls"!
THE
BRUSHCUTIER
Transporting the brushcutter
Warning!
Always turn off the engine and make
sure the cutting attachment has stop-
ped before putting abrushcutter down.
When transporting your brushcutter in a
vehicle, properly secure
it
to
prevent
turnover, fuel spillage and damage to
the brushcutter. Keep metal cutting
tools covered with the transport guard
(optional accessory).
Preparation for the
use
of the
brushcutter
Adjust carrying harness and hand grip
to suit your size before starting work.
The machine should be properly
balanced as specified
in
your owner's
manual for proper control and less
fatique in operation.
Always check your bruhcutter for
proper condition and operation before
starting, particularly the throttle trigger,
throttle trigger interlock (if applicable
stop switch, cutting tool, deflector and
harness.
Arrows on the deflector (A) and stop (8)
show the correct direction of rotation of
the cutting tool.
The throttle trigger must move freely
and always spring back to the idle
position.The cutting tool must be
properly tightened and
in
safe operating
condition. Inspect for loose parts (nuts,
screws, etc.) and for cracked, bent,
warped or damaged blades.
Fueling
Your STIHL brushcutter uses an oil-
gasoline mixture for fuel (see the chap-
ter on "Fuel" of your owner's manual).
Warning!
Gasoline is an extremely flammable fuel.
Ir
spilled or ignited by aspark or other
ignition source, it can cause fire and
serious burn injury or property damage.
Use extreme caution when handling
gasoline or fuel mix.
Do not smoke or bring any fire
or
flame
near the fuel.
8

Fueling Instructions
Fuel your brushcutter
in
well-ventilated
areas, outdoors.
rntng
l
Gasoline vapor pressure may build up
inside the gas tank of atwo cycle engine
depending on the fuel used, the weather
condition, and the venting system of the
tank.
In
order to reduce
th
risk of
personal injury from escaping gas vapor
and fumes, remove the fuel filler cap on
your brushcutter carefully so as to allow
any pressure build-up
in
the tank
to
release slowly. Never remove fuel filler
cap while engine
is
running. Select bare
ground for fueling and move at least 10
feet
(3
m) from the fueling spot before
starting the engine. Wipe off any spilled
fuel before starting your brushcutter and
check for leakage.
.
arnmg!
Check for fuel leakage while refueling
and during operation.
If
fuel or oil-
leakage
is
found, do not start or
run
the
engine until leak is fixed and spilled fuel
has been wiped away.
If
this happens,
change your clothing immediately.
~
Warning!
J1~
'\
Unit vibrations can
.(
cause an Improperly
tightened fuel cap to
loosen or come off and
spill quantities of fuel.
In
order
to
reduce
risk of fuel spillage and fire, tighten fuel
cap by hand with as much force as
possible. The screw driver end of the
STIHL combination wrench
or
other
similar tool can be used as an aid
in
tightening slotted fuel caps.
Starting
Warning!
Your brushcutter
is
aoneperson machi-
ne. Once started
it
may fling foreign ob-
jekts for agreat distance.
To
reduce the risk of eye and other injury
insure that bystanders are at least 50
feet (15 m) away. Stop the engine and
cutting tool immediately
if
you are
approached. Start and operate your
brushcutter without assistance. For
specific starting instructions, see the
appropriate section of your manual.
Place the brushcutter on firm ground or
other solid surface
in
an open area.
Maintain agood balance and secure
footing.
To
reduce the risk of injury from loss of
control, be absolutely sure that the cut-
ting tool is clear of you and all other
obstructions and objects, including the
ground, because when the engine starts
at starting-throttle, engine speed will
be
fast enough for the clutch to engage and
turn the cutting tool.
'-
When you pull the starter grip, don't
wrap the starter rope around your hand.
Do not allow the grip
to
snap back, but
guide the starter rope to rewind properly.
Failure to follow this procedure may
result
in
injury to hand
or
fingers and
may damage the starter mechanism.
9

\
f\
'"
;:;
...
CD
8
o
I
~
Before cutting, inspect
the area for stones, glass,
pieces of metal, trash or
other solid objects. The
cutting attachment could throw objects
of this kind.
~.
To
reduce the
.risk of injury
from thrown
objects and
blade contact,
never operate abrushcutter without a
properly mounted deflector. Keep the
skirt on the deflectors adjusted properly
at all times (see chapter
on
mounting the
various cutting tools of your owner's
manual). Do not overreach. Keep proper
footing and balance at all times.
Working Conditions
Operate and start your brushcutter only
outdoors
in
aventilated area. Operate
the brushcutter under good visibility
and daylight conditions only. Work
carefully.
Always hold the brushcutter firmly with
both hands. Wrap your fingers tightly
around the handles, keeping the hand-
les cradled between your thumb and
forefinger. Keep your hands
in
this positi-
on, to have your brushcutter under con-
trol at all times. Make sure your brush-
cutter handles and grip are
in
good con-
dition and free of moisture, pitch, oil or
grease.
10
Warningl
Never attempt
to
operate any brush
cutter with one hand. Loss of control of
the brushcutter resulting
in
serious or
fatal injury may result.
To
reduce the risk of bodily injury
resulting from loss of control and contact
with the cutting tool, make sure your unif':-
is
equipped with the proper handle ana
harness for the type of cutting attach-
ment being used (see chart
in
chapter
on "Selecting the Cutting Tool").
Special care must be taken
in
slippery
conditions (wet ground, snow) and
in
difficult, over-grown terrain. Watch for
hidden obstacles such as tree stumps,
roots and ditches to avoid stumbling.
Waming'
This brushcutter
is
normally to be used
at ground level with the cutting attach-
ment parallel
to
the ground. Use of a
brushcutter above ground level or with
the cutting attachment perpendicular
to
the ground may increase the risk of
injury, since the cutting attachment
is
more fully exposed and the brushcutter
may be more difficult
to
control. Never
use your brushcutter as ahedge
trimmer.

Wmmg!
When using rigid blades, avoid cutting
close to fences, sides of buildings, tree
trunks, stones or other such objects
that could cause the brushcutter to kick
out or could cause damage to the
blade. STIHL recommends use of the
nylon line heads or Polycut head for
such jobs.
In
addition, be alert to an
increased possibility of ricochets
in
such situations.
Do not operate using the starting
throttle lock as you do not have control
of the engine speed. See section of your
owner's manual on the proper use of the
slide control.
If
the cutting tool or deflector becomes
clogged or stuck, always turn off the
engine and make sure the cutting tool
has stopped, before cleaning. Grass,
weeds, etc. should be cleaned off the
cutting tool at regular intervals.
Warning!
During CUlling, check the tightness and
the condition of the cutting tool at
regular intervals.
If
the behavior of the
tool changes, stop the engine immedi-
ately, and check the nut securing
the tool for tightness and the cutting tool
for cracks and damage.
Replace cracked, bent, warped, dam
aged or dull cutting tools immediately.
Such tools may shatter at high speed
and cause serious or fatal injury.
Warn'ng'
Aloose blade may cause the blade
to
vibrate, crack, break or come off the
brushcutter, which may result
in
serious or fatal injury. Make sure that
the blade is properly tightened. Use the
wrench supplied or one of sufficient
length to obtain the proper torque.
If
the
blade loosens after being properly
tightened, stop work immediately. The
retaining nut may be worn or damaged
and should be replaced. Never use
unauthorized parts to secure the blade.
If
the blade continues
to
loosen, see
your STIHL dealer. Never use a
brushculler with aloose blade.
Important adjustments
amlng'
To
reduce the risk of personal injury from
loss of control or contact with the run-
ning grass cutting blade, do not use a
grass cutting blade with incorrect idle
adjustment. At correct idle speed, the
grass cutting blade should not move.
For directions to adjust idle speed, see
the appropriate section of your owner's
manual.
If
you cannot set the correct idle speed,
have your STIHL dealer check your
brushcutter and make proper
adjustments or repairs.
Waming'
Never touch arotating cutting tool with
your hand or any part of your body. It
continues to rotate for ashort period
after the throttle trigger
is
released
(flywheel effect).

Operating instructions
(jG
wamln91
oImproper use of any
~
brush-cutter can
cause serious or
fatal personal injury. Read, understand
and follow all safety instructions
in
your
owner's manual before operating these
products.
To
reduce the risk of personal
injury
to
the operator from blade con-
tactand thrown objects, make sure your
unit
is
equipped with the proper de-
flector, handle and harness for the type
of cutting attachment being used (see
chart
in
chapter on "Selecting the Cut-
ting Tool"). Always wear proper eye pro-
tection.
12
11111.111.111.11,'111.11111
..
11.1
,11'11'111112;;1111111
1.111'11
rl
,1111111'111111.'
III
,11111,1111111111
,lh9';.I'IIIIII
II
1111
,I'
'11'11',111
i'1I"1,
'111,:11'11,11
1,'1,,111,8<.701111111
1<lllil1llll'
II
11,1111
1111I1hl.III,
1111
1II1I1,l,l:5?"
II
II
11.1
Ilttl,lljjl
11,11"r".
t.,
1111·,irl..rl~lldlll
Ifdl'
I
III
..
11,11111111111111,.
....
I11IUhh.
III
lilf
,
111'"'111
II
'"
.,.""
',I
,:1111111,'1,1'11:1
~
'I,I'"
·111!
..
llllllhl
,," I'll
1'11I
_-----
':11111,1111111
//
- -
~'III,II'IIIII
,/
IILlI,dll
111i111"IIIlII
il
1111
1111
lit
I'
1I11,III,llIllI
JI
II.
I.
Ii
II
I!LII
11111,111111",
111'111'1,1,1111
11,111',1.111\.1
1lllllilll'lto
11"1'1\'1
~
11'.
..
'II\I~
111111111.1,8
Do not cut any material other than
grass, brush and wood. The cutting
tools may be used only for the
operations described
in
your manual.
With the engine running, attach the
brushcutter to the spring hook of your
harness (see appropriate chapter of this
manual).
USING THE CUTTING TOOLS
For an illustration of the various cutting
tools and instructions on proper mount-
ing see the chapter on "mounting the
cutting tools"
in
your owner's manual.
Using the mowing heads
The STIHL Supercut, Autocut, Polymatic
and Polycut mowing heads produce a
clean and tidy finish.
They are
to
be used only on brushcut-
ters equipped with achopper blade
in
the deflector
in
order to keep the line at
the proper length (see "Parts and
Controls" chapter of this manual).
If
the lawn edges are planted with trees
or bordered
by
afence etc
..
it
is
best
to
use anylon line head.
It
achieves a
"softer" cut with less risk of damaging
tree bark than with the polymer blades.
However, the polymer bladed STIHL
"Polycut" produces abetter cut
if
there
are no plants along the edge of the lawn.
Sharpening
is
not necessary and worn
cutting blades are easily replaced.
Warnmg!
To
reduce the risk of serious injury.
never use wire or metal-reinforced line
"':--
or other material
in
place of the nylon
cutting lines. Pieces of wire could break
off and be thrown at high speed toward
the operator or bystanders.
STIHL "Supercut" mowing head
Fresh line
is
advanced automatically.
Frayed line
is
replaced by asimple
adjustment (see instruction sheet
supplied with mowing head).

f
STIHL
"Polymatic"
mowing
head
Frayed line
is
replaced by asimple
adjustment (see instruction sheet
supplied with mowing head).
STIHL
"Autocut"
mowing
head
Nylon cutting cord advances automat-
ically when tapped against the ground.
STIHL
"Polycut"
mowing
head
Important!
Three rectangular wear limit marks are
applied to the base (periphery)
of
the
Polycut.
To
reduce the risk of serious
injury from breakage of the head or
blades, the Polycut must not be used
I,I'~
11111'11111111111111111,
,I"l',ill Ii'!
'1'I2j;lIlIll"
,/
11'1
1
'1
1111111'111111:
IIIJ
,i1It1,,:1111111
1.
.IIi<i~,llllIlllllillr
1,1'
Ii,
'I'
1l1111111i.,:
'I'll
,'11'11
I
1""II~ldWo'lilllll
11111'11\111,
I
II.U,
1111
1"1.'
1,"11
,/lIoIIIIII.lJlY,q
11III
1~11:
hld.llill
".11'
"'ll
t
11
hlJ!dr
..
ll1~lfdlh
11111'
IU·
..•
Ii
l
11/111111
1'
....._
·1l11l'1!!~.
dlll.l!
I.
111,111'11'
".,." •""
'I
.
.11'1111,'''111111
['~'II""'"
"".111111111
"II'
'I
It
'I'tll
_
-----
.11111':1111111
/--
,!I'
",11111
I
,//
;,11111:'11111
.illllll.\llili
11,11111111111
ViI,II'i1II1,11
JIII,l,llllillil
1111,1111\
dol
11l
1
111l.l.i'lIl
II,
!Illillllll~1
1111111111\1'0
II'
11111l1~
\'111 '
,11\
~
/11.11111,118
when
it
has worn as far as one of these
marks.
It
is
important to follow the
maintance instructions supplied with
the head!
Using
the
grass
cutting
blade
All
kinds of grass and weeds can be
easily cut with the cutting blade. The
brushcutter
is
swept in an
arcsimiliar to ascythe.
Warmngl
To
reduce the risk
of
serious or fatal
injury never attempt to cut woody
materials.
The
4-tooth
grass cutting blade
is
intented
to
cut grass and weeds.
It
has 4 cutting knives with cutting edges
on
both sides, i.e. front and
rear.
The
8-tooth
grass cutting blade
is
recommended for cutting fern or reed.
'-
Both bjades have to be resharpened
when all cutting edges are dull.
13

Using the brush knife
When fitted
to
the brushcutter, the
brush knife
is
suitable for applications
ranging from cutting matted grass to
clearing weeds, wild growth and scrub.
To
cut wild growth and scrub, lower the
rotating brush knife down onto the
growth to achieve achopping effect.
Use the brushcutter like ascythe to cut
grass,
i.e.
sweep
it
to and fro
in
an
arc.
Warning!
When cutting woody materials, use the
left side of the blade to avoid "kickout"
(blade thrust) situations.
14
Warnlngl
Improper use of abrush knife may
cause
it
to crack, chip or shatter. Thrown
parts may seriously injure the operator
or bystanders.
To
reduce the risk of
personal injury
it
is essential to take the
following precautions:
Avoid contact with hard or solid foreign
objects such as stones, rocks or pieces
of metal.
Never cut wood or shrubs with astem
diameter of more than 2cm (3/4") -
use acircular saw blade for such work.
Inspect the brush knife at regular short
intervals for signs of damage. Do not
continue working with adamaged brush
knife. Resharpen the brush knife re-
gUlarly (when
it
has dulled noticeably).
Warning!
When cutting young saplings or other
woody materials up
to
2cm (3/4")
in
diameter, use left side of the blade
to
avoid "kickout" situations (see
appropriate section
in
this manual). Do
not attempt to cut woody material with a
larger diameter, since the blade may
catch or jerk the brushcutter forward.
This may cause damage
to
the blade or
brushcutter or loss of control of the
brushcutter, resulting
in
personal injury

To
redUce the risk of serious injury
to the operator or bystanders by a
kickout, never use acircular saw blade
on abrushcutter with aloop handle.
by experienced operators with speciali-
zed training
in
use and control of the
brushcutter.
amlngl
The risk of kickout is highest when
cutting in the darker shaded area.
To
reduce the risk of kickout and resulting
injury, do not use this area of the
circular saw blade for cutting trees or
shrubs. Special techniques using the
lighter shaded areas of the blade to cut
shrubs and trees should only
be
used
Before starting the cut, accelerate the
engine up
to
full throttle. Perform cut
with uniform pressure. STIHL recom-
mends that the circular saw blade be
applied to the right of the tree, using
the non-shaded area of the blade.
Warning'
In
order
to
reduce the risk of injury from
thrown objects
or
from operator
contact with the cutting tool, be sure
to
remount the standard deflector for all
other
u·ses.
N
o
<{
en
o
o
o
positioned against the tree during the
cutting process. Inexperienced users
should place the left side of the stop
against the tree trunk before beginning
to cut. This act will keep the brush-
cutter against the tree during the
cutting operation and will reduce the
risk of loss of control and possible
kickout (described in the following
section).
<D
o
<{
en
o
o
o
Using the circular saw blade
Circular saw blades are suitable for
thinning brush and cutting small trees up
to adiameter of 7cm
(23/4
in). Do not
attempt to cut trees with larger
diameters, since the blade may catch or
jerk the brushcutter forward. This may
cause damage to the blade or loss of
control of the brushcutter which may
result
in
serious injury.
When the brushcutter with circular saw
blade is used
to
cut down small trees,
STIHL recommends that the standard
deflector be removed and replaced by
the special "stop" (see chapter "circular
saw blade" for mounting instructions).
This stop helps to keep the brushcutter
15

N
;;
~
§
Risk of "kickout" (blade thrust)
with all rigid cutting blades
Warningl
Kickout (blade thrust) is the sudden and
uncontrolled motion towards the opera-
tor's right or rear that can occur when
the shaded area of the rotating blade
comes
in
cont<;:lct
with asolid object like
atree, rock, bush or wall. The rapid co-
unterclockwise rotation of the blade may
be stopped or slowed, and the
cutting attachment may be thrown
in
an
area
to
the right or to the rear.
16
This kickout (blade thrust) may cause
loss of control of the brushcutter and
may result
in
serious or fatal injury to the
operator or bystanders.
To
reduce the
risk, extreme caution should be used
when cutting with the shaded area of
nay rigid blade and never use arigid
blade on abrushcutter with aloop
handle.
MAINTENANCE, REPAIR AND
STORING
Use only identical STIHL replacement
parts for maintenance and repair.
Use of parts manufactured by others
may cause serious or fatal injury.
Follow the maintenance and repair
instructions
in
the appropriate section of
your owner's manual. Please refer
to
the
maintenance chart at the last pages of
this manual.
arnmgl
Always stop the engine and make sure
that the cutting tool
is
stopped before do-
ing any maintenance or repair work or
cleaning the brushcutter. Do not attempt
any maintenance or repair work not
described
in
your owner's manual. Have
such work performed at yourSTIHL
service shop only.
Never repair damaged cutting attach-
ments by welding, straightening or
modifying the shape. This may cause
parts of the cutting tool
to
come off and
result
in
serious
or
fatal injuries.

Check condition of culling tool at regular
short intervals.
If
behavior of tool
changes, check it immediately for
tightness or any signs of cracks
in
par-
ticular. Replace damaged or dull cUlling
tools immediately, even if they have only
superficial cracks.
If
the blade loosens
after being properly tightened, the
retaining nut may be worn or damaged
and should be replaced.
If
the blade
continues
to
loosen, see your STIHL
dealer. Do not attach any blade to aunit
without proper installation of all required
parts. Never use unauthorized parts to
secure the blade. Failure to use the
proper parts may cause the blade
to
fly
off and seriously injure the operator or
bystanders.
Check fuel filler cap for leaks at regular
intervals. Use the specified spark plug
and make sure
it
and the ignition lead
are always
in
good condition.
Warning!
Do
not operate your brushcutter if the
muffler
is
damaged, missing or mode-
fied. An improperly maintained muffler
will increase the risk of fire and hearing
loss. Never touch ahot muffler or burn
will
result.
If
your muffler was equipped
with aspark-arresting screen
to
reduce
the risk of fire (e.g.
in
the USA, Canada
and Australia), never operate your hedge
trimmer if the screen
is
missing or dama-
ged. Remember that the risk of forest
fi-
res is greater
in
hot or dry weather.
Warning!
In
order
to
reduce the risk of fire, do not
modify or remove any part of the muffler
or spark arrestor.
Keep cutting tool sharp. Tighten all nuts,
bolts and screws except the carburetor
adjustment screws after each use.
Keep spark plug and wire connection
tight and clean. The spark plug electrode
gap should be checked with afeeler
gauge at least every 50 operating hours
and reset
if
necessary. Fit anew spark
plug
if
the electrodes are badly pilled.
Store brushcutter
in
adry, high or locked
location place and out of reach of
children.
Before storing for longer than afew
days, always empty the fuel tank.
Warnlngl
Keep hands and feet away from cUlling
tool.
17

Selecting
the
Cutting
Tool
Cutting
tools:
1STIHL Supercut
20-1
mowing head
(FS
74
only)
2STIHL Supercut 20-2 mowing head
3STIHL Autocut 20-2 mowing head
(FS
74
only)
4STIHL Autocut 24-2 mowing head
5STIHL Autocut 25-2 mowing head
6STIHL Autocut 30-2 mowing head
7STIHL Polymatic 30-2 mowing head
8STIHL Polycut 20-3 mowing head
9STIHL Fixed Line head
10 Grass Cutting blade 230-4
11
Grass Cutting blade 230-8
12 Brush knife 250
13 Circular saw blade 200
(scratcher tooth)
14 Circular saw blade 200
(chisel tooth)
Deflectors:
15 Deflector for mowing heads
16 Deflector for
all
cutting tools
with
17 Skirt and line limiting blade
18 Deflector for
all
cutting tools
without
skirt
and
line limiting blade
19 Stop for circular saw blades
Handles:
20 Loop handle
21
Loop handle
with
22 Standoff lever
23 Bike handle
18
Carrying straps:
24
Shoulder strap recommended
25 Shoulder strap
26 Full harness recommended
27 Full harness
Afully equipped brushcutter comprises,
among other items:
-Cutting tool
-Deflector
-Handle
-Carrying strap
Select the
correct
combination
from
the table
according
to
the
cutting
tool
you
intend
to
use:
For safety reasons, you may only combi-
ne
the cutting tool, deflector, handle and
carrying strap versions shown when you
read the table
horizontally
from left
to
right
Other
combinations,
e.g. reading the
table diagonally, are
not
permitted
since
there is
otherwise
a
risk
of
':-
serious
injury.
Warning'
STIHL brushcutters with aloop handle
without
standoff
lever may
be
used
only with
the
above-mentioned mowing
heads with nylon line or plastic blades.
Other plastic or metal cutting tools may
only
be
used
on
brushcutters with abike
handle, "J"-handle or loop handle
with
standoff
lever
in
order
to
minimize the
risk of personal injury through contact
with the cutting tool.

Cutting tools Deflectors Handles Carrying straps
20
20~
~---'
15
3
4~
21
~
~
-
5622 24
16
7823 V
~l
t-J
(e'
'C(
~
.....
-
925
10
11
21
~
)
-:1
--
\18
~
.~
--..../J
22
12 23 V
AI
...."
25 26
19
~
13 14
~
23 V
0
(:)
=27
19
This manual suits for next models
1
Table of contents
Other Stihl Brush Cutter manuals

Stihl
Stihl FR 460 TC M Series User manual

Stihl
Stihl FS 75 User manual

Stihl
Stihl FR 230 User manual

Stihl
Stihl HS 81 User manual

Stihl
Stihl FSA 130 R User manual

Stihl
Stihl FS 300 User manual

Stihl
Stihl FS 510 C User manual

Stihl
Stihl FS 120 User manual

Stihl
Stihl FS 410 C-M User manual

Stihl
Stihl FS 510 C User manual
Popular Brush Cutter manuals by other brands

Elem Garden Technic
Elem Garden Technic DCBT33D-2S15 Original instructions

Poulan Pro
Poulan Pro PP28RJ instruction manual

Saurium
Saurium YR-MT520 manual

Tanaka
Tanaka TCG 40EAS Handling instructions

Qualcast
Qualcast QG-BC 30 quick start guide

Gartenteile
Gartenteile EFB 4010 Set Translation of the original instructions for use