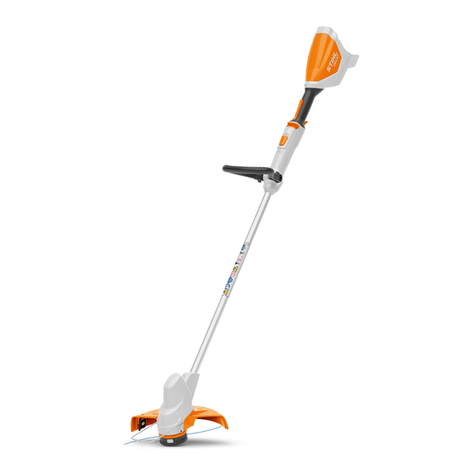
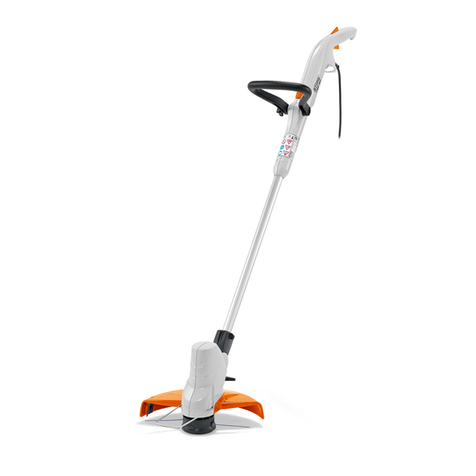
Stihl FSE 52 User manual

STIHL FSE 52 Instruction Manual


Translation of Original Instruction
Manual
Printed on chlorine-free paper
Printing inks contain vegetable oils, paper can be recycled.
© ANDREAS STIHL AG & Co. KG 2021
0458-777-0121-C. VA0.G21.
0000008818_004_GB
0458-777-0121-C
English
1
This instruction manual is protected by copyright. All rights reserved, especially the rights to reproduce, translate and process
with electronic systems.
Contents
1 Introduction
. . . . . . . . . . . . . . . . . . . . . . . . . . . . . . . . . . . . . . . . .
2
2 Guide to Using this Manual
. . . . . . . . . . . . . . . . . . . . . . . . . .
2
2.1 Applicable Documentation
. . . . . . . . . . . . . . . . . . . . . . . . . . .
2
2.2 Symbols used with warnings in the text
. . . . . . . . . . . . . .
3
2.3 Symbols in Text
. . . . . . . . . . . . . . . . . . . . . . . . . . . . . . . . . . . . .
3
3 Overview
. . . . . . . . . . . . . . . . . . . . . . . . . . . . . . . . . . . . . . . . . . . .
3
3.1 Trimmer
. . . . . . . . . . . . . . . . . . . . . . . . . . . . . . . . . . . . . . . . . . . . .
3
3.2 Deflector and Cutting Attachments
. . . . . . . . . . . . . . . . . .
4
3.3 Symbols
. . . . . . . . . . . . . . . . . . . . . . . . . . . . . . . . . . . . . . . . . . . .
4
4 Safety Precautions
. . . . . . . . . . . . . . . . . . . . . . . . . . . . . . . . . .
5
4.1 Warning Signs
. . . . . . . . . . . . . . . . . . . . . . . . . . . . . . . . . . . . . .
5
4.2 Intended Use
. . . . . . . . . . . . . . . . . . . . . . . . . . . . . . . . . . . . . . . .
5
4.3 The Operator
. . . . . . . . . . . . . . . . . . . . . . . . . . . . . . . . . . . . . . . .
5
4.4 Clothing and equipment
. . . . . . . . . . . . . . . . . . . . . . . . . . . . .
6
4.5 Trimmer
. . . . . . . . . . . . . . . . . . . . . . . . . . . . . . . . . . . . . . . . . . . . .
6
4.6 Safe Condition
. . . . . . . . . . . . . . . . . . . . . . . . . . . . . . . . . . . . . .
7
4.7 Working
. . . . . . . . . . . . . . . . . . . . . . . . . . . . . . . . . . . . . . . . . . . . .
8
4.8 Connecting to Power Supply
. . . . . . . . . . . . . . . . . . . . . . . .
9
4.9 Transporting
. . . . . . . . . . . . . . . . . . . . . . . . . . . . . . . . . . . . . . .
10
4.10 Storing
. . . . . . . . . . . . . . . . . . . . . . . . . . . . . . . . . . . . . . . . . . . . .
10
4.11 Cleaning, Maintenance and Repair
. . . . . . . . . . . . . . . . .
11
5 Preparing Trimmer for Operation
. . . . . . . . . . . . . . . . . . .
11
5.1 Preparing Trimmer for Operation
. . . . . . . . . . . . . . . . . . .
11
6 Assembling the Trimmer
. . . . . . . . . . . . . . . . . . . . . . . . . . .
11
6.1 Mounting the Deflector
. . . . . . . . . . . . . . . . . . . . . . . . . . . . .
11
6.2 Mounting and Removing the Mowing Head
. . . . . . . . .
12
6.3 Mounting the Loop Handle
. . . . . . . . . . . . . . . . . . . . . . . . .
13
7 Adjusting Trimmer for User
. . . . . . . . . . . . . . . . . . . . . . . . .
13
7.1 Adjusting Length of Shaft
. . . . . . . . . . . . . . . . . . . . . . . . . . .
13
7.2 Adjusting Angle of Control Handle
. . . . . . . . . . . . . . . . . .
14
7.3 Adjusting the Loop Handle
. . . . . . . . . . . . . . . . . . . . . . . . .
14
8 Connecting to Power Supply
. . . . . . . . . . . . . . . . . . . . . . .
14
8.1 Connecting Trimmer to Power Supply
. . . . . . . . . . . . . .
14
9 Switching the Trimmer On/Off
. . . . . . . . . . . . . . . . . . . . . .
15
9.1 Switching On
. . . . . . . . . . . . . . . . . . . . . . . . . . . . . . . . . . . . . . .
15
9.2 Switching Off
. . . . . . . . . . . . . . . . . . . . . . . . . . . . . . . . . . . . . . .
15
10 Testing the Trimmer
. . . . . . . . . . . . . . . . . . . . . . . . . . . . . . . .
15
10.1 Checking the controls
. . . . . . . . . . . . . . . . . . . . . . . . . . . . . .
15
11 Operating the Trimmer
. . . . . . . . . . . . . . . . . . . . . . . . . . . . .
16
11.1 Holding and Controlling the Trimmer
. . . . . . . . . . . . . . .
16
11.2 Mowing
. . . . . . . . . . . . . . . . . . . . . . . . . . . . . . . . . . . . . . . . . . . .
16
11.3 Adjusting Nylon Line
. . . . . . . . . . . . . . . . . . . . . . . . . . . . . . .
16
12 After Finishing Work
. . . . . . . . . . . . . . . . . . . . . . . . . . . . . . .
17
12.1 After Finishing Work
. . . . . . . . . . . . . . . . . . . . . . . . . . . . . . .
17
13 Transporting
. . . . . . . . . . . . . . . . . . . . . . . . . . . . . . . . . . . . . . .
17
13.1 Transporting the brushcutter
. . . . . . . . . . . . . . . . . . . . . . .
17
14 Storing
. . . . . . . . . . . . . . . . . . . . . . . . . . . . . . . . . . . . . . . . . . . . .
17
14.1 Storing the Trimmer
. . . . . . . . . . . . . . . . . . . . . . . . . . . . . . . .
17
15 Cleaning
. . . . . . . . . . . . . . . . . . . . . . . . . . . . . . . . . . . . . . . . . . .
17
15.1 Cleaning the Brushcutter
. . . . . . . . . . . . . . . . . . . . . . . . . . .
17
15.2 Cleaning the Deflector and Cutting Attachment
. . . . .
17
16 Maintenance
. . . . . . . . . . . . . . . . . . . . . . . . . . . . . . . . . . . . . . .
17
16.1 Maintenance Intervals
. . . . . . . . . . . . . . . . . . . . . . . . . . . . .
17
17 Repairing
. . . . . . . . . . . . . . . . . . . . . . . . . . . . . . . . . . . . . . . . . .
17
17.1 Repairing the Trimmer and Cutting Attachment
. . . . .
17
18 Troubleshooting
. . . . . . . . . . . . . . . . . . . . . . . . . . . . . . . . . . . .
18
18.1 Troubleshooting Trimmer
. . . . . . . . . . . . . . . . . . . . . . . . . .
18
19 Specifications
. . . . . . . . . . . . . . . . . . . . . . . . . . . . . . . . . . . . . .
19
19.1 STIHL FSE 52 Trimmer
. . . . . . . . . . . . . . . . . . . . . . . . . . . .
19
19.2 Extension Cords
. . . . . . . . . . . . . . . . . . . . . . . . . . . . . . . . . . .
19
19.3 Noise and Vibration Data
. . . . . . . . . . . . . . . . . . . . . . . . . .
19
19.4 REACH
. . . . . . . . . . . . . . . . . . . . . . . . . . . . . . . . . . . . . . . . . . . .
19
20 Combinations of Cutting Attachments and
Deflectors
. . . . . . . . . . . . . . . . . . . . . . . . . . . . . . . . . . . . . . . . . .
20
20.1 STIHL FSE 52 Trimmer
. . . . . . . . . . . . . . . . . . . . . . . . . . . .
20

0458-777-0121-C
2
English
1 Introduction
Dear Customer,
Thank you for choosing STIHL. We develop and
manufacture our quality products to meet our customers’
requirements. The products are designed for reliability even
under extreme conditions.
STIHL also stands for premium service quality. Our dealers
guarantee competent advice and instruction as well as
comprehensive service support.
STIHL expressly commit themselves to a sustainable and
responsible handling of natural resources. This user manual
is intended to help you use your STIHL product safely and in
an environmentally friendly manner over a long service life.
We thank you for your confidence in us and hope you will
enjoy working with your STIHL product.
Dr. Nikolas Stihl
IMPORTANT! READ BEFORE USING AND KEEP IN A
SAFE PLACE FOR REFERENCE.
2.1 Applicable Documentation
Local safety regulations apply.
► Read, understand and save the following documents in
addition to this instruction manual:
– Instruction manual and packaging of the cutting
attachment you are using
21 Spare Parts and Accessories
. . . . . . . . . . . . . . . . . . . . . . .
20
21.1 Spare parts and accessories
. . . . . . . . . . . . . . . . . . . . . . .
20
22 Disposal
. . . . . . . . . . . . . . . . . . . . . . . . . . . . . . . . . . . . . . . . . . .
20
22.1 Disposing of Brushcutter
. . . . . . . . . . . . . . . . . . . . . . . . . . .
20
23 EC Declaration of Conformity
. . . . . . . . . . . . . . . . . . . . . . .
20
23.1 STIHL FSE 52 Brushcutter
. . . . . . . . . . . . . . . . . . . . . . . . .
20
24 UKCA Declaration of Conformity
. . . . . . . . . . . . . . . . . . .
21
24.1 STIHL FSE 52 Brushcutter
. . . . . . . . . . . . . . . . . . . . . . . . .
21
1 Introduction
2 Guide to Using this Manual

0458-777-0121-C 3
English
3 Overview
2.2 Symbols used with warnings in the text
WARNING
This symbol indicates dangers that can cause serious
injuries or death.
► The measures indicated can avoid serious injuries or
death.
NOTICE
This symbol indicates dangers that can cause damage to
property.
► The measures indicated can avoid damage to property.
2.3 Symbols in Text
3.1 Trimmer
1 Trigger
The trigger switches the motor on and off.
2 Appliance Plug
Connects connecting cable to extension cable.
3 Control Handle
For operating, holding and controlling the trimmer.
4 Connecting Cable
Connects trimmer to appliance plug.
This symbol refers to a chapter in this instruction
manual.
3Overview
1
3
5
7
4
6
2
8
9
10
0000-GXX-9910-A0

0458-777-0121-C
4
English
3 Overview
5 Trigger Lockout
Unlocks the trigger.
6 Star Knob Nut
Secures loop handle to shaft.
7 Lock Button
Locks the shaft at the required length.
8 Loop Handle
For holding and controlling the trimmer.
9Shaft
Connects all components.
10 Bump Guard
Helps protect objects from contact with the cutting
attachment.
# Rating Label with Serial Number
3.2 Deflector and Cutting Attachments
Trimmer with fanwheel
1 Line Limiting Blade
Trims nylon lines to correct length.
2 Mowing Head
Holds the nylon lines.
3 Fanwheel
Cools the electric motor.
4 Deflector
Protects user from flying debris and contact with the
cutting attachment.
Trimmer without fanwheel
1 Deflector
Protects user from flying debris and contact with the
cutting attachment.
2 Line Limiting Blade
Trims nylon lines to correct length.
3 Mowing Head
Accommodates the nylon lines.
4 Mowing Line
The mowing lines cut grass.
3.3 Symbols
Meanings of symbols that may be on the trimmer:
3
1
4
2
0000-GXX-B518-A0
This symbols indicates that the length of the shaft is
adjustable.
This symbols indicates that the control handle can be
rotated 90°.
1
2
3
4
0000-GXX-1483-A0

0458-777-0121-C 5
English
4 Safety Precautions
4.1 Warning Signs
4.1.1 Warning Symbols
Meanings of warning signs on the trimmer:
4.2 Intended Use
The STIHL FSE 52 trimmer is designed for mowing grass.
The trimmer must not be used in the rain.
WARNING
■ Using the trimmer for purposes for which it is not designed
may result in serious or fatal injuries and damage to
property.
► Use the trimmer with an extension cable.
► Use the trimmer as described in this instruction manual.
4.3 The Operator
WARNING
■ Users who have had no instruction cannot recognize or
assess the risks involved in using the trimmer. The user or
other persons may sustain serious or fatal injuries.
► If the trimmer is passed on to another user: Always give
them the instruction manual.
► Make sure the user meets the following requirements:
– The user must be rested.
– The user must be in good physical
condition and mental health to operate
and work with the trimmer. If the user’s
physical, sensory or mental ability is
Guaranteed sound power level according to
directive 2000/14/EC in dB(A) in order to make
sound emissions of products comparable.
Do not dispose of the product with your household
waste.
4 Safety Precautions
Observe safety notices and take the necessary
precautions.
Read, understand and save the instruction
manual.
Wear safety glasses.
If the connecting cable or extension cable is
damaged: Disconnect the plug from the wall
outlet.
Wait until the cutting attachment comes to a
complete stop.
Protect the trimmer from rain and dampness.
L
W
A
Maintain safe distance.
► Read, understand and save the instruction
manual.
15m (50ft)

0458-777-0121-C
6
English
4 Safety Precautions
restricted, he or she may work only
under the supervision of or as instructed
by a responsible person.
– The user is able to recognize and assess the risks
involved in using the trimmer.
– The user must be of legal age or is being
trained in a trade under supervision in
accordance with national rules and
regulations.
– The user has received instruction from a
STIHL servicing dealer or other
experienced user before working with
the trimmer for the first time.
– The user must not be under the influence of alcohol,
medication or drugs.
► If you have any queries: Contact a STIHL servicing
dealer for assistance.
4.4 Clothing and equipment
WARNING
■ Objects can be thrown at high speed during operation.
This may result in injury to the user.
► Wear face protection.
► Wear long trousers made from resistant material.
■ Dust can be whipped up during operation. Whipped up
dust can damage the respiratory passages and cause
allergic reactions.
► If dust is generated: Wear a dust respirator mask.
■ Inappropriate clothing can snag on wood, brush or the
brushcutter. Users not wearing suitable clothing are at risk
of serious injury.
► Wear close-fitting clothing.
► Remove scarves and jewelry.
■ The user may come into contact with the rotating cutting
attachment during operation. This may result in serious
injury to the user.
► Wear robust footwear.
► Wear long trousers made from resistant material.
■ There is a risk of the user coming into contact with the
cutting attachment or the line limiting blade during
cleaning and maintenance work and when the cutting
attachment is mounted or removed. This may result in
injury to the user.
► Wear work gloves made from resistant material.
■ Wearing unsuitable footwear may cause the user to slip.
This may result in injury to the user.
► Wear sturdy, closed-toed footwear with high-grip soles.
4.5 Trimmer
WARNING
■ Bystanders, children and animals are not aware of the
dangers of the trimmer or flying debris. Bystanders,
children and animals may be seriously injured and
damage to property may occur.
► Maintain a clearance of 15 meters from objects.
► Do not leave the trimmer unattended.
► Make sure that children cannot play with the trimmer.
► Wear close-fitting safety glasses. Suitable
safety glasses are tested in accordance with
EN 166 or national regulations and
available commercially with the
corresponding marking.
► Do not allow bystanders, children
or animals within 15 meters of the
work area.
15m (50ft)

0458-777-0121-C 7
English
4 Safety Precautions
■ The trimmer is not waterproof. Working in the rain or a
damp location may result in an electric shock. This can
result in injuries to the user and may damage the trimmer.
■ Electrical components of the trimmer can produce sparks.
Sparks may cause a fire or an explosion in an easily
combustible or explosive environment. This can result in
serious or fatal injuries and damage to property.
► Do not work in an easily combustible or explosive
environment.
■ Persons may trip over the extension cable. This can result
in injuries and may damage the trimmer.
► Lay the extension cable flat on the ground and make
sure it is easily visible.
4.6 Safe Condition
4.6.1 Brushcutter
The brushcutter is in a safe condition if the following points
are observed:
– The brushcutter is not damaged.
– The extension cable and its plug are not damaged.
– The brushcutter is clean and dry.
– The controls function properly and have not been
modified.
– A combination of cutting attachment and deflector
recommended in this user manual is mounted.
– The cutting attachment and deflector are properly
mounted.
– Genuine STIHL accessories for this brushcutter are fitted.
– The accessories are correctly attached.
WARNING
■ If not in safe condition, components may no longer
operate correctly and safety devices may be disabled.
This may result in serous or fatal injury to people.
► Work only with an undamaged brushcutter.
► Work only with an undamaged extension cable and an
undamaged plug.
► If the brushcutter is dirty or wet: Clean the brushcutter
and allow it to dry.
► Never attempt to modify your brushcutter. Exception:
Mounting one of the combinations of cutting attachment
and deflector recommended in this user manual.
► If the controls do not function properly: Do not use your
brushcutter.
► Never mount metal cutting attachments.
► Fit genuine STIHL accessories for this brushcutter.
► Mount the cutting attachment and deflector as
described in this user manual.
► Attach accessories as described in this User Manual or
in the User Manual for the accessories.
► Never insert objects in the openings of the brushcutter.
► Replace worn or damaged labels.
► If you have any doubts, be sure to consult a STIHL
dealer.
4.6.2 Deflector
The deflector is in a safe condition if the following points are
observed:
– The deflector is not damaged.
– The line limiter blade is correctly installed.
► Do not work in the rain or a damp location.

0458-777-0121-C
8
English
4 Safety Precautions
WARNING
■ If the product does not comply with safety requirements,
components will no longer function properly or safety
devices may be rendered inoperative. This can result in
serious injuries.
► Work only with an undamaged deflector.
► Work with a correctly installed line limiter blade.
► If you have any queries: Contact your STIHL servicing
dealer.
4.6.3 Mowing Head
The mowing head is in a safe condition if the following points
are observed:
– The mowing head is not damaged.
– The mowing head is not jammed.
– The mowing lines are properly installed.
– The wear limits are not exceeded.
WARNING
■ If they are in an unsafe condition, parts of the mowing
head or mowing lines may come off and be ejected at high
speed. They may cause serious injury to persons.
► Work only with an undamaged mowing head.
► Never use metal objects in place of the nylon mowing
lines.
► Observe and remain inside the wear limits.
► If you have any doubts, be sure to consult a STIHL
dealer.
4.7 Working
WARNING
■ In certain situations, the user may no longer be able to
concentrate on their work. This may result in the user
stumbling, falling and suffering serious injury.
► Work carefully and in a considered manner.
► If light and visibility are poor: Do not use your trimmer.
► Operate the trimmer alone.
► Keep the cutting attachment close to the ground.
► Watch out for obstacles.
► Work standing on the ground and keep your balance.
► If you feel tired, take a break.
■ The rotating cutting attachment can cut the user. This may
result in serious injury to the user.
► Do not touch the rotating cutting attachment.
► If the cutting attachment is blocked by an object: Switch
off the brushcutter and remove the extension cable
connection from the brushcutter plug. Only then should
you remove the object.
■ If the behavior of the trimmer changes during operation or
feels unusual, it may no longer be in a safe condition. This
can result in serious injury to people and damage to
property.
► Stop work, remove extension cable connection from
brushcutter plug and contact your STIHL servicing
dealer for assistance.
■ Vibrations may occur during brushcutter operation.
► Wear gloves.
► Take breaks.
► If signs of a circulatory disturbance occur: Consult a
doctor.

0458-777-0121-C 9
English
4 Safety Precautions
■ If the cutting attachment makes contact with a foreign
object during operation, the object or parts of it may be
thrown at high speed. Persons may be injured or property
damaged.
► Remove foreign objects from the working area.
■ If the rotating cutting attachment makes contact with a
hard object, sparks may occur and the cutting attachment
may be damaged. Sparks can cause fires in a flammable
environment. Persons may be seriously or fatally injured
and property may be damaged.
► Do not use in a flammable environment.
► Make sure the cutting attachment is in a safe condition.
4.8 Connecting to Power Supply
Contact with live components may occur for the following
reasons:
– The connecting cable or extension cable is damaged.
– Connecting cable plug or extension cable is damaged.
– Wall outlet is not properly installed.
DANGER
■ Contact with live components can result in an electric
shock. This can result in serious or fatal injuries.
► Check that the connecting cable, extension cable and
their plugs are not damaged.
► Never touch the connecting cable, extension cable or
their plugs with wet hands.
► Insert the plug of the connecting cable or extension
cable in a properly installed fused wall outlet with
ground contact.
► Connect the trimmer via a ground fault circuit
interrupter (30 mA, 30 ms).
■ A damaged or unsuitable extension cable can cause an
electric shock. This can result in serious or fatal injuries.
► Use an extension cable with the correct wire gauge,
@19.2.
► Use a splash-proof extension cable approved for
outdoor use.
► Use an extension cable with the same specifications as
the trimmer’s connecting cable, @19.2.
Note that the cutting attachment continues to
rotate for a short period after you release the
trigger. There is a risk of serious injury to
persons.
► Wait until the cutting attachment comes to a
complete stop.
If the connecting cable or extension cable is
damaged:
► Do not touch damaged areas.
► Disconnect the plug from the wall outlet.

0458-777-0121-C
10
English
4 Safety Precautions
WARNING
■ Overvoltage can occur in the trimmer if the line voltage
and/or frequency are incorrect during operation. This can
damage the trimmer.
► Make sure the line voltage and frequency agree with the
data on the trimmer’s rating label.
■ If several electric power tools are connected to a multiple
socket, electrical components may be overloaded during
operation. The components may overheat and cause a
fire. This can result in serious or fatal injuries and damage
to property.
► Connect the trimmer to a separate wall outlet.
► Do not connect the trimmer to a multiple socket.
■ A carelessly laid connecting or extension cable can be
damaged and cause others to trip or fall. This can result in
injuries and may damage the connecting cable or
extension cable.
► Position the connecting and extension cables so that
there is no risk of contact with the cutting attachment.
► Position and mark connecting cable and extension
cable so they do not represent a trip hazard.
► Position the connecting and extension cables so that
they are not under tension or entangled.
► Position the connecting and extension cables so that
they cannot be damaged, kinked, pinched or chafed.
► Protect the connecting cable and extension cable from
heat, oil and chemicals.
► Lay the connecting and extension cables on a dry
surface.
■ The extension cable becomes hot during operation. If the
heat cannot dissipate, it may cause a fire.
► If you use a cable drum: Unwind the extension cable to
its full length.
4.9 Transporting
4.9.1 Trimmer
WARNING
■ The trimmer may turn over or shift during transport. This
may result in personal injuries and damage to property.
► Disconnect extension cable’s coupling from trimmer’s
plug.
► Secure the trimmer with lashing straps, belts or a net to
prevent it turning over and moving.
4.10 Storing
4.10.1 Trimmer
WARNING
■ Children are not aware of and cannot assess the dangers
of a trimmer and can be seriously injured.
► Disconnect extension cable’s coupling from trimmer’s
plug.
► Store the trimmer out of the reach of children.
■ Dampness can corrode the electrical contacts on the
trimmer and metal components. This can damage the
trimmer.
► Disconnect extension cable’s coupling from trimmer’s
plug.
► Store the trimmer in a clean and dry condition.

0458-777-0121-C 11
English
5 Preparing Trimmer for Operation
4.11 Cleaning, Maintenance and Repair
WARNING
■ The brushcutter may be switched on unintentionally if it
remains connected to the power supply during cleaning,
maintenance or repair operations. This can result in
serious injury to people and damage to property.
► Disconnect extension cable connection from
brushcutter plug.
■ Aggressive cleaning agents, water jets or pointed objects
can damage the trimmer, deflector and the cutting
attachment. If the brushcutter, deflector and cutting
attachment are not cleaned correctly, components may no
longer function properly or safety devices may be
rendered inoperative. There is a risk of serious injury to
persons.
► Clean the brushcutter, deflector and cutting attachment
as described in this instruction manual.
■ If the brushcutter, deflector and cutting attachment are not
serviced or repaired correctly, components may no longer
function properly or safety devices may be rendered
inoperative. This may result in serious or fatal injury to
people.
► Do not attempt to service or repair the brushcutter,
deflector, cutting attachment or battery.
► If the brushcutter, deflector, or cutting attachment
require servicing or repairs: Contact your STIHL
servicing dealer for assistance.
5.1 Preparing Trimmer for Operation
Perform the following steps before starting work:
► Make sure the following components are in a safe
condition:
– Trimmer and connecting cable, @4.6.1.
– Deflector, @4.6.2.
– Mowing head, @4.6.3.
► Clean the trimmer, @15.1.
► Mount the deflector, @6.1.
► Fit spool when using trimmer without fanwheel, @6.2.
► Fit spool when using trimmer with fanwheel, @6.2
► Mount the loop handle, @6.3.
► Adjust length of shaft, @7.1.
► Adjust the loop handle, @7.3.
► Connect trimmer’s plug to an extension cable and the
extension cable’s plug to a convenient wall outlet.
► Check the controls, @10.1.
► If you cannot carry out the above steps: Do not use your
trimmer and contact a STIHL dealer for assistance.
6.1 Mounting the Deflector
► Switch off the trimmer and disconnect extension cable’s
coupling from trimmer’s plug.
5 Preparing Trimmer for Operation
6 Assembling the Trimmer

0458-777-0121-C
12
English
6 Assembling the Trimmer
The line limiting blade (1) is already installed in the deflector
(2) and must not be removed.
► Push the deflector (2) into the guides on the housing as far
as stop.
The deflector (2) is tight against the housing.
► Insert and tighten down the screws (3) firmly.
The deflector (2) must not be removed again.
6.2 Mounting and Removing the Mowing Head
6.2.1 Mounting the Mowing Head
Trimmer with fanwheel
► Switch off the trimmer and disconnect extension cable’s
coupling from trimmer’s plug.
► Fit the fanwheel (2) on the shaft (3) with fan blades facing
down.
If the fanwheel is not fitted, the motor will not be cooled
properly and it will not be possible to remove the mowing
head.
► Hold fanwheel (2) steady with one hand.
► Fit the mowing head (1) on the shaft (3) and screw it on
counterclockwise.
Trimmer without fanwheel
The trimmer comes with the AutoCut 2-2 mowing head
already mounted. The spool can be fitted by the user.
► Switch off the trimmer and disconnect extension cable’s
coupling from trimmer’s plug.
► Place spool in a container filled with water for 12 to 24
hours before installing.
This makes the nylon mowing lines supple.
► Thread the ends of the nylon lines (4) from the spool (2)
through the openings (1) in the mowing head (5).
► Insert the spool (2) in the mowing head (5).
► Fit the cover (7) on the mowing head (5) so that its tabs
(3) line up with the openings (6) in the mowing head (4).
► Push the cover (7) onto the mowing head (5) as far as
stop.
The tabs (3) engage audibly.
1
3
2 2
0000-GXX-1486-A1
11
2
32
0000-GXX-9897-A0
5
7
6
2
1
3
4
0000-GXX-1485-A1

0458-777-0121-C 13
English
7 Adjusting Trimmer for User
6.2.2 Removing the Mowing Head
Trimmer with fanwheel
► Switch off the trimmer and disconnect extension cable’s
coupling from trimmer’s plug.
► Hold fanwheel (2) steady with one hand.
► Unscrew the mowing head (1) counterclockwise.
► Remove the fanwheel.
Trimmer without fanwheel
The trimmer comes with the AutoCut 2-2 mowing head
already mounted and cannot be removed by the user.. The
spool can be removed by the user.
► Switch off the trimmer and disconnect extension cable’s
coupling from trimmer’s plug.
► Press in the tabs (1) and remove the cover (3).
► Remove the spool (2).
6.3 Mounting the Loop Handle
► Switch off the trimmer and disconnect extension cable’s
coupling from trimmer’s plug.
► Line up the loop handle (2) so that the recess for the star
knob nut (1) is on the right of the control handle and the
openings in the loop handle (2) are facing the operator.
► Ease the ends of the loop handle (2) apart and push it onto
the control handle until it engages in position.
► Insert the screw (3) through the hole.
► Fit the star knob nut (1) and tighten it down.
The loop handle (2) must not be removed again.
7.1 Adjusting Length of Shaft
The length of the shaft can be adjusted to suit the height and
reach of the user.
► Switch off the trimmer and disconnect extension cable’s
coupling from trimmer’s plug.
► Hold the shaft firmly.
2
1
0000-GXX-9899-A0
12
3
1
0000-GXX-1484-A0
7 Adjusting Trimmer for User
3
1
2
0000-GXX-1488-A0

0458-777-0121-C
14
English
8 Connecting to Power Supply
► Depress lock button (1) and hold it in that position.
► Pull or push the control handle (2) to the required position.
► Release the lock button (1).
► Move the control handle (2) back and forth until it
engages.
7.2 Adjusting Angle of Control Handle
The control handle can be set to two positions (0° and 90°).
► Switch off the trimmer and disconnect extension cable’s
coupling from trimmer’s plug.
► Hold the shaft firmly.
► Depress lock button (1) and hold it in that position.
► Turn the control handle (2) 90° on the shaft.
► Release the lock button (1).
► Move the control handle (2) back and forth until it
engages.
7.3 Adjusting the Loop Handle
The loop handle can be set in different positions to suit the
height and reach of the user.
► Switch off the trimmer and disconnect extension cable’s
coupling from trimmer’s plug.
► Loosen the star knob nut (1).
► Swing the loop handle (2) to the required position.
► Tighten down the star knob nut (1) firmly.
8.1 Connecting Trimmer to Power Supply
► Insert the plug (1) into the extension cable coupling (2).
1
2
0000-GXX-1489-A0
2
1
3
0000-GXX-B536-A0
8 Connecting to Power Supply
1
2
0000-GXX-1490-A0
12
3
0000-GXX-9911-A0

0458-777-0121-C 15
English
9 Switching the Trimmer On/Off
The strain relief (cable retainer) protects the connecting
cable from damage.
► Make a loop in the extension cable.
► Pass the loop (3) through the opening (4).
► Slip the loop (3) over the hook (5) and pull it tight.
► Insert the extension cable’s plug in a properly installed
wall outlet.
9.1 Switching On
► Hold the trimmer firmly with one hand on the control
handle – wrap your thumb around the handle.
► Hold the trimmer firmly with the other hand on the loop
handle – wrap your thumb around the handle.
► Depress the trigger lockout (1) with your hand and hold it
there.
► Pull the trigger (2) with your index finger and hold it there.
The motor accelerates and the cutting attachment rotates.
9.2 Switching Off
► Release the trigger and trigger lockout lever.
► Wait for the cutting attachment to come to a standstill.
► If the cutting attachment continues to rotate: Stop work,
disconnect extension cable’s coupling from trimmer’s plug
and contact your STIHL servicing dealer for assistance.
The trimmer has a malfunction.
10.1 Checking the controls
Trigger lockout and trigger
► Switch off the brushcutter and remove extension cable
connection from brushcutter plug.
► Try pressing the trigger without pressing the trigger
lockout.
► If you can press the trigger: Stop using your brushcutter
and contact a STIHL dealer.
The trigger lockout is faulty.
► Press and hold the trigger lockout.
► Press and release the trigger.
► If the trigger or trigger lockout is stiff or does not spring
back to the idle position: Do not use your brushcutter and
contact your STIHL dealer for assistance.
The trigger or the trigger lockout is defective.
Switching the Brushcutter on
► Connect the brushcutter to a separate wall outlet.
► Press and hold the trigger lockout.
► Press and hold the trigger.
The cutting attachment rotates.
9 Switching the Trimmer On/Off
35
4
0000-GXX-9912-A0
1
2
0000-GXX-9913-A0
10 Testing the Trimmer

0458-777-0121-C
16
English
11 Operating the Trimmer
► Release the trigger.
The cutting attachment stops rotating after a brief delay.
► If the cutting attachment continues to rotate: Stop work,
remove extension cable conection from brushcutter plug
and contact your STIHL servicing dealer for assistance.
The brushcutter is defective.
11.1 Holding and Controlling the Trimmer
► Hold the trimmer with one hand on the control handle -
wrap your thumb around the control handle.
► Hold the trimmer with the other hand on the loop handle -
wrap your thumb around the loop handle.
11.2 Mowing
The cutting height is determined by the distance of the
cutting attachment from the ground.
► Swing the brushcutter steadily back and forth in an arc.
► Move forward slowly in a controlled manner.
► If you work with a bump guard: Extend the bump guard (1)
fully.
11.3 Adjusting Nylon Line
► Tap the rotating mowing head on the ground.
About 30 mm of fresh nylon line is advanced.
The line limiting blade in the deflector trims the mowing
lines to the correct length.
Automatic feed will not take place if the mowing lines are
shorter than 25 mm.
► Switch off the trimmer and disconnect extension cable’s
coupling from trimmer’s plug.
► Press the button on the mowing head and hold it
depressed.
► Pull out the mowing lines.
► If the mowing lines cannot be pulled out to required length:
Install a new spool with mowing line.
The spool is empty.
11 Operating the Trimmer
0000-GXX-1494-A0
1
0000-GXX-1495-A1

0458-777-0121-C 17
English
12 After Finishing Work
12.1 After Finishing Work
► Switch off the trimmer and disconnect extension cable’s
coupling from trimmer’s plug.
► If the trimmer is wet: Allow the trimmer to dry.
► Clean the trimmer.
► Clean the deflector.
► Clean the cutting attachment.
13.1 Transporting the brushcutter
► Switch off the brushcutter and remove extension cable
connection from brushcutter plug.
► Adjust the shaft to its shortest length.
Carrying the brushcutter
► Carry the brushcutter in one hand properly balanced by
the shaft, with the cutting attachment behind you.
Transporting the trimmer in the car
► Secure the trimmer to prevent turnover and movement.
14.1 Storing the Trimmer
► Switch off the trimmer and disconnect extension cable’s
coupling from trimmer’s plug.
► Remove the mowing head.
► Observe the following points when storing the trimmer:
– The trimmer is out of the reach of children.
– The trimmer is clean and dry.
15.1 Cleaning the Brushcutter
► Switch off the brushcutter and remove extension cable
connection from brushcutter plug.
► Clean the brushcutter with a damp cloth.
► Clean vents with a paintbrush.
► Clean the area underneath the fanwheel with a soft brush.
15.2 Cleaning the Deflector and Cutting Attachment
► Switch off the trimmer and disconnect extension cable’s
coupling from trimmer’s plug.
► Clean the deflector and cutting attachment with a damp
cloth or a soft brush.
16.1 Maintenance Intervals
The maintenance intervals are dependent on the
environmental and operating conditions. STIHL
recommends the following maintenance intervals:
Every 12 months
► Have the trimmer checked by a STIHL servicing dealer.
17.1 Repairing the Trimmer and Cutting Attachment
The trimmer and cutting attachment cannot be repaired by
the user.
► If the trimmer or cutting attachment is damaged: Do not
use your trimmer or cutting attachment and contact your
STIHL servicing dealer for assistance.
12 After Finishing Work
13 Transporting
14 Storing
15 Cleaning
16 Maintenance
17 Repairing

0458-777-0121-C
18
English
18 Troubleshooting
18.1 Troubleshooting Trimmer
18 Troubleshooting
Condition Cause Remedy
Trimmer does not start
when switched on.
Connecting cable plug or extension cable plug
not connected.
► Reconnect connecting cable plug or
extension cable plug.
Miniature circuit breaker (fuse) or ground fault
circuit interrupter has tripped. Circuit is
overloaded or faulty.
► Determine reason for circuit breaker tripping
and rectify the problem. Switch on miniature
circuit breaker (fuse) or ground fault circuit
interrupter.
► Switch off other consumers in the same
circuit.
Wall outlet’s fuse rating is too low. ► Insert the connecting cable plug in a wall
outlet with the correct fuse rating, @19.1.
Wire gauge of extension cable is wrong. ► Use an extension cable of the right wire
gauge. @19.2
The extension cable is too long. ► Use an extension cable of the correct length,
@19.2
Trimmer cuts out during
operation.
Connecting cable plug or extension cable plug
has been pulled out of wall outlet.
► Reconnect connecting cable plug or
extension cable plug.
Miniature circuit breaker (fuse) or ground fault
circuit interrupter has tripped. Circuit is
overloaded or faulty.
► Determine reason for circuit breaker tripping
and rectify the problem. Switch on miniature
circuit breaker (fuse) or ground fault circuit
interrupter.
► Switch off other consumers in the same
circuit.
Wall outlet’s fuse rating is too low. ► Insert the connecting cable plug in a wall
outlet with the correct fuse rating, @19.1.
Mowing head cannot be
unscrewed by hand.
Mowing head overtightened. ► Block the fanwheel with the stop pin.
► Unscrew mowing head by hand.
► Remove stop pin.
Other manuals for FSE 52
7
Table of contents
Other Stihl Trimmer manuals

Stihl
Stihl FSA 60 R User manual

Stihl
Stihl ACK 050 User manual

Stihl
Stihl SuperCut 40-2 User manual

Stihl
Stihl FS 56 User manual

Stihl
Stihl AUTOCUT C 25-2 User manual

Stihl
Stihl FSE 31 User manual

Stihl
Stihl HSA 56 User manual

Stihl
Stihl HLA 66 User manual

Stihl
Stihl HSA 100 Setup guide

Stihl
Stihl FS 45 User manual

Stihl
Stihl FS 38 User manual

Stihl
Stihl KombiMotor KMA 130 R User manual

Stihl
Stihl KM 56 R User manual

Stihl
Stihl HSA 40.0 User manual

Stihl
Stihl HSE 52 User manual

Stihl
Stihl FSA 86 R User manual

Stihl
Stihl FSB-KM User manual

Stihl
Stihl FS 55 User manual

Stihl
Stihl FS 111 User manual

Stihl
Stihl FS 111 R User manual