Give us a call
What? You mean this Quick Start Guide didn’t have ALL the answers? The manual has more
comprehensive instructions, or speak to us. Call our After Sales Support on 1300 886 649.
Well done, you made it! Now sit back and relax...
your new pedestal fan is automatically covered by a 2 year warranty. V1.1
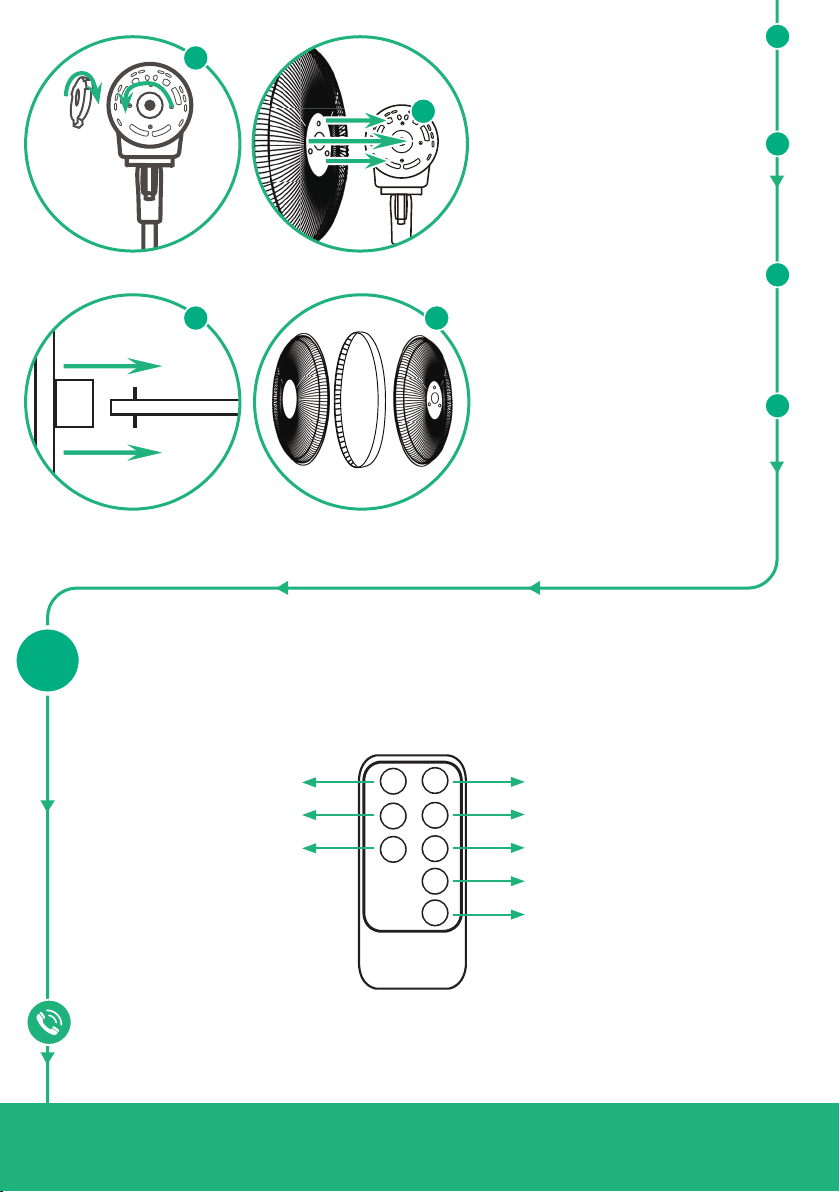
The motor shaft has the blade cap and
guard nut attached. Remove the cap by
turning it clockwise and the nut by turning
it anticlockwise.
4
5
6 7
5
6
7
4
Place the rear guard on the front of the
motor housing so that the four positioning
knobs protrude through the holes.
Reattach the guard nut and turn it
clockwise to secure.
Remove the protected sleeve from the
motor shaft. Slide the blade onto the
shaft, making sure to align the protrusions
on the shaft with the slots in the blade.
Secure the blade with the blade cap,
turning it anticlockwise.
The guards are held together with a guard
ring. Slightly loosen the long screw at
the bottom of the ring, then t the front
guard against the rear guard, making sure
that the edges of the guards sit in the
appropriate grooves all around the fan
head. Retighten the screw to secure the
guards together.
The fan is equipped with 15 step speed control, 3 breeze modes, a 10 hour timer and a remote control
for convenient operation, or use the control panel at the front of the appliance. Set the fan on a dry, level
surface and connect it to your power supply with the supplied AC adaptor.
Using your pedestal fan
3
ON MODE
SPEED+
TIMER+ TIMER-
SWING
OFF
SPEED-
Select the mode: normal, natural,
sleep
Decrease the fan speed in 15 steps
Decrease the timer period
Activate or stop oscillation
Set the fan to standby
Switch the fan on
Increase the fan speed in 15 steps
Increase the timer period in half-
hourly steps


