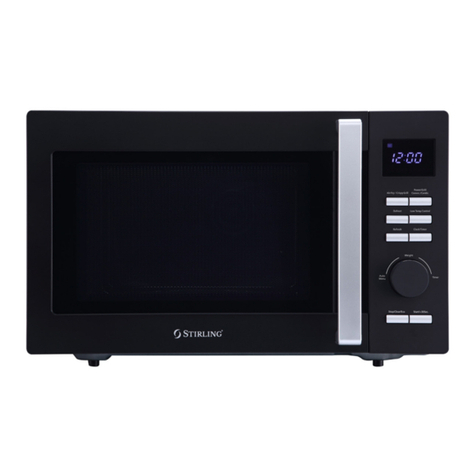
Stirling P70H20EL-DG-BLU User manual

N13275
20L Microwave Oven
INSTRUCTION MANUAL
Model Number P70H20EL-DG-BLU
AFTER SALES SUPPORT
1300 886 649
AUS MODEL: P70H20EL-DG-BLU PRODUCT CODE: 56354 03/2017

2
Welcome
Congratulations on choosing to buy a STIRLING®product.
All products brought to you by STIRLING®are manufactured to the highest
standards of performance and safety and, as part of our philosophy of
customer service and satisfaction, are backed by our comprehensive
3Year Warranty.
We hope you will enjoy using your purchase for many years to come.
AFTER SALES SUPPORT
1300 886 649
AUS MODEL: P70H20EL-DG-BLU PRODUCT CODE: 56354 03/2017

3
Contents
02 Welcome
04 Warranty Details
05 General Safety Instructions
08 Product Overview
11 Getting Started
16 Instructions
21 Cleaning and Care
22 FAQs and Troubleshooting Guide
24 Other Useful Information
26 Recipes
31 Repair and Refurbished Goods or Parts Notice
AFTER SALES SUPPORT
1300 886 649
AUS MODEL: P70H20EL-DG-BLU PRODUCT CODE: 56354 03/2017

4
20L Microwave Oven
Warranty Details
The product is guaranteed to be free from defects in workmanship and parts for
a period of 36 months from the date of purchase. Defects that occur within this
warranty period, under normal use and care, will be repaired, replaced or refunded
at our discretion, solely at our option with no charge for parts and labour. The
benefits conferred by this warranty are in addition to all rights and remedies
in respect of the product that the consumer has under the Competition and
Consumer Act 2010 and similar state and territory laws.
Our goods come with guarantees that cannot be excluded under the Australian
Consumer Law. You are entitled to a replacement or refund for a major failure
and to compensation for any other reasonably foreseeable loss or damage. You
are also entitled to have the goods repaired or replaced if the goods fail to be of
acceptable quality and the failure does not amount to a major failure.
YEAR WARRANTY
3
REGISTER YOUR PURCHASE AT www.aldi.com.au/en/about-aldi/product-registration/ TO KEEP UP-TO-DATE WITH IMPORTANT PRODUCT INFORMATION
AFTER SALES SUPPORT
1300 886 649
AUS MODEL: P70H20EL-DG-BLU PRODUCT CODE: 56354 03/2017

5
General Safety Instructions
IMPORTANT SAFETY INSTRUCTIONS
READ CAREFULLY AND KEEP FOR FUTURE REFERENCE
Read this manual thoroughly before first use. The safety precautions enclosed
herein reduce the risk of fire, electric shock and injury when correctly adhered to.
Keep the manual in a safe place for future reference, along with the
completed warranty card, purchase receipt and carton. Note the product serial
number on this manual, so you always have it ready at hand. If applicable, pass
these instructions on to the next owner of the appliance.
Always follow basic safety precautions and accident prevention measures
when using an electrical appliance, including the following:
Precautions to avoid possible exposure to excessive microwave energy
• Do not tamper with the safety locking mechanism, and do not attempt to use
the microwave oven with the door open. The door needs to be tightly shut to
prevent harmful exposure to microwave energy.
• Do not allow any object to prevent the door from closing. Also, do not allow
cleaner residue to accumulate on sealing surfaces.
• Do not use the oven if it is damaged. It is particularly important that there is no
damage to the oven door (bent, warped or otherwise damaged), hinges and
latches (broken or loosened), door seals and sealing surfaces.
• WARNING! If the door or door seals are damaged, the oven must not be
operated until it has been repaired by a competent person.
• WARNING! Do not attempt to repair the oven or adjust it yourself. Any repair
must only be carried out by qualified personnel. It is hazardous for anyone else
to remove a cover which protects against exposure to microwave energy.
Precautions to avoid the risk of fire in the microwave interior
• Keep an eye on the microwave oven when heating food in plastic or paper
containers as these could ignite.
• If you detect smoke, switch the oven off immediately, unplug it, and keep the
oven door closed in order to stifle any flames.
• WARNING! Do not heat oil or fat for deep frying as its temperature cannot be
controlled.
• Remove wire twist ties from paper or plastic bags before placing them in the oven.
• Do not overcook food.
• Do not leave paper products, cooking utensils, or food in the interior, and do
not use the oven for storage purposes when it is not in use.
• After use wipe the waveguide cover first with a damp, then a dry cloth, to
remove any food splashes and grease. Built-up grease may overheat and
begin to cause smoke or catch fire.
• The appliance is not intended to be operated by means of an external timer or
separate remote control system.
AFTER SALES SUPPORT
1300 886 649
AUS MODEL: P70H20EL-DG-BLU PRODUCT CODE: 56354 03/2017

6
General Safety Instructions (Cont.)
Electrical safety and cord handling
• Voltage: Make sure that your outlet voltage and circuit frequency correspond
to the voltage stated on the appliance rating plate.
• Power outlet: Connect the appliance to a properly earthed power outlet,
which must be readily accessible so that you can easily unplug it if necessary.
• Power cord: Do not kink or damage the power cord. Do not let it hang over
the edge of a table or benchtop, and do not let it touch hot or sharp surfaces.
Make sure the cord does not run under the microwave oven. Run it so that
there will be no risk of anyone pulling it inadvertently or tripping over it.
• Electrical safety: Do not insert any objects into the appliance.
• WARNING! To reduce the risk of electrocution and other electrical hazards, do
not immerse the cord or plug in water, do not spill liquids into the oven, and do
not operate it with wet hands.
• WARNING! Do not operate this appliance if it has a damaged cord or plug, if
it is not working properly, or if it has been damaged or dropped, or if its door
seal is damaged. In such a case, contact our after sales support centre.
• WARNING! If the appliance and/or its supply cord or plug are damaged, it
must be replaced by the manufacturer, its service agent or a similarly qualified
person in order to avoid a hazard. Do not attempt to repair, disassemble, or
modify the appliance. There are no user-serviceable parts contained within.
• Disconnection: Switch the appliance off and unplug it from the power
supply after use and before cleaning, servicing, maintenance, or moving the
appliance. Do not pull the cord when disconnecting, grip the plug and pull it
gently out of the outlet.
• Safety switch: The installation of a residual current device (safety switch) is
recommended to provide additional safety protection when using electrical
appliances. It is advisable that a safety switch with a rated residual operating
current not exceeding 30mA be installed in the electrical circuit supplying the
appliance. See your electrician for professional advice.
Usage conditions and restrictions
• Domestic use only: This appliance is intended for indoor household use only. It
is not suitable for commercial, industrial, trade or laboratory use.
• Intended use: This microwave oven is specifically designed for heating, cooking
or defrosting food or beverages in a domestic environment. Do not use it for
anything other than its intended purpose. Drying of food or clothing and heating
of warming pads, slippers, sponges, damp cloths and similar items may lead to
risk of injury, ignition or fire.
AFTER SALES SUPPORT
1300 886 649
AUS MODEL: P70H20EL-DG-BLU PRODUCT CODE: 56354 03/2017

7
General Safety Instructions (Cont.)
• Do not use when empty: Do not operate the microwave oven without any
liquid or food inside the oven. This would damage the oven.
• No outdoor use: Do not use the appliance outdoors.
• Usage restrictions: The appliance is not intended for use by persons (including
children) with reduced physical, sensory or mental capabilities, or lack of experi-
ence and knowledge, unless they have been given supervision or instruction
concerning use of the appliance by a person responsible for their safety.
• Children: Supervise children to ensure they do not play with the appliance.
Only allow children to use the oven without supervision when adequate
instructions have been given so that the child is able to use the oven in a safe
way and understands the hazards of improper use. Do not allow children to
clean the microwave oven or perform user maintenance.
• No external timer: The appliance is not intended to be operated by means of
an external timer or separate remote control system.
• Accessories: Any accessories not recommended by the manufacturer may
cause injuries to persons.
• Utensils: Only use utensils that are suitable for use in a microwave oven.
• Cleaning: Maintain the oven in a clean condition to avoid surface deterioration,
which could affect its working life and result in a hazard risk. Clean the oven
regularly and remove food residues from door seals, cavities and adjacent parts.
Do not use a steam cleaner for cleaning any part of the microwave oven. Do not
use corrosive chemicals in this appliance.
• Improper use: Improper installation or use of accessories not recommended in
this manual may result in fire, electric shock and/or personal injury. We accept no
liability for any eventual damages due to improper use, incorrect handling or
noncompliance with these instructions.
CAUTION: HOT!
• Hot cookware: After cooking, the container is very hot. Use oven mitts to
avoid burns when handling cooking utensils that have become hot because of
the heat transferred from the food.
• Hot surfaces: Take due care, accessible surfaces may be hot during operation.
• Hot steam: To avoid burns from hot steam, always open any lids away from
your face and body. Take the same precautions when removing microwave
plastic wrap or opening popcorn or microwave oven cooking bags.
• Hot drinks: Microwave heating of beverages can result in delayed eruptive
boiling, therefore take utmost care when handling a container with hot drinks.
• Hot food: Always check the temperature before serving.
• Baby food: To avoid burns, always stir or shake the contents of feeding
bottles and baby food jars.
AFTER SALES SUPPORT
1300 886 649
AUS MODEL: P70H20EL-DG-BLU PRODUCT CODE: 56354 03/2017

8
1 Viewing window: allows you to see the cooking status.
2 Glass turntable (245mm): the food sits on the turntable, its rotation during
operation helps to cook food evenly.
CAUTION! Place the rotating ring (6) onto the rotating axis in the centre of the
cavity base, then place the turntable on top and ensure it can rotate freely.
3 Waveguide cover: this cover is inside the microwave oven, next to the wall
of control panel. Never remove this cover!
4 Control panel: this panel contains the digital display, time/menu dial and
operation buttons (see opposite for details).
5 Door safety lock system: the door of the microwave oven must be properly
closed in order for it to operate.
6 Rotating ring: the glass turntable sits on the wheels of the rotating ring; it
supports the turntable and helps it to balance when rotating.
Product Overview
Scope of delivery
(A) Microwave oven parts and features
2 3
4
5
6
1
AFTER SALES SUPPORT
1300 886 649
AUS MODEL: P70H20EL-DG-BLU PRODUCT CODE: 56354 03/2017

9
Digital Display: Cooking time, power level,
weight or servings indicators, and the current
time are displayed here (see page 10 for
details).
Auto Cook Settings: The numbers 1–8 are the
codes for cooking popular foods: beverages,
rice, spaghetti, potatoes, fish, pizza, popcorn,
and auto reheat.
Power: Press to set the microwave cooking
power level.
Multi Stage Cooking: Press to set a
multistage cooking program.
Pre-Set: Press to set a pre-set (delayed start)
timer.
Wei. Adj.: Press to set the desired weight/
servings for the quick cook settings.
Wei. Def.: Press to set the weight of food to
be defrosted.
Kitchen Timer: Press to set the kitchen timer
(up to 95 mins).
Clock: Press to set the clock time.
Time/Menu: Turn the dial to select an auto
cooking function, input a cooking time, select
a food weight/serving, or set the clock time.
Start/Quick Start ( ): Press to start a
set program. Press multiple times to set the
desired cooking time, without previously
setting a power level and a cooking time.
Stop/Cancel: Press to cancel a setting or
reset the microwave before setting a cooking
program. Press once to temporarily stop
cooking, or twice to cancel cooking altogether.
Product Overview (Cont.)
(B) Control panel
(C) Documentation (not pictured)
Instruction manual, Quick start guide, Warranty certificate
NOTE:
Due to continued product improvement, images and illustrations in this manual
may vary slightly from the product purchased. All images in this manual are for
reference purposes only. Parts are not necessarily pictured to scale.
Multi Stage
Cooking
Pre-Set
Wei. Adj.
Wei. Def.
Power
Kitchen Timer
Clock
Stop/Cancel
Milk/Coffee
AFTER SALES SUPPORT
1300 886 649
AUS MODEL: P70H20EL-DG-BLU PRODUCT CODE: 56354 03/2017

10
Product Overview (Cont.)
Icons on the digital display
The digital display at the top of the control panel features the following symbols,
which illuminate when the respective function is selected.
Auto cook settings
Zero microwave power
Pause
Clock
Child lock
Power level (%)
Weight (g)
Weight defrost
Microwave working
Stage 1 of multistage cooking
High power level
Stage 2 of multistage cooking
Low power level
AFTER SALES SUPPORT
1300 886 649
AUS MODEL: P70H20EL-DG-BLU PRODUCT CODE: 56354 03/2017

11
Getting Started
Unpacking
• Unpack: Remove all packing materials from outside and inside the oven. If
there is a safe film over the oven door, tear it off before use. Keep the original
packaging carton and materials in a safe place. It will help prevent any
damage if the product needs to be transported in the future, and you can
use it to store the appliance when it is not in use. In the event that it is to be
disposed of, please recycle all packaging materials where possible. Plastic
wrapping can be a suffocation hazard for babies and young children, so
ensure all packaging materials are out of their reach and disposed of safely.
• Inspect: Unwind the power supply cord to its full length and inspect it
for damage. Then check the microwave oven for any damage, such as a
misaligned or bent door, damaged door seals and sealing surfaces, broken or
loose door hinges and latches, dents inside the cavity or on the door.
WARNING: If there is any damage to the appliance or its cord, do not operate
the microwave oven! Contact our after sales support centre.
• Read: Read this manual to familiarise yourself with the parts and operating
principles. Pay particular attention to the safety advice on the previous pages.
• Clean: Wipe the inside surfaces of the microwave oven with a damp cloth.
Wash the glass turntable with a soft cloth in warm water and a little dish
detergent to remove any dust from transport. Rinse and dry thoroughly.
Installation
• Position: Place the microwave oven on a flat, stable surface that can support
the weight of the oven plus the heaviest foods likely to be cooked in it.
• WARNING: Do NOT place the microwave oven:
X In a cabinet; this appliance is intended to be used freestanding, placed
against a wall.
X Where heat, moisture or high humidity are generated (such as near a gas
burner, cooktop or water tank).
X Near combustible materials.
X Near a TV, radio or antenna; keep a minimum distance of 5m to such
appliances in order to avoid potential picture interference.
• Clearances: Place the microwave oven with its back against a wall, allowing
enough space for ventilation: 20cm of space above the oven, 10cm at the
back and 5cm at both sides. Do not cover or block any openings on the
appliance. Do not remove the feet.
• Assembly: Place the rotating ring in its position in the cavity base and the
turntable on top, making sure it sits securely in place and can move freely.
WARNING: Do not operate the appliance without the turntable and rotating
ring in their proper positions.
AFTER SALES SUPPORT
1300 886 649
AUS MODEL: P70H20EL-DG-BLU PRODUCT CODE: 56354 03/2017

12
Getting Started (Cont.)
Electrical connection
• This appliance must be earthed. We accept no liability for damage to the
oven or personal injury resulting from failure to observe any electrical
connection procedures. In the event of a malfunction or breakdown,
earthing will reduce the risk of an electric shock by providing a path of least
resistance for the current.
• The plug must be connected to an appropriate outlet that is installed
and earthed in accordance with all local standards and requirements. If
unsure, consult an electrician or a service representative. Do not, under any
circumstances, cut or remove the third grounding prong from the power plug.
• It is recommended that a separate circuit be provided for use by the
microwave oven alone.
• Make sure that the power cord does not run under the oven and that the
socket is readily accessible so it can be easily unplugged in an emergency.
Before first use
The appliance may produce fumes or odour when it is first heating up. This
is due to the components being new and can be disregarded safely. We
recommend you place a cup of water on the turntable and run the microwave
oven on full power for a few times until all odour and/or smoke has dissipated
(see page 15 for usage instructions). Ensure there is adequate ventilation.
Microwave cookware details
Cookware used in a microwave oven must be microwave safe. Suitable materials
are listed in the table overleaf.
• Shape of cooking container: We recommend round/oval dishes for micro-
wave cooking rather than square/oblong ones, as food in the corners of a
container tends to overcook.
• Heating liquids: Use a wide-mouthed container for heating liquid, and when
it is hot, wait a few moments before opening the container in order to avoid
possible hazards caused by delayed eruptive boiling.
• Placement: Make sure the cooking container does not touch the interior walls
during cooking.
• Metal: Microwaves cannot penetrate metal, so do not use any cookware
made of or containing metal, such as dishes with a metallic trim, metal
racks, trays or utensils, aluminium foil, or foil containers.
• Recycled paper products: Do not use these when microwave cooking, as
they may contain small metal fragments which may cause sparks and/or fires.
• Browning dish: When using a browning dish or self-heating container, always
place a heat-resistant insulator such as a porcelain plate under it to prevent
damage to the turntable and rotating ring.
AFTER SALES SUPPORT
1300 886 649
AUS MODEL: P70H20EL-DG-BLU PRODUCT CODE: 56354 03/2017

13
Getting Started (Cont.)
Cookware and utensils guide for microwave cooking
Cookware used in a microwave oven must be microwave safe.
Recommended
Microwave plastic wrap Use to retain steam. Leave a small opening for steam to
escape and avoid placing it directly on the food. Do not use
when cooking meat. Do not allow it to come into contact with
high-fat food as it may melt.
Paper towels and paper
napkins
Use for short-term heating and covering; these absorb excess
moisture and prevent spattering. Do not use recycled paper
towels, which may contain metal and could ignite.
Heat-resistant glass and
ceramic dishes
Use for heating or cooking.
Paper plates and cups Use for short-term heating at low temperatures. Do not use
recycled paper, which may contain metal and could ignite.
Wax paper Use as a cover to prevent spattering.
Limited Use
Aluminium foil Use narrow strips of foil to prevent overcooking of exposed
areas. However, take care not to use too much foil, and keep
a distance of 2–3cm between the foil and the cavity wall.
Ceramic, porcelain and
stoneware dishes
Use these if they are labelled "Microwave Safe". If they are
not labelled, test them to make sure they can be used safely.
Never use ceramics decorated with a metal rim or glaze.
Heat-resistant plastic
containers
Use only if labelled "Microwave Safe", and only according to
dish instructions. Avoid when cooking foods with high fat and
sugar content. Other plastics can melt.
Not Recommended
Glass jars and bottles Regular glass is too thin to be used in a microwave. It can
shatter and cause damage and injury.
Paper bags These are a fire hazard, except for popcorn bags that are
designed for microwave use.
Polystyrene plates and
cups
These can melt and leave an unhealthy residue on food.
Plastic storage and food
containers
Containers such as margarine tubs can melt in the
microwave.
Metal utensils, racks or
trays
These can damage your oven. Do not use in the microwave.
AFTER SALES SUPPORT
1300 886 649
AUS MODEL: P70H20EL-DG-BLU PRODUCT CODE: 56354 03/2017

14
Microwave cooking principles
• Arrange the food. Arrange the food so the thickest parts are towards the
outside of the dish, the thinner parts towards the centre, and spread it evenly.
Do not overlap if possible.
• Cover it. Cover the food, but not tightly, as some ventilation is necessary for
even heating. Covering food will prevent spattering and help food cook evenly.
• Turn over. To speed up the cooking time and ensure even cooking, turn pieces
of food over, rearrange them or stir the food from the outside to the centre of the
dish at least once halfway through cooking.
• Watch the cooking time. Cook for the shortest amount of time indicated and
add more time as needed. Severely overcooked food can smoke or ignite.
• Is it done? Colour and hardness of the food help you to determine if it is done.
Indicators include:
• Steam is coming out from all parts of food, not just the edge.
• Joints of poultry can be moved easily.
• Pork or poultry pieces show no signs of blood.
• Fish is opaque and can be sliced easily with a fork.
• Let it stand. After cooking times out, leave the food in the oven for an adequate
length of time. This will allow the food to complete its cooking cycle and cool it
down in a gradual manner.
• WARNING! Do not heat liquids and other food in sealed containers as
they are liable to explode. Baby bottles fitted with a screw cap or teat are
considered to be sealed containers.
• No frying. Do not attempt to fry food in the microwave oven, as hot oil can
damage oven parts and utensils, or cause skin burns.
• No whole eggs. Do not attempt to boil eggs in their shell, as they may
explode, even after microwave heating has ended.
• Pierce skins. Pierce food with nonporous skin such as potatoes, whole
squash, apples, chestnuts or sausages before cooking.
• Take special care to prevent the turntable from breaking.
• Let the turntable cool down before cleaning.
• Do not place hot food or utensils on the cold turntable.
• Do not place frozen food or utensils on the hot turntable.
• Make sure your cooking container is dry, as a wet surface may generate
excessive heat which could damage the glass turntable.
Getting Started (Cont.)
AFTER SALES SUPPORT
1300 886 649
AUS MODEL: P70H20EL-DG-BLU PRODUCT CODE: 56354 03/2017

15
First connection
Insert the plug of the microwave oven supply cord into a suitable power point.
On first connection, the unit will emit a short beep sound and [ : ] flashes on the
display. We recommend that at this stage you set the digital clock to the correct
time of day. However, this is not necessary for basic oven use.
Setting the clock
• The microwave oven clock can be set to a 12 or 24 hour cycle. Press the
CLOCK button once for a 12 hour cycle, or twice for a 24 hour cycle. The
display will show [ 12H ] or [ 24H ], depending on your selection.
• To set the time of day, turn the TIME/MENU dial to set the correct hour, then
press the CLOCK button to confirm. Turn the TIME/MENU dial to set the correct
minutes, then press the CLOCK button to confirm. The current time will now be
shown on the display.
NOTE: To check the clock time during cooking, press the CLOCK button.
Setting microwave controls
• Each time a button is pressed, a beep will sound to acknowledge the action.
• At the end of a set cooking or defrosting program, [ End ] will be displayed
on the screen and the oven will beep 3 times, prompting you to open the
door and take out the food. If you do not open the door or press the STOP/
CANCEL button, otherwise the oven will repeat beeping every 3 minutes.
Stopping the oven during operation
• During operation: Press the STOP/CANCEL button once to pause the
microwave oven, or twice to cancel the program.
• At initial or input stage: Press the STOP/CANCEL button once to cancel
input programs and resume initial stage.
Getting Started (Cont.)
Child safety lock
The child safety lock prevents unsupervised operation by young children. Once
set, the child lock indicator (a closed lock symbol) will appear on the display
screen and the oven cannot be operated.
• To set the child safety lock, press and hold the STOP/CANCEL button for
about 3 seconds: a beep will sound and the child lock indicator will appear on
the display screen. Pressing any button now will be ineffective.
• To cancel the child safety lock, press and hold the STOP/CANCEL button for
about 3 seconds until the child lock indicator disappears from the display. The
microwave oven can now be operated.
AFTER SALES SUPPORT
1300 886 649
AUS MODEL: P70H20EL-DG-BLU PRODUCT CODE: 56354 03/2017

16
Microwave cooking
Microwave cooking allows you to customise cooking power and time. First,
select a power level by pressing the POWER button a number of times (see the
table below). Then set the cooking time (maximum 60 minutes), using the TIME/
MENU dial, before pressing START/QUICK START.
After the set time has elapsed, the buzzer will beep every 3 minutes and [ End ]
will be displayed. Press the STOP/CANCEL button to clear the [ End ] display
before starting another cooking function.
Power levels
Press
Button
Power
Level Cooking Power Application
1 x 100% High Quick and thorough cooking
2 x 80% Medium High Medium express cooking
3 x 60% Medium Steaming food
4 x 40% Medium Low Defrosting food
5 x 20% Low Keeping warm
Example: To cook food for 3 minutes with medium microwave (60%) power:
• Place food into the microwave oven and close the door.
• Press the POWER button three times to set the power level to 60%.
• Rotate the TIME/MENU dial until the cooking time [ 3:00 ] is displayed.
• Press START/QUICK START to start cooking. The countdown will start and the
remaining cooking time will be displayed.
Important notes
• Never operate the oven empty.
• The lower the cooking power, the slower the cooking.
• The maximum time that can be set is 60 minutes.
• If you want to turn the food during operation, press the STOP/CANCEL button
once to stop operation, turn the food over, and then press START/QUICK
START to continue the preset cooking procedure.
• If you intend to remove the food before the preset time, you must press the
STOP/CANCEL button twice to clear the preset procedure in order to avoid
unintended operation when using the oven next time.
Instructions
AFTER SALES SUPPORT
1300 886 649
AUS MODEL: P70H20EL-DG-BLU PRODUCT CODE: 56354 03/2017

17
Instructions (Cont.)
Multistage cooking
Some recipes may require setting a multistage program involving defrosting and
cooking at different power levels. The following example shows the steps involved
in setting up such a program.
Example
• Place the food into the microwave oven and close the door.
• Press the WEI. DEF. button once, then rotate the TIME/MENU dial to choose the
food weight for the defrosting stage.
• Press the MULTI STAGE COOKING button.
• Press the POWER button, repeatedly, to select the cooking power, then turn the
TIME/MENU dial to select the cooking time for the first cooking stage.
• Press the MULTI STAGE COOKING button again.
• Press the POWER button, repeatedly, to select the cooking power, then turn the
TIME/MENU dial to select the cooking time for the second cooking stage.
• Press START/QUICK START to start the multistage program.
Important notes
• Defrosting can only be set in the first stage.
• Quick start and auto cook functions cannot be set in a multistage program.
• When the first stage is finished, the second stage will start automatically.
Quick Start
This is a convenient setting for cooking or heating food quickly at full microwave
power.
Example
• Place the food into the microwave oven and close the door.
• Press START/QUICK START to cook instantly with full power for 30 seconds.
• Press START/QUICK START repeatedly in quick succession to set the cooking
time (in 30 second steps, maximum: 12 minutes) and start cooking instantly
with full power.
AFTER SALES SUPPORT
1300 886 649
AUS MODEL: P70H20EL-DG-BLU PRODUCT CODE: 56354 03/2017

18
Instructions (Cont.)
Defrosting food
This feature automatically sets an appropriate defrosting cycle based on the
weight of the food (meat, poultry, seafood) to be defrosted. The weight can be
set in 100g steps, up to a maximum of 1800g, for automatic defrosting.
Example
• Place the food to be thawed in the microwave oven and close the door.
• Press the WEI. DEF. button once.
• Rotate the TIME/MENU dial until the food weight is displayed.
• Press START/QUICK START to start defrosting. The countdown will start and
the display will show the remaining defrosting time.
• The system will beep during defrosting to prompt you to turn the food over (or
to remove parts of the food that are already defrosted). This will ensure even
defrosting. Open the door and turn over the food, then close the door and
press START/QUICK START again to continue defrosting.
• After the set time has elapsed, the buzzer will beep every 3 minutes and
[ End ] will be displayed.
• Press the STOP/CANCEL button to clear the [ End ] display before starting
another cooking function.
Important notes
• It is necessary to turn over the food during operation to obtain a uniform effect.
• Defrosting usually takes longer than cooking food.
• If the food can be cut with a knife, the defrosting process can be considered
completed.
• Microwaves penetrates around 4cm into most food.
• Defrosted food should be consumed as soon as possible. Do not refreeze
food that has been defrosted.
AFTER SALES SUPPORT
1300 886 649
AUS MODEL: P70H20EL-DG-BLU PRODUCT CODE: 56354 03/2017

19
Instructions (Cont.)
Auto cook settings
This microwave oven has several programmed cooking settings for cooking
particular types and quantities of food automatically, without the need for setting
cooking time or power level.
Example
• Place the food into the microwave oven and close the door.
• Rotate the TIME/MENU dial to display the codes (see the table below).
• When the desired food code is displayed, press the WEI. ADJ. button
(repeatedly) until the desired weight is displayed (the available weight/serving
options are listed in the table below).
• Press START/QUICK START to start the program.
• You may need to turn the food over during cooking to ensure even heating.
Code Food Options Weight/Serving Options
1 Milk/Coffee 3 200mL each for beverages
2 Rice 4 150g - 300g - 450g - 600g
3 Spaghetti *3 100g - 200g - 300g (* add boiled water)
4 Potatoes 3 230g each
5 Auto Reheat 7 200g - 300g - 400g - 500g - 600g - 700g - 800g
6 Fish 5 200g - 300g - 400g - 500g - 600g
7 Pizza 3 150g - 300g - 450g
8 Popcorn 1 99g
Important notes
• The programmed auto cooking times are based on the food being at room
temperature (20-25°C) before cooking. Food that is colder or warmer may
require increased or decreased cooking times.
• Auto cooking results are affected by the shape and size of the food to be cooked,
how well it is placed in the microwave, voltage fluctuations and, of course,
your personal preference as to how well done you like certain foods cooked.
If your food is not cooked to your satisfaction, please adjust the cooking time
accordingly.
AFTER SALES SUPPORT
1300 886 649
AUS MODEL: P70H20EL-DG-BLU PRODUCT CODE: 56354 03/2017

20
Instructions (Cont.)
Pre-set (delayed start timer)
The pre-set function allows you to program the oven to start cooking at a later
time. To use this delayed start timer, the clock must be set to the correct time.
Example
Suppose it is 11:10 a.m. now and you want the oven to start at 11:30 a.m.
• Place the food into the microwave oven and close the door.
• Set a cooking program, as described on the previous pages, but do not press
START/QUICK START.
• Press the PRE-SET button, then rotate the TIME/MENU dial to set the hour
digits for your start time [ 11 ].
• Press the PRE-SET button again, then rotate the TIME/MENU dial to set the
minute digits for your start time [ 30 ].
• Press START/QUICK START to set the preset program. The pre-set function is
now set and the program will start at 11:30 a.m.
• To cancel the pre-set (delayed start timer), press the STOP/CANCEL button.
WARNING!
• Fire risk: For your personal safety, do not program the timer and then
leave the microwave oven unattended. Operating an electrical appliance
unattended could present a risk of fire or electrical hazards.
• Health risk: For food safety reasons, do not leave easily spoilt foods in
the oven for too long when using the timer. Some foods should not be left
at room temperature in order to prevent the risk of spoilage and bacterial
contamination. Consuming spoilt foods can have serious health risks.
Kitchen timer
The microwave oven has a kitchen timer, or minute minder, which can be set to
sound an alarm after a set period of time (max. 95 minutes).
Example
• During waiting or cooking mode, press the KITCHEN TIMER button once, then
rotate the TIME/MENU dial to set the time period and, finally, press START/
QUICK START to start the timer countdown. When the countdown time has
expired, the oven will beep.
• To check the remaining time during the countdown, press the KITCHEN TIMER
button. The time remaining will be displayed for 4 seconds.
• To stop or cancel the timer, press the STOP/CANCEL button.
AFTER SALES SUPPORT
1300 886 649
AUS MODEL: P70H20EL-DG-BLU PRODUCT CODE: 56354 03/2017
Other manuals for P70H20EL-DG-BLU
1
Table of contents
Other Stirling Microwave Oven manuals

Stirling
Stirling D80D20EL-Y4 User manual

Stirling
Stirling P10034AP-M4/H User manual

Stirling
Stirling STR-G34M-W User manual

Stirling
Stirling VTM20L-01 User manual

Stirling
Stirling STR-G34M-B User manual

Stirling
Stirling D80D20EL-Y4 User manual

Stirling
Stirling D90D25EL-G3 User manual

Stirling
Stirling D90N30ASLR-T4-H User manual

Stirling
Stirling D90D25EL-G3 User manual

Stirling
Stirling MD 18637 User manual