Stirling SWC46 User manual

MODEL: SWC46 | PRODUCT CODE: 54317 | 08/2016
Issue Date: 08/2016IM Version No.: V1.1
46 Bottle Wine Cellar
Model Number SWC46
INSTRUCTION MANUAL

2
MODEL: SWC46 | PRODUCT CODE: 54317 | 08/2016
Congratulations on choosing to buy a STIRLING® product.
All products brought to you by STIRLING® are manufactured to the highest standards
of performance and safety and, as part of our philosophy of customer service and
satisfaction, are backed by our comprehensive 3 Year In Home Warranty. We hope you
will enjoy using your purchase for many years to come.
Welcome

3
MODEL: SWC46 | PRODUCT CODE: 54317 | 08/2016
Contents
2 Welcome
4 Warranty
5 General Safety Instructions
7 Product Overview
9 Getting Started
9 Installation
10 Instructions
12 Specifications
13 FAQ’s and Troubleshooting
14 Other Useful Information
18 Repair and Refurbished Goods or Parts Notice
19 Warranty Returns

4
MODEL: SWC46 | PRODUCT CODE: 54317 | 08/2016
The product is guaranteed to be free from defects in workmanship and parts for a period
of 36 months from the date of purchase. Defects that occur within this warranty period,
under normal use and care, will be repaired, replaced or refunded at our discretion. The
benets conferred by this warranty are in addition to all rights and remedies in respect of
the product that the consumer has under the Competition and Consumer Act 2010 and
similar state and territory laws.
Our goods come with guarantees that cannot be excluded under the Australian Consumer
Law. You are entitled to a replacement or refund for a major failure and for compensation
for any other reasonably foreseeable loss or damage. You are also entitled to have the
goods repaired or replaced if the goods fail to be of acceptable quality and the failure does
not amount to a major failure.
46 Bottle Wine Cellar

5
MODEL: SWC46 | PRODUCT CODE: 54317 | 08/2016
IMPORTANT SAFETY INSTRUCTIONS
READ CAREFULLY AND KEEP FOR FUTURE REFERENCE
Read this manual thoroughly before rst use, even if you are familiar with this type of product. The safety
precautions enclosed herein reduce the risk of re, electric shock and injury when correctly adhered to. Make
sure you understand all instructions and warnings.
Keep the manual in a safe place for future reference, along with the completed warranty card and purchase
receipt. If you sell or transfer ownership of this product, pass on these instructions to the new owner.
Always follow basic safety precautions and accident prevention measures when using an electrical appliance,
including the following:
WARNING: This is a wine cellar, this is NOT to be used to preserve or store fresh food or consumables.
A wine cellar is designed for the storage of bottles at a set temperature that is particularly suitable for wine.
The temperature maintained in this wine cellar is too high for safe storage of perishable foods.
Electrical Safety
• Voltage: Before connecting and turning on the wine cellar, ensure the electrical voltage and circuit
frequency correspond to that indicated on the appliance rating label.
• Earthing: This wine cellar should be properly earthed for your safety. The power cord of this wine cellar
is equipped with a three-prong plug for use in standard wall outlets to minimise the possibility of electrical
shock. Do not modify the cord and/or plug provided with the appliance. Improper use of the earthed plug
can result in the risk of electric shock.
• Connection: This wine cellar requires a standard 220-240 V AC 50Hz electrical outlet. Do not overload
the electrical circuit.
• Power cord: Do not kink or damage the power cord; do not leave it exposed or dangling. Secure it at the
back of the appliance so no one steps on or places anything on the cord or against it. Keep the cord out of
reach of children. When moving the appliance, make sure not to damage the power cord.
• Auxiliary Items: Do not use an inverter, adaptor or extension cord with this wine cellar. If the cord is too
short, have a qualied electrician install an outlet near the appliance. Use of an extension cord and an
inverter can negatively affect the performance of the unit.
• Protect from moisture: To protect against the risk of electric shock, do not immerse the unit, cord or
plug in water or spray it with any other liquid. Do not connect or disconnect the electric plug when your
hands are wet. Turn the power switch off before removing the plug from the socket.
• WARNING: Disconnect! To reduce the risk of re, electric shock or personal injury, always unplug the
appliance from the socket when not in use, when moving and before cleaning or servicing. Never unplug
the unit by pulling the power cord. Always grip the plug rmly and pull straight out from the power point.
• Electrical work: Any electrical work required for the installation of this appliance should be carried out by
a qualied electrician.
Usage Conditions and Restrictions
• Domestic use only: This wine cellar is intended for indoor household use only. It is not intended for
commercial, industrial or outdoor use. It is not intended for use in a recreational vehicle.
• Purpose: Do not use this wine cellar for anything other than its intended purpose. Other uses are not
recommended and may cause re, electric shock or personal injury.
• Attachments: The use of attachments is not recommended by the appliance manufacturer and
distributor as they may be hazardous.
• Improper use: Damage due to improper use, or repairs made by unqualied personnel will void
your warranty. We assume no liability for any eventual damages caused by misuse of the product or
noncompliance with these instructions.
General Safety Instructions
6MODEL: SWC46 | PRODUCT CODE: 54317 | 08/2016
General Safety Instructions Cont.
• WARNING: Do not use mechanical devices or other means to accelerate the defrosting process, other
than those recommended by the manufacturer.
• Usage restriction: This wine cellar is not intended for use by persons (including children) with reduced
physical, sensory or mental capabilities, or lack of experience and knowledge, unless they have been given
supervision or instructions concerning use of the appliance by a person responsible for their safety.
• Children: Supervise young children to ensure they do not play with the appliance. Never allow children to
operate, play with or crawl inside the wine cellar.
• WARNING: Do not use electrical appliances inside the wine cellar, unless they are of the type
recommended by the manufacturer.
• Explosive or flammable substances: Do not store explosive substances such as aerosol cans with a
ammable propellant in this wine cellar. Do not store or use petrol or any other ammable vapours and
liquids in the vicinity of this or any other appliance. Do not use such substances for cleaning the wine
cellar. The fumes can create a re hazard or an explosion.
• Damage: Do not use the wine cellar if the power cord, plug or the wine cellar itself is damaged. If the cord
is damaged, contact the after sales support line and have the cord replaced by qualied personnel in order
to avoid a hazard.
• WARNING: Do not damage the refrigerant circuit.
• Do not modify: Do not attempt to alter or modify this wine cellar in any way.
• Repair: Do not attempt to repair or replace any part of your wine cellar unless it is specically
recommended in this manual. All other servicing should be referred to a qualied technician. Contact the
after sales support line for advice.
• WARNING: Keep ventilation openings, in the wine cellar enclosure or in-built structure, clear of
obstruction.
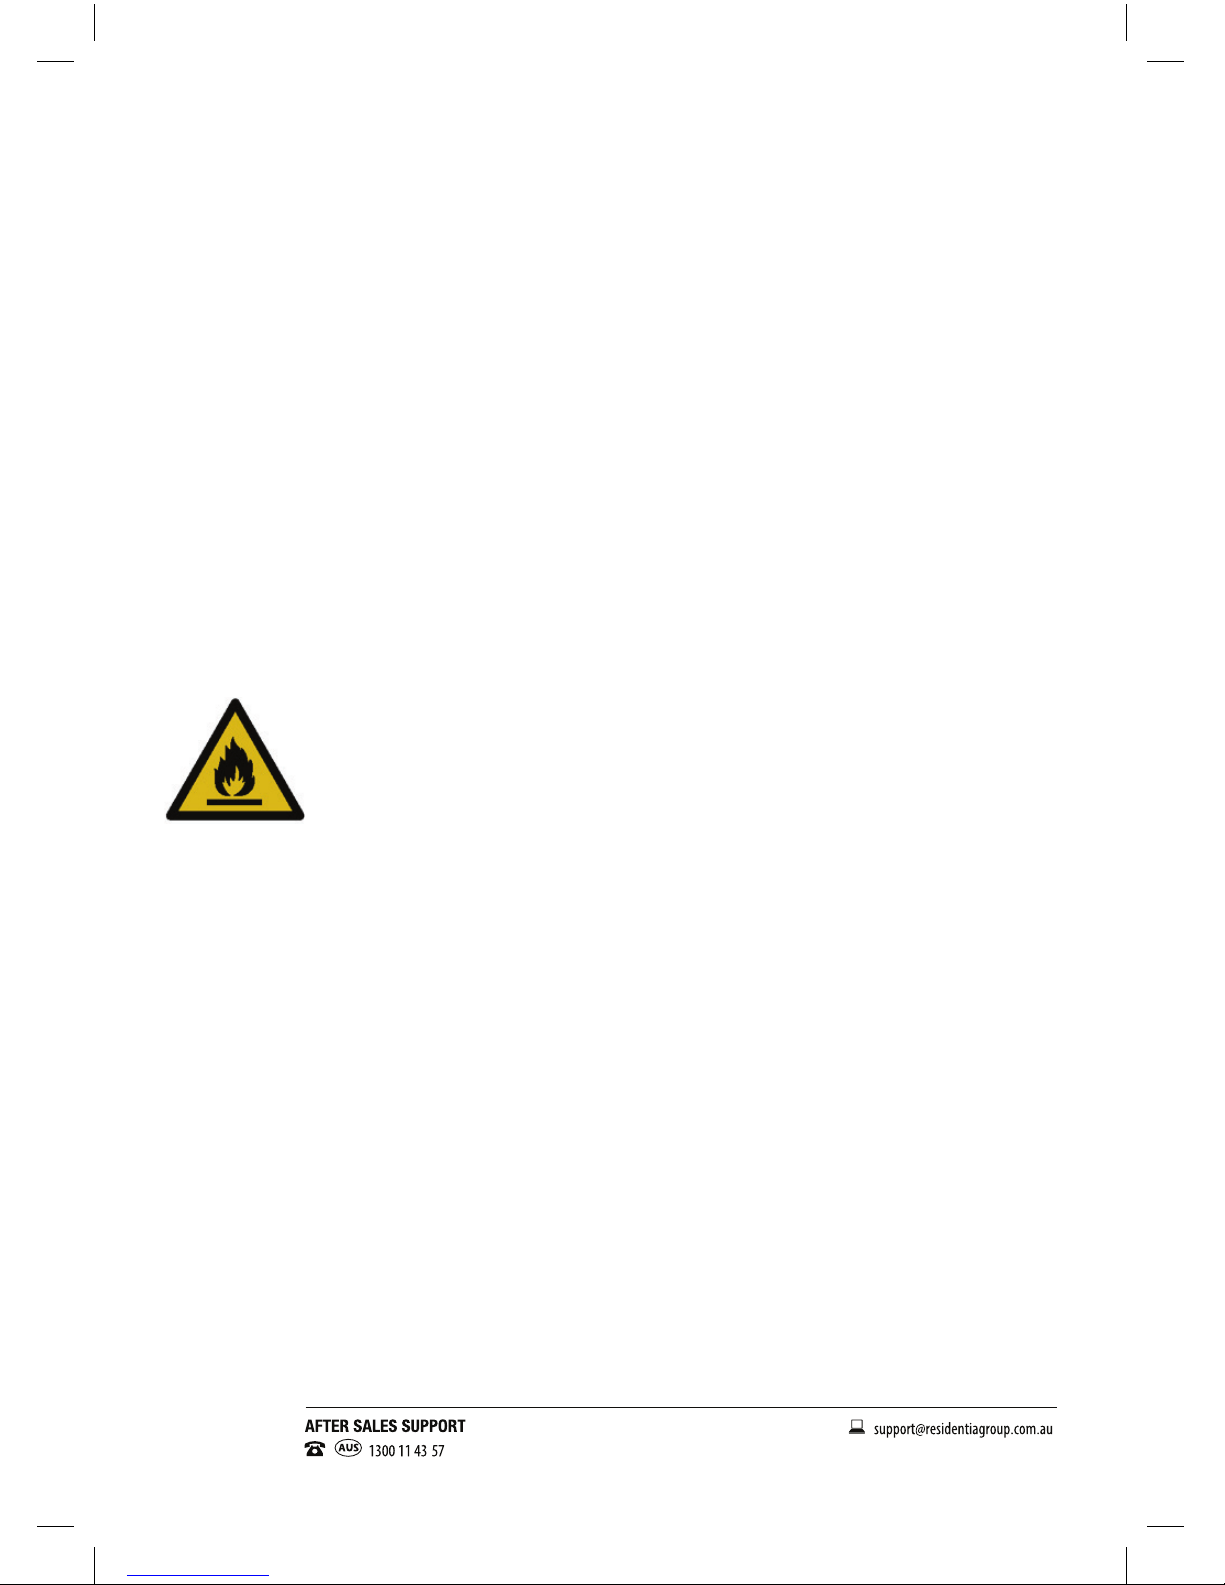
This symbol alerts you to take care as this wine cellar contains a ammable
refrigerant (isobutane) and insulation blowing gas (cyclopentane). Do not expose it to
high heat, sparks and open ames.
The refrigerant isobutane (R600a) is contained within the refrigerant circuit of
the appliance, a gas with a high level of environmental compatibility, which is
nevertheless ammable. During transportation and installation of the wine cellar,
ensure that none of the components of the refrigerant circuit become damaged.
Never use a wine cellar with a damaged refrigerant circuit! If the coolant circuit becomes damaged,
avoid proximity to open res and all types of heat sources. The room in which the wine cellar is located
should be ventilated for a few minutes.
It is hazardous for anyone other than an authorised service person to service this wine cellar. In Queensland,
the authorised service person MUST hold a Gas Work Authorisation for hydrocarbon refrigerants to carry out
servicing or repairs which involve the removal of covers.
The room for installing the appliance must be at least 1m³ per 8g of refrigerant. The amount and type of
refrigerant in the appliance can be found in the technical specications on page 17 and on the appliance
rating plate.
CAUTION
RISK OF FIRE
7
MODEL: SWC46 | PRODUCT CODE: 54317 | 08/2016
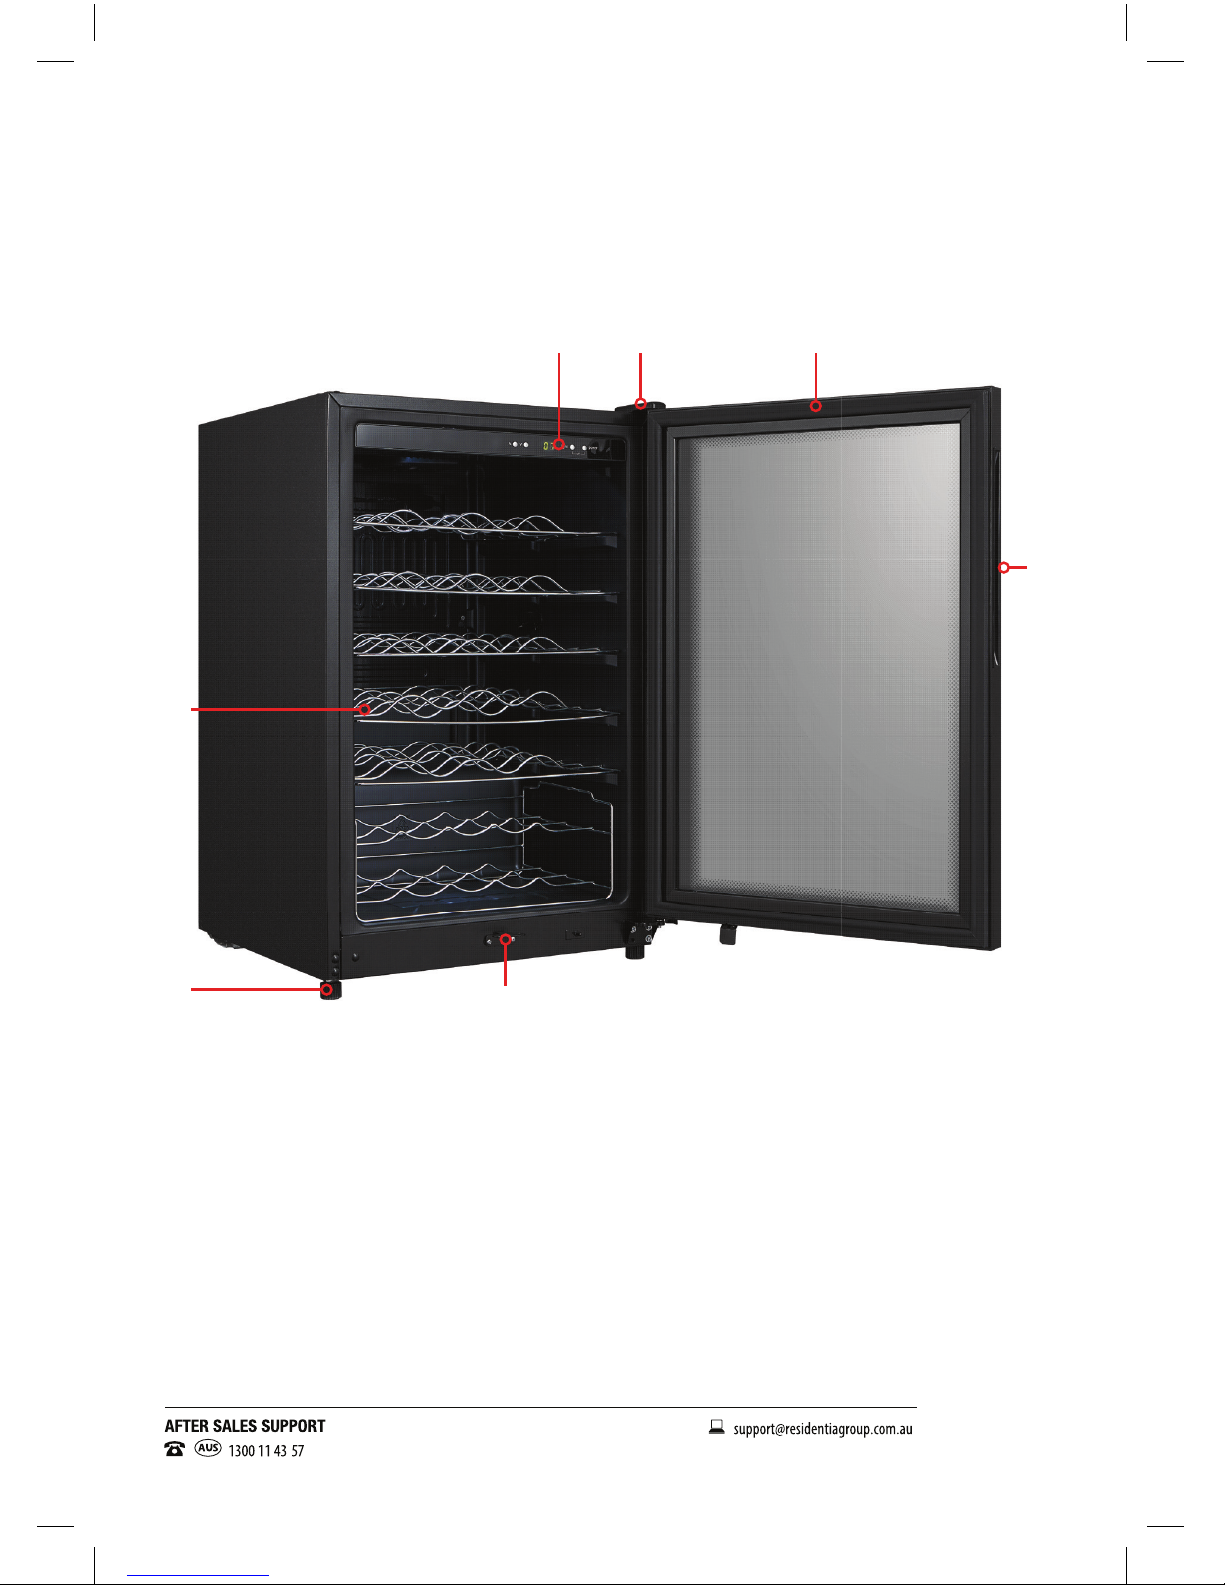
Wine Cellar Layout
Product Overview
5
7
1 2
6
3
4
1. Electronic Control Panel (inside top of cabinet)
2. Hinge Cover
3. Glass Door
4. Recessed Handle (on both sides)
5. Chrome Shelves (5) + Chrome Basket (1)
6. Security Lock (centred beneath glass door)
7. Levelling Legs (4)
8. Keys for lock (not shown)
Key:

8MODEL: SWC46 | PRODUCT CODE: 54317 | 08/2016
Control Panel Layout
Product Overview Cont.
2 3 41
1. Temperature “+” & “-” Controls
Press the Up or Down buttons to increase
or decrease the temperature inside the wine
cellar cabinet in 1°C intervals.
2. LED Display
Displays the current temperature inside
the wine cellar cabinet.
3. Light Control Button
Press the light control button to turn
the interior light ON and OFF.
4. Power Control Button
Press the power button to turn the
wine cellar ON and OFF.
Note.
• Temperature Units
Press and hold the Light and Power button together for 5 seconds to change
the temperature display units from Celsius to Fahrenheit
Key:

9
MODEL: SWC46 | PRODUCT CODE: 54317 | 08/2016
Getting Started
Unpacking
• Packaging materials: This wine cellar has been packaged to protect it against transportation damage.
Remove all packaging materials from around and inside the wine cellar and keep the original packaging
carton and materials in a safe place. It will help prevent any damage if the product needs to be transported
in the future, and you can use it to store the wine cellar when it is not in use. In the event the carton is to
be disposed of, please recycle all packaging materials where possible.
• Suffocation: Plastic wrapping can be a suffocation hazard for babies and young children, so ensure all
packaging materials are out of their reach and disposed of safely.
• Power cord: Unwind the power cord to its full length and inspect it for damage. Do not use the wine
cellar if it or its cord have been damaged or are not working properly. In case of damage, contact our after
sales support line for advice on examination, repair or return of the damaged product.
• Read the manual: Read this manual to familiarise yourself with the wine cellar. Pay particular attention to
the safety instructions on the previous pages.
• Clean: To remove any dust from transit and storage, clean the interior and exterior surfaces of the wine
cellar with lukewarm water and a soft cloth. Dry thoroughly.
Installation
• Two person installation: Use two or more suitably qualied people to move and install the wine cellar.
Failure to do so can result in back or other injury.
• Freestanding design: This wine cellar is designed to be freestanding only, and should not be recessed
or built-in.
• Floor surface: This wine cellar must be properly positioned on a dry, sturdy, level surface that is strong
enough to support it when it is fully loaded.
Do NOT install/use the wine cellar in the following locations/situations:
• In a garage or any other outside installation.
• In moist areas or areas of high humidity.
• In a recreational vehicle, or for use with an inverter.
• In direct sunlight, near heat sources, next to an open ame, cooking or heating appliance, or near any
other source of high heat.
• Direct sunlight may affect the acrylic coating and heat sources may increase the unit’s power
consumption. For best energy efciency install the wine cellar in the coolest area of the room.
• In an area with extreme cold ambient temperatures.
• In an area with excessive moisture and high humidity. Make sure it is protected from elements such as
wind, rain, water spray or drips.
• In an area where petrol or other explosive and/or ammable liquids or fumes are used or stored. The
fumes can create a re hazard or explosion.
• Levelling: It is important for the wine cellar to be level in order to work properly. To level the unit, adjust
the levelling legs at the bottom of the wine cellar.
• Ventilation: To allow for proper air ventilation, leave a minimum 5cm of space between the back, sides
and top of the wine cellar and make sure that the front of the unit is completely unobstructed. Ensure that
the ventilation openings are never blocked or covered. Never cover shelves with aluminium foil or any
other material, which may prevent air circulation.
• Door swing: The door on this appliance can be opened from either the left or the right side.
Should you wish to change the door swing direction, follow the instructions on pages 16–17.
10
MODEL: SWC46 | PRODUCT CODE: 54317 | 08/2016
Installation Cont.
• Suggested ambient temperatures: Choose a well ventilated area for the wine cellar with temperatures
above 16°C and below 32°C. Ambient temperatures above or below this range may affect the
performance of the unit.
• Settling: Before connecting the wine cellar to the power source, let it stand upright for approximately
4 hours. This will allow any refrigerant gasses that may have been disturbed during the transportation
process to settle and reduce the possibility of a malfunction in the cooling system from handling during
transport.
• Electrical connection: Plug the wine cellar into a dedicated, properly installed wall outlet. Do not under
any circumstances cut or remove the third (earth) prong from the power cord. Any questions concerning
power and/or earthing should be directed toward a licensed electrician or our after sales support centre.
• After plugging the wine cellar in, turn the unit on and allow it to cool down for 3–4 hours before placing
wine bottles or beverages in the appliance.
Instructions
First use
• Powering on: Press and hold the POWER button for three seconds to turn the appliance on.
• First cooling down: When you rst switch on the wine cellar, the compressor will run continuously until
the wine cellar reaches the set temperature. During this period of time, try not to open the door frequently
or place bottles inside the appliance. After about 3–4 hours, you can start loading the wine cellar.
• Odour: You may notice an odour when you rst switch on the wine cellar. This is due to the parts being
new and is no cause for concern. The odour will subside as the wine cellar starts to cool.
IMPORTANT
• When you use the wine cellar for the rst time or restart it after it has been turned off for a long time, there
could be a few degrees variance between the temperature you select and the one indicated on the LED
display. This is normal and it is due to the length of activation time. Once the wine cellar has been running
for a few hours, everything will return back to normal.
• When loading several bottles of wine at once, it will take longer for the appliance to cool the individual
bottles than when adding a bottle at a time.
• If the unit is switched off or unplugged, you must allow at least 5 minutes before restarting the wine cellar
or reconnecting it to your mains supply.
Temperature Control
This wine cellar enables you to store your wine in a stable temperature environment and free from light
exposure and vibrations. These are most important factors when it comes to storing wine. A stable,
temperature-appropriate environment will help maintain the quality of your wine and prevent spoilage.
• Selecting the right temperature: You can store your wine at the most appropriate serving temperature (see
the table below). Set the temperature according to the type of wine that is mostly stored in the wine cellar.
Wine Type Recommended Storage Temperature
Bordeaux Red 18ºC
Burgundy / Bordeaux Red 16ºC
Port 15ºC
Young Burgundy Red 14ºC
Young Red Wines / Rosé 12ºC
Aged White Wines / Chardonnay 10ºC
Sherry 7–9ºC
Young White Wines 5–7ºC
11
MODEL: SWC46 | PRODUCT CODE: 54317 | 08/2016
Instructions Cont.
Setting and adjusting the temperature:
You can set and adjust the temperature in the cabinet
to anywhere within the cooling range (5°C – 18°C).
1. To adjust the temperature, press the UP or DOWN
button repeatedly.
2. With every press, the temperature will increase
(or decrease) by one degree.
3. The current temperature inside the cabinet is
shown on the LED display.
4. To view the set temperature at any time, press
the UP or DOWN button and the set temperature
will temporarily ash in the LED display for a
few seconds.
Temperature display:
The temperature inside the cabinet can be displayed
in either degrees Celsius (°C) or degrees Fahrenheit
(°F). The default setting is in °C.
To change the display to °F
1. Press and hold the LIGHT and POWER button
together for approximately 5 seconds.
2. The temperature value will change and the °F
indicator will be illuminated on the control panel.
Loading the wine cellar
Standard bottle capacity: Your wine cellar holds a maximum of 46 standard (traditional 750mL bottles). Do
not overload the cabinet, and only store wine in sealed bottles.
Larger bottles: Storing wine in larger or different shaped bottles may affect its storage capacity. If storing
larger bottles, make sure that they do not prevent the door from shutting properly. Before shutting the door,
always check that you can close it without bottles falling down inside the cabinet.
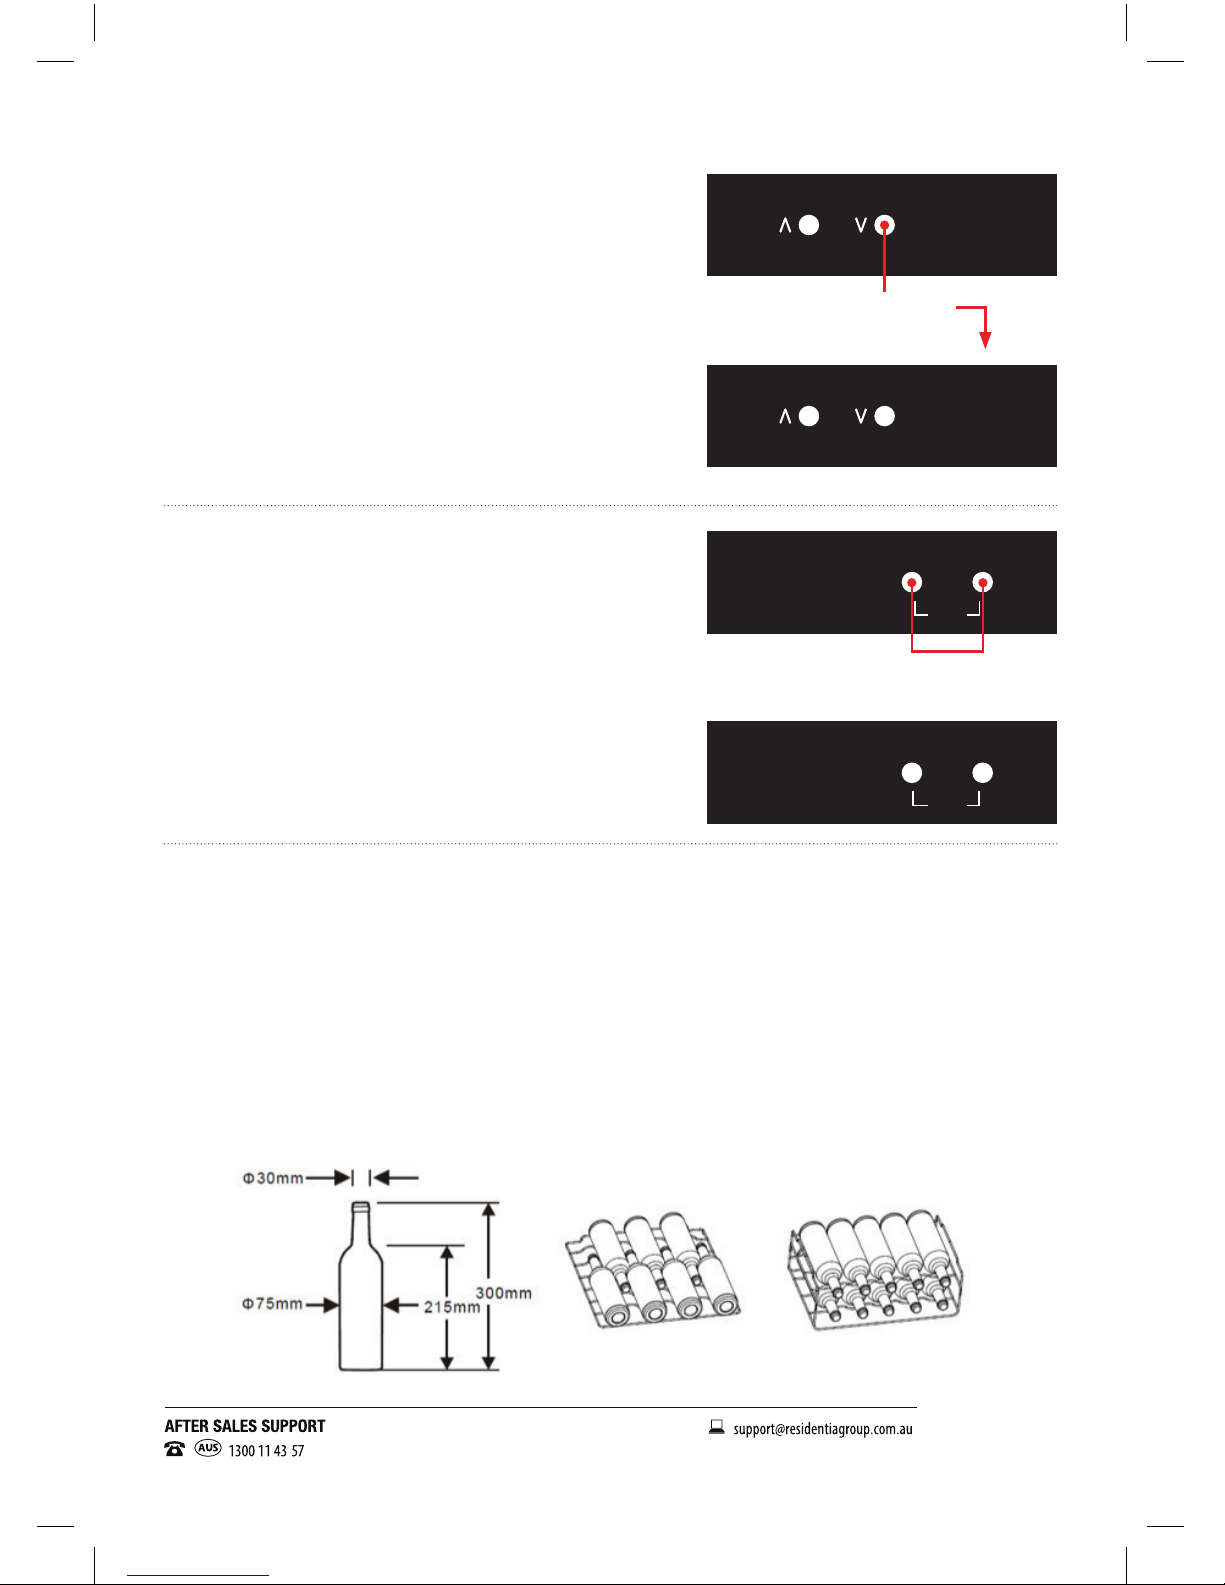
Shelving configuration: The shelves in the wine cellar may be removed to suit various wine bottle shapes
and sizes. The loading diagram (Fig. 1) shows how to t the maximum amount of standard size and shape
bottles. (See page 14 for instructions on how to remove a shelf)
12
09
Pressed × 3
=
Press both to change
from ºC to ºF
light power
c/f
F
light power
c/f
C
Fig. 1
Example:

12
MODEL: SWC46 | PRODUCT CODE: 54317 | 08/2016
Instructions Cont.
Access: To prevent damaging the door gasket, make sure the door is fully open when pulling shelves out
of the rail compartment. For easy access to the bottles stored, pull the shelves out approximately one third.
The shelves are designed with an emergency stop to prevent them being removed too far when loaded.
For efficient operation: Do not open the door unnecessarily. Only keep it open for as long as necessary
when removing or adding a bottle.
Interior Light
• Your wine cellar has an LED interior light for your viewing convenience. To activate the light, press the
LIGHT button on the control panel and check the contents, then press the button again to switch off
the light.
• For best wine storage conditions, always leave the light off during normal operation.
• Note: If the light is not working or needs to be replaced, please call our After Sales Support on
1300 11 4357 for further guidance.
Door Lock
• Your wine cellar is equipped with a lock and key for safe storage of wine.
• The keys are located inside the plastic bag that contains the instruction manual.
• Insert the key into the lock and turn it counter clockwise to unlock the door.
• Turn the lock clockwise to lock the door, making sure the metal pin is engaged completely
• Remove the key and place it in a secure place for safekeeping.
Fridge Door Detector Alarm
• If the cellar door is accidentally left open for more than one and a half minutes, an audible alarm will sound.
To stop the beeping, press any button on the controls or simply close the cellar door.
Specifications
Product Dimenions (W, D, H): 545mm, 565mm, 855mm
Weight: 37kg
Temperature Range: 5–18ºC
Other Features: White internal LED light
Electronic controls
Double layer UV glass

13
MODEL: SWC46 | PRODUCT CODE: 54317 | 08/2016
FAQ’s & Troubleshooting
Problem Possible Cause Possible Solution
The wine
cellar does
not operate.
• The appliance is not plugged in.
• The appliance is turned off.
• The circuit breaker tripped or a
blown fuse.
• Plug in appliance.
• Turn on power point.
• Reset circuit breaker/replace fuse.
The wine
cellar is not
cold enough.
• Check the temperature control
setting.
• The door is opened too often, or is
kept open for too long.
• The wine cellar has recently been
disconnected for a period of time.
The door is not closed completely.
• Reduce the temperature.
• Do not open door for 4 hours.
• Check that the door is closed properly
and for any obstructions preventing the
door closing properly.
The wine
cellar turns
on and off
frequently.
• The room temperature is hotter than
normal.
• A large amount of contents has been
added to the wine cellar.
• The door is opened too often.
• The door is not closed completely.
• The temperature control is not set
correctly.
• The door gasket does not seal
properly.
• Increase air ow into room.
• Do not open door for 4 hours to allow
wine cellar to cool to temperature.
• Check that the door is closed properly
and for any obstructions preventing the
door closing properly.
• Check temperature setting and decrease
if required.
• Replace gasket.
Vibrations • Wine cellar is not level.
• Wine cellar is touching the wall
• If continued vibration occurs.
• Level wine cellar.
• Ensure a 5cm gap from sides and top
• Turn off the wine cellar, unplug the power
plug and contact our after sales support
centre for further assistance.
The door
will not close
properly.
• The wine cellar is not level.
• The door was reversed and is not
properly installed.
• The gasket is dirty.
• The shelves are out of position.
• Level wine cellar.
• Remove door and re-t.
• Clean gasket with warm water and
a soft cloth.
• Re-position shelves correctly.
Moisture
forms on the
inside cellar
walls.
• The door is slightly open.
• The door is kept open too long,
or is opened too frequently.
• The door does not seal properly.
• Check that the door is closed properly
and for any obstructions preventing the
door closing properly.
• Do not open door for 4 hours to allow
wine cellar to cool to temperature.
• Check if gasket is damage and replace
if it is.
Moisture
forms on the
outside of
the appliance.
• The door is slightly open, causing
cold air from inside the wine cellar to
meet warm, moist air from outside.
• Check that the door is closed properly
and for any obstructions preventing the
door closing properly.
14
MODEL: SWC46 | PRODUCT CODE: 54317 | 08/2016
Other Useful Information
Cleaning and Maintenance
WARNING
Before cleaning the appliance, make sure it is switched off and disconnected from the power supply.
Failure to do so can result in electric shock or injury.
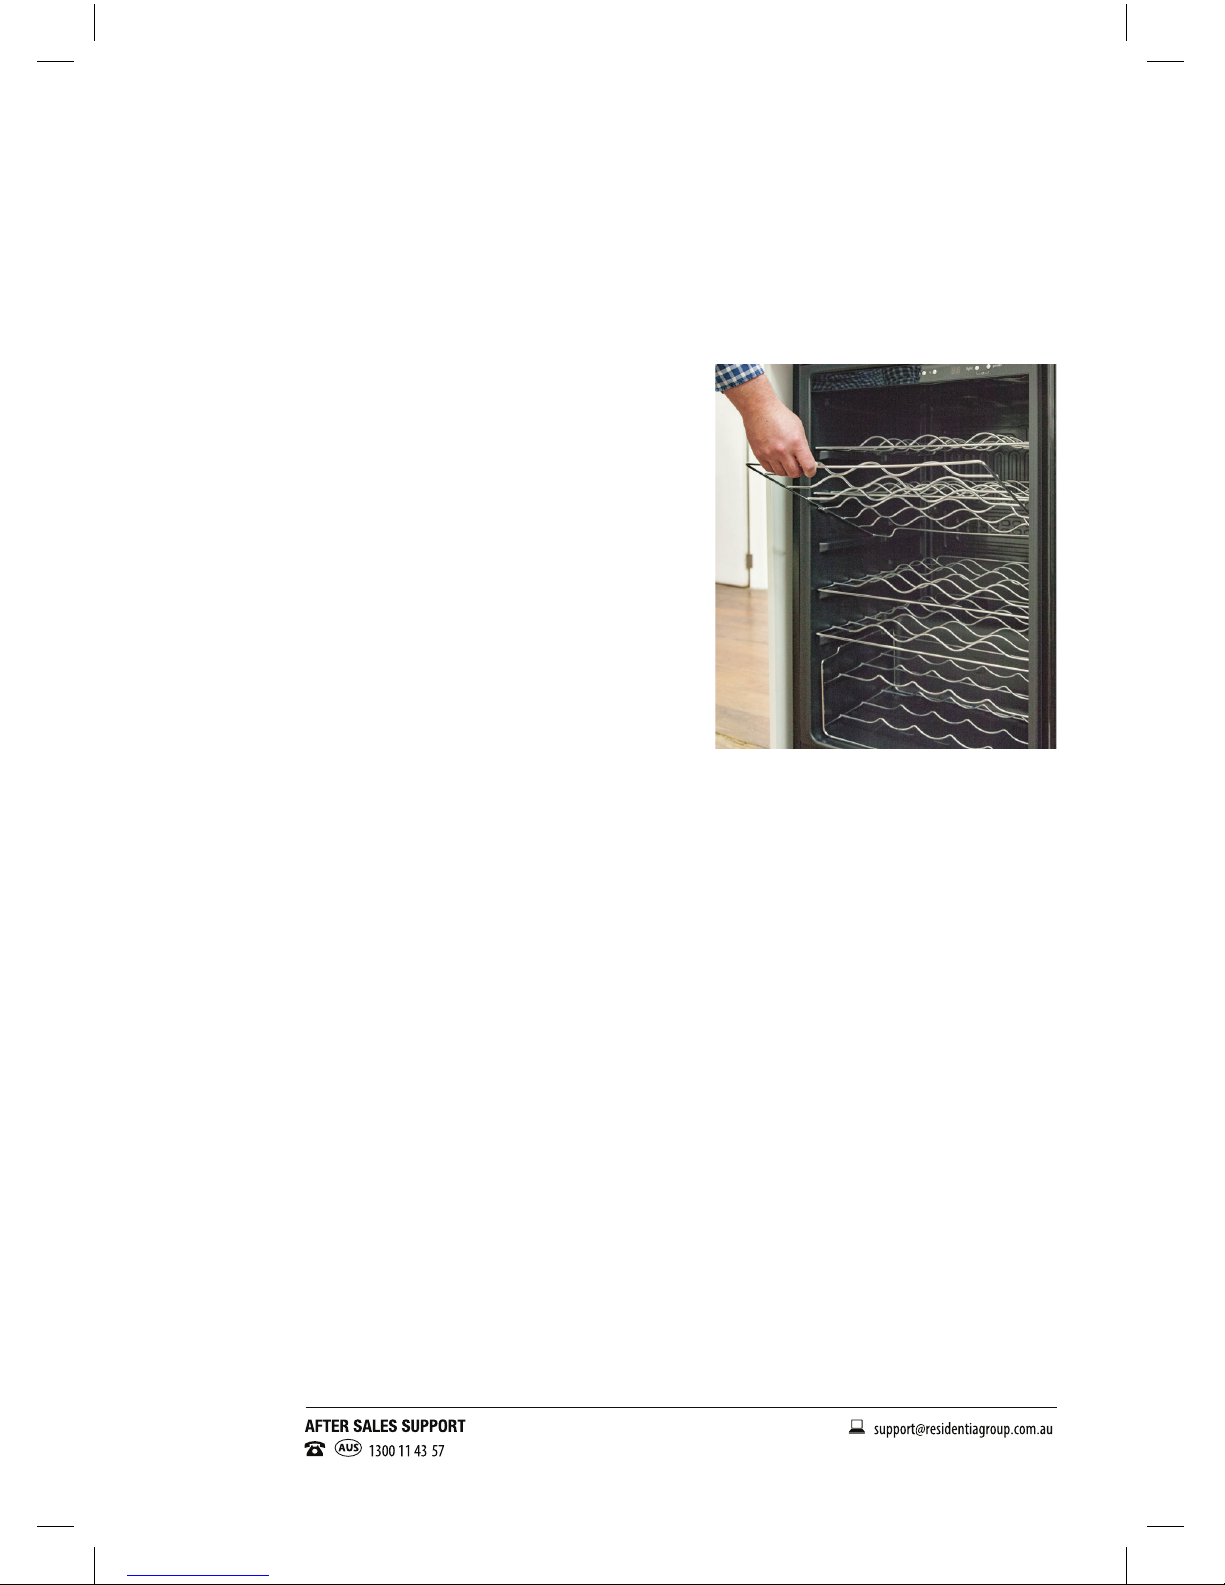
• Take out any bottles as well as the shelves before cleaning.
• To remove a shelf, pull it out slightly so that the notch in the
shelf is positioned exactly under the plastic protrusion at the
side of the cabinet, then lift up the shelf and remove (Fig. 2).
• When reinserting the shelf, place it with the notch exactly
above the plastic post and then lower the shelf onto the rails.
• Wash the inside surfaces with a solution of lukewarm water
(1L) and baking soda (2 tbsp). Use a soft, clean cloth to wipe
down the surfaces, then rinse with clean water and dry with
a dry cloth. Do not use soap or detergent for cleaning the
cabinet.
NOTE: Wring excess water out of the cloth when cleaning
around the controls or electrical parts.
• Make sure to keep the door gasket (seal) clean to keep the
unit running efciently.
• Wash the shelves and the outside of the cabinet with a mild
detergent solution. Wipe dry with a clean soft cloth.
• Dust or anything else blocking the vent may hinder the
cooling efciency of the appliance. Always keep the vent
clean; vacuum it if necessary.
WARNING
Never clean the unit with an abrasive, acid, oil or solvent
based cleaning agent. Never use ammable uids or sprays for
cleaning as the fumes from these substances can create a re
hazard or Explosion.
When you are on holidays
• Leave the wine cellar operating during holidays of less than
three weeks. If you are not going to use the wine cellar for
longer periods, remove all items and unplug the power cord.
Clean and dry the interior thoroughly. To prevent odours and
mould growth, leave the door open slightly, blocking it open
if necessary.
• To move the wine cellar, take all items out of the appliance,
securely tape down the shelves and tape the door shut. Turn
the levelling leg up to the base to avoid damage.
• Protect the outside of the wine cellar with a blanket or similar
soft material and make sure the wine cellar stays secure in
the upright position during transportation.
Fig. 2

15
MODEL: SWC46 | PRODUCT CODE: 54317 | 08/2016
Other Useful Information Cont.
Defrosting
The evaporator behind the rear wall of the unit defrosts automatically. The condensate collects in the
drainage channel behind the rear wall of the unit and ows through the drainage hole into the water drip tray
by the compressor, where it evaporates.
Power Failure
Most power failures are corrected within a few hours and should not affect the temperature of your wine cellar
if you minimise the number of times the door is opened. If the power is going to be off for a longer period of
time, take proper steps to protect the contents.
Service and Repair
Do not attempt to alter or modify this wine cellar in any way.
Do not attempt to repair or replace any part of the wine cellar unless it is specically recommended in this
manual. All other servicing should be referred to a qualied technician. Contact the after sales support line
for advice.
Spare Parts
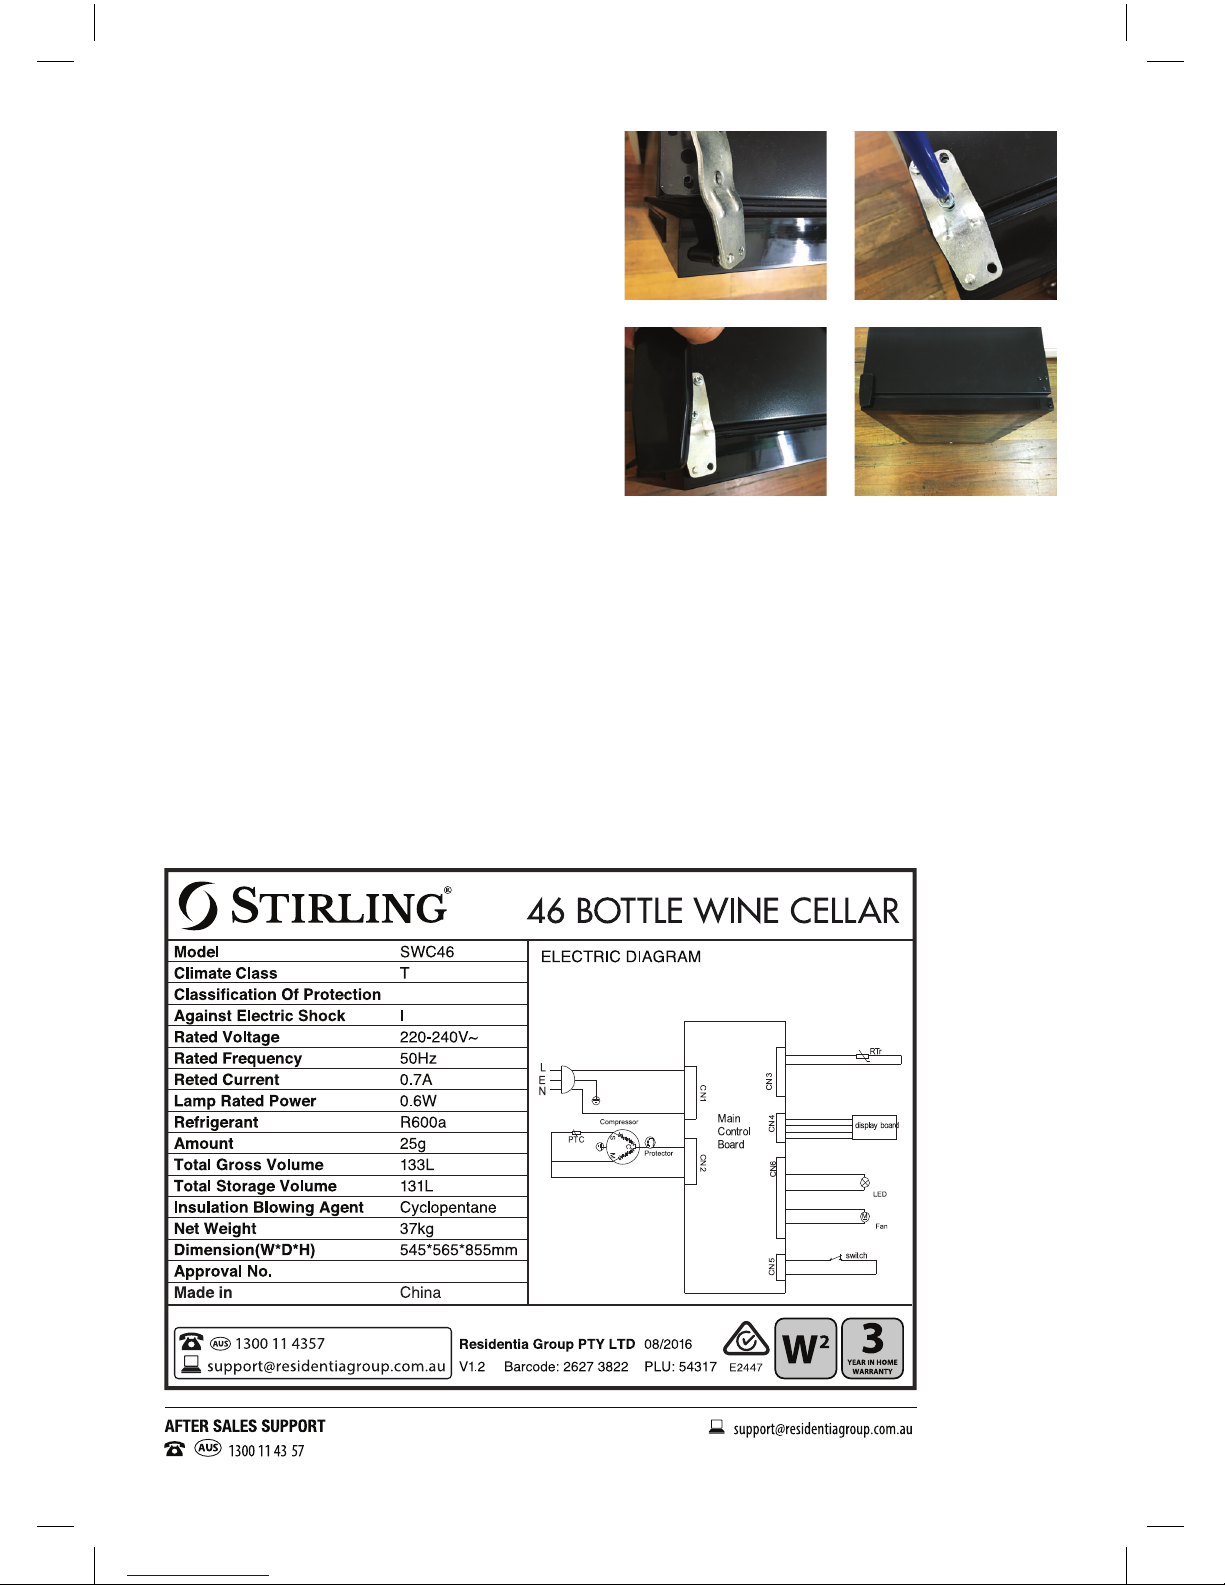
Our after sales support centre stocks the following spare parts for the SWC46 – 46 Bottle Wine Cellar.
To purchase a part, call the centre on 1300 11 4357 or email us at support@residentiagroup.com.au
1. Control box 8. Glass door
2. Control panel sticker 9. Light PCB
3. Cooling fan 10. Chrome basket
4. Display PCB 11. Chrome shelf, large
5. Door gasket 12. Power PCB
6. Door hinge (upper and lower) 13. Thermostat
7. Foot, large 14. Water tray

16
MODEL: SWC46 | PRODUCT CODE: 54317 | 08/2016
Other Useful Information Cont.
Reversing the Door Swing
The wine cellar has the capability of the door
opening from either the left side or the right side
to suit your individual installation requirements.
If you want to reverse the opening direction,
follow the instructions below.
WARNING
• To avoid personal injury to yourself and/or
damage to property, it is highly recommended
that someone assist you during the door
reversal process.
• Make sure the wine cellar is disconnected from
the power supply when changing the side at
which the door opens.
• Keep all parts you remove from the wine cellar
for installation on the other side.
1. Remove the hinge cap from the top of the door.
2. Unscrew the hinge and place screws in a safe
place as they will be used later.
3. Remove the hinge and the plastic washer.
4. Remove the plastic screw hole plugs from the
other side of the wine cellar.
5. Lift the door upwards off the bottom hinge and
put it to one side.
6. Remove the hinge plug from the left hand side
of the wine cellar door.
7. Put the hinge plug just removed onto the other
side of the door.
8. Remove the bottom hinge.
9. Remove the screw hole plugs from the other
side of the wine cellar.
10. Install the hinge in the new position.
11. Put the door on the hinge.
12. Place the washer over the screw holes and
place the hinge on top.
1
3
5
9
8
12
7
11
2
4
6
10
17
MODEL: SWC46 | PRODUCT CODE: 54317 | 08/2016
Other Useful Information Cont.
— Reversing the Door Swing Cont.
13. Make sure that the hinge pin is inserted
into the hole in the door.
14. Screw the hinge into place.
15. Place the hinge cap over the hinge.
16. The swing of the door is now on the other side.
Specification and Technical Parameters
This product complies with AS/NZS 60335.1 and AS/NZS 60335.2.24 electrical safety, and with
EN 55014-1:2006+A1:2009 A2:2011 for electromagnetic compatibility.
Responsible Disposal
• At the end of its working life, do not throw this appliance out with your household rubbish. Electrical and
electronic products contain substances that can have a detrimental effect on the environment and human
health if disposed of inappropriately.
• This refrigeration appliance contains ammable refrigerants and insulation blowing gases, which must
be removed before disposal. Observe any local regulations regarding the disposal of electrical consumer
goods and dispose of it appropriately for recycling and recovery of the refrigerant. Contact your local
authorities for advice on recycling facilities in your area.
• Danger: risk of child entrapment! To avoid the possibility of child entrapment, take off the door and leave
the shelves in place before discarding your wine cellar so that children cannot easily climb inside.
1413
15 16

18
MODEL: SWC46 | PRODUCT CODE: 54317 | 08/2016
1
www.xxxxxxx.com
0000 000 000
60cm/90cm Canopy Rangehood
Unfortunately, from time to time, faulty products are manufactured which need to be
returned to the Supplier for repair.
Please be aware that if your product is capable of retaining user-generated data (such as files
stored on a computer hard drive, telephone numbers stored on a mobile telephone, songs
stored on a portable media player, games saved on a games console or files stored on a USB
memory stick) during the process of repair, some or all of your stored data may be lost.
We recommend you save this data elsewhere prior to sending the product for repair.
You should also be aware that rather than repairing goods, we may replace them with
refurbished goods of the same type or use refurbished parts in the repair process.
Please be assured though, refurbished parts or replacements are only used where they
meet ALDI’s stringent quality specifications.
If at any time you feel your repair is being handled unsatisfactorily, you may escalate your
complaint. Please telephone us on 1300 11 43 57 or write to us at:
Residentia Group
1/32 Wangaratta St
Richmond VIC 3121
Australia
Email: [email protected]
Repair and Refurbished
Goods or Parts Notice
Helpline hours of operation:
Mon–Fri
9:00 AM - 5:00 PM
46 Bottle Wine Cellar

19
MODEL: SWC46 | PRODUCT CODE: 54317 | 08/2016
20
MODEL: SWC46 | PRODUCT CODE: 54317 | 08/2016
Table of contents
Other Stirling Wine Cooler manuals


