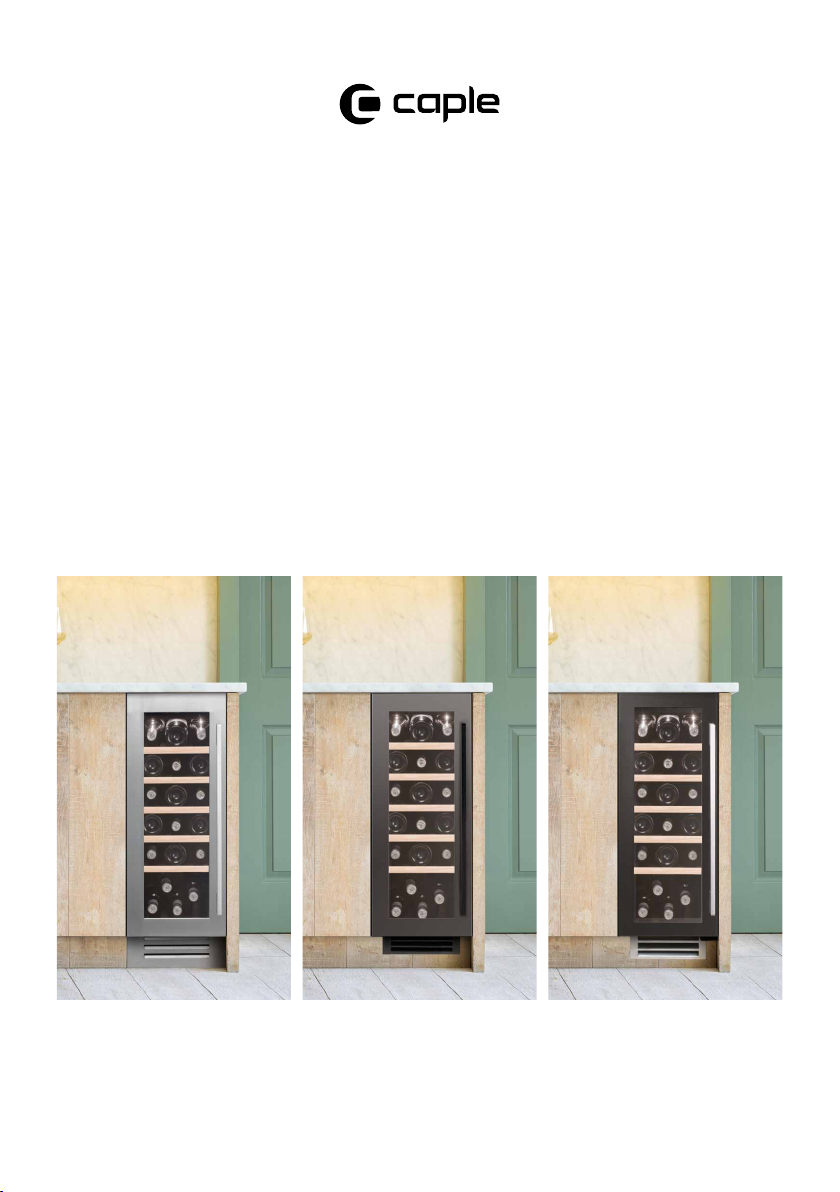
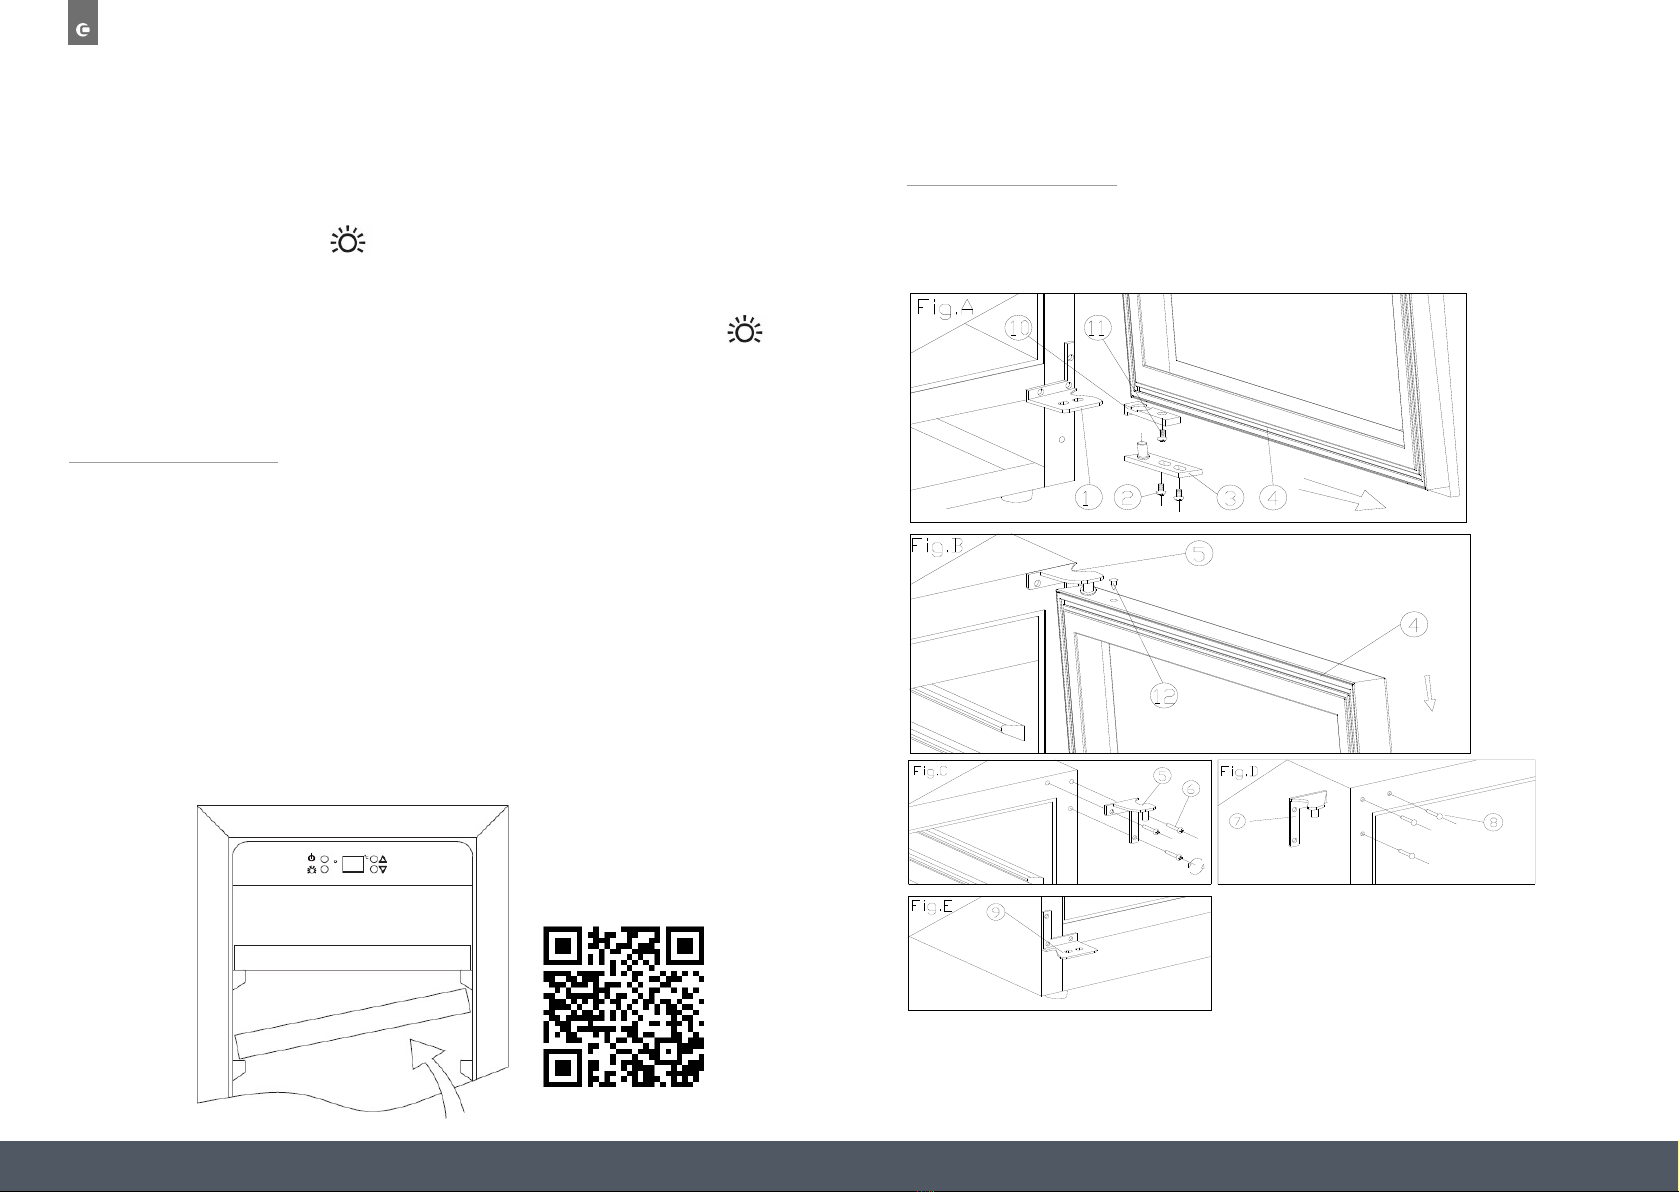
10 11Instruction manual Wi3125 Wi3125GM Wi3126 Instruction manual Wi3125 Wi3125GM Wi3126Please keep this instruction manual for future reference Please keep this instruction manual for future reference
OPERATING YOUR WINE CABINET
Please use the cabinet within ambient temperatures between 16-32ºC, if the ambient
temperature is higher or lower than this, it will cause the temperature to fluctuate in the
cabinet, possibly preventing it from reaching 5-18ºC.
SETTING THE TEMPERATURE
Set the desired cooling temperature by pressing the / keys. Each press of the keys will
scroll through the available temperature settings in increments of 1°C.
The temperature setting can be adjusted from 5°C to 18°C
To view the actual temperature at anytime press and hold either / for approximately 5
seconds, the actual temperature will temporarily flash in the LED display for 5 Seconds. After
this it will revert back to the set temperature.
Flashing LED = Cabinet temperature
Steady LED = Set temperature
NOTE
If the unit is unplugged, power lost or turned off, you must wait 3 to 5 minutes before
restarting the unit. If you attempt to restart before this time delay, the wine cabinet will
not start.
When you use the wine cabinet for the first time or you restart the cabinet after having been
shut off for a long time, there could be a few degrees variance between the temperature you
select and the one indicated on the LED readout. This is normal and it is due to the length of
the activation time. Once the wine cabinet has been running for a few hours everything will be
back to normal.
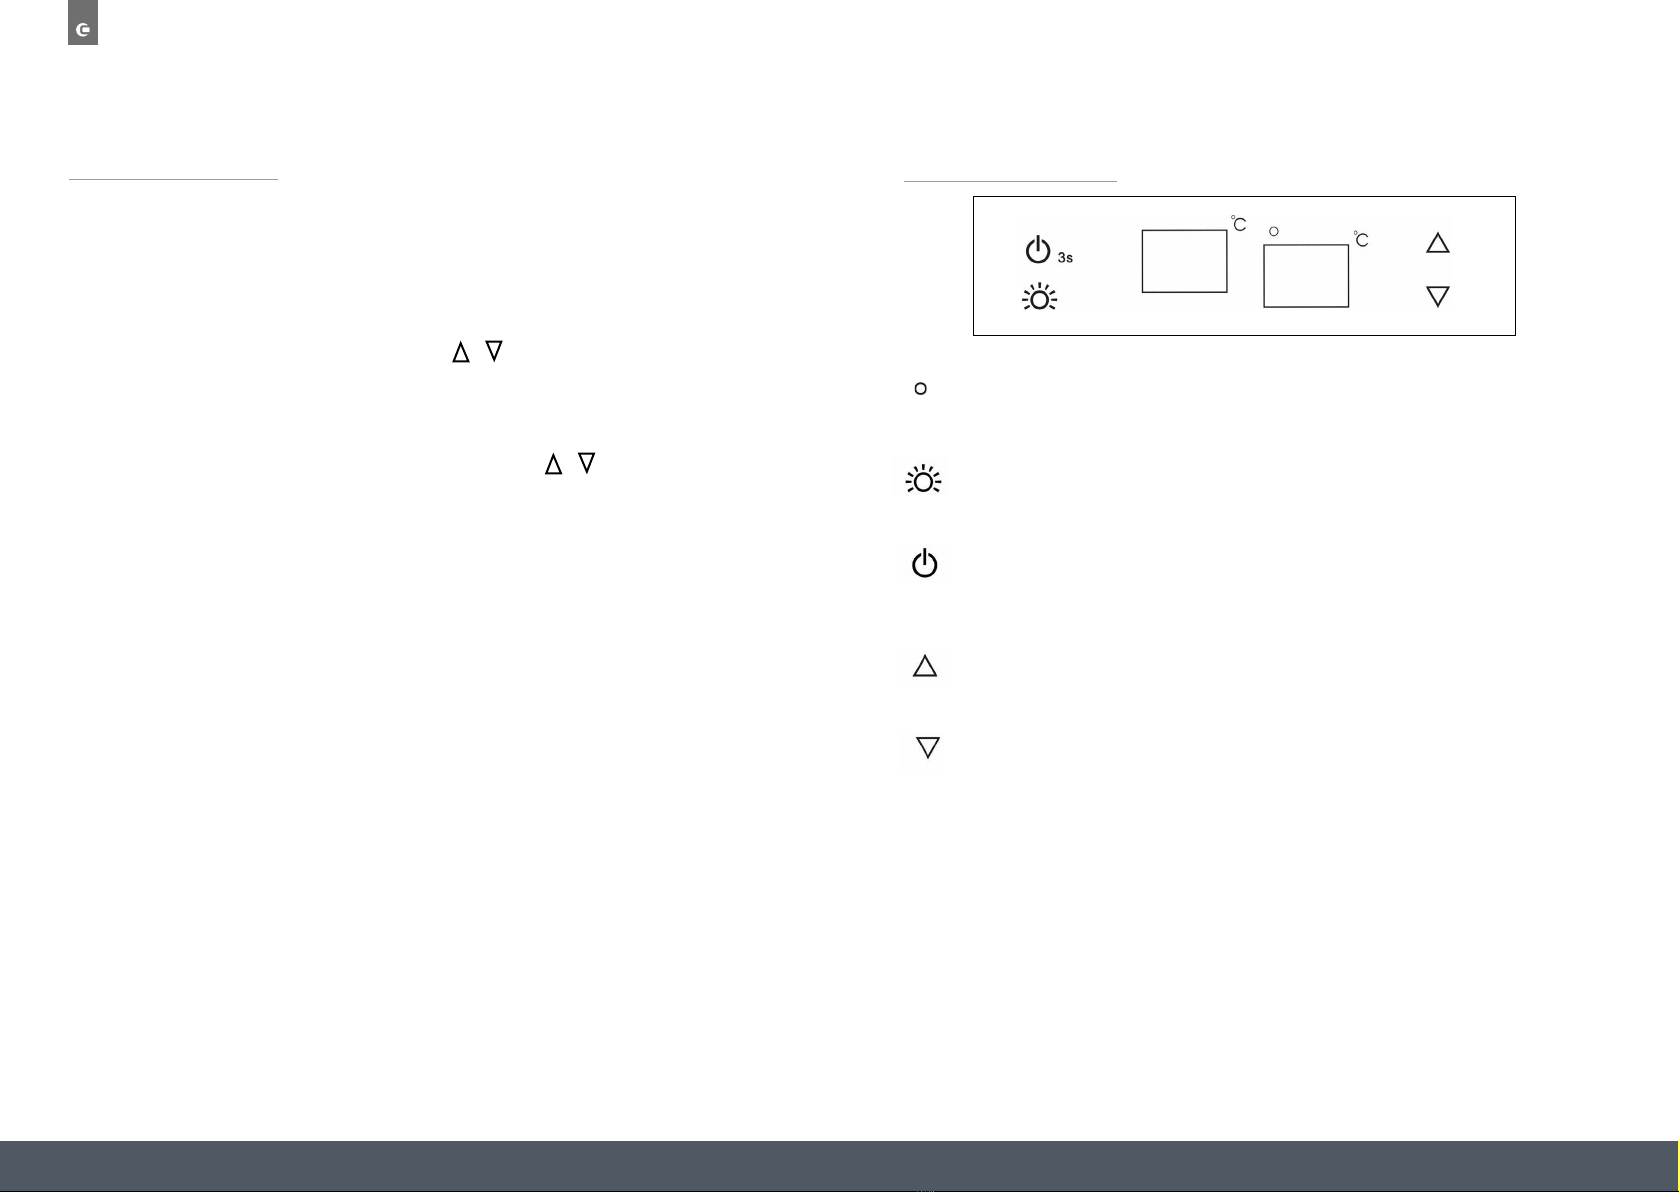
CONTROL PANEL
Indicator light illuminates to signify the cooling mode is currently in operation
TOUCH CONTROL KEYS
Switches the interior light ON/OFF
To switch the appliance ON/OFF
(press and hold this buttons for approximately 3 seconds)
Used to raise the temperature in 1ºC increments
Used to lower the temperature in 1ºC increments
TEMPERATURE ALARM
If inner temperature is higher than 23ºC, “HI” is shown in the display panel, and the alarm
sounds after one hour continuously. It warns you that the inner temperature is too high.
If inner temperature is lower than 0ºC, “LO” is shown in the display panel, the alarm sounds
and the malfunction indicator lights at the same time.
Control panel
•“ ”
Indicator light illuminates to signify the cooling mode is currently in operation.
•“ ”Button
Used to switch the internal light on/off.
•“ ” Button
To switch the appliance on/off (press and hold this buttons for approximately 3 seconds).
•“ ” Button
Used to raise the temperature in 1ºC increments.
•“ ” Button
Used to lower the temperature by in 1ºC increments.
Setting the temperature
•To set the temperature, connect the power cord to a properly grounded outlet. In the event of
a power interruption, the previous temperature setting is automatically erased and it will default
to a preset temperature setting of 12°C
•Set the desired cooling temperature by pressing the buttons adjacent to the “ / "
indicators. Each press of the buttons will scroll through the available temperature settings in
increments of 1°C.
•The temperature setting can be adjusted from 5°C to 18°C
•To view the actual temperature at anytime press and hold the temperature adjustment button
(up or down) for approximately 5 seconds, the actual temperature will temporarily flash in the
LED display for 5 Seconds. After this it will revert back to the set temperature.
Flashing LED = Cabinet temperature
Steady LED = Set temperature
Note
•If the unit is unplugged, power lost or turned off, you must wait 3 to 5 minutes before restarting
the unit. If you attempt to restart before this time delay, the wine cabinet will not start.
•When you use the wine cabinet for the first time or you restart the cabinet after having been shut
off for a long time, there could be a few degrees variance between the temperature you select
and the one indicated on the LED readout. This is normal and it is due to the length of the
activation time. Once the wine cabinet has been running for a few hours everything will be back
to normal.